Table of Contents
Advertisement
Quick Links
Business (519) 650-5501 Fax (519) 650-3773 Toll Free Phone: 1-800-361-1517 Toll Free Fax: 1-800-327-5609
INSTALLATION
AND OPERATING
INSTRUCTIONS
SAVE THESE
INSTRUCTIONS
FOR FUTURE USE
Note: Please read these instructions
thoroughly before attempting to install
this unit.
SAFETY NOTICE: IF THIS STOVE IS NOT PROPERLY
INSTALLED, A HOUSE FIRE MAY RESULT. FOR YOUR
SAFETY, FOLLOW THE INSTALLATION DIRECTIONS.
CONTACT LOCAL BUILDING OR FIRE OFFICIALS
ABOUT RESTRICTIONS AND INSTALLATION
INSPECTION REQUIREMENTS IN YOUR AREA.
IMPORTANT: Check around oven chamber on a weekly
basis for soot and creosote accumulation. Clean the
chamber thoroughly from the top, side and bottom with
the rake (part #1425) provided. Burn the stove hot daily to
reduce creosote accumulation. Use only dry wood aged
for one year. Failure to do so could result in chimney fire
and void the warranty.
OVERFIRING CAUTION:
Repeated or extended overfiring
will void warranty on this
appliance. See page 28 for details.
The temperature registered by the oven door
thermometer may not necessarily correspond with
the reading taken with the thermometer inside the
oven. For accurate oven temperatures, refer to the
interior oven thermometer.
W O O D C O O K S T O V E S
Manual #1705 051502
1050 Fountain St N. Cambridge, Ontario, Canada N3H-4R7
The Oval and Sweetheart
cookstoves are listed to CSA
Standard B366.2M ULC
Standard S-627 & UL 1482 by
Warnock Hersey Professional
Services Ltd.
NOTE: Warnock Hersey NBR
is 219.
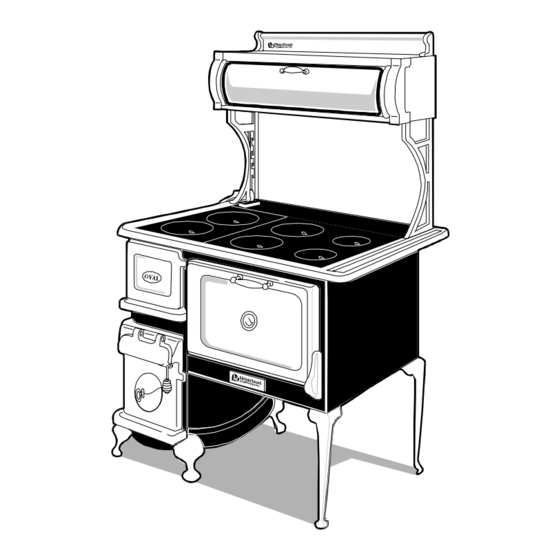
Oval
With Towel Rack
#1902
PLEASE NOTE: Specifications contained in this manual are subject to change with out notice
ATTENTION INSTALLER: Leave this manual with appliance
SweetHeart
SweetHeart
With Towel Rack
#2602
© 2002 HEARTLAND APPLIANCES INC.
Oval
With Reservoir
#1903
SweetHeart
With Reservoir
#2603
Advertisement
Table of Contents

Related Manuals for Heartland Appliances 1902

Summary of Contents for Heartland Appliances 1902
- Page 1 With Towel Rack #1902 SweetHeart SweetHeart With Towel Rack #2602 © 2002 HEARTLAND APPLIANCES INC. PLEASE NOTE: Specifications contained in this manual are subject to change with out notice ATTENTION INSTALLER: Leave this manual with appliance Oval With Reservoir #1903...
-
Page 2: For Your Safety
DO NOT STORE OR USE GASOLINE OR OTHER FLAMMABLE VAPOURS OR LIQUIDS IN THE VICINITY OF THIS STOVE. Stove Location - If the range must be located near a window, avoid using long curtains which could blow over the stove top, causing a fire hazard. - Page 3 Such parts will be repaired or replaced at the option of Heartland without charge, subject to the terms and conditions set out below.
-
Page 4: Table Of Contents
Installation Instructions ... Unpacking ... 2 Assembly ... 3 Cabinet Installation ... 5 Installation ... Clearances ... 6 Rough In for Oval Diagram ... 7 Rough In for SweetHeart Diagram ... 8 Chart of Clearances ... 9 Clearance Reductions ... 10 Floor Protection ... -
Page 5: Installation Instructions
Heartland Cookstove is a time proven design of North American heritage. Our cookstoves were first made in 1906 and many originals are still in use today. With proper operation and maintenance, your Heartland cookstove will give your family generations of warmth, delightful meals and untold pleasures. -
Page 6: Assembly
Oval Before removing the oval stove from the skid, the flu body must first be attached tothe stove back. Follow the instructions below. 1) unscrew the flu body from the skid and set aside. 2) unscrew 3 sheet metal screws (2 along the bottom of the oven at the bottom and 1 along left side - see illustration) 3)Remove the first level only of nuts and washers from the screws extending out the back of the stove (7pcs) - Page 7 If possible, have a fourth person remove the skid while the others lift. 3. In order not to damage the nickel trim lift the range from the front and the rear . The person at the front can first open the oven door and use the oven opening for a hand hold.
-
Page 8: Cabinet Installation
Oval and SweetHeart: 1. Assemble the bell dampers (Fig. 2).and thread into the three locations, one at the front in the ash pan door, and two on the firebox side. 2. Insert a piece of 6” diameter black smoke pipe into the flu and secure with three sheet metal screws.(see page 10, "Stovepipe Chimney Connection Reqiurements") Cabinet Assembly... -
Page 9: Installation
Maintain the clearances outlined in this manual, particularly with respect to nearby combustable surfaces. Your Heartland cookstove has been tested for safe operation providing that these guidelines are followed. Clearances must be maintained to all combustible material. These include doors, trim, furniture, drapes, newspapers and clothes. -
Page 10: Rough In For Oval Diagram
Oval Rough in and Dimension Diagrams These drawings are for reference only, s h o w i n g a p p r o x i m a t e dimensions rough in purposes. Make sure that floor ceiling supports will be cut chimney installation. -
Page 11: Rough In For Sweetheart Diagram
SweetHeart Rough in and Dimension Diagrams 12 " w ith heat shield kit (from w all to center o f pipe) 21“ w ith out h eat s hield (from w all to ce nte r of pipe) H eat shield ex te nds 14 "... -
Page 12: Chart Of Clearances
Status Model A B C D E F G H J Measure SweetHeart NO HEAT SHIELD Oval SweetHeart WITH HEAT SHIELD Oval *Note: A chimney approved to ULC standard S629 in Canada or UL 103HT in the U.S. must be used to connect the smokepipe at the top of the cabinet to maintain the 2"... -
Page 13: Clearance Reductions
Clearance Reductions There are many alternate decorative methods to reduce clearances to combustible materials. See your dealer, or local fire or building official to ensure the appropriate standards are being met with these alternatives. In Canada, refer to the Installation Code for Solid Fuel Appliances and Equipment. -
Page 14: Chimney Connection Requirements
Fig. 4.) An installation and operating manual is packed with every Oval and Sweetheart heat shield kit. Extra copies may be obtained from your dealer or by contacting Heartland Appliances Inc. Figure 4 Illustration of Oval with... -
Page 15: Fresh Air Kit
These deposits will quickly burn off thus reducing creosote formation in the stove and chimney. An installation and operating manual is packed with every Oval and Sweetheart water jacket. Extra copies may be obtained from your dealer or by contacting Heartland Appliances Inc. -
Page 16: Fuel
Understanding Combustion Water: Up to half the weight of freshly cut logs is water. After proper seasoning only about 20% of the weight is water. As the wood is heated in the firebox, this water boils off, consuming heat energy in the wood, the more heat energy is consumed. -
Page 17: Getting Acquainted
Getting Acquainted The Sweetheart and Oval cookstove are time proven heating and cooking appliances. Take your time to acquaint yourself with the principles on which your new stove operates as a heater and cooking stove. Understanding the primary principles of the air intake controls, the oven damper, the flame path for the fire and the relationship to the chimney will give you a very comprehensive understanding of what you are trying to accomplish with the stove. -
Page 18: Starting The Stove
Break-In Fire (Refer to page 13 figure 7) The firebox of your stove is made of superior materials—cast iron and firebrick lining. Both materials could be broken by a sharp blow or thermal shock. A little extra care and thoughtfulness during the break- in period will help promote a long life for your stove. -
Page 19: Your First Fire
To use the summer position in the SweetHeart you will need to purchase the optional #4271 summer grate support. Call your dealer to order, or call direct to Heartland 1. Remove the wood grate from the lower firebox position by pulling the grate up, back end first, and out of the firebox. -
Page 20: Coal Burning
An installation and operating manual is packed with every Oval and Sweetheart Coal Kit. Extra copies may be obtained from your dealer or by contacting Heartland Appliances Inc. Below is a brief description of the coal kit installation... -
Page 21: Recharging The Fire
The ash door also may be opened during start-up to accelerate the initial burn. 3. When a substantial bed of red embers is built up, start adding coal – small amounts at a time. Keep the draft control open. 4. Continue adding small amounts of coal until there is a solid bed of burning coal. -
Page 22: Using The Oven And Cooking Surface
Using the Oven and Cooking Surface Stove top cooking The cast iron top provides an excellent large cooking area for griddling, frying, basting and simmering. Some users report griddling directly on the cooking surface, although this is not recommended, as it usually creates quite a mess. -
Page 23: Oven Cooking
Oven Cooking Learning how to most effectively control the oven temperature takes some time and experience. As a general rule, the stove should be at the charcoal stage of the combustion process before the oven is ready for cooking. Important Note: The oven door thermometer registers the temperature at the door only. - Page 24 The tank in the reservoir is made of copper, for easy cleaning and the seams are soldered with lead free solder.The tank has a 5 gallon capacity with a spigot mounted on the side, for easy access to the water. Water must be added manually, the tank is not connected to your plumbing.
-
Page 25: Trouble Shooting
Chimneys and Draft The performance of your woodburning system depends more on the chimney than on any other single component. The chimney ‘drives’ the system by producing the draft that draws in combustion air and exhausts smoke and gases to outdoors. -
Page 26: Saftey Practices
Masonry chimneys should be checked for deterioration including damaged bricks, crumbling and missing mortar, cracks in the drip cap at the top of the chimney, and loose flashings at the roof line. The liner should be checked for cracks and mis-alignment, and its size should be 6". An existing factory-built metal chimney needs a careful inspection. -
Page 27: Maintenance
Oven Flue Passage As heat, smoke and gases travel around the oven, fly ash and often creosote are left behind. The frequency of cleaning of the oven flue will depend on your use, burning habits and the wood you burn. If a ‘fly ash’ which is very fine and light in colour, is what is left behind in the oven flue chamber, it is a good indication you are burning your stove well. -
Page 28: Oven Damper
Flue Boot Inspection Remove the cover plate on the flue boot, located at the back of the range. Inspect for soot or creosote buildup, scrape and clean as much as possible, and remove debris through the clean out door with the ash scraper. -
Page 29: Door Gaskets
If the gasket comes loose but is still usable, it can be reseated using a good high temperature silicon. Replacement gasketing and adhesive can be ordered from Heartland or your dealer. Gasketing is sold by the foot. Refer to the gasket listing below. -
Page 30: Terms Of Reference And Function
Terms of Reference and Function Backpuffing—The momentary emission of smoke through openings in the stove when oxygen is admitted to an oxygen- starved fire. When a door or the bell dampers are opened, the sudden charge of air may not be immediately absorbed by the chimney system, resulting in a backpuff of smoke. -
Page 31: Over Firing-Caution
Overfiring — Caution! Overfiring of your woodburning appliance represents a serious fire hazard. Overfiring can also warp your stove, break welds, permanently discolour the plating and cause premature burnout of your stove. Repeated overfirings will void the warranty of this appliance . To prevent overfiring: 1. -
Page 32: Kitchen Appliances
3535 Metro. Cooktop versions for both Metro 3805 and Legacy 3800 models are available. 3630- Legacy 36" Gas / Electric kitchen range - 6 sealed gas burners or 4 sealed burners and centre grill! Electric convection oven come standard. Also available in stainless steel as model 3635 Metro. -
Page 33: Oval Parts Diagram
Oval Cookstove Parts Diagram 15 99 15 4 6 15 9 2 16 0 7 15 7 0 15 5 6 15 2 1 118 4 12 3 6 13 6 1 13 8 0 12 8 9 13 7 6 12 8 7 44 0 5 13 0 7... -
Page 34: Sweetheart Parts Diagram
SweetHeart Cookstove Parts Diagram 1599 154 6 1 59 2 460 7 457 0 155 6 452 3 436 9 123 6 136 1 440 5 428 9 437 0 428 6 139 1 430 5 404 5 430 0 404 1 410 7 602 9... -
Page 35: Replacement Parts Diagram
Replacement Parts Diagram see page 33 for part description 1440 1361 4271 1415 1420 146 0 4277 446 5 1425 1277 1255 1127 123 7 4221 4222 8452 1258 4223 1232 1270 1232 9449 1258 Fire Brick Kit #1 234 4449 1445 4445... -
Page 36: Cookstove Parts List
1460 6" Dia Oval flue weldment 1521 Splash back 1536 Warming cabinet body 1545 Cresting panel 1546 Heartland nameplate w/clips 1551 Right cabinet bracket 1556 Left cabinet bracket 1570 Lower cabinet front trim strip 1575 Upper cabinet front trim strip... - Page 37 If your home is tight and well insulated, then the fire in the stove may be “starved” for combustible air, then this kit is what you need! For pricing please call your dealer, or call Heartland Appliances (519) 650-5501 OvalWater Jacket Kit- #1506...
Need help?
Do you have a question about the 1902 and is the answer not in the manual?
Questions and answers