Table of Contents
Advertisement
Quick Links
Advertisement
Table of Contents

Summary of Contents for HamiltonBuhl HDV5200-01
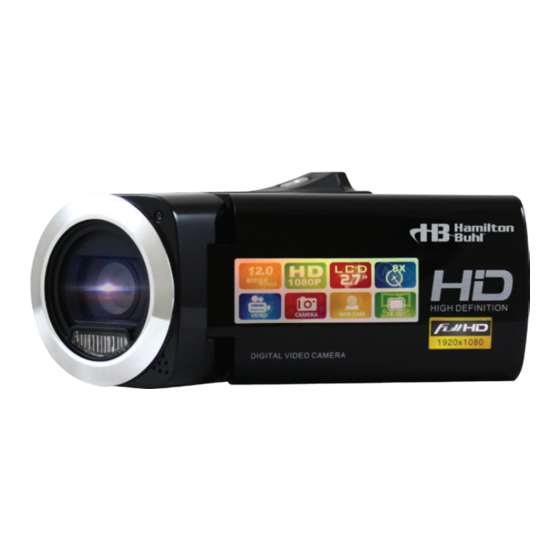
- Page 1 Instruction Manual High Definition Digital Video (DV) Camcorder Model HDV5200-01 Please read this manual carefully before using and retain for future reference. Never-Ending Learning Innovation 80 Little Falls Road, Fairfield, NJ 07004 • 1-800-631-0868 www.HamiltonBuhl.com...
-
Page 2: Table Of Contents
High Definition Digital Video Camcorder Contents Safety Information ........4 Parts of the DV. - Page 3 High Definition Digital Video Camcorder Menu in Video Recording Mode ......13 Menu in Photography Mode ......15 Setup Menu .
-
Page 4: Safety Information
High Definition Digital Video Camcorder Safety Information Before using the camcorder, please read and understand the following safety precautions: • Do not try to open the body of the DV or change the DV in any way. Only authorized service personnel are allowed to open the DV. •... -
Page 5: Parts Of The Dv
High Definition Digital Video Camcorder Parts of Your DV Display Button ‚ LED Button ƒ Mode Button „ Power Button … Menu Button † Video Recording Button ‡ Up p Button/Zoom In ˆ Working Indicator Light (Red) and Charging Indicator Light (Green) ‰ SD Card Slot Š Shutter Button Right u ... -
Page 6: Preparation Before Shooting
High Definition Digital Video Camcorder Preparation before Shooting Loading Battery 1. Open the Battery Door. 2. Load the lithium battery into the battery box according to the polarity marks. 3. Close the Battery Door after loading the battery. 4. Charging Lithium Battery: When the battery power of the DV is insufficient, recharge the battery by connecting it to the power adapter or computer with the USB cable. -
Page 7: Inserting Memory Card
High Definition Digital Video Camcorder Inserting Memory Card The DV has no built-in memory, and cannot store videos or image files without installing an SD card. Always turn off the DV before inserting or taking out a memory card. Be sure that the card is inserted in the correct direction. Do not force the card to go in, as that may indicate you have it in the wrong direction. -
Page 8: Formatting Memory Card
High Definition Digital Video Camcorder Formatting Memory Card All the data in the Memory Card (including protected files) will be deleted when the Memory Card is formatted. Therefore, please back up any important files before formatting. 1. Turn on the DV, Press the MENU button to enter menu interface, press the Left/Right button to select setup menu, then press the Up / Down button and select Format. -
Page 9: Lcd Display - Video
High Definition Digital Video Camcorder LCD Display – Video Recording Mode LCD Display – Photography Mode... -
Page 10: Lcd Display - Video Playback
High Definition Digital Video Camcorder LCD Display – Video Playback LCD Display – Photo Playback Turning the DV On/Off 1. Open the LCD screen, and press the On/Off button to turn DV on. 2. Press the On/Off button to turn off the DV, when the DV is on. In order the save power, the DV will power off automatically within a certain time. -
Page 11: Dv Settings
High Definition Digital Video Camcorder DV Settings Mode Switch 1. Press the On/Off button to turn on the DV. 2. Press the Mode button to change the working mode of the DV. Pressing the Mode button each time runs through the modes. Icon Mode Description... -
Page 12: Taking Photos
High Definition Digital Video Camcorder Taking Photos 1. Turn on the DV, press the Mode button to enter Photography Mode 2. Find a view for the image you want through the LCD screen, and press the Shutter button to take photos. •... -
Page 13: Dv Menu Settings In Detail
High Definition Digital Video Camcorder Self Timer options: 1. Off 2. Selecting “2” secs – Delays shutter release for 2 seconds. 3. Selecting “5” secs – Delays shutter release for 5 seconds. 4. Selecting “10” secs – Delays shutter release for 10 seconds. 5. - Page 14 High Definition Digital Video Camcorder Menu in Video Recording Mode Functions Selecting Desired Options and Settings Resolution Selecting small size will take up less memory but quality will be reduced. Options include: HD (Default – 1920x1080); 1280x720; 640x480; 320x240. Scene You can select different scenes while recording your Video using these selections.
-
Page 15: Menu In Photography Mode
High Definition Digital Video Camcorder Menu in Photography Mode 1. Turn on the DV, press Mode button to Photography Mode. 2. Press the Menu button to show the menu in the Photography Mode. 3. Press the Left /Right button to select an option.. 4. - Page 16 High Definition Digital Video Camcorder Image Quality Selecting a lower image quality may reduce the space occupied by images so as to take more pictures. Options in Image Quality include: Super- Fine, Fine, Normal, and Cancel. Exposure Manually set over or under the exposure of your photo, to compensate for special conditions such as low indoor light, back light or strong light.
-
Page 17: Setup Menu
High Definition Digital Video Camcorder Setup Menu 1. Turn on the DV, and press the Menu button to enter menu mode. 2. Press the Left /Right button to select Setup. 3. Press Up /Down button to select an option in Setup. In some cases, there is a sub-menu. - Page 18 High Definition Digital Video Camcorder Sound Effect Off/On or Cancel. Format Formatting will permanently delete all the data on the Memory Card, including locked files. Back-up of important files is recommended before formatting. Default This will revert all menu and button settings back Settings to initial factory settings.
-
Page 19: Playback
High Definition Digital Video Camcorder Playback Video Playback 1. Turn on the DV and press Mode to enter playback mode. 2. Press the Left or Right button to select the video file you want to play. 3. Press the OK button to begin playing. Press the OK button to pause playing, and press the OK button again to continue playing. -
Page 20: Deleting Files
High Definition Digital Video Camcorder Deleting Files Delete files using the deletion function in the playback menu. 1. Press the Menu button in the Playback Mode to enter into the menu interface. 2. Press the Right/Left button and select File Deletion. 3. -
Page 21: Description Of Menu Items
High Definition Digital Video Camcorder Description of Menu Items Functions Selecting Desired Options and Settings Delete Refer to the section on file deleting. Option: This Image, All, or Cancel. Rotate Rotate a picture. Options are: 90°, 180°, 270°, and Cancel. Protect Use this function to prevent accidental deletion of files. -
Page 22: Connections
High Definition Digital Video Camcorder Connections Connect the DV to TV Connect the DV to TV and the LCD screen of the DV will shut off. The TV will then act as the LCD screen of the DV. 1. Connect the DV to TV with the AV cable. 2. -
Page 23: Downloading Images To Computer
High Definition Digital Video Camcorder Downloading Images to Computer There are two methods to download images to a computer from the Memory Card of the DV. 1. Insert the SD card into a flash memory card reader. 2. Connect the DV to computer with the USB cable. -
Page 24: Installing Software
High Definition Digital Video Camcorder Installing Software Installing the CD Software The attached software CD contains the drivers and software necessary for the DV to function properly. Insert the CD into the CD-ROM. Open the CD disk in My Computer or Windows Explorer. -
Page 25: Specifications
High Definition Digital Video Camcorder Specifications Photoreceptor 5MP CMOS Screen 2.7" TFT Liquid Crystal Display Focal Length 150cm ~ infinite Range Aperture F. 3MM f=6.5mm Shutter 1/6,000~1/20 seconds Resolution Static Picture: 18M (4896x3672), 16M (4608x3456), 12M (4000x3000), 10M (3648x2736), 8M (3264x2448), 7MHD (3648x2048), HD/5M (2592x1944), 3M (2048x1536), 2MHD (1920x1080), HD/VGA (640x480) - Page 26 High Definition Digital Video Camcorder Photo Effects Normal, B&W, Sepia, Red, Green, Blue, Sunset, Warm, Cool, Over Exposure, IR/Binary, Vivid, Undertone, Dog Eye, Aibao, Gothic, Japan Style, LOMO, Negative Self-Timer 2 seconds, 5 seconds and 10 seconds External Memory Supports SD/HC SD (32GB) Anti-Shake Face Detection Smile Capture...
- Page 27 High Definition Digital Video Camcorder Environmental Operating temperature: Temperature 32ºF to 104ºF (0ºC to 40ºC) Storage temperature: 68ºF to 140ºF (20ºC to 60ºC) Size 4.5”L x 2.5”W x 2.5”H Weight Battery not installed: 0.43 lbs. (195g) Battery installed: 0.049 lbs. (220g)
- Page 28 Product Registration: Visit www.HamiltonBuhl.com 1. Click on Customer Care 2. Click on Product Registration Icon 3. Please fill out all fields marked with * to register Warranty: Warranty begins the date item ships from our warehouse. All products have a one year warranty from original date of shipment, unless otherwise noted.
Need help?
Do you have a question about the HDV5200-01 and is the answer not in the manual?
Questions and answers