Table of Contents
Advertisement
Quick Links
Advertisement
Table of Contents

Related Manuals for MMF VM40C

Summary of Contents for MMF VM40C
- Page 1 Instruction Manual IoT Connection with the Triaxial Vibration Monitor VM40C Valid from version xxx.012 Manfred Weber Metra Mess- und Frequenztechnik in Radebeul e.K. Meißner Str. 58 - D-01445 Radebeul Tel. +49-351 836 2191 Fax +49-351 836 2940 Email: Info@MMF.de Internet:...
- Page 2 Metra Mess- und Frequenztechnik in Radebeul e.K. Meißner Str. 58 D-01445 Radebeul Tel. +49-351-836 2191 +49-351-836 2940 Email Info@MMF.de Internet www.MMF.de Note: The latest version of this manual can be found at http://www.mmf.de/product_literature.htm Specification subject to change. © 2022 Manfred Weber Metra Mess- und Frequenztechnik in Radebeul e.K.
-
Page 3: Table Of Contents
2.2. Setting up a Device Channel................2 2.3. Entering Measuring Channels.................3 2.4. Dashboard.......................4 2.5. Data Export....................7 2.6. Email Alerts....................7 2.7. Settings at the VM40C..................8 3. ThingSpeak......................10 3.1. General......................10 3.2. Setting up ThingSpeak..................10 3.3. ThingSpeak Settings at the VM40C..............11 3.4. Channel Settings in ThingSpeak..............12 4. Troubleshooting....................18... -
Page 5: Introduction
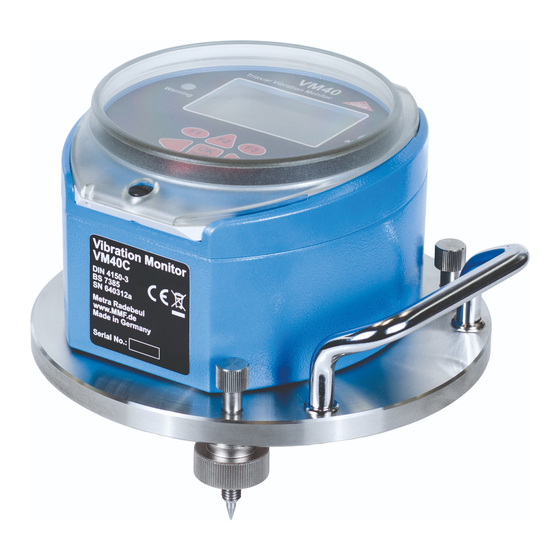
This also has advantages for the VM40C structural vibration monitor. Structural measurements often take place in remote or difficult-to-access locations. The VM40C in conjunction with the modem available as an accessory can send its measurement data to a sensor data platform on the Internet. This makes it possible to follow the vibration history both currently and in retrospect remotely via an Internet browser. -
Page 6: Setting Up A Device Channel
"Sensor devices" (Figure 2). Click "New Sensor". The menu for entering the device data opens (Figure 3). Under "Name" enter a designation for the VM40C. Figure 2: Devices, example with two VM40C units Figure 3: Setting up a device channel... -
Page 7: Entering Measuring Channels
By clicking on the device channel (Figure 2) you can check the settings of device and measuring channels. Here you will also find the key "API Key In", which must be entered in the VM40C (cf. page 8) to establish the connection to AskSensors. -
Page 8: Dashboard
Figure 5: API Key In 2.4. Dashboard Now switch to the menu item "Dashboards" (Figure 6). Here the settings for the measurement data visualization are made. A dashboard is an arrangement of dia - grams or other visualization elements, here called "widget". Clicking on the device channel opens the dashboard. - Page 9 Line charts (Lines) for the measured values and bar charts (Bars) for the status dis- play are particularly useful. However, you can also use all other elements. "Command widgets" are not supported by the VM40C. Figure 8 shows an example for the output of the amplitudes of X/Y/Z over time as a line chart.
- Page 10 Figure 9: Example of a configured dashboard The number of messages already sent and possible connection errors can be checked up in measurement mode by pressing F2. The AskSensors connection is deactivated by switching off the VM40C.
-
Page 11: Data Export
2.5. Data Export In the header of the display elements you will find the symbol . It is used to ex- port the saved data to a file (Figure 10). CSV and JSON are available as output formats. The export must be done individu- ally for each measuring channel. -
Page 12: Settings At The Vm40C
2.7. Settings at the VM40C To set up a connection between the VM40C and AskSensors, select "IoT/SMS/ Alarms" in the VM40C main menu, then "AskSensors" and there "Settings". Figure 13: IoT menu First, you specify the Access Point Name (APN). This is the name of the gateway through which the mobile network operator provides access to the Internet. - Page 13 After the display "Ready for AskSensors" AskSensors receives data from the VM40C in case of warnings and alarms as well as in the time cycle. You can recog- nize the active AskSensors function in measurement mode by an "A" at the top right of the display (Figure 17).
-
Page 14: Thingspeak
Figure 19: Entered channel A ThingSpeak channel consists of a maximum of eight data fields, of which the VM40C uses six in the following manner: Field 1: Current status; OK/Warning/Alarm (0/1/2). Field 2: Measured value X in mm/s or m/s² (for SN 640312a the vector sum) Field 3: Measured value Y in mm/s or m/s²... -
Page 15: Thingspeak Settings At The Vm40C
ThingSpeak to a specific data channel. You will find the Write API Key under "API Keys" in the newly created channel (Figures 19and 21). Figure 21: Write API Key of a ThingSpeak channel Enter this letter/digit combination using the arrow keys in the VM40C (Figure 22). -
Page 16: Channel Settings In Thingspeak
After the display "Ready for ThingSpeak" the platform receives data from the VM40C in case of warnings and alarms as well as in the heartbeat intervals. You can recognize the active ThingSpeak function in measurement mode by a "T" at the top right of the display (Figure 24). - Page 17 Figure 25: Channel settings...
- Page 18 The texts entered under “Name” and “Description” appear later above the measure- ment data. Activate the fields 1 to 6 by clicking the check boxes and enter a name for each field. The entered field names will later be displayed above the time histories. Further down you can activate “Show Channel Location”...
- Page 19 Figure 26: Example of a measuring channel view in ThingSpeak...
- Page 20 The “Channel Status Updates” window displays the operating mode that the VM40C transmits once after startup. Furthermore you will find the last warning and alarm events with timestamp. Figure 27 shows an example. Figure 27: Channel Status Updates The graphs headed with “Field ...” show the data of the fields 1 to 6 (cf. page 10).
- Page 21 eadChannelID = xxxxxxx; fieldID1 = 2; fieldID2 = 3; fieldID3 = 4; fieldID4 = 5; readAPIKey = 'yyyyyyyyyyyyyyyy'; [x, time] = thingSpeakRead(readChannelID, 'Field', fieldID1, 'NumPoints', 600, 'ReadKey', readAPIKey); [y, time] = thingSpeakRead(readChannelID, 'Field', fieldID2, 'NumPoints', 600, 'ReadKey', readAPIKey); [z, time] = thingSpeakRead(readChannelID, 'Field', fieldID3, 'NumPoints', 600, 'ReadKey', readAPIKey);...
-
Page 22: Troubleshooting
4. Troubleshooting The following instructions apply equally to the connection to AskSensors and ThingSpeak. If no connection can be established after selecting the menu item "AskSensors connection" or "ThingSpeak connection", no letter "A" or "T" will be displayed at the top right of the measurement display. In this case, restart the con - nection and observe the display.
Need help?
Do you have a question about the VM40C and is the answer not in the manual?
Questions and answers