Table of Contents
Advertisement
Advertisement
Table of Contents

Related Manuals for REALINN RL6200W


Summary of Contents for REALINN RL6200W
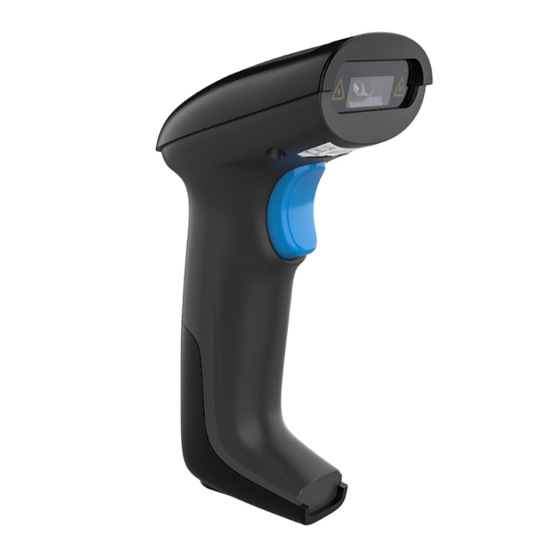
- Page 1 REALINN RL6200W Barcode Scanner Manual Guide...
- Page 2 In order to correctly use the bar code scanner, please read the instruction carefully and do not arbitrarily scan the settings code otherwise some settings may not be available. Please keep this instruction for reference in the future.
-
Page 3: Table Of Contents
Contents Product Specification ........Packing List ........Battery & Charging ........Quick Guide ........FAQs ........Optional Function settings ........1. Upload Mode Setting ..........2. Scanning Mode Setting ..........3. Beep Setting ..........4. Anti-duplication Setting ..........5. Aiming & LED Light Setting .......... -
Page 4: Product Specification
Product Specification Model-Number RL6200W Connection 2.4GHz Wireless + Wired Memory 16MB = 100,000 barcodes Battery capacity 2000mAh Voltage DC 5V Standby current 30mA Charging power 5V-400mA Printing Contract >25% Light source 624nm LED LED life 12000 hours Button life 5000,000 times... -
Page 5: Packing List
Packing List •Bar code scanner*1 •USB Cable*1 •Instruction Manual*1 •USB Wireless Receiver*1 Battery & Charging The scanner is powered by 2000mAh rechargeable battery. Please ensure that the scanner has enough power before use. Battery level indication: 1). Plug in the USB receiver,the blue indicator light of the scanner is on all the time, it indicates that the battery is sufficient. -
Page 6: Quick Guide
Quick Guide The scanner has two connection mode: wireless mode and wired mode. Mode 1: Wireless mode 1). Turning on the scanner, the scanner has triple beeps. Pull the trigger again, the green aiming light and white LED light will show up. (The scanner has been paired with the receiver, and set up already.)... - Page 7 Step 3. Scan the code “ instant upload mode “to set the scanner instantly upload barcode. Instant upload mode Step 4. Open notepad on computer and move cursor to the blank where scanning output should be placed. Scanning results can be displayed on notepad then. ( If there is triple quick “di-di-di”beep, that means paired unsuccessful, please operate the step1 and step 2 again.
-
Page 8: Faqs
FAQs: Q1. If I scan a product bar code, will it include the name of the product in the file automatically? Answer: The scanner works like a keyboard. It does not interpret what the bar code is, it just "types" out a string of alphabet numeric characters that the bar code represents. it's up to the database software you are using to interpret what that string of characters means. - Page 9 Example 3:There are two separate bar codes together, it scanned the first 12digits in the barcode but not the last five. Solution:please scan the code “UPCA- additional 2 digits-On”on page 21. If that is not your case, please send us a clear picture of the bar code and the result you get, our customer service will help you to solve the problem.
-
Page 10: Optional Function Settings
Optional Function settings You can change the settings of the scanner by scanning the setup bar codes included in this manual. 1. Upload Mode Setting 1.1. Instant Upload Mode Read barcodes and upload the information straightly to the file you have opened already. - Page 11 ** To upload data stored in scanner, put the cursor in the blank, and then scan the setting code “ Upload Data “, it will upload all the stored bar code at a time. Upload data ** To show total number of stored bar code, put the cursor in the blank, and then scan the “Show total storage”bar code.
- Page 12 barcode by scanning the code "Upload Data" and then clear the saved barcode by scanning code "Clear Data". (3) When all of the barcodes are been uploaded completely , the buzzer will ring a short“ de “ sound. Note: In storage mode, the bar code will be stored and will not come up on your computer instantly.
-
Page 13: Scanning Mode Setting
2. Scanning Mode Setting Supporting three kinds of scanning modes. 2.1. Manual Trigger mode (default) : Press the trigger, the scanner will emit light and read the barcode. Release the trigger, the scanner will stop reading barcode and the light will go off. ** Scan the following codes to set the scanner to Manual trigger mode . -
Page 14: Beep Setting
2.3. Auto-Sensing Mode There’s no need to click the trigger under the Auto-sensing Mode. Just move the barcodes in front of the scanner, a green light band will show up to read the barcode. The green light band will go off once the scanner scans barcode successfully or preset timeout expires. -
Page 15: Anti-Duplication Setting
4.Anti-duplication Setting In continuous scanning mode or auto-induction mode, the scanner might read the same barcode repeatedly. Here you can set the time interval to avoid this issue. ** Scan one of the following code to set the time interval. After reading a bar code, at the preset time interval, the scanner can not read the same bar code. -
Page 16: Aiming & Led Light Setting
5. Aiming & LED Light Setting 5.1 Aiming Mode The green beam that projected by the scanner can help user to find out the best reading distance. Normal mode:green beam appears when the user press the trigger Always on : green beam always appears when the scanner is electrified ** Scan one of the following code to select the Aiming mode Always on Normal mode(default) -
Page 17: Case Sensitivity Setting
6. Case Sensitivity Setting The scanner can change all the letter cases of barcode into uppercase or lowercase. It takes “Not Altering the Letter Case of barcodes” as default, letter case of barcodes can be altered through scanning correspondent bar code below. Note: Please deactivated caps lock on keyboard first. -
Page 18: Identity Barcode Type
8. Identify Barcode Type This is to identify what type of the barcode is, follow the steps below to confirm: Scan code "Add Code ID " below, then scan your goal barcode, there will be a character BEFORE the barcode you scanned, and this character states your Barcode Type. -
Page 19: Frequently-Used End Character Setting
GS1 DataBar-14, GS1 DataBar Limited, GS1 DataBar Expanded, RSS Matrix 25 PDF417 Data Matrix(DM) Aztec Code Maxi Code HanXin 9. Frequently-used End Character Setting By default,the scanner is sending a 'carriage return' after scanning a code (the same as pressing the 'enter' key) . To add TAB Key, please scan the code “... -
Page 20: Interface Setting
10. Interface Setting 10.1 USB-HID mode (default) In the HID protocol, there are 2 entities: the "host" and the "device". The host communicates with the device and receives input data from the device on actions performed by the human. The most common example of a "host" is a PC. The "device"... -
Page 21: Stand-By Setting
12. Stand-by Setting By default, it is set to be 1 minutes. The scanner will enter into stand-by mode if there is no operation on it over 1 minutes. In stand-by mode, the CPU is still working. Short press on the trigger can wake it up. **Scan one of the following barcode to set the time interval, when it's idle exceeding the time interval you set,the scanner will enter into stand-by mode. -
Page 22: Keyboard Language Setting
13. Keyboard Language Setting The scanner support 7 international keyboards in wireless mode. You are suggested to set the keyboard language of the scanner to be in agreement with that in real use by scanning the correspondent barcode listed below. French German English... -
Page 23: Enable / Disable Barcode Type
14. Enable / Disable Barcode Type One-dimensional code Read all 1D code-On Read all 1D code-Off* White in black background-On White in black background-Off* Two-dimensional code Read all 2D code-On Read all 2D code-Off*... - Page 24 UPC-A UPCA-On* UPCA-Off UPCA Check digit-On* UPCA Check digit-Off UPCA -system digit - On*(default) UPCA -system digit - Off UPCA- additional 2 digit-Off* UPCA- additional 2 digit-On UPCA- additional 5 digit-On UPCA- additional 5 digit-Off*...
- Page 25 UPCA additional digit required-On UPCA additional digit required-Off* Note: after scanning the “ UPCA additional digit required- ON “, the UPCA code without additional digit can not be read. UPCA to EAN13-On UPCA to EAN13-Off* UPC-E UPCE-On* UPCE-Off UPCE Check digit-On* UPCE Check digit-Off...
- Page 26 UPCE - system digit - On*(default) UPCE - system digit - Off UPCE- additional 2 digit-Off* UPCE- additional 2 digit-On UPCE- additional 5 digit-On UPCE- additional 5 digit-Off* UPCE additional digit required-On UPCE additional digit required-Off* Note: after scanning the “ UPCE additional digit required - ON “ ,the UPCE code without additional digit can not be read.
- Page 27 EAN8 EAN8-On* EAN8-Off EAN8 check digit -Off* EAN8 check digit -On* EAN8 - additional 2 digit-On EAN8- additional 2 digit-Off* EAN8 -additional 5 digit-On EAN8 - additional 5 digit-Off* EAN8 additional 5 digit required-On EAN8 additional 5 digit required-Off* Note: after scanning the “ EAN8 additional digit required - ON “ ,the EAN8 code without additional digit can not be read.
- Page 28 EAN13 EAN13-On* EAN13-Off EAN13 check digit -On* EAN13 check digit -Off EAN13 - 2 digit-On EAN13- 2 digit-Off* additional additional EAN13- 5 digit-On EAN13 - 5 digit-Off* additional additional EAN13 digit required - On additional EAN13 digit required - Off* additional Note: after scanning the “...
- Page 29 Code 128 Code128-On* Code128-Off GS1-128 GS1-128-On* GS1-128-Off Interleaved 2 of 5 Interleaved 2 of 5-On, Code1 Interleaved 2 of 5-On, Code2 Note: To enable the scanner to read the interleaved 2 of 5 code, please scan the 2 setting codes above in order. Interleaved 2 of 5-Off*...
- Page 30 Matrix 2 of 5 Matrix 2 of 5-On,code 1 Matrix 2 of 5-On,code 2 Note: To enable the scanner to read the Matrix 2 of 5, please scan the 2 setting codes above in order. Matrix 2 of 5-Off* Industrial 2 of 5 Industrial 2 of 5-On, code 1 Industrial 2 of 5-On, code 2 Note: To enable the scanner to read the Industrial 2 of 5code,...
- Page 31 Standard 2 of 5 Standard 2 of 5-On, code1 Standard 2 of 5-On Code2 Note: To enable the scanner to read the Standard 2 of 5 code, please scan the 2 setting codes above in order. Standard 2 of 5-Off* Code 39 Code39-On* Code39-Off...
- Page 32 Code39 start & stop digit -On Code39 start & stop digit -Off* Code39 any length string-On Code 93 Code93-On Code93-Off* Code 11 Code11-On Code11-Off*...
- Page 33 Codabar Codabar - On Codabar-Off* Codabar Start & End Digit- On* Codabar Start & End Digit- Off MSI - On,code1 MSI - On,code2 Note: To enable the scanner to read the MSI code, please scan the 2 codes above in order. MSI-Off* GS1-Databar GS1-Databar-On...
- Page 34 Code 32 QR code Code32-Off* Code32-On QR code-On* Code32 prefix A-Off* Code32 prefix A-on White in black background-On White in black background-Off*...
- Page 35 Data Matrix Data Matrix-On* Data Matrix-Off White in black background-On White in black background-Off* PDF 417 PDF 417-On* PDF 417-Off White in black background-On White in black background-Off*...
- Page 36 Aztec code Aztec code-On Aztec code-Off* Maxi Code Maxi Code-On Maxi Code-Off*...
-
Page 37: Insert And Delete Character
15. Insert and delete Character The barcode scanners permit special characters to be added/delete at the beginning (prefix) or end (suffix) of the scanned barcode. 15.1 Insert Characters As Prefix First step: Scan the below code to add characters from the beginning of the barcode. - Page 38 15.2 Insert Characters As Suffix First step: Scan the below code to add character from the end of barcode. Add Suffix Second step: Scan the character code. ( Character tablet is on page 38) E.g. To add prefix C, d, scan the character code one by one. After that, if you scan your goal barcode, the Cd will be add at the end of the scanned barcode.
- Page 39 15.3 Hide Characters from Start Position First step:Scan the below code to hide characters from the leading character. Delete characters from Start Position Second step: Scan one of the following code to hide the corresponding characters. E.g. To delete the first 3 characters, please scan the number 3. After that, if you scan your goal barcode 123456789, the 123 will be hided and the barcode only show 456789.
- Page 40 15.4 Hide Characters from End Position First step:Scan the below code to hide characters from the leading character. Delete characters from End Position Second step: Scan one of the following code to hide the corresponding characters. E.g. To delete the first 3 characters, please scan the number 3. After that, if you scan your goal barcode 123456789, the 789 will be hided and the barcode only show 123456.
-
Page 41: Ascii Barcode Table
ASCLL Barcode Table Back Space... - Page 42 Right Arrow Left Arrow & Up Arrow Down Arrow Spacebar "...
- Page 43 < >...
- Page 46 FCC Caution. a、§ 15.19 Labeling requirements. This device complies with part 15 of the FCC Rules. Operation is subject to the following two conditions: (1) This device may not cause harmful interference, and (2) this device must accept any interference received, including interference that may cause undesired operation.
- Page 47 turning the equipment off and on, the user is encouraged to try to correct the interference by one or more of the following measures: -Reorient or relocate the receiving antenna. -Increase the separation between the equipment and receiver. -Connect the equipment into an outlet on a circuit different from that to which the receiver is connected.
Need help?
Do you have a question about the RL6200W and is the answer not in the manual?
Questions and answers