Table of Contents
Advertisement
Quick Links
Advertisement
Table of Contents

Related Manuals for The Wine Square CUBE LT

Summary of Contents for The Wine Square CUBE LT
- Page 1 CUBE User Manual...
- Page 2 DESIGNED AND MADE IN CANADA...
-
Page 3: Table Of Contents
TABLE OF CONTENTS Warning / Caution / Note Definition Introduction Conditions In The Wine Cellar Description of Components Minimum Requirements Location Selection Installation ROUGH-IN FINAL INSTALLATION System Start-Up Temperature Adjustment Adjusting the Alarm Sound Level Settings Screen Unlock Control with a Device on the Same Network Remote Connection Maintenance Cleaning the Water Chiller Filter... -
Page 4: Warning / Caution / Note Definition
Warning / Caution / Note Deinition The words WARNING, CAUTION and NOTE have special meanings and should be carefully reviewed. WARNING Alerts the reader to a situation which, if not avoided, could result in death or serious injury. It can also describe potential serious side effects and their safety risks. - Page 5 • This appliance has been manufactured for the air conditioning of a wine cellar and must not be used for any other purpose. • STRICTLY use the installation hardware provided by The Wine Square. DO NOT attempt to install or connect this device using any methods other than those provided in this...
-
Page 6: Introduction
50%-80%. The lower the cellar temperature, the slower the wine will age. A temperature that is too low will block its ageing. The Wine Square recommends a temperature setpoint of 14°C (57°F) with this device, which corresponds to both an aging temperature and a tasting temperature for most red wines. -
Page 7: Description Of Components
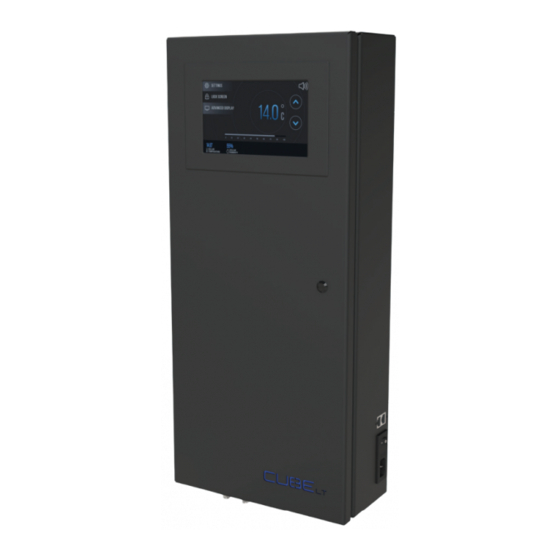
Description of Components The CUBE is a “split” cooling system made up of three components. It allows the noisy element (the compressor) to be placed at a distance from the wine cellar. 1- CUBE CONTROL BOX 2-CUBE WATER CHILLER 3-RC4LT DIFFUSER... - Page 8 CONTROL BOX The CUBE Control Box is the unit managing the system. Equipped with a high-resolution 7” touch screen, it allows the display and simple adjustment of the conditions of the wine cellar. It provides the electrical power and the chilled water to the RC4-LT module in the wine cellar by means of a network wire and two 1/2”...
- Page 9 WATER CHILLER The CUBE Water Chiller provides the chilled water necessary for the proper functioning of the system. Italian designed, this small, robust and eco-friendly unit uses R290 as refrig- erant, a non-toxic gas with zero ODP (Ozone Depletion Potential) and very low GWP (Global Warming Potential).
- Page 10 RC4LT DIFFUSER The RC4LT is the cooling unit of the system positioned at the ceiling of the wine cellar. It pumps the heat in and carries it to the water cooler. It is equipped with a condensate pump to evacuate the condensation outside the wine cellar. The RC4LT must be installed horizontally at the highest point of the wine cellar.
-
Page 11: Minimum Requirements
Minimum Requirements In order to ensure proper operation of the system as well as to maintain the warranty, it is important that the wine cellar is built according to the rules of the art. These requirements remain the same, regardless of the size of the wine cellar. GENERAL •... -
Page 12: Location Selection
Location Selection Before starting the installation of the system, it is important to select the location where the various components will be installed. Although air conditioning systems push cold air when they are in use, these devices work more to remove heat, colder air is only a result. The nu- ance seems small, but it is very important when evaluating the placement of the compo- nents of the air conditioning system. -
Page 13: Rough-In
ROUGH-IN PEX 1/2’’ PIPE RC4-LT ETHERNET RJ45-CAT6 CONTROL BOX * CUBE° 2X INSULATED PEX 1/2’’ PIPE ETHERNET WALL PLATE LINKED TO INTERNET WA TER CHILLER SOCKET NEMA 5-15R,2P CUBE° DEDICATED CIRCUIT DRAIN... - Page 14 A Position RC4LT in the wine cellar. It is important to consider the thickness of the insula- tion, finishing material and glass envelope when locating the final location of the unit. Check that the clearance necessary for the correct operation of the unit is respected. Back Minimum Clearance Front (A)
- Page 15 At the ceiling in the wine cellar, leave between 2” and 6” of tubing hanging from the ceil- B’ ing and install an elbow on each conduit. 2’’-6’’ [50-150] NOTE : It is preferable not to exit all the tubes at the same height to facilitate the connection of the system during its final installation.
- Page 16 Install an RJ45 network wire with minimum 23AWG wires between the RC4LT and the control box location. Allow a minimum of 36” of wire to hang in the wine cellar and the length needed to connect to the right side of the control box. NOTE : It is more prudent at this stage to run a second RJ45 wire away from the first.
-
Page 17: Final Installation
FINAL INSTALLATION This installation step must be carried out at the very end of the work when there is no lon- ger any dust production. Otherwise, dust could damage the device and reduce the cool- ing capacity of the system. In the event that construction steps are required following the installation of the system, please unplug the device before starting work. - Page 18 Install the radiator module on the support plate. Be careful not to trap the tubes when rotating the module. Secure the radiator in place with two # 8 flat head wood screws long enough to anchor into the nailing base.
- Page 19 Connect the tubes previously installed in the walls with the radiator module. The tubes preinstalled on the radiator are connected directly to the PEX fittings without a crimp ring. The tube is therefore installed on the PEX tip as it will be on a barb fitting.
- Page 20 Install the wooden box over the radiator. Before sliding the casing into place, find the joint on the wood veneer and orient that surface toward the back of the wine cellar. When putting the housing back in place, make sure the tubes are not kinked. Once the wood box is in place, turn the support fins to hold it in position.
- Page 21 CONTROL BOX FINAL INSTALLATION At the desired location of the control box, install the mounting plate 60“ from the floor. 60’’ [1524] Using the two openings behind the control box, embed the unit on the two hooks of the support plate, previously installed on the wall.
- Page 22 Secure the control box in place with a screw. The locking hole is located in the middle under the device. Install the power supply bracket under the unit on the right side of the unit. The bracket is in- stalled with two wood screws directly to the wall. Slide the control box power supply block into its bracket.
- Page 23 Connect the power supply to the control box, the connector is located on the bottom of the device. Do not start the device at this step. Connect the communication cable (previously connected to the RC4LT) to the control box. The communication cable connects to the clos- est to the wall RJ45 outlet, identified by an icon showing three bottles of wine.
- Page 24 WATER CHILLER FINAL INSTALLATION Take the water chiller out of its packaging and install the cover on top of the unit. The hood allows you to choose the direction of hot air exit. Orient the hot air out- let so that the heat emitted easily dissipates into the room. Place the water chiller on the floor under the control box.
- Page 25 Make the hydraulic connection of the device accord- ing to the following diagram. Any of the two tubes coming from the RC4LT can be used for supply or return to the unit. They can be reversed without problem. The connections between the different units must be made with the pre-insulated tubes supplied with the device.
-
Page 26: System Start-Up
System Start-Up Now that all of the components are connected together, the system can be put into opera- tion. In order to avoid damaging the appliance, it is important not to start the system if the wine cellar has not yet been completed (door missing, seal missing, etc.) or if work that can generate a lot of dust remains to be done (joint pulling, wood cutting ...). - Page 27 Turn the control box to “ON” by flipping the power button on the side of the device. CAUTION Do not start the water chiller at this point. Water must be put into the sys- tem before it is started. Fill the reservoir with distilled water until the reser- voir is full.
- Page 28 Repeat step 5 a minimum of three times to make sure the system is full of water. You should be able to put a minimum of 3.8 liters (1 gal) of water in the system. Replace the two tank caps. Close the door and lock the front of the control box using a coin.
- Page 29 Plug in the water chiller and start the unit by press- ing the power button for a minimum of 3 seconds. SECS The water chiller has a 2 minutes delay be- fore starting to protect the compressor. CAUTION The water chiller has been factory pre-set, do not change the temperature.
-
Page 30: Use
The CUBELT is controlled by the system touch screen located on the front of the control box. When the screen has not been used for a while, the power to the display is turned off to prolong the life of the product as much as possible. Just touch the screen to restart the display. -
Page 31: Temperature Adjustment
Temperature Adjustment To change the temperature set point in the wine cellar. Click on the arrows to the right of the temperature display. The current temperature display will then change to show the setpoint. Adjusting the Alarm Sound Level Click on the icon displaying the alarm sound level to change it. -
Page 32: Settings
Settings The settings menu provides access to the various display settings of your device. To access this menu click on the Settings button in the upper right corner of your screen. Selecting the Display Language In the Settings menu, select the language tab on the left of the screen. - Page 33 Activation / Deactivation of the Lock Screen In the Settings menu, select the screen lock in the tab on the left. Then click on On or Off to activate or deactivate the function. To return to the main screen. Click on the “X” in the upper right corner. Display Color Selection In the Settings menu, select the Colors tab in the left of the screen.
-
Page 34: Screen Unlock
Screen Unlock To unlock the home screen, click the circle at the top left of the keyboard. An arrow will appear in the center of the button, then click on the next circle, indicated by the arrow. Continue going through it this way until the screen unlocks. -
Page 35: Remote Connection
Remote Connection Thanks to its internet connection, the CUBE can be controlled remotely. It also records its temperature and humidity history which can be viewed through the system’s web inter- face. Get the serial number of your device under the pow- er button. -
Page 36: Maintenance
Maintenance Cleaning the Water Chiller Filter The filter should be cleaned at least once a month or depending on the amount of dust present where the appliance is located. 1. Open the plastic grid of the upper part 2. Take out the filter 3. -
Page 37: Add Water
Add Water It is normal over time to add water to the reservoir. The water evaporates through the tubes much like wine does through the cork. However, the system should not lose more than a few milliliters per year. However, during the first filling, it is normal to have to add water after a few days. During fill- ing, micro-bubbles form on the internal walls of the radiator. - Page 38 Fill the tank with distilled water until the tank is full. It is normal for the pump to start and stop a few times during filling. A water level sensor inside the tank ensures that the pump stops in the event of a lack of water.
-
Page 39: Water Replacement
Water Replacement Every 5 years, the water in the system must be replaced. To do this, the system must be completely drained and refilled. 1. Unplug the Water Chiller and the CUBE 2. Position a container under the control box 3. -
Page 40: Troubleshooting
Troubleshooting If there is a problem with your device, please refer to the section below. If you cannot find a solution to your problem, please contact your reseller or go to www.thewinesquare.com to find contact information. Failure identified by a system error code In most cases, if your system is experiencing difficulties, an alarm will appear on the monitor screen. - Page 41 The table below presents the complete list of errors that can be displayed on your system. Error No. Level Description Error 001 Communication interrupted with the RC4LT Error 005 Cold water loop, too cold Error 006 Defective cold water loop pump Error 009 Cellar temperature sensor is faulty Error 011...
- Page 42 ERROR 001 Loss of communication with your wine cellar causes the system to shut down. The Cube is no longer able to know the temperature and humidity inside the room. Communica- tion is done using the RJ45 communication cable. In most cases, this problem is simply due to a disconnection of the cable.
- Page 43 The cold water pump is faulty. The system no longer receives feedback from the pump. The system will stop cooling until the situation is restored. SOLUTION 1. Replace the cold water pump. To do this, contact your The Wine Square product retailer. ERROR 009 The temperature sensor inside the RC4LT (in the wine cellar) is faulty.
- Page 44 ERROR 011 The water level in the cold water loop has dropped. The system is working normally but it is necessary to add water in the next few weeks to prevent the system from shutting down. The system is operating normally. SOLUTION 1.
- Page 45 The fan inside the control box has stopped working. The system continues to operate but is at risk of overheating. The situation must be corrected quickly. SOLUTION 1. Replace the fan in the control box. To do this, contact your The Wine Square prod- uct retailer.
- Page 46 The temperature inside the control box has reached the critical point of 50°C. In this situation the system shuts down to prevent any damage. SOLUTION 1. Contact your The Wine Square product dealer to identify the source of the prob- lem. ERROR 021 The temperature inside the wine cellar has reached the critical point of 24°C.
- Page 47 SOLUTION 1. Contact your The Wine Square product dealer to identify the source of the prob- lem. ERROR P1 The water chiller temperature sensor is damaged. In this situation the water cooling sys- tem stops.
-
Page 48: Failure Without System Error Code
4. Stop and restart the control box a few times to try to get rid of any air bubbles that may have formed in the water cooler pump or tank. 5. Contact your The Wine Square product retailer. Humidity too high (> 80%) in the wine cellar. - Page 49 Water drips from the RC4LT 1. In the ma jority of cases, this is due to a poorly insulated hose. Remove the case from the RC4LT. 2. Look for the source of the water drops. Here are the most common problems: •...
- Page 50 A temperature diference between my thermometer in the wine cellar and the system display. Temperature control of the CUBE use a temperature sensor located in the RC4LT housing. As the temperature is taken from the ceiling and close to the radiator, it is nor- mal to see a difference between this measurement and a measurement taken elsewhere in the wine cellar.
- Page 51 5. Check that the water chiller ventilation filter is clean. If necessary, clean the filter by following the filter cleaning procedure in the Maintenance section. 6. Check that the ambient temperature around the chiller is well below 38°C [100°F]. If necessary, ventilate to reduce the temperature. 7. Contact your The Wine Square product dealer.
-
Page 52: Appendices
APPENDICES... -
Page 53: Wall Pre-Closure Checklist
Wall Pre-Closure Checklist CUBE By checking, I confirm the presence of the elements for the installation of the CUBE Wood blocking to the ceiling at the location of the RC4LT in the wine cellar An uninsulated PEX line between the RC4LT location and an open drain Two 1/2’’... - Page 54 Wine Cellar (suite) By checking, I confirm the presence of the elements in the wine cellar Moisture barrier (vapour barrier) on all surfaces Wood blocking for glass installation Wood blocking for racking installation Low voltage wires for the installation of lighting Pictures of the walls and ceiling before they are closed Inspection done by: Dated:...
-
Page 55: Parts List
PARTS LIST... -
Page 56: Control Box Cube Lt
Control Box CUBE CUBLT-M-0001 Screen Assembly/ Assemblage écran CUBLT-M-0009 Electronic Plate / Plaque électronique CUBLT-M-0002 Door Front / Devant porte CUBLT-M-0010 Main Board / Carte principale CUBLT-M-0003 Door Back / Dos porte CUBLT-M-0011 RJ45 Inlet / Entrée RJ45 CUBLT-M-0004 Water Tank / Réservoir d’eau CUBLT-M-0012 Power Switch / Interrupteur CUBLT-M-0005... -
Page 57: Rc4Lt
RC4LT CUBLT-M-0017 Ceiling Plate / Plaque plafond CUBLT-M-0025 RC4LT PCB / PCB RC4LT CUBLT-M-0018 Radiator / Radiateur CUBLT-M-0026 Fan Grill / Grille de ventilateur CUBLT-M-0019 CUBLT-M-0027 Fan / Ventilateur RC4 Water Level Switch / Capteur de niveau d’eau RC4 CUBLT-M-0020 Condensation Tray / Bac de condensation CUBLT-M-0021 RC4LT Box / Boîtier RC4LT... -
Page 58: Notes
NOTES... - Page 59 TECHNICAL SUPPORT QUESTIONS OR CONCERNS The Wine Square’s number one con- cern is customer satisfaction. If you need help or have any problems with your CUBE air conditioning system, please contact the members of the tech- nical support team for assistance.
- Page 60 WWW.THEWINESQUARE.COM © The Wine Square, 2022 All rights reserved R0.0...
Need help?
Do you have a question about the CUBE LT and is the answer not in the manual?
Questions and answers