
Summary of Contents for aevit SMART-SHIFT
- Page 1 LIT-SMTSH-030420-Rev2 SMART-SHIFT INSTALLATION MANUAL DISTRIBUTED BY: ELECTRONIC MOBILITY CONTROLS, LLC - www.aevit.com...
-
Page 2: Table Of Contents
TABLE OF CONTENTS 1. OVERVIEW 2. INSTALLATION 2.1 SHIFT CABLE INSTALLATION 2.2 MOUNTING THE SMART-SHIFT ACTUATOR BRACKET 2.3 MOUNTING CONTROLLER AND TOUCHPAD 2.4 ELECTRICAL CONNECTIONS 3. CALIBRATION SMART-SHIFT INSTALLATION... -
Page 3: Overview
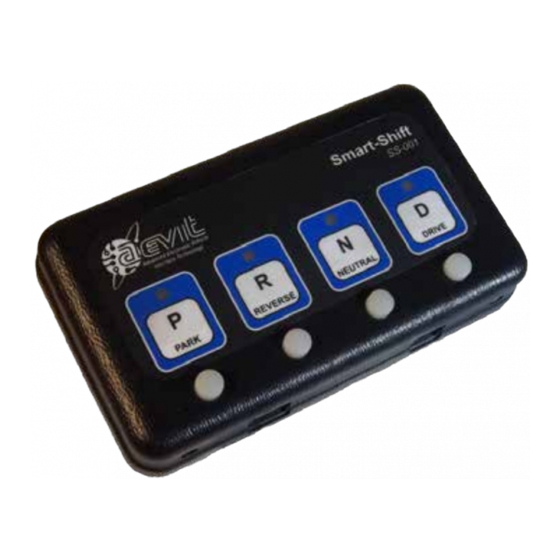
M1-1 1. OVERVIEW The EMC Smart-Shift answers all of the “shifting” needs of the individual, the installing dealer, and the driver rehabilitation professional. This system can be installed in almost any vehicle equipped with a cable actuated automatic transmission to remotely operate the vehicle’s shifting functions. The Smart-Shift is operated by the four illuminated tactile buttons on the front of a small (5.5”... -
Page 4: Installation
For this reason, EMC supplies the Smart-Shift mounting bracket preassembled to the actuator. Determine the method for attaching the shift cable first, followed by securing the actuator mounting the bracket to the vehicle. - Page 5 Cable Bracket until the plastic ear snaps into the hole in Park. Insert the shoulder screw through the OEM in the Cable Bracket. cable end and into the Nose Cone as shown, using a small amount of Blue Loctite®. SMART-SHIFT INSTALLATION...
- Page 6 #6-32 x 3/8” BUTTON HEAD SCREW Attach the cable bracket (included in KIT-SS-ASSY- Attach the Smart-Shift pin (included in KIT-SS-ASSY- 04T) to the end of the Smart Shift bracket in the 04T) to the Nose Cone using the supplied #6-32 x location shown in the figures above.
- Page 7 #6-32 x 3/8” BUTTON HEAD SCREW Attach the cable bracket (included in KIT-SS-ASSY- Attach the Smart-Shift pin (included in KIT-SS-ASSY- 04T) to the end of the Smart Shift bracket in the 04T) to the Nose Cone using the supplied #6-32 x location shown in the figures above.
- Page 8 2008-2010 HONDA ODYSSEY Attach the Cable Bracket (included in KIT-SS-ASSY- Insert the Smart-Shift pin (included in KIT-SS-ASSY- 04T) to the end of the Smart Shift bracket in the 04T) through the OEM shift cable connector. Using location shown in the figures above. The flat side of the provided #6-32 x 3/8”...
- Page 9 OEM cable onto the Cable Bracket and vehicle is in Park. The shift cable should be secured rotating. to the Nose Cone using the 5/16” x 3/4” long button head bolt and 5/16” lock nut. SMART-SHIFT INSTALLATION...
- Page 10 #6-32 x 3/8” BUTTON HEAD SCREW Attach the Cable Bracket (included in KIT-SS-ASSY- Attach the Smart-Shift pin (included in KIT-SS-ASSY- 05M) to the end of the Smart Shift bracket in the 05M) to the nose cone using the supplied #6-32 x location shown in the figures above.
- Page 11 Park. Secure the shift cable to the Nose Shift Cable Bracket with the preassembled OEM Cone using the OEM preassembled hardware and a hardware and a small amount of Blue Loctite®. small amount of Blue Loctite®. SMART-SHIFT INSTALLATION...
-
Page 12: Mounting The Smart-Shift Actuator Bracket
2.2 MOUNTING THE SMART-SHIFT ACTUATOR BRACKET Each vehicle is different, depending on the vehicle type, amount of body lift and length of the shift cable. Start by pulling the shift cable into the engine bay and seeing where it will reach without contacting anything hot or needing sharp bends. -
Page 13: Mounting Controller And Touchpad
Make sure you drill a large enough hole to accommo- date the connector. Locate the power cable which plugs into the Smart-Shift Harness port and connect the four wires as depicted and explained in FIGURE 2. - Page 14 G R E E N ( D a s h L a m p 1 2 V d c ) B L A C K ( C h a s s i s G r o u n d ) SMART-SHIFT INSTALLATION...
-
Page 15: Calibration
If you are unable to “drop into” a gear from the low side direction, use the actuator control buttons to reset the gears position slightly further to the low side. SMART-SHIFT INSTALLATION... - Page 16 Drive (D) position, the vehicle’s transmission will dictate when and if these lower gears can be accessed. CAUTION: THE EMC SMART-SHIFT ACTUATOR MUST BE EITHER PLACED IN NEUTRAL OR THE OEM SHIFT CABLE DISCONNECTED FROM THE ACTUATOR BEFORE ATTEMPTING TO TOW THE VEHICLE.
Need help?
Do you have a question about the SMART-SHIFT and is the answer not in the manual?
Questions and answers