Advertisement
Available languages
Available languages
Quick Links
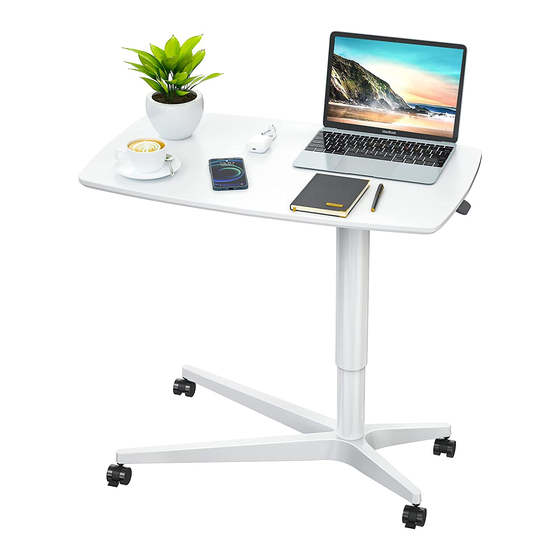
Mobile Standing Desk
Instruction Manual
V2.0
Model: FNSTT1
Thank you for choosing this FURNINXS product! At FURNINXS we strive to
provide you with the best quality products and services in the industry. Should
you have any issues, please don't hesitate to contact at
support@furninxs.com (US/CA/DE/UK/FR/IT/ES/AU)
Advertisement

Related Manuals for FURNINXS FNSTT1

Summary of Contents for FURNINXS FNSTT1
- Page 1 Instruction Manual V2.0 Model: FNSTT1 Thank you for choosing this FURNINXS product! At FURNINXS we strive to provide you with the best quality products and services in the industry. Should you have any issues, please don't hesitate to contact at...
-
Page 2: Installation Step
Attention: Do not tighten the bolts until all of them are in right positions Supplied Parts and Hardware M8x15mm M6X12mm M6x15mm M6X20mm [A] x3 [B] x3 [C] x7 [D] x4 [E] x3 Φ8 Φ8 [F] x4 [G] x4 [H] x2 [I] x 2 13/64 in.(5mm) 15/64 in.(6mm) - Page 3 Step 2 Small Allen Key A x3 C x7 Step 3 Small Allen Key Small Allen Key B x3 E x3...
- Page 4 Step 4 F x4 G x4 H x2 I x2 Height Adjustment Lever [L] Lift and hold the lever [L] to lower or raise the desk. After adjusting the desk to your Height Adjustment desired height, release the lever [L] to secure the height in place.
- Page 5 Achtung: Ziehen Sie die bolzen erst an, wenn sich alle in der richtigen Position befinden Mitgelieferte Teile und Hardware M8x15mm M6X12mm M6x15mm M6X20mm [A] x3 [B] x3 [C] x7 [D] x4 [E] x3 Φ8 Φ8 [F] x4 [G] x4 [H] x2 [I] x 2 13/64 Zoll.(5mm) 15/64 Zoll.(6mm)
- Page 6 Schritt 2 Kleiner Inbusschlüssel A x3 C x7 Schritt 3 Kleiner Inbusschlüssel Kleiner Inbusschlüssel B x3 E x3...
- Page 7 Schritt 4 F x4 G x4 H x2 I x2 Höhenverstellung Heben Sie den Hebel [L] an und halten Sie ihn gedrückt, Hebel [L] um den Schreibtisch abzusen- ken oder anzuheben. Nachdem Sie den Schreibtisch auf die Höhenverstellung gewünschte Höhe eingestellt haben, lassen Sie den Hebel [L] los, um die Höhe zu sichern.
-
Page 8: Etapes D'installation
Attention : Ne pas serrer les boulons jusqu'à ce qu'ils soient tous dans la bonne position Pièces et matériels fournis M8x15mm M6X12mm M6x15mm M6X20mm [A] x3 [B] x3 [C] x7 [D] x4 [E] x3 Φ8 Φ8 [F] x4 [G] x4 [H] x2 [I] x 2 13/64 pouce.(5mm) - Page 9 Étape 2 Petite clé Allen A x3 C x7 Étape 3 Petite clé Allen Petite clé Allen B x3 E x3...
- Page 10 Étape 4 F x4 G x4 H x2 I x2 Réglage de la hauteur Levier [L] Soulever et maintenir le levier [L] pour abaisser ou élever le bureau. Après avoir réglé le Réglage de la hauteur bureau à la hauteur désirée, libérer le levier [L] pour fixer la hauteur à...
- Page 11 Atención: No apriete los tornillos hasta que todos estén en la posición correcta. Piezas y hardware suministrados M8x15mm M6X12mm M6x15mm M6X20mm [A] x3 [B] x3 [C] x7 [D] x4 [E] x3 Φ8 Φ8 [F] x4 [G] x4 [H] x2 [I] x 2 13/64 pulg.(5mm) 15/64 pulg.(6mm) Llave Allen pequeña...
- Page 12 Paso 2 Llave Allen pequeña A x3 C x7 Paso 3 Llave Allen pequeña Llave Allen pequeña B x3 E x3...
- Page 13 Paso 4 F x4 G x4 H x2 I x2 Ajuste de altura Levantar [L] Levante y sostenga la palanca [L] para bajar o subir el escri- torio. Después de ajustar el Ajuste de altura escritorio a la altura deseada, suelte la palanca [L] para asegurar la altura en su lugar.
- Page 14 Attenzione: non serrare i bulloni finché non sono tutti nella giusta posizione Parti e Hardware Forniti M8x15mm M6X12mm M6x15mm M6X20mm [A] x3 [B] x3 [C] x7 [D] x4 [E] x3 Φ8 Φ8 [F] x4 [G] x4 [H] x2 [I] x 2 13/64 pollici.(5mm) 15/64 pollici.(6mm) Chiave a...
- Page 15 Passaggio 2 Chiave a Brugola Piccola A x3 C x7 Passaggio 3 Chiave a Brugola Piccola Chiave a Brugola Piccola B x3 E x3...
- Page 16 Passaggio 4 F x4 G x4 H x2 I x2 Regolazione altezza Leva [L] Sollevare e tenere la leva [L] per abbassare o alzare la scrivania. Dopo aver regolato Regolazione altezza la scrivania all'altezza desider- ata, rilasciare la leva [L] per fissare l'altezza in posizione.
Need help?
Do you have a question about the FNSTT1 and is the answer not in the manual?
Questions and answers