Advertisement
Quick Links
Advertisement

Related Manuals for e-survey UT12P

Summary of Contents for e-survey UT12P
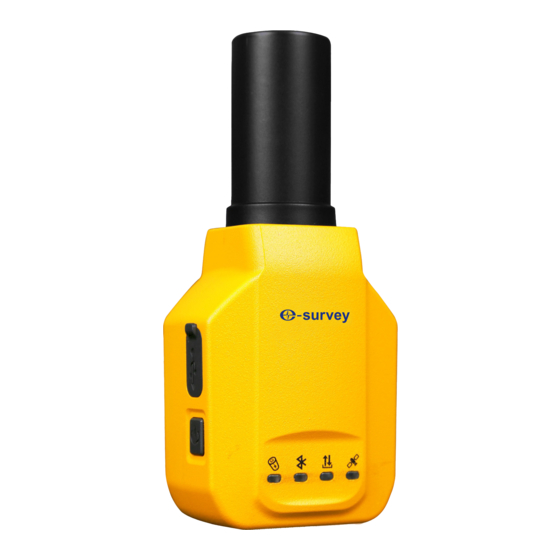
- Page 1 UT12P Quick Start Guide...
-
Page 5: What's In The Box
WHAT’S IN THE BOX Type-C cable Charging adaptor Standard battery Converter plugs... - Page 6 Please use this device indoor in the European Community using frequency in 5150 - 5250MHz to reduce the potential interference. Restriction in BE, BG, CZ, DK, DE, EE, IE, EL, ES, FR, HR, IT, CY,LV,LT,LU,HU,MT,NL,AT, PL, PT, RO, SI, SK, FI, SE, and UK. Please do not use this device in the place where the use of electronic device is not allowed, such as airports, hospitals, gas stations, etc.
-
Page 7: Charge The Battery
Charge the Battery During normal charging, the status bar will display the charging icon when screen is on. When charging is completed, the status bar will display the full battery icon when screen is on. Charge with travel charger Insert the small plug end of the USB data cable into the TYPE-C port of the device. Insert the large plug end of the USB data cable into the travel charger plug. - Page 8 Insert SIM Card, MicroSD Card and Battery Power off the device. Flip the device to its rear, push the back cover lock to the open position according to the direction as follows: Remove the battery cover. To insert the SIM card and MicroSD card, do the following: Face the SIM card metal contacts downwards and push into the slot.
-
Page 9: Turn The Device On And Off
To insert the battery, do the following: Align the contacts of the battery with the terminals of the battery compartment and put in the battery gently. Push the battery lock to the locked position. Attach the battery cover. Push the battery cover lock to the locked position. -
Page 10: Home Screen Operations
Home Screen Operations After turning on the device, swipe upwards on the screen to unlock. The main interface of the home screen is as follows: Notification area To open the notification panel, hold the status bar and drag down. Shortcut panel To add a shortcut icon, press and hold the icon and drag it down to “Shortcut panel”. -
Page 11: Connect To A Computer
Connect to a Computer Connect the type-C cable with UT12P and your computer. Open the notification panel. Notification “Android System·Charging this device via USB” shows. Click on the notification, tap it, and select a USB preference: Including file transfer, USB tethering, MIDI, PTP and no data transfer. - Page 12 WLAN / Bluetooth / VPN connection Slide the home screen up, and tap the app icon Setting Wi-Fi connection Find “Network & Internet”. Tap “Wi-Fi”, and turn switch “Use Wi-Fi” to “ON” status. Select the target Wi-Fi from the list of available networks. Input the password.
- Page 13 Normal Mode RF Power Range (GSM, WCDMA) Mode Range(dBm) GSM900 31.00-33.00 GPRS900(1 Slot) 31.00-33.00 GPRS900(2 Slots) 30.00-32.00 GPRS900(3 Slots) 28.50-30.50 GPRS900(4 Slots) 26.00-28.00 EGPRS (8PSK, 1-Slot) 24.50-26.50 EGPRS (8PSK, 2-Slots) 23.00-25.00 EGPRS (8PSK, 3-Slots) 22.00-24.00 EGPRS (8PSK, 4-Slots) 21.00-23.00 GSM1800 28.50-30.50 GPRS1800(1 Slot) 28.50-30.50...
- Page 14 Normal Mode RF Power Range (LTE) Mode Bandwidth Modulation Range(dBm) 19.80-21.80 QPSK 19.00-21.00 19.00-21.00 20 MHz 19.00-21.00 16QAM 18.00-20.00 18.00-20.00 19.80-21.80 QPSK 19.00-21.00 19.00-21.00 15 MHz 19.00-21.00 16QAM 18.00-20.00 18.00-20.00 LTE Band 1 19.80-21.80 QPSK 19.00-21.00 19.00-21.00 10 MHz 19.00-21.00 16QAM 18.00-20.00 18.00-20.00...
- Page 15 Mode Bandwidth Modulation Range(dBm) 20.80-22.80 QPSK 20.00-22.00 20.00-22.00 20 MHz 20.00-22.00 16QAM 19.00-21.00 19.00-21.00 20.80-22.80 QPSK 20.00-22.00 20.00-22.00 15 MHz 20.00-22.00 16QAM 19.00-21.00 19.00-21.00 20.80-22.80 QPSK 20.00-22.00 20.00-22.00 LTE Band 3 10 MHz 20.00-22.00 16QAM 19.00-21.00 19.00-21.00 20.80-22.80 QPSK 20.00-22.00 20.00-22.00 5 MHz 20.00-22.00...
- Page 16 Mode Bandwidth Modulation Range(dBm) 20.80-22.80 QPSK 20.00-22.00 20.00-22.00 LTE Band 3 1.4 MHz 20.00-22.00 16QAM 19.00-21.00 19.00-21.00...
- Page 17 Mode Bandwidth Modulation Range(dBm) 19.80-21.80 QPSK 19.00-21.00 19.00-21.00 20 MHz 19.00-21.00 16QAM 18.00-20.00 18.00-20.00 19.80-21.80 QPSK 19.00-21.00 19.00-21.00 15 MHz 19.00-21.00 16QAM 18.00-20.00 18.00-20.00 LTE Band 7 19.80-21.80 QPSK 19.00-21.00 19.00-21.00 10 MHz 19.00-21.00 16QAM 18.00-20.00 18.00-20.00 19.80-21.80 QPSK 19.00-21.00 19.00-21.00 5 MHz 19.00-21.00...
- Page 18 Mode Bandwidth Modulation Range(dBm) 21.00-23.00 QPSK 20.00-22.00 20.00-22.00 10 MHz 20.00-22.00 16QAM 19.00-21.00 19.00-21.00 21.00-23.00 QPSK 20.00-22.00 20.00-22.00 5 MHz 20.00-22.00 16QAM 19.00-21.00 19.00-21.00 LTE Band 8 21.00-23.00 QPSK 20.00-22.00 20.00-22.00 3 MHz 20.00-22.00 16QAM 19.00-21.00 19.00-21.00 21.00-23.00 QPSK 21.00-23.00 21.00-23.00 1.4 MHz 20.00-22.00...
- Page 19 Mode Bandwidth Modulation Range(dBm) 21.00-23.00 QPSK 20.50-22.50 20.50-22.50 20 MHz 20.50-22.50 16QAM 19.00-21.00 19.00-21.00 21.00-23.00 QPSK 20.50-22.50 20.50-22.50 15 MHz 20.50-22.50 16QAM 19.00-21.00 19.00-21.00 LTE Band 20 21.00-23.00 QPSK 20.50-22.50 20.50-22.50 10 MHz 20.50-22.50 16QAM 19.00-21.00 19.00-21.00 21.00-23.00 QPSK 20.50-22.50 20.50-22.50 5 MHz 20.50-22.50...
- Page 20 Mode Bandwidth Modulation Range(dBm) 21.50-23.50 QPSK 20.50-22.50 20.50-22.50 20 MHz 20.50-22.50 16QAM 19.50-21.50 19.50-21.50 21.50-23.50 QPSK 20.50-22.50 20.50-22.50 15 MHz 20.50-22.50 16QAM 19.50-21.50 19.50-21.50 21.50-23.50 QPSK 20.50-22.50 20.50-22.50 LTE Band 28 10 MHz 20.50-22.50 16QAM 19.50-21.50 19.50-21.50 21.50-23.50 QPSK 20.50-22.50 20.50-22.50 5 MHz 20.50-22.50...
- Page 21 Mode Bandwidth Modulation Range(dBm) 20.00-22.00 QPSK 19.00-21.00 19.00-21.00 20 MHz 19.50-21.50 16QAM 18.00-20.00 18.00-20.00 20.00-22.00 QPSK 19.00-21.00 19.00-21.00 15 MHz 19.50-21.50 16QAM 18.00-20.00 18.00-20.00 LTE Band 20.00-22.00 QPSK 19.00-21.00 19.00-21.00 19.50-21.50 16QAM 18.00-20.00 10 MHz 18.00-20.00 20.00-22.00 QPSK 19.00-21.00 19.00-21.00 5 MHz 19.50-21.50 16QAM...
- Page 22 Mode Bandwidth Modulation Range(dBm) 20.00-22.00 QPSK 19.00-21.00 19.00-21.00 20 MHz 19.00-21.00 16QAM 18.00-20.00 18.00-20.00 20.00-22.00 QPSK 19.00-21.00 19.00-21.00 15 MHz 19.00-21.00 16QAM 18.50-20.50 18.50-20.50 LTE Band 40 20.00-22.00 QPSK 19.00-21.00 19.00-21.00 10 MHz 19.00-21.00 16QAM 18.00-20.00 18.00-20.00 20.00-22.00 QPSK 19.00-21.00 19.00-21.00 5 MHz 19.00-21.00...
- Page 23 Normal Mode RF Power Range (WLAN/Bluetooth) Band (GHz) Mode Channel Freq. (MHz) Range(dBm) 2412 11.50-13.50 2442 11.50-13.50 802.11b CH13 2472 11.50-13.50 2412 11.50-13.50 WIFI 2.4G 802.11g 2442 11.50-13.50 (2.4~2.4835) CH13 2472 11.50-13.50 2412 10.50-12.50 802.11n(HT20) 2442 10.50-12.50 CH13 2472 10.50-12.50 5180 10.00-12.00 802.11ac(VHT20)
- Page 24 Google, Google Play, the Google Play logo and other marks are trademarks of Google LLC. This device complies with Part 15 of the FCC Rules. Operation is subject to the following conditions: This device may not cause harmful interference, and This device must accept any interference received, including interference that may cause undesired operation.
- Page 26 To be the leading provider of high-precision professional, solution & service in the global geospatial industry Shanghai eSurvey GNSS Co., Ltd. Address: Building 4, No.651 Wanfang Rd, Pujiang Town, Minhang District, Shanghai, China E-mail: Sales: info@esurvey-gnss.com Support: support@esurvey-gnss.com Hotline: +86 400-9998088 Website: https://esurvey-gnss.com/...
Need help?
Do you have a question about the UT12P and is the answer not in the manual?
Questions and answers