
Summary of Contents for Phenom SpecialOPS
- Page 1 Tri-Band GSM OPS Watch Phone PECIAL USER MANUAL © Phenom Communications Inc. 2009...
-
Page 2: Table Of Contents
TABLE OF CONTENTS 1. Basics………………………………………………………………. 4 1.1. Brief Introduction………………………………………...4 1.2 Safety Warnings and Notice Items………………………..4 1.3 Safety Instructions………………………………………..4 1.3.1 General Safety Instructions……………………4 1.3.2 Watch Phone Instructions……………………...5 1.3.3 Battery Usage Instructions…………………….6 1.3.4 Charger Safety Instructions…………………..7 1.3.5 Cleaning and Maintenance…………………….8 1.3.6 General Care…………………………………..8 2. - Page 3 3.4.1 SMS……………………………………………..21 3.4.2 MMS…………………………………………….23 3.4.3 Chat……………………………………………...23 3.4.4 Voice Box………………………………………..24 3.4.5 Cell Broadcast…………………………………...24 3.5 Watch Phone Records……………………………………..24 3.6 Bluetooth…………………………………………………...25 3.7 Music Player………………………………………………..25 3.8 Movie Player………………………………………………..26 3.9 Video………………………………………………………..26 3.10 Camera…………………………………………………….26 3.11 Sound Recorder……………………………………………27 3.12 Toolbox…………………………………………………….27 3.12.1 Alarm……………………………………………27 3.12.2 Calculator……………………………………….27 3.12.3 Reminder………………………………………..27 3.12.4 Calendar…………………………………………28 3.12.5 Personal Assistant……………………………….28 3.13 Mobile Internet…………………………………………….29 3.13.1 WAP…………………………………………….29...
- Page 4 5.1 Insert the T-Flash Card……………………………………..35 5.2 USB Connection……………………………………………..35...
-
Page 5: Basics
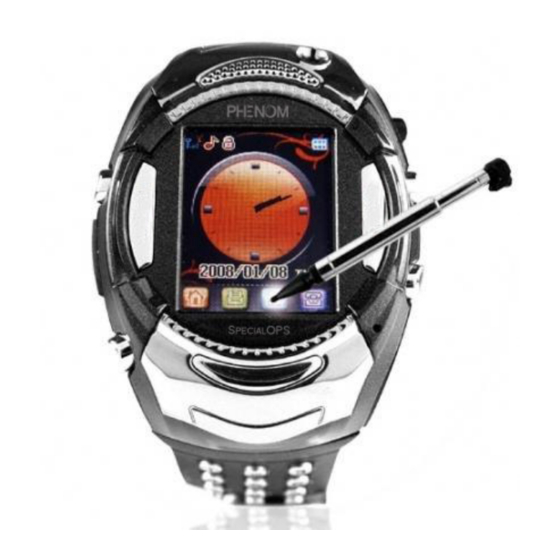
1. Basics 1.1 Brief Introduction Thank you for choosing the Phenom Watch Phone. Please read the user manual before operating the Phenom Watch Phone. This color touch screen Watch Phone includes functions such as GSM/GPRS internet, multi language input, handwriting input, business card type phone book, 64... -
Page 6: Watch Phone Instructions
Do not rub the eyes Never attempt to disassemble the Watch Phone by yourself. Contact Phenom Communications if there are any problems with your Phenom Watch Phone. In some cases, the Watch Phone could affect the performance of electronic equipment in some vehicles. -
Page 7: Battery Usage Instructions
To avoid demagnetization, keep the handset away from magnetic items, such as magnetic discs or credit cards. Demagnetization can result in the malfunctioning or loss of information from items such as bank cards and floppy discs. Please keep any small metal objects away from the Watch Phone receiver. When the speaker of the Watch Phone is active as it can magnetize any small metal objects which can cause injury or damage the Watch Phone. -
Page 8: Charger Safety Instructions
contact your doctor immediately. Please keep the battery away from fire. Particularly, if you sense e an odd smell from the battery or battery leakage occurs, stay away from fire. Keep the battery away from moist places to avoid battery overheating, erosion and smoke. -
Page 9: Cleaning And Maintenance
Please disconnect the charger from the power outlet before cleaning the charger. When disconnecting the charger from the power outlet, do not pull the wire, as this will damage the charger and cause an electric shock. Hold on to the plug and pull slightly. -
Page 10: Watch Phone Description
not charge near televisions, radios and other electrical equipment, this could affect the image and sound quality. 2. Watch Phone Description 2.1.1 Technical Parameters Dimension (length*width*height): 62mm*45.5mm*17.5mm Weight: 35g Lithium battery Standard voltage: 500mAh Limited charging voltage: 4.2V Rated Capacity Standby time: 100 hours Talking time: 150 minutes Power Adapter... -
Page 11: Keypad Instructions
2.2 Keypad Instructions To unlock: press the “dial” key (top right) and “*” or touch the “*” on the screen. 1. Number key Enter numbers and characters; numbers 2-9 can be set for speed dialing. 2. “Dial” key (Top right key on the right side of the Watch Phone) It is used to dial telephone numbers and receive incoming calls;... -
Page 12: Touch Screen Instructions
Star Key “* “ Use the “*” key to change input language and symbols. Press and hold “*” to input “+” Pound Sign Key “#” Press and hold the pound (#) key in idle screen mode to activate/deactivate the silent mode. -
Page 13: Getting Started
When the battery is completely charged, the charging process stops automatically and the battery icon stops flashing on the screen. After the battery is completely charged, please unplug the Watch Phone as soon as possible and disconnect the charger from the power outlet. -
Page 14: Inserting And Removing The Sim Card
additional system services. Please handle the SIM card with care. Twisting or pressing may cause damage. If it is lost, please contact your network operator immediately for assistance. Note: A SIM card can be easily damaged if its metal contacts become scratched. Therefore, take special care when holding or inserting it and keep it away from children. -
Page 15: Connecting To The Network
Warning: If you input the wrong PIN three consecutive times, the SIM card will be locked. Please contact your network operator immediately for unlocking instructions. Attempting to unlock by yourself may result in the SIM card's permanent failure. A SIM card cannot prevent the illegal use of the Watch Phone. Press “end”... -
Page 16: International Calls
2.6.10 International Calls Press and hold the "*" key until "+" appears, and enter the country code, area code and phone number. 2.6.11 Making a Call from the Phonebook To add a new contact in the phone book, enter a phone number in standby state, press ‘Option’, and choose ‘Save number’. -
Page 17: Receiving Calls
2.6.13 Receiving Calls To answer a phone call, press the “Answer key”. If your Watch Phone is set to “Any key answer” then press any key to answer. If the headset is connected to the Watch Phone you can answer a call by pressing the button on the headset. You can also answer a call by automatic answering, in which case, after 5 seconds the headset will be connected automatically and you can answer the phone call. -
Page 18: Menu
3. Menu 3.1 Menu Functions Scroll, search and select function. 1. In standby mode, press menu icon on the touch screen to open the menu. 2. Under all menus and submenus, touch the icon on the screen to open or close a function. - Page 19 Call Time Talk time SMS Counter GPRS Counter 1. 4. Bluetooth 2. 5. Music player 3. 6. Movie player 4. 7. Video camera 5. 8. Camera 6. 9. Multimedia centre Album Record 10. Tool box 10-1 Alarm clock 10-2 Calculator 10-3 Memorandum 10-4...
-
Page 20: Phonebook
message, phonebook, and dial number. 3.3 Phonebook With this function you can store names, phone numbers, home telephone numbers, and company telephone numbers. You can view the phonebook by selecting the phonebook icon in the menu or by touching phonebook icon when the Watch Phone is in standby mode. -
Page 21: Messages
3.4 Messages 3.4.1 SMS The message function is a network service. You may need to subscribe to the service from your network provider prior to being able to receive and send SMS messages. This Watch Phone supports the function of sending and receiving short messages. A short message is sent to the SMS center of the network, and then the network sends it to the target user. -
Page 22: Mms
◆ Send to Many: Send the message to several receivers. ◆ Send By Group: Send the message to each member of the corresponding group. [Template]: Edit preset SMS message template. [Message settings]: Set some relevant parameters to the SMS messages. Common Settings: Enable or disable message delivery report and reply path. -
Page 23: Chat
If the receiver’s cell phone does not support the MMS function, then the MMS center will create a temporary mailbox for storing the MMS messages on a dedicated server for the receiver and inform the receiver via SMS to access it on the internet. MMS messages and the temporary mailbox will be deleted if the receiver fails to access them in 48 hours. -
Page 24: Watch Phone Records
Read Message: Read the received cell broadcast. Languages: Choose the display language of the cell broadcast. Channel Setting: Select, add, edit or delete the channel of the cell broadcast. 3.5 Watch Phone Records You can view recent calls in the following menus: -Missed Calls: Displays the list of the missed calls. -
Page 25: Bluetooth
Searching for hands free devices: After the Watch Phone has finished searching for Bluetooth devices, choose the device you want to connect to and press “connect”. Then enter Bluetooth password. You can choose any password you like (the default password is 0000). If the password is correct, the handset will ask to confirm connection, press “yes”... -
Page 26: Video
Storage: Choose to save video files to the phone’s memory or memory card. 3.9 Video This function is used for video shooting. The recorded file will be saved to the Watch Phone or to the T-Flash card. Player: Play saved video files. Camcorder Setting: Set relevant parameters of the video recorder. -
Page 27: Toolbox
◆ Rename: Rename selected audio recording. Note: If the recording set as a caller ring tone is renamed, the caller ring tone will be restored to the default setting. ◆ Delete: Delete the selected audio recording. ◆ Delete All: Delete all audio recordings. ◆... - Page 28 nWay Stopwatch: The total time is displayed on the top of the screen. ■Unit Converter Unit Converter: Performs various weight and length unit conversions. ■ Exchange Rate Conversion Performs currency conversion. ■Electronic Book This feature lets you read documents in the Watch Phone's TXT format text file. Just copy the files to the File Management / phone / EBOOK or memory card / [EBOOK], and then enter the function to read e-books.
-
Page 29: Mobile Internet
3.13 Mobile Internet 3.13.1 WAP WAP: The Watch Phone includes a WAP browser to surf the Internet. Prior to using this function, you must register with your network operator and set all relevant parameters properly.. ◆ Homepage: Set the home page. ◆... -
Page 30: Games
6. Domain: IP address. GPRS data Select an account to enter: 1. Name: The name of the account. 2. APN: APN name. 3. Username: Dial-up account username. 4. Password: Dial-up account password. 5. Authentication mode: Select normal or secure. 3.14 Games Three built-in games are provided. -
Page 31: Settings
Error: If this option is selected the Watch Phone will sound an error tone for each error. Camp on: When this option is selected the Watch Phone will sound a prompt tone if it finds the network. Connect: If this option is selected, the Watch Phone will sound a prompt tone when the connection for a call is established. -
Page 32: Call Setup
g Background light setting: Setting the brightness of the LCD screen. 3.16.3 Call setup ■ IP Number: Add and edit IP dialing number. ■ Caller ID: Set caller ID state - Hide number: your number won't show when you are calling. - Send number: your number will show when you are calling. -
Page 33: Equalizer
3.16.7 Equalizer Choose a style from: natural, accent bass, dance, classical, alt, banquet, pop, and rock-and-roll. 3.16.8 Multi-color Light Setting Set incoming call multi-color light. 3.17 My Collection Store user’s documents by pressing the “file” option: Turning on: Display the file content. Setting up file: Set up new file. -
Page 34: Handwriting Input
number key “0”. , - ? ! ’ @ : # $ / _ 1 number key ABCabc2 number DEFdef3 “2” number key “3” GHIghi4 number key “4” JKLjkl5 number key “5” MNOmno6 number key “6” PQRSpqrs7 number key “7” TUVtuv8 number key “8”... - Page 35 6. Troubleshooting If any problems appear during use, please refer to the following table for troubleshooting: Problems Reason Solution Low signal The signal can be low in basements Avoid those areas and high buildings When you turn the Watch Phone on Wait a few seconds after turning and off, it might take a few seconds to the Watch Phone on before...
- Page 36 Out of GSM service area your network service provider about area coverage. The signal is too weak Avoid low signal area Call failure Call confinement function in usage Cancel in set-up Solid number dial function in usage Cancel in set-up Incorrect PIN Continuous Incorrect input of the PIN Contact your network service...
Need help?
Do you have a question about the SpecialOPS and is the answer not in the manual?
Questions and answers