Table of Contents
Advertisement
Quick Links
Advertisement
Table of Contents

Related Manuals for Astivita BODI60SIS


Summary of Contents for Astivita BODI60SIS
- Page 1 BODI60SIS 12 place settings half-load function...
- Page 2 For detailed operating method read the corresponding content on the instruction manual. Switch on the appliance Press the On/Off button to switch on the appliance, Open the door. Compartment A: With each wash cycle. Compartment B: Fill the detergent dispenser For programmes with pre-wash only .
-
Page 3: Table Of Contents
Dear Customer, This appliance is in tended to be used in household and similar applications such as: -staff kitch en areas in shop s, offices and other working environme nts; Control Panel...........2 -farm hous es; Dishwash er Fe atures........2 -by clients in hotels, motels and othe r residential type environments;... - Page 4 When using your dishwasher, follow the precautions listed below: This appliance must be grounded. In the event of a Improper connection of the equipment-grounding malfunction or breakdown, grounding will reduce conductor can result in the risk of an electric shock. the risk of an electric shock by providing a path of Check with a qualified electrician or service least resistance of electric current.
-
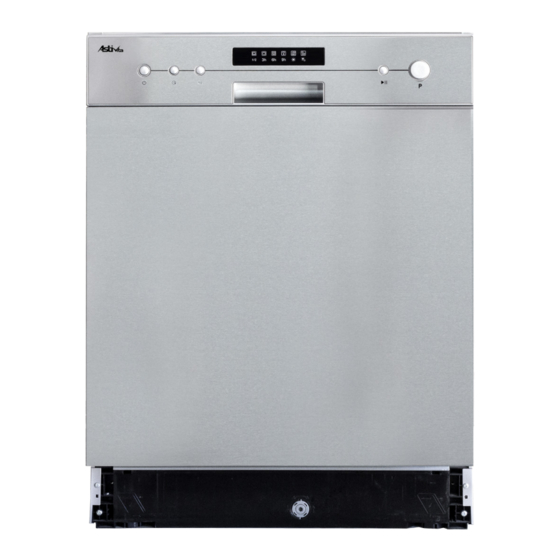
Page 5: Control Panel
To get the best performance from your dishwasher, read all operating instructions before using it for the first time. 6. Delay indicators: to show the delay time 1. On/Off Button: To turn on/off the power s upply. (3h/6h/9h ) 2. Delay Button : To Press the butto n to delay the washing time. -
Page 6: A F Ill The Rinse Aid Dispenser
Before using your dishwas her for the first time: Fill th e rinse a id dispenser Fill in detergent Rinse Aid Dispenser The rinse aid is released during the final rinse to prevent water from forming droplets on your dishes, which can leave spots and streaks. -
Page 7: B Functio N Of Detergent
Clean up any rinse aid spilled while during filling with an absorbent cloth to avoid excessive foaming during the next wash. Don't forget to repla ce the cap before you close dishwasher door. Adjusting Rinse Aid Dispenser The rinse aid dispenser has six or four settings. Always start with the dispenser set on "4". - Page 8 Amount of Detergent to Use If th e lid is close d: press rele ase button. The lid will spring ope n. Always add the dete rgent just before starting each wash cycle. Only use branded detergent and rinse aid for dishwasher. Dishwasher detergent is corrosive! Take care to keep it ou t of reach of c hildren.
- Page 9 Consider buying utensils which are identified as dishwasher-proof. Use a mild detergent that is described as 'kind to dishes'. If necessary, seek further information from the detergent manufacturers. For particular items, select a program with as low a temperature as possible. To prevent damage, do not take gla ss a nd c utlery out of the dishwasher immediately after the programme h as ended.
-
Page 10: Ba Skets
The u pper basket is designed to hold more delicate We suggest that you place large items and the most and lighter dishware such as glasses, coffee and difficult to clea n ite ms are to be placed into the lo wer tea cups and saucers, as well as plates, small bowls basket: such as pots, pans, lids, se rving dishes and and shallow pans (as long as they are not too dirty). -
Page 11: Wash Cycle Table
Means: need to fill rinse into the Rinse-Aid Dispenser. ℃ Pre-wash(50 ) For the heaviest soiled ℃ Wash (65 loads, such as pots, pans, Rinse 5/25 g Intensive casserole dishes and dishes Rinse (OrAll that have been sitting with ℃ Rinse(65 ) dried food on them for a Drying... -
Page 12: Change The Programme
When you press the Start/Pause button to pause during washing, the running indicator will stop blinking and the dishwasher will beeping every minute unless you press the Start/Pause button to start. Premise: A cycle that is underway can on ly be modified if it has only been running for a short time. Otherwise, the detergent may have already be en released, a nd the appliance may have already drained the wash water. -
Page 13: Filtering System
The filter prevents larger remnants of food or other objects from getting inside the pump. The residues may block the filter, in this case they must be removed. The filter system consists of a coarse filter,a flat (Main filter) And a microfilter(Fine filter). Main filter Fo od and soil particles trap ped in this filter are pulverized by a specia l jet on the lower spray arm and washed down to drain. - Page 14 Remarks: - Inspect the filters for blo cking a fter e very time the dishwa sher has been used. - By unscrewing the coarse filter, you can remove the filter system. Re move any foo d remna nts and clean the filters under running water. The entire filter assembly should be cleaned once a week.
-
Page 15: Installation Preparation
After Every Wash When not in Use for a LongTime It is recommend that you run a was h cy cle with the After every wash, turn off the water supply to the dishwasher empty an d the n remove the plug from the appliance and leave the door slightly open so that socket, turn off the wa ter supply and leave the door of moisture and odours are not trapped inside. -
Page 16: Aesthetic Panel's Dimensions And Installation
Please carefully read the installation instruction. ● Illustrations of cabinet dimensions and installation position of the dishwasher Preparations should be made before moving the dishwasher to the installation place. Choose a place near the sink to facilitate the installation of inlet and drain hoses (see figure 1). - Page 17 magical paster A and magical paster B be disjoinedon ,magical paster A on the aesthetic wooden panel and felted magical paster B of the outer door of dishwasher(see f igure 4a). After positioning of the panel , fix the panel onto t he outer door by screws and bolts(See figure 4b) 【...
-
Page 18: Tension Adjustment Of The Door Spring
● Tension adjustment of the door spring The door springs are set at the factory to the proper tension for the outer door. If aesthetic wooden panel are installed, you will have to adjust the door spring tension. Rotate the adjusting screw to drive the adjustor to strain or relax the steel cable (see figure 5). -
Page 19: Dishwasher Installation Steps
Dishwasher installation steps ● 1 Install the furniture door to the outer door of the dishwasher using the brackets provided. Refer to the template for positioning of the brackets. 2 Adjust the tension of the door springs by using an Allen key turning in a clockwise motion to tighten the left and right door springs. -
Page 20: About Electricity Connecting
Dishwasher must be level for proper dish rack operation and wash performance. Place a spirit level on door and rack track inside the tub as shown to check that the dishwasher is level. level the dishwasher by adjusting the three levelling legs individually. When level the dishwasher, please pay attention not to let the dishwasher tip over. -
Page 21: Cold Water Connection
The a ppliance mus t be connected to th e water mains using n ew hose-sets. The o ld hose-sets sho uld not be re used. Wate r pressure must be between 0,04 MPa and 1 MPa. If the pressure is below the minimum consult our Service Department for advice. - Page 22 The following things should be checked before starting the dishwasher. The dishwasher is level and fixed properly The inlet valve is open There is a leakage at the connections of the conducts The wires are tightly connected The power is switched on The inlet and drain hoses are knotted All packing materials and printings should be taken out from the dishwasher After installation, please make sure to keep this manual.
- Page 23 Fuse blown, or the Replace fuse or reset circuit breaker. Remove any other circuit breaker triggered appliances sharing the same circuit with the dishwasher Power supply is not Make sure the dishwasher is turned on and the door is turned on closed securely.
- Page 24 The dishes were not See notes in " Loading the Dishwasher Baskets ". loaded correctly. The programme was Select a more intensive programme. not powerful enough. See" Wash Cycle Table . " Not enough detergent Use more detergent, or change your detergent. was dispensed.
- Page 25 If overflow occurs, turn off the main water supply before calling a service. If there is water in the base pan because of an overfill or small leak, the water should be removed before restarting the dishwasher. Height : 815mm Width : 598 mm Depth :...
Need help?
Do you have a question about the BODI60SIS and is the answer not in the manual?
Questions and answers