Table of Contents
Advertisement
Quick Links
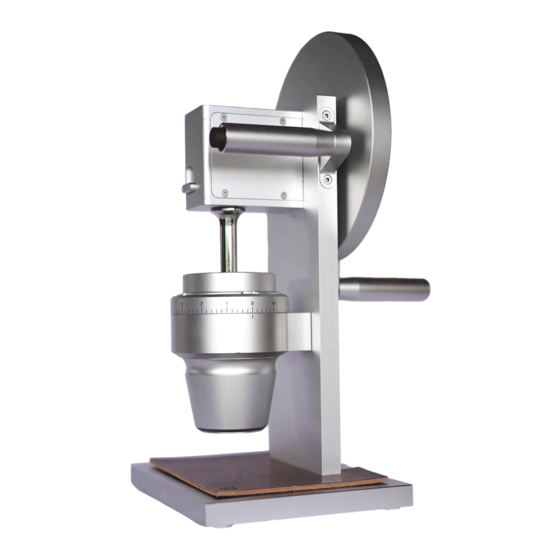
HG-2 grinder quick start guide
!
Caution
• the HG-2 grinder is a tool and should only be
used with caution and common sense
• the HG-2 grinder should only be used for
Grinding coffee beans
• the HG-2 grinder should only be used by adults,
and only after reading the instruction manual
• do not leave children unattended with the HG-2
grinder; the grinder has extremely sharp blades
and can cause serious harm
3
Release flywheel handle
• hold the flywheel handle and rotate outward
to horizontal position: don't slam the handle down
• when storing, pull handle away from flywheel, then
raise to vertical position to lock
1
Remove from packaging
• find a good, clean location to work with ample
space
• the HG-2 weighs close to 11kg (24lbs) and
stands over 44cm tall, excercise caution when
removing the grinder from the box
• keep all packing materials, for warranty repairs,
moving, or the unlikely event of resale, it's a
good idea to have the original box
4
Find suitable location
• the HG-2 grinder stands slightly over 44cm
and can be stored under most modern kitchen
cabinets
• when operating the grinder, place on a clean, flat,
stable surface with ample clearance for rotating
the flywheel handle
note: when not in use, store out of reach of
children, the grinder weighs 11kg and can
cause serious injury if dropped
2-1
optional - Attach static wiper
• lay the grinder on its side on a clean towel or cloth
• using the 5mm hex key (included) remove the screw holding the lower axle cap in place
• choose magic tumbler or standard tumbler wiper (they are different as shown in pic 2-2)
• while loosening the screw, stabilize the grinder by holding the flywheel
• remove the axle cap and store for safekeeping
• re-use screw and thread through washer and wiper
• using the 5mm hex key, tighten screw securely in place
• the magic wiper has a replaceable stirring rod in case it gets bent or damaged. Push out the insert block
on backside of wiper (needs to be removed from machine) to swap the stirring attachment
5
Set burr mount to zero
• lift the locking ring until it clears the burr collar pins
• while holding the locking ring rotate the burr mount
clockwise until the inner and outer burrs touch ...
this is the zero point
• Note: Do NOT attempt to use or rotate the flywheel at
the zero point. This could cause premature burr wear
for detailed instructions, visit http://weberworkshops.com/products/hg-2
side A
2-2
Standard Wiper
Magic Wiper
Funnel
Blind Tumbler
Magic Tumbler
6
Dial in grind
• From the zero point, rotate the locking ring counter-clockwise
1.75 turns (630 degrees). This is a good starting point for
espresso, but will likely require further adjustment depending
on your beans and setup. For pour-over, another full turn in the
larger direction is a good starting point.
• lower the locking ring onto the burr collar pins
• IMPORTANT! Verify the locking ring sits flush with the burr
collar, and the pins are completely engaged. Try to rotate the
locking ring to ensure the burrs are locked. If you operate the
grinder with the burrs improperly secured, you could potentially
sieze the machine
Advertisement
Table of Contents

Subscribe to Our Youtube Channel
Summary of Contents for Weber HG-2
- Page 1 Remove from packaging optional - Attach static wiper • the HG-2 grinder is a tool and should only be • find a good, clean location to work with ample • lay the grinder on its side on a clean towel or cloth...
- Page 2 B HG-2 grinder quick start guide Place blind tumbler Fill hopper Grind Place magic tumbler • attach the lower funnel on the magnetic mount • pour your desired dose of beans into the • using your right hand, rotate the flywheel •...
Need help?
Do you have a question about the HG-2 and is the answer not in the manual?
Questions and answers