Table of Contents
Advertisement
Quick Links
Wine Refrigerators | Ice Machines | Beverage Centers | Glass Door Refirgerators | Accessories
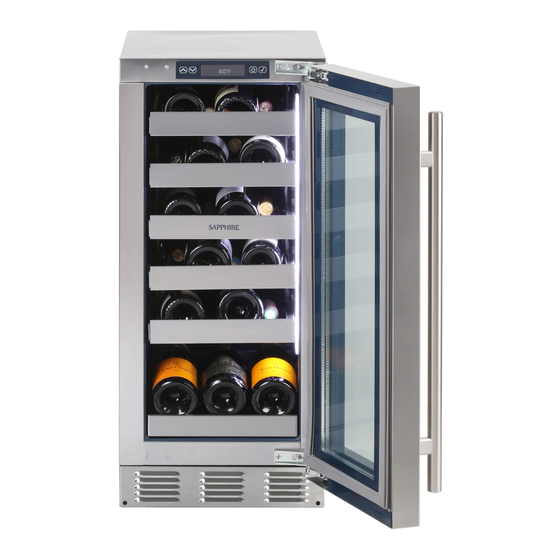
SAPPHIRE 15" and 24"
Single- & Dual-Zone
Wine Refrigerators
Operator's Manual
SW15SZ, SW24SZ & SW24DZ Indoor Models
SAPMN04
080322
Adapting to Your Environment
Indoor, Outdoor and ADA
SapphireAppliances.com | 866.754.6672
Advertisement
Table of Contents

Related Manuals for Sapphire Audio SW15SZ

Summary of Contents for Sapphire Audio SW15SZ
- Page 1 Indoor, Outdoor and ADA Wine Refrigerators | Ice Machines | Beverage Centers | Glass Door Refirgerators | Accessories SAPPHIRE 15" and 24" Single- & Dual-Zone Wine Refrigerators Operator’s Manual SW15SZ, SW24SZ & SW24DZ Indoor Models SAPMN04 SapphireAppliances.com | 866.754.6672 080322...
- Page 2 WARNING California Proposition 65 Certain components in this product and its related accessories contain chemicals known to the state of California to cause cancer, birth defects or other reproductive harm. PRODUCT REGISTRATION INFORMATION Please record your model’s information. You will need to know this information whenever you call to request information or service.
-
Page 3: Table Of Contents
T A B L E O F C O N T E N T S S AF T E Y ...............................5 SAF ETY D EF IN ITION S..........................5 SAF ETY PRECAUTION S ..........................5 S PE CIF ICAT IO NS ............................8 SAPPHIRE 1 5 - Inch Indoor Single- Z one Wine Cellar ................8 SAPPHIRE 2 4 - Inch Indoor Single- Z one Wine Cellar ................8 SAPPHIRE 2 4 - Inch Indoor D ual- Z one Wine Cellar................8... - Page 4 T AB L E O F CO NT E NT S U SIN G T HE C ON T ROL S ......................... 20 T urning th e U nit On .
-
Page 5: Saf Ety D Ef In Ition S
S AF E T Y S AF E T Y D E F INIT IO NS T h e w ord s D AN G ER, WARN IN G , C AU T ION and N OT IC E are used th rough out th is m anual to h igh ligh t im portant inform ation. - Page 6 S AF E T Y MOVING PRECAUTIONS • Wh en m ov ing th e applianc e, d o not turn it upsid e- d ow n and d o not unlev el it m ore th an 4 5 d egrees. •...
- Page 7 S AF E T Y • D o not use m ec h anic al d ev ic es or oth er m eans to ac c elerate th e d efrosting proc ess, oth er th an th ose rec om m end ed b y th e m anufac turer.
-
Page 8: S Pe Cif Icat Io Ns
S P E CI F ICA T I O N S SAPPHIRE 15-INCH INDOOR SINGLE-ZONE WINE CELLAR 15-INCH PREMIUM SINGLE-ZONE FEATURES INDOOR WINE CELLAR Electrical Requirement 115V/60Hz Maximum Amp Fuse 15 amp Net Capacity 2.8 cu. ft. (78 L) Bottle Capacity (750ml) Temperature Setting 34°- 65°F (1°- 18°C) Defrost Type... -
Page 9: Instal L Ing The U Nit
INSTAL L ING THE U NIT WARNING Fire/Explosion Hazard DO NOT install in spaces containing gasoline engines, fuel tanks or fuel line fittings. This device does not meet federal requirement for ignition protection. IMPORTANT: Electrical Tips • T h is applianc e m ust b e installed w ith all elec tric al c onnec tions in ac c ord anc e w ith state and loc al c od es. - Page 10 INS T AL L ING T H E U NIT Factors Affecting the Unit OTE: Do not use an appliance intended for indoor use outside. Only use an appliance that is intended for outdoor use outdoors. • N ev er k eep th e applianc e nex t to ov ens, grills or oth er h igh - h eat resourc es. •...
-
Page 11: Required Cabinet Opening
INS T AL L ING T H E U NIT REQUIRED CABINET OPENING WARNING F ire / E x plosion H a z ard DO NOT install in spaces containing gasoline engines, fuel tanks or fuel line fittings. This device does not meet federal requirement for ignition protection. Failure to comply could result in injury or death. -
Page 12: Sapphire 15-Inch Indoor Cabinet Dimensions
INS T AL L ING T H E U NIT SAPPHIRE 15-INCH INDOOR CABINET DIMENSIONS Recommended location for electrical connection in either adjacent cabinet. " " (864 mm) " " 7.00" (177 mm) " NOTICE • If you remove the rubber feet from the bottom of the unit, reinstall the mounting screws into the bottom of the cabinet to avoid damage to components mounted to the base pan. -
Page 13: Electrical Connection
INS T AL L ING T H E U NIT ELECTRICAL CONNECTION D o not, und er any c irc um stanc es, c ut or rem ov e th e th ird ( ground ) prong from th e pow er c ord . F or personal safety , y ou m ust properly ground th is applianc e. -
Page 14: L Ev El In G
INS T AL L ING T H E U NIT LEVELING THE UNIT T h e applianc e req uires lev eling b efore it c an w ork properly . If nec essary , raise or low er th e unit b y turning th e four lev eling feet on th e b ottom . - Page 15 INS T AL L ING T H E U NIT C arefully rem ov e th e tw o plugs at th e top and b ottom of th e left sid e of th e applianc e. Sav e th e plugs.
-
Page 16: Custom D Oor Pan
INS T AL L ING T H E U NIT Li t the oor off the p rti ll loosene right-si e s re s ot te the oor n position it on the t o partially installed left- sid e sc rew s. F inish rem ov ing th e outer top and b ottom sc rew s from th e righ t- sid e h inges. -
Page 17: 4 - Inch Indoor Integrated D Oor Frame
INS T AL L ING T H E U NIT 24-INCH INDOOR INTEGRATED DOOR FRAME ” ” ” ” ” ” ” ” 2-3/4” ” ” (70 mm) 30” (762 mm) not to exceed 31” (787 mm) 15-IN. INDOOR INTEGRATED DOOR FRAME "... -
Page 18: In Stal L In G
INS T AL L ING T H E U NIT INSTALLING THE CUSTOM DOOR PANEL Rem ov e th e d oor from th e unit. Rem ov e th e d oor seal to gain ac c ess to th e c ustom d oor panel m ounting h oles. -
Page 19: Anti-Tip System
INS T AL L ING T H E U NIT Reinstall th e d oor seal. B e sure th e seal is properly seated . Reinstall th e d oor to th e unit. ANTI-TIP SYSTEM On b uilt- in installations, onc e th e applianc e is in plac e and lev eled , sec ure th e tw o anti- tip b rac k ets und erneath th e c ountertop using th e tw o prov id ed sc rew s. -
Page 20: O Pe Rat Ing T H E U Nit
O P E RA T ING T H E U NI T U S ING T H E C O N T R O L S T h e c ontrol panel is loc ated at th e top of th e applianc e. OTE: You have 30 seconds to make a control change before the display reverts to the default screen. -
Page 21: Turning The Unit Off
O PE RAT ING T H E U NIT T h e w ine c ellar pow ers up and d isplay s th e d efault tem perature sc reen. OTE: The factory default temperature must be 38°F. TURNING THE UNIT OFF Press th e ON / OF F b utton ( ) and h old for 3 sec ond s. -
Page 22: Entering The Display Of Menu Items
O PE RAT ING T H E U NIT ENTERING THE DISPLAY OF MENU ITEMS To enter the enu o settings press the NT utton The ispl sho s the rst enu ite O T ON roll to the ne t enu ite pressing the O N utton... - Page 23 O PE RAT ING T H E U NIT roll to the ne t enu ite pressing the O N utton roll to the ne t enu ite pressing the O N utton To e it the enu press the NT utton OTE: Once you select a menu item, the system takes you directly to that particular setting.
-
Page 24: Lighting Options
O PE RAT ING T H E U NIT LIGHTING OPTIONS ust the lighting press the NT utton ) to ac c ess th e m enu. The rst enu ite is L O T ON ress the NT utton ress the O N rro to re h the esire setting... -
Page 25: Lighting Options - Scheduling Nightlight
O PE RAT ING T H E U NIT To return to the enu s roll o n pressing the O N ) and th en press th e utton LIGHTING OPTIONS - SCHEDULING NIGHTLIGHT To s he ule the nightlight setting press the NT utton ) to ac c ess th e m enu. - Page 26 O PE RAT ING T H E U NIT ress the O N to re h the UL N T setting et the lo ti e e ore re hing the esire UL N T setting ress the NT utton T h e d isplay w ill sh ow th e c loc k at 00: 00 and prom pt y ou to set th e h our.
- Page 27 O PE RAT ING T H E U NIT et the hour using the U uttons On e the hour is set press the NT utton et the inutes using the U uttons SAPPHIRE Wine Refrigerator © 2022 SAPPHIRE Operator’s Manual...
- Page 28 O PE RAT ING T H E U NIT On e the inutes re set press the NT utton 1 0. ele t using the U uttons 1 1 . On e the is set press the NT utton SAPPHIRE Wine Refrigerator ©...
- Page 29 O PE RAT ING T H E U NIT 1 2. On e the ti e is properl set set the T or the UL N pressing the U or O N uttons 1 3 . Using the U uttons set the T 1 4 .
- Page 30 O PE RAT ING T H E U NIT 1 5 . Using the U uttons set the T 1 6 . On e the inutes re set press the NT utton 1 7 . Using the U uttons sele t T SAPPHIRE Wine Refrigerator ©...
- Page 31 O PE RAT ING T H E U NIT 1 8 . On e the is set press the NT utton 1 9 . On e the st rt ti e is properl set set the N T or the UL N pressing the U or O N...
- Page 32 O PE RAT ING T H E U NIT 21 . On e the hour is set press the NT utton 22. Using the U uttons set the N T 23 . On e the inutes re set press the NT utton SAPPHIRE Wine Refrigerator ©...
- Page 33 O PE RAT ING T H E U NIT 24 . Using the U uttons sele t N T 25 . On e the is set press the NT utton 26 . UL N T is no set n the ispl ill sho the e ult te per ture s reen ith the c resc ent m oon ic on and th e tim e set.
-
Page 34: Lighting Options - Turning Nightlight Off
O PE RAT ING T H E U NIT LIGHTING OPTIONS - TURNING NIGHTLIGHT OFF To turn off the N T setting press the NT utton ) to ac c ess th e m enu. The rst enu ite is L O T ON ress the NT utton... -
Page 35: Setting Temperature
O PE RAT ING T H E U NIT To on r the setting press the NT utton SETTING TEMPERATURE 1. To set the temperature, press the ENTER button ( ress the O N utton to the ite °F / °C and then press the ENTER button ( SAPPHIRE Wine Refrigerator ©... -
Page 36: Entering Sab B Ath Mod
O PE RAT ING T H E U NIT ress the O N utton to re h the esire setting The e ult unit setting is int in the T F ) setting press the NT utton ( OTE: DEGREES FAHRENHEIT (°F) is the default setting and displays in increments of 1 degree. DEGREES CELCIUS (°C) displays in increments of 0.5 degrees. - Page 37 O PE RAT ING T H E U NIT roll o n to the NT setting ress the NT utton ( The ispl sho s nothing ut is still running n in The ispl sho s nothing ut the unit int ins the set te per ture uring the NT le until n elle...
-
Page 38: Ex Iting Or C Anc Elling Sab B Ath Mod
O PE RAT ING T H E U NIT EXITING OR CANCELLING SABBATH MODE To e it or n el press the NT utton ( T h e d isplay rev erts b ac k to th e d efault sc reen. OTE: The clock time in the lower right of the display appears ONLY if the clock time has been set in the NIGHTLIGHT function. -
Page 39: Default Temperature - Single-Zone Unit
O PE RAT ING T H E U NIT ress the O N utton to h nge ust te per ture lo er ress the U utton to h nge ust te per ture higher OTE: You do not need to press the ENTER button. The new setting will remain unless changed. DEFAULT TEMPERATURE - SINGLE-ZONE UNIT T h e d efault tem perature is 60 °... -
Page 40: Changing / Adjusting The Temperature - Dual-Zone Unit
O PE RAT ING T H E U NIT CHANGING / ADJUSTING THE TEMPERATURE - DUAL-ZONE UNIT To h nge ust the te per ture setting press the U or O N rro utton ress the rro utton ) to selec t th e d esired z one. ress the NT utton to on r... -
Page 41: Default Temperatures - Dual-Zone Unit
O PE RAT ING T H E U NIT ress the U or O N rro utton ) to set tem perature. OTE: If user does not press the ENTER button, the new setting will remain con rmed with door closing. DEFAULT TEMPERATURES - DUAL-ZONE UNIT The u l- one ULT te per ture is 60 °F in the U... -
Page 42: C Learing Sim Ple Error C Od
O PE RAT ING T H E U NIT CLEARING SIMPLE ERROR CODES The OO O N lert soun s n sho s OO O N in the ispl The lert uto le rs hen ou properly c lose th e d oor. OTE: The audible alert emits three beeping sounds that occur every 30 seconds after the door has remained open for more than 2 minutes. -
Page 43: Manually C Learing T Em P Out Of Range Error C Od
O PE RAT ING T H E U NIT MANUALLY CLEARING TEMP OUT OF RANGE ERROR CODE nu ll le r the T OUT O lert press the NT utton The ispl sho s L ress the NT utton The ispl re erts to the e ult ispl n the T... -
Page 44: Ex Pec T In G
O PE RAT ING T H E U NIT E X P E C T ING N O R M A L S O U N D S our ne ppli n e e soun s th t re not ili r to ou r sur es li e the oor n... -
Page 45: Care And Maintenance
CARE AND MAINTENANCE WARNING Electrical Shock Hazard Always disconnect power at the source before working on the unit. Failure to unplug the appliance could result in electrical shock or personal injury. • Do not touch the power plug when your hands are wet. •... -
Page 46: Ex T En D Ed Period S Of N On - U
CARE AND M AINT E NANCE E X T E ND E D PE RIO D S O F NO N- U S E WARNING E lectrical S hock H az ard Alway s disconnect power at the source before working on the unit. OTE: Do not winterize this unit with ANY type of anti-freeze;... -
Page 47: Cleaning The Condenser
CARE AND M AINT E NANCE CLEANING THE CONDENSER WARNING E lectrical S hock H a z ard Alwa y s disconnect the power at the source before workin g on the unit. CAU T IO N S harp O b j ect H a z ard N O T touch the condenser surface. -
Page 48: T Ro U B L E S H O O T Ing
T RO U B L E S H O O T ING PRO B L E M PO S S IB L E CAU S E S S O L U T IO NS • T h e applianc e d oes not operate. •... -
Page 49: D Is Po S Ingt H E U Nit
D IS PO S ING T H E U NIT This symbol on the product or its pack aging indicates that you cannot treat this product as normal domestic trash; you must hand it in to a collection point for recycling electric and electronic appliances. Y our contribution to the correct disposal of this product protects the env ironment. -
Page 50: Warrant Y
WARRANT Y L IM IT E D WARRANT Y CO V E RAGE The L egacy Companies, warrants to the original purchaser of its SAPPHIRE products that they will be free from defects in materials and work manship for the following time periods from the date of purchase shown on the sales receipt: Two ( 2 ) year Parts &... - Page 51 WARRANT Y CO NS U M AB L E S : This rr nt oes not in lu e onsu le p rts su h s ter lters n light ul s AD J U S T M E NT S & CAL IB RAT IO NS : Adj ustments including calibrations, lev eling, tightening of fasteners, or utility connections normally associated with the original installation are the responsibility of the dealer, installer or the end user and not the responsibility of SAPPHIRE or The L egacy Companies and will not be considered warranty issues for this L imited Warranty.
- Page 52 SapphireAppliances.com | 866.754.6672 SAP P H IRE Appliances | T he L egacy Companies 3 3 55 E nterprise Avenu e , Su ite 1 60 , F ort L au d erd ale, F L 3 3 3 3 1 ©...
Need help?
Do you have a question about the SW15SZ and is the answer not in the manual?
Questions and answers