
Related Manuals for Prorack K997


Summary of Contents for Prorack K997
- Page 1 K997 Fitting Kit Fitting Instructions for Basic Carrier Revision No: 1A...
- Page 2 Fitting Kit K997 MAX kgs (lbs) Jeep Renegade Sport, 5dr SUV 15-+ 68 kgs (149 lbs) 68 kgs (149 lbs) Renegade Sport, 5dr SUV 15-+ 68 kgs (149 lbs) 68 kgs (149 lbs) Renegade Sport, 5dr SUV 16-+ 68 kgs (149 lbs)
- Page 3 Fitting Kit K997 Renegade Sport, 5dr SUV 15-+ (AU) 275mm 480mm 915mm 970mm 10 13/16ths" 18 7/8ths" 36" 38 3/16ths" Renegade Sport, 5dr SUV 15-+ (EU) 275mm 480mm 915mm 970mm 10 13/16ths" 18 7/8ths" 36" 38 3/16ths" Renegade Sport, 5dr SUV 16-+ (NZ)
-
Page 4: First Time Installation
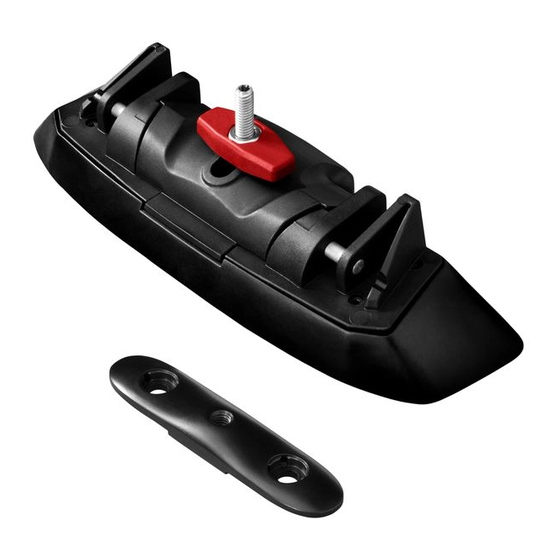
Fitting Kit K997 First Time Installation Remove parts from inside the package and check. Contact your dealer if any parts are missing or damaged. This kit fits type A, B, C and D. These instructions show type A crossbar fitted. They also apply to type B, C and D. - Page 5 Fitting Kit K997 Fitment FRONT ONLY Use hex screwdriver to reverse adjusting screw 10 turns. Press adjusting screw and pull crossbar legs out. Refer to the crossbar instructions for crossbar adjustment method. Ensure each end of the crossbar is adjusted equally.
- Page 6 Fitting Kit K997 Tighten adjusting screw to 3 Nm (2.2 ft lb) hand tight. Remove plastic clamp block by gripping bar leg with fingers and push firmly with thumbs until clamp block drops out behind leg. Select plastic internal block (from fitting kit)
- Page 7 Fitting Kit K997 Remove as shown. Mark as shown. Fitment Front Bar Only Use drill bit supplied, to drill holes in marked positions.
- Page 8 Fitting Kit K997 Re-install rubber ditch mould back into roof channel and click into place. Select grubscrews and screw into the vehicle's fixed points. Do not over tighten. Repeat for all items. Refer to the underside of the pad for the...
- Page 9 Fitting Kit K997 It is important to put the pads in the correct position on the vehicle. Letters refer to the pad part numbers and position. Pad Part Number: A = 224 B = 225 Place crossbars on pads ensuring the pads...
- Page 10 Fitting Kit K997 Ensure the plastic knob is in the position shown when fully tightened. Repeat at other end. Check crossbar is securely attached to the vehicle. Use keys to fit and lock covers If crossbars are removed, please install the...
- Page 11 Fitting Kit K997 Fitment REAR ONLY Use hex screwdriver to reverse adjusting screw 10 turns. Press adjusting screw and pull crossbar legs out. Refer to the crossbar instructions for crossbar adjustment method. Ensure each end of the crossbar is adjusted equally.
- Page 12 Fitting Kit K997 Refer to the underside of the pad for the part number. It is important to put the pads in the correct position on the vehicle. Letters refer to the pad part numbers and position. Pad Part Number:...
- Page 13 Fitting Kit K997 Make sure the pad fits into the holes underneath the foot. Place crossbar on vehicle. Minimum recommended spacing between the bars is 700mm (27 1/2") (unless otherwise stated). Apply protective strip as shown. Trim if required.
- Page 14 Fitting Kit K997 It is important to put the clamps in the correct position on the vehicle. Letters refer to the part numbers stamped on clamps. Clamp Part Number: A = A853 Attach clamp to each leg. Refit locking screw so that it goes through the hole in the clamp.
- Page 15 Fitting Kit K997 Adjust the legs on the crossbar so that they are positioned equally from the ends of the crossbar, and the clamps engage firmly on the body work of the vehicle. Clamps directly to edge of roof under the...
- Page 16 Fitting Kit K997 Tighten locking screw on both legs evenly, 2.5 Nm (1.8 ft lb). Check crossbar is securely attached to the vehicle. Use keys to fit and lock covers...
- Page 17 Fitting Kit K997 CAUTION: Recheck all fasteners immediately after a load is applied to the crossbars. Regularly check screws are tight.
-
Page 18: Maintenance
Fitting Kit K997 Maintenance Never drive into a car wash with the roof rack system fitted. Lubricate locks and adjusting screws at regular intervals. Remove the products from the vehicle when not in use. Make sure all loose parts are stored safely. - Page 19 Fitting Kit K997 Set crossbars a minimum distance of 700mm (27 1/2") apart where no other distance is specified in the fitting instructions. This is especially important when carrying long loads. Check unit is securely attached whenever you refit it to the vehicle. If the unit feels loose, refer to the fitting instructions and readjust.
-
Page 20: Year Warranty
YakimaEU will issue to the original retail purchaser, at YakimaEUs option, either a refund equal to the purchase price paid for the product, or a credit to be used toward the purchase of new Prorack products or rack components.
Need help?
Do you have a question about the K997 and is the answer not in the manual?
Questions and answers