Table of Contents
Advertisement
Quick Links
"Easy Gentleman" Door Operator Installation Instructions
THE EASY GENTLEMAN IS A LOW ENERGY DOOR OPENER. PROPERLY ADJUSTED, THIS OPENER SHOULD EASILY BE STOPPED BY HAND.
EXCESSIVE OPENING SPEED OR POWER WILL DAMAGE THE "EASY GENTLEMAN" AND THE DOOR COMPONENTS. THESE ADJUSTMENTS
CANNOT BE MADE AT THE FACTORY AND ARE YOUR RESPONSIBILITY TO MAINTAIN SAFE OPERATION.
NOTE: BEFORE INSTALLING THE OPENER, THE DOOR MUST FUNCTION MANUALLY WITHOUT ANY BINDING,
SAGGING, LOOSE OR DAMAGED HINGES. REPAIR ANY PROBLEMS BEFORE CONTINUING WITH THIS INSTALLATION!
INSTALL A MANUAL DEADBOLT ON THE DOOR FOR ADDED SECURITY.
WE ALSO RECOMMEND:
SHUT OFF AIR SUPPLY AND UNPLUG THE REMOTE MODULE WHEN YOU WILL BE AWAY FROM THE HOUSE FOR AN EXTENDED
•
PERIOD OF TIME.
•
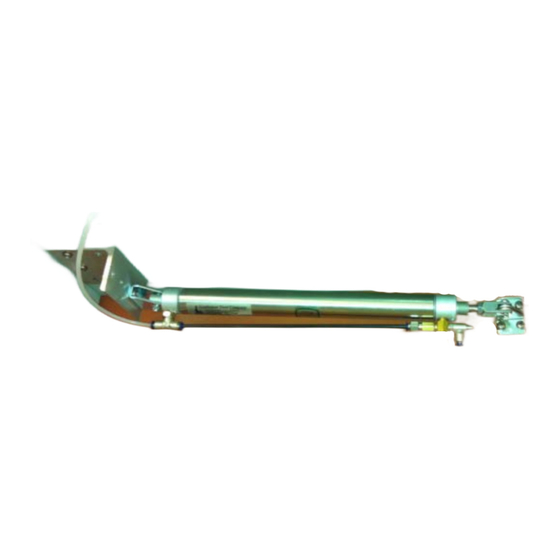
NOTE: PHOTOS ARE OF AN ORIGINAL GENTLEMAN; THE MOUNTING INFORMATION STILL APPLIES TO YOUR EASY GENTLEMAN.
SAFETY
Figure 1
1
Advertisement
Table of Contents

Summary of Contents for EDA Easy Gentleman
- Page 1 “Easy Gentleman” Door Operator Installation Instructions THE EASY GENTLEMAN IS A LOW ENERGY DOOR OPENER. PROPERLY ADJUSTED, THIS OPENER SHOULD EASILY BE STOPPED BY HAND. SAFETY EXCESSIVE OPENING SPEED OR POWER WILL DAMAGE THE “EASY GENTLEMAN" AND THE DOOR COMPONENTS. THESE ADJUSTMENTS CANNOT BE MADE AT THE FACTORY AND ARE YOUR RESPONSIBILITY TO MAINTAIN SAFE OPERATION.
- Page 2 Figure 2 (Left Hand Example)
-
Page 3: General Information
Multiple openers can operate from a single air compressor. If there is an existing system, it may be used if it meets the above criteria. The Easy Gentleman is comprised of many precision pneumatic controls and requires a clean source of air with minimal moisture. Draining the air compressor tank periodically is essential to eliminate moisture in the air. - Page 4 The pivot point is the key to properly installing the mount; the following instructions are for standard hinges: STANDARD HINGES: Open door 90 degrees Measure 4 5/8” from the hinge pin to jamb, extend that point straight up to the corner, then measure out 4 3/4”...
-
Page 5: Control Box
OPTIONAL ASSIST CYLINDER FOR EXTERIOR DOORS: This device is used to overcome the holding power of magnetic weather seals, stack pressure, and/or the weight of a heavy door. It mounts Figure 9 (Left Hand Example) on the same side as the opening cylinder, close to the center of the door or within 1 inch of the cylinder bracket. (Figures 2 & 9) Mount the cylinder securely to the door jamb or stop molding. -
Page 6: Leak Check
This system may be used to hold the door open for moderate periods of time without incurring any problems. As electricity is being used while the door is open it is not recommend that this device be used to hold doors open for long periods. Thank you for purchasing the “Easy Gentleman Door” Operator! - Page 7 Gentleman Door Latch Release Installation Instructions Figure 11 * Determine how much if any, the existing strike plate needs to move to allow the existing door to latch perfectly. Mark the location of the new set of holes for the strike plate. WOOD JAMB INSTALLATION 1.
- Page 8 11. Drill a 3/8 inch hole in the wall approximately 5 inches from the door jamb face and in line with the hole for the latch release cylinder. This hole must extend into the same hollow wall cavity as the cylinder hole. Its purpose is to accommodate the tubing which will connect to the back of the latch release cylinder.
-
Page 9: Final Adjustment
If existing latch is of the interior type shown on the drawing, no further action is required.(Figure 12) If existing latch is of the exterior type LATCH SUBSTITUTION as shown, it must be replaced with an interior type (i.e. without security pin) of the proper backset. Figure 12 Figure 14 Upon examination of the two latches pictured you will notice the presence of a small pin which, when depressed, prohibits the latch itself...
Need help?
Do you have a question about the Easy Gentleman and is the answer not in the manual?
Questions and answers