Advertisement
Quick Links
Advertisement

Related Manuals for Southern Enterprises Lantara FA1140456


Summary of Contents for Southern Enterprises Lantara FA1140456
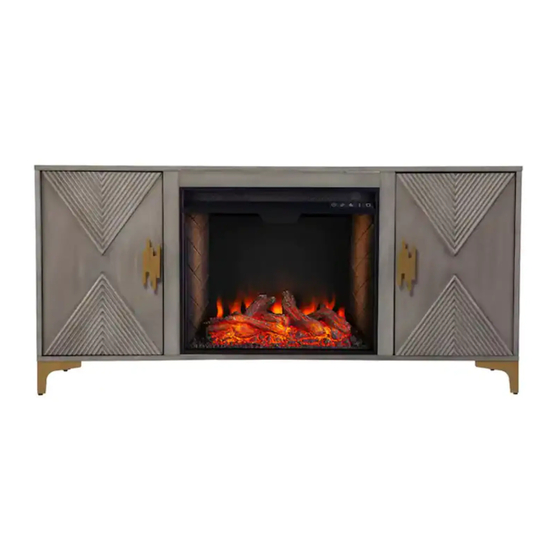
- Page 1 FA1140456...
- Page 4 Top panel Left side panel Right side panel Panel superior Panel lateral izquierdo Panel lateral derecho Panneau du haut Panneau latéral gauche Panneau latéral droit Left middle panel Right middle panel Rail Panel central izquierdo Panel central derecho Carril Panneau central gauche Panneau central droit Rail Back panel...
- Page 5 Side shelf panel Middle shelf panel Panel de estante lateral Panel de estante medio Panneau de tablette latérale Panneau d'étagère intermédiaire...
- Page 6 Cam bolt Wood dowel Cam lock Perno de leva Taco de madera Bloqueo de leva Boulon à came Cheville en bois Serrure à came Bolt Spring washer Flat washer Tornillo Arandela de resorte Arandela plana Boulon ø1/4”*1/2” Rondelle élastique ø 1/4” Rondelle plate ø...
- Page 7 Handle Bolt Shelf holder Mango Tornillo Poignée Boulon #8*3/4”L Bracket Screw Cover Soporte Tornillo Tapa Support #8*1/2”L Couverture Screw Anchor Bracket Tornillo Ancla Soporte #8-5/8” Ancre Support Lazo L’attache...
- Page 10 10 |...
- Page 11 11 |...
- Page 12 12 |...
- Page 13 13 |...
- Page 14 To achieve uniform clearance around the door, you may need to adjust the door by tightening or loosening the two screws on the hinge itself. Para lograr un espacio uniforme alrededor de la puerta, es posible que deba ajustar la puerta apretando o aflojando los dos tornillos de la bisagra.
- Page 15 15 |...
- Page 16 Firebox shipped in separate carton 16 |...
- Page 17 17 |...
- Page 18 18 |...
- Page 19 Anti-tipping hardware must be used for this product to avoid tipping and injury Anti-tipping hardware must be used for this product to avoid tipping and injury. Se deben utilizar herrajes anti-vuelco para este producto para evitar vuelcos y lesiones. Le matériel anti- basculement doit être utilisé...
- Page 20 < 30 lbs < 20 lbs < 30 lbs 20 |...
- Page 21 21 |...
- Page 22 FA5523 ELECTRICAL SPECIFICATIONS | ESPECIFICACIONES ELÉCTRICAS CARACTÉRISTIQUES ÉLECTRIQUES Voltage: Tensión: Tension : 120V, 60 Hz Amps: Amperios: Intensité de courant : 11.7 Amps Watts: Watts: Puissance : 1400 Watts Lighting: Iluminación: Éclairage :...
- Page 24 Operating Instructions: When you plug in the firebox, please turn on the switch to the right of the vent. All operations must be performed with the remote control. Firebox insert does not have control buttons on unit. Instrucciones de uso: Cuando enchufe el módulo de chimenea, mueva el interruptor hacia la derecha de la ventilación para encender.
- Page 28 Important Operating and Safety Information: When using electrical appliances, the following basic precautions should always be followed to reduce the risk of fire, electric shock, and injury. Read all instructions before using this heater. Use this heater only as described in this manual. Any other use not recommended by the manufacturer may ...
- Page 29 Información importante de operación y seguridad: Cuando use artefactos eléctricos, siempre debe respetar las siguientes precauciones básicas para reducir el riesgo de incendio, descarga eléctrica y lesiones. Lea todas las instrucciones antes de usar este calefactor. Use este calefactor de la manera exacta que se describe en este manual. Cualquier otro uso no recomendado ...
-
Page 30: Conservez Ces Directives
Information importante concernant la sécurité et l'utilisation: Lorsque vous utilisez des appareils électriques, respectez toujours les précautions de base afin de réduire les risques d'incendie, de chocs électriques et de blessures. Lisez toutes les directives avant d'utiliser la fournaise. ... -
Page 31: Maintenance
Maintenance: 1. Cleaning your fireplace: You may clean exterior of unit with a soft, damp, lint-free cloth. WARNING: Before cleaning the exterior of the appliance, disconnect the unit from the power supply. Clean unit only after it is cool to the touch. 2.Cleaning the front glass: The front glass panel may become dirty or dusty. - Page 32 Entretien: 1. Nettoyage de votre foyer: Vous pouvez laver l'extérieur de l'unité à l'aide d'un chiffon non pelucheux doux et humide. AVERTISSEMENT: Avant de nettoyer l'extérieur de l'appareil, débranchez l'unité de la source d'alimentation. Nettoyez l'unité seulement lorsqu'elle est froide au toucher. 2.
- Page 33 Setup: | Configuración: Réglage : Acrylic Fire Beads | Perlas de cristal de acrílico | Perles d’acrylique Remove the two screws at the top of the glass front cover. Retire los dos tornillos ubicados en la parte superior de la cubierta frontal de vidrio.
- Page 34 Place the acrylic fire beads inside, then replace the glass panel. Coloque las cuentas de acrílico dentro, luego vuelva a colocar el panel de vidrio. Placez les perles de feu acryliques à l'intérieur, puis replacez le panneau de verre. Parts: | Piezas: Pièces : Color Changing Fireplace Insert...
- Page 35 Remote Acrylic Fire Beads Control Remote Perlas de cristal de acrílico Télécommande Perles d’acrylique Attention! | ¡Atención! Attention! If your remote control does not work, follow these instructions to reconnect it to the firebox: Plug in the firebox and turn on the power manually. To connect the remote to the firebox, hold down both the flame button and the temperature button...
-
Page 36: Button Layout
Button Layout 1. Main Power ON/OFF (one click) 2. Plus and Minus Lowers, raises, and changes Temperature Time Programing 3. Fire Button Brightness F1 – F4 4. LOG Color Settings L1 – L4 ... - Page 37 1. Interruptor principal Disposición de Botones Encendido/apagado (un clic) 2. Signos Más y Menos para elevar y bajar la temperatura, y para efectuar cambios Temperatura Programación de tiempo 3. Botón de fuego Brillo F1 – F4 ...
- Page 38 Disposition des Boutons 1. Alimentation principale MARCHE/ARRÊT (un clic) 2. Plus et moins Diminue, augmente et change Température Heure Programmation 3. Bouton de feu Luminosité F1 – F4 4. BÛCHE Réglage des couleurs ...
- Page 39 Set Clock (24 hour) Turn the power switch off. While in standby, change the time by holding down the settings button for three seconds Plus changes the hours Minus changes the minutes Standby Press the settings button Note: To finish adjustment press settings again to select the date button to finalize.
- Page 40 Ajuste del reloj (24 horas) Presione el interruptor de encendido/apagado para apagar la unidad. Mientras la unidad está en espera, para modificar la hora, mantenga presionado el botón de ajuste por tres segundos. El signo Más permite cambiar la hora ...
- Page 41 Réglage de l’horloge (24 heures) Éteignez l’interrupteur. Pendant que l’unité est en veille, changez l’heure en maintenant le bouton de réglage enfoncé pendant trois secondes. Le bouton plus modifie les heures. Veille Le bouton moins modifie les minutes.
- Page 42 Auto-Shutoff Timer 1. Press power to turn unit on if in standby. 2. Press the timer button for each hour. 10 settings: 1H – 9H and OF meaning off. Programming While in standby, hold down the timer button for 3 seconds. ...
- Page 43 Temporizador de apagado automático 1. Presione el interruptor de encendido/apagado para encender la unidad, si está en espera. 2. Presione el botón de temporizador para cada hora. 10 ajustes: 1H – 9H y OF que significa apagado. Programación Mientras las unidad está en espera, mantenga presionado el botón de temporizador por 3 segundos.
-
Page 44: Minuterie D'arrêt Automatique
Minuterie d’arrêt automatique 1. Appuyez sur le bouton de mise en marche si l’unité est en veille. 2. Appuyez sur le bouton de minuterie pour chaque heure. 10 réglages : 1H à 9H et OF pour l’arrêt. Programmation Pendant que l’unité est en veille, ... - Page 45 Digital Display Heater Shows the heater ON/OFF Main flame Shows the flame effect ON/OFF Timing Mode Shows the week time mode selection Timing setting status Shows the week time status Timer Indicates the timer setting Week Shows each day of week Indicates which days have a heating preset activated Day Selection Time...
- Page 46 Pantalla Digital Indicador de llama Indicador de leña Indicador de luz descendente Modo de temporización Indicador del calefactor Indicador de preajuste Indicador de temperatura Indicador de escala Indicador de estado Indicador de tiempo Indicador de semana Indicador de selección Calefactor Muestra si el calefactor está...
- Page 47 Affichage Numérique Indicateur de flammes Indicateur de bûche Indicateur de lumière inférieure Mode minuterie Indicateur de fournaise Indicateur de préréglage Indicateur de température Indicateur d’échelle Indicateur d’état Indicateur de l’heure Indicateur de semaine Indicateur de sélection Fournaise Indique si la fournaise est en MARCHE/ARRÊT Flamme principale Indique si l’effet de flammes est en MARCHE/ARRÊT Mode minuterie...
- Page 48 27 |...
Need help?
Do you have a question about the Lantara FA1140456 and is the answer not in the manual?
Questions and answers