
Summary of Contents for Waterworks MUT2200EL
- Page 1 BERMAD Meters Electromagnetic flowmeters Sensors Instructions manual MUT2200EL/US MUT2300 /US MUT1000EL/US MUT1100J MUT1222 MUT2660 MUT2770...
- Page 2 Waterworks Sensors This document must be delivered to the user before machine installation and commissioning. Symbols used in this manual In order to draw the attention of all personnel working with the equipment supplied by EUROMAG INTERNATIONAL, the points of particular importance described in this manual are highlighted with graphic signs and different colors that will make them easily identifiable.
-
Page 3: Table Of Contents
APPLICATIONS PRODUCT DESCRIPTION OPERATING PRINCIPLE 2.1.1 Bidirectional reading AVAILABLE VERSIONS 2.2.1 Flanged sensors • MUT2200EL – Full Bore • MUT2300 – Reduced Bore 2.2.2 Wafer sensors • MUT1000EL - Wafer • MUT1100J - Wafer in plastic material 2.2.3 Insertion sensors •... - Page 4 Waterworks Sensors INSTALLATION 3.4.1 Important instructions on installation 3.4.2 Sensor support 3.4.3 Tightening torque • Flanged sensors • Wafer Sensors 3.4.4 Underground installations HOW TO AVOID AIR POCKETS IN THE PIPELINES INSTRUCTIONS FOR DIAMETER REDUCTION POTENTIAL EQUALIZATION GENERAL INDICATIONS PLASTIC PIPES...
- Page 5 Waterworks Sensors MUT1222 7.3.1 Dimensions and main features 7.3.2 Calculation of the insertion depth 7.3.3 Installation of the sensor 7.3.3.1 Preparation of the pipe 7.3.3.2 Assembly of the flowmeter 7.3.4 Installation on non-metallic pipes using a saddle bracket 7.3.5 Flowmeter grounding MUT2660 7.4.1...
-
Page 6: Introduction
Waterworks Sensors INTRODUCTION IMPORTANT WARNING! It is very important that all personnel working with the equipment have read and understood the instructions and indications provided in this manual, and that they follow them prior to using the equipment itself. The manufacturer assumes no responsibility for the consequences resulting from improper use by the worker. -
Page 7: Preliminary Notes
Waterworks Sensors PRELIMINARY NOTES Main parts of the electromagnetic flowmeter are: Sensor – installed in the tube with the use of flanges and other joints „ Converter – can be installed on the sensor (in compact version) or remotely (in remote version) connected „... -
Page 8: Applications
Waterworks Sensors APPLICATIONS The sensors manufactured by the company EUROMAG are widely used in many applications where it is important to measure the flow rate of electrically conductive liquids. Various models can be used in different applications. The table below shows the typical applications according to the individual sensor models manufactured by EUROMAG. -
Page 9: Product Description
Waterworks Sensors PRODUCT DESCRIPTION OPERATING PRINCIPLE The electromagnetic sensor is used to measure the flow rate of liquids (drinking water, wastewater, beverages, fertilizers, chemical products, and any other liquid) that have an electrical conductivity of at least 5μS/cm. Electromagnetic flowmeters are the best solution for measuring the flow rate liquids because of fast response times, great measurement accuracy, and a passage tube that does not present any obstruction to the liquid flow, therefore no pressure drop in the pipe. -
Page 10: Available Versions
EUROMAG manufactures its sensors in different versions, each intended for use in different applications, as summarized in the paragraph “1.5 Applications.” The different sensor versions available are shown below. 2.2.1 Flanged sensors MUT2200EL – Full Bore „ MUT2300 – Reduced Bore „... -
Page 11: Installation
Waterworks Sensors INSTALLATION STORAGE AND MOVING 3.1.1 Storage To ensure the correct maintenance of the device while waiting for its installation, it is necessary to comply with the storage provisions below: 1) Store the device in a dry place and protected from dust... -
Page 12: General Installation Requirements
Waterworks Sensors GENERAL INSTALLATION REQUIREMENTS IMPORTANT NOTE! THE SENSOR MUST ALWAYS BE COMPLETELY FULL OF LIQUID! Fig. 5 The pipe must always be completely full of liquid 3.2.1 Vibrations DO NOT expose the flowmeter to vibrations and/or movements that could affect its performance and duration „... -
Page 13: Negative Pressure
Waterworks Sensors 3.2.3 Negative pressure Avoid vacuum conditions in the pipe. These can damage the coating of the flowmeter and move the electrodes from their correct position. 3.2.4 Protection from direct sunlight Protect the flowmeter if exposed to direct sunlight. -
Page 14: Installation Conditions
Waterworks Sensors INSTALLATION CONDITIONS 3.3.1 Positioning in relation to the plant To ensure optimal working conditions, the flowmeter must be installed correctly inside the system. Correct and incorrect installation positions are described and illustrated below. The flowmeter must remain below the hypothetical blue line (piezometric level line), which connects the two levels of fluid to be measured (Fig. - Page 15 Waterworks Sensors Insertion sensors Fig. 14 Installation on U-shaped tube “T” connection downstream of the flowmeter Fig. 15 Installation on U-shaped tube Three-dimensional curves Fig. 16 Installation near three-dimensional bends | 15 |...
- Page 16 Waterworks Sensors IMPORTANT NOTE: THE SENSOR MUST ALWAYS BE COMPLETELY FULL OF LIQUID! To ensure that the sensor is always completely filled with liquid, it is important to install it in the correct position ) and avoid all possible incorrect positions ( This installation secures the sensor full of liquid.
- Page 17 Waterworks Sensors This installation secures the sensor full of liquid. This installation DOES NOT guarantee a pipe full of liquid. Fig. 21 Correct (LH) and incorrect installation (central and RH) We recommend installing gate valves downstream of the meter Fig. 22 Gate valves installation In order to avoid a vacuum, always install the sensor downstream of the pump and NEVER upstream.
-
Page 18: Installation
Waterworks Sensors DO NOT install the sensor on vertical pipes with a free outlet or at the highest point of the pipe system. Fig. 24 Incorrect installation INSTALLATION 3.4.1 Important instructions on installation In case of inadequate distance between the sensor and the pipe, use elastic pipe fittings (Fig. 25). Do not try to move the pipe closer to the sensor by tightening the bolts (Fig. -
Page 19: Sensor Support
Waterworks Sensors Maximum allowable deviation of the pipe flange faces is 0.5 mm Fig. 30 Maximum allowable deviation 3.4.2 Sensor support DO NOT USE the sensor as a support for the pipe. The pipe must be the support for the flowmeter. -
Page 20: Wafer Sensors
Waterworks Sensors Fig. 33 Flange tightening Carefully follow the instructions given in the diagrams. Check the correct centering of the sensor before you tighten the flanges and proceed following the steps described here. Step 1. ≈ 50% of the maximum tightening torque „... - Page 21 Waterworks Sensors Maximum tightening torque [Nm] BULLONI MUT2200EL MUT1000EL MUT110J PTFE Ebanite PTFE Ebanite OR NBR 4xM12 4xM12 4xM16 4xM16 4xM16 4xM16 8xM16 8xM16 8xM16 8xM16 8xM20 8xM20 12xM20 12xM20 12xM24 12xM20 12xM24 16xM20 16xM24 20xM24 20xM24 20xM27 20xM27 24xM30...
-
Page 22: Underground Installations
Waterworks Sensors 3.4.4 Underground installations The remote sensor is protected by IP68/ NEMA 6P and can be positioned underground. We recommend the use of gravel for at least 300mm (12 inches) around the sensor. This provides drainage and prevents dirt solidification on the sensor. -
Page 23: How To Avoid Air Pockets In The Pipelines
Waterworks Sensors HOW TO AVOID AIR POCKETS IN THE PIPELINES This paragraph is intended to help the designers and users of electromagnetic flowmeters to create the best installation layout that guarantees optimum performance of the meter, taking into particular consideration the problem of the presence of air pockets in the pipe. - Page 24 Waterworks Sensors Fig. 37 Air pockets inside the pipe The greater the diameter of the pipe, the higher the speed of the liquid will be required to move the air pockets away from the flowmeter. It is also important to understand what kind of effect the water pressure has on the nature of the air pocket inside the pipe.
- Page 25 Waterworks Sensors A minimum slope in an ascending flow of 1: 500 or higher is recommended in order to stimulate the entrapped air pocket to move away from the meter. Drawings are made with an exaggerated slope for greater clarity Fig.
- Page 26 Waterworks Sensors The design of the vent valve is essential to ensure that the entrapped air pockets are released. Pneumatic valves or vacuum switches should be avoided. Instead, it is preferable to use combined pneumatic valves that incorporate an automatic orifice, as well as a large kinetic orifice. These valves ensure that the largest volumes of air are released quickly and effectively while filling the pipe.
-
Page 27: Instructions For Diameter Reduction
Waterworks Sensors INSTRUCTIONS FOR DIAMETER REDUCTION In the case of diameter reduction, please refer to the indications shown in the figure below. Fig. 43 Installation on pipes with diameter reduction REFERENCES Vent Flowmeter type Recommended maximum vertex angle: 15° Full Bore... -
Page 28: Potential Equalization
Waterworks Sensors POTENTIAL EQUALIZATION GENERAL INDICATIONS The sensor must be grounded, as shown in the figures below, using the cables with a minimum section of 2.5 (recommended: 4 mm ). This will assure the potential bonding, noise reduction, and, in the case of a metal pipe, it will guarantee electrical continuity. -
Page 29: Plastic Pipes
Waterworks Sensors Compact version grounding connections The sensor must be earthed using the appropriate ground screw placed on the converter casing Grounding rod Grounding rod Fig. 45 Compact version grounding connection PLASTIC PIPES PLASTIC PIPE PLASTIC PIPE GROUNDING RINGS GROUNDING RINGS Grounding rod Fig. -
Page 30: Metal Pipes
Waterworks Sensors METAL PIPES METAL PIPE METAL PIPE Grounding rod Fig. 47 Grounding of sensor on metal pipes In the case of metal pipes with an insulating coating, follow the instructions for plastic pipes. 4.4 METAL PIPES WITH INSULATING ADAPTERS... -
Page 31: Metal And Plastic Pipes
Waterworks Sensors METAL AND PLASTIC PIPES METAL PIPE PLASTIC PIPE Grounding rod Fig. 49 Grounding of the sensor on metal and plastic pipes (with grounding rings) 4.6 PIPES EQUIPPED WITH CATHODIC PROTECTION Particular attention must be paid when installing the product in the pipeline with cathodic protection. Isolate it from the pipeline by installing isolation bushings and washers on the bolts of the flange and connect a wire between the pipes, large enough to handle the cathodic current and the environmental effect. -
Page 32: Electrical Connection
Waterworks Sensors ELECTRICAL CONNECTION SEPARATE VERSION SENSOR CONNECTION All operations on the electrical connections must be carried out if the instrument is disconnected from the mains and/or from the battery! All operations performed on the electrical junction box or the electrical components of the device must be carried out by duly trained and specialized personnel. -
Page 33: Electrical Diagrams
Waterworks Sensors ELECTRICAL DIAGRAMS 5.2.1 Connection with standard single-shielded electrode cable The shields must ONLY be connected on the converter side. Coils cable Electrodes cable Separation box of the sensor Converter Fig. 52 Standard single-shielded cables - C022 5.2.2 Connection with standard double-shielded electrode cable The shield of the coil cable must be connected ONLY on the converter side, as well as the INTERNAL shield of the electrode cable. -
Page 34: Separation Cables
Waterworks Sensors SEPARATION CABLES Optional single-shielded electrode cables - C022 C022 PVC outer jacket Shield Fig. 54 Standard single-shielded electrode cables - C022 Optional double-shielded electrode cables - C028 C028 cables are provided with double shielding, one external, and one additional shielding of the single signal cables of the measuring electrodes only. -
Page 35: Pressure Tap
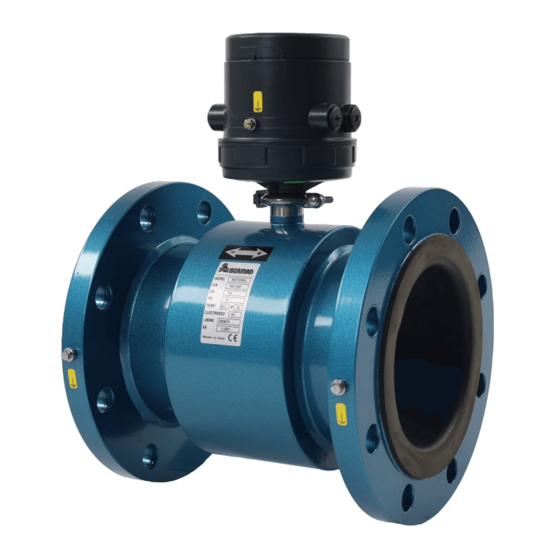
Sensors PRESSURE TAP The MUT2200EL sensor can be optionally supplied with a 1/8 ”GAS pressure plug to which a pressure transducer can be connected. The pressure transducer can be supplied by Euromag on request, and it will be integrated into the converter, or a third-party sensor can be used. -
Page 36: Insertion Meters
Waterworks Sensors INSERTION METERS INTRODUCTION The insertion flowmeters are intended to be inserted inside existing pipes, with minimal intervention on the existing system, through a threaded or flanged sleeve and possibly a valve. The meter can be installed in any pipe of internal diameter between DN50 and DN2600. -
Page 37: General Installation Requirements
Waterworks Sensors GENERAL INSTALLATION REQUIREMENTS The probe must be installed at the point of average axial speed, which is located at 1/8 of the internal diameter of the pipe (Fig. 58). The meter axis must intercept the pipe axis (Fig. 59). -
Page 38: Alignment Of The Electrodes In Relation To The Flow
Waterworks Sensors 7.2.2 Alignment of the electrodes in relation to the flow The measurement of the flow is directly linked to the component of the distance between electrodes perpendicular to the flow axis, d’. If the electrodes are positioned perpendicularly to the flow direction, d=d’, where d is the distance between the electrodes. -
Page 39: Mut1222
Waterworks Sensors MUT1222 7.3.1 Dimensions and main features The MUT1222 flowmeter is available in three different sizes and can be installed in pipes from DN50 to DN2600 by using a 1” valve. The sensor is equipped with Hot-Tap functionality (i.e., it is possible to assemble and disassemble the flowmeter with the pipe under pressure and full of liquid). -
Page 40: Calculation Of The Insertion Depth
Waterworks Sensors 7.3.2 Calculation of the insertion depth SECTION C-C DETAIL D Scale 1:2 Fig. 64 The insertion depth I can be determinated using the following formula: I = – Di In order to precisely set the insertion depth, it is possible to use the control value M = L - S - –... -
Page 41: Installation Of The Sensor
Waterworks Sensors 7.3.3 Installation of the sensor 7.3.3.1 Preparation of the pipe ATTENTION: The preparation of the pipe can be carried out even on pressurized lines by using special machinery. Aside from the fact that this operation requires the use of special equipment, it is also intrinsically dangerous. -
Page 42: Installation On Non-Metallic Pipes Using A Saddle Bracket
Waterworks Sensors 7.3.4 Installation on non-metallic pipes using a saddle bracket There are different types of saddle brackets available on the market that can be applied in pipes of different diameters. If an installation of this type is required, follow the instructions below. -
Page 43: Mut2660
Waterworks Sensors MUT2660 7.4.1 Dimensions and main features The MUT2660 sensor is suitable for fixed installation in pipes from DN80 up to DN500. The installation and assembly/disassembly of the flowmeter requires a 40mm hole drilling on the pipe and a threaded sleeve welding. -
Page 44: Calculation Of The Insertion Depth
Waterworks Sensors 7.4.2 Calculation of the insertion depth Sez. A-A Ø Di Fig. 77 The insertion depth I can be determinated using the following formula: I = – Di In order to precisely set the insertion depth, it is possible to use the control value M = L - S - –... -
Page 45: Installation Of The Sensor
Waterworks Sensors 7.4.3 Installation of the sensor ATTENTION: The sensor is equipped with a safety device (consisting of a stop ring) designed to prevent the pressure from leaking out of the sensor in case the locking ring accidentally unscrews. Do not, under any circumstances, remove this safety device. -
Page 46: Flowmeter Grounding
Waterworks Sensors 7.4.4 Flowmeter grounding ROUNDING CONNECTION BOLT Grounding rod Fig. 84 Grounding | 46 |... -
Page 47: Mut2770
Waterworks Sensors MUT2770 7.5.1 Dimensions and main features The MUT2770 sensor is suitable for fixed installation in medium-large diameter pipes. It can be supplied in different sizes depending on the size of the pipe in which it will be installed, starting from a minimum of DN100 up to DN2500. -
Page 48: Calculation Of The Insertion Depth
Waterworks Sensors 7.5.2 Calculation of the insertion depth Ø Di Fig. 86 The insertion depth I can be determinated using the following formula: I = – Di In order to precisely set the insertion depth, it is possible to use the control value M1: M = Li - S - –... -
Page 49: Installation Of The Sensor
Waterworks Sensors 7.5.3 Installation of the sensor ATTENTION: For installation, assembly, and disassembly of the meter, the pipe must be empty. 7.5.3.1 Preparation of the pipe Drill in the installation Prepare the flanged sleeve for assembly by cutting it to length M and weld it to position. -
Page 50: Flowmeter Grounding
Waterworks Sensors 7.5.4 Flowmeter grounding Grounding rod Fig. 92 Messa a terra MAINTENANCE BOLTS TIGHTENING Periodically check the tightness of all the fixing nuts. If necessary, ensure correct tightening by applying the tightening torques shown in the table in paragraph 3.4.3. -
Page 51: Sending The Flowmeter To The Manufacturer
Waterworks Sensors TROUBLESHOOTING For the TROUBLESHOOTING section (Problems / Causes / Solutions), please refer to the instruction manual of the converter associated with the specific sensor. 10 CERTIFICATIONS AND TECHNICAL FEATURES Please refer to the sensor and converter catalogs to see the list of the certifications and all the technical features related to your product.
Need help?
Do you have a question about the MUT2200EL and is the answer not in the manual?
Questions and answers