
Summary of Contents for HOME REFINEMENTS JULIEN HR-ELGG32-P
- Page 1 GUIDE D’INSTALLATION ET D’ENTRETIEN INSTALLATION DU GRIL AU GAZ ET BASE ELEMENT (HR-ELKGGB32-P)
- Page 2 FÉLICITATIONS POUR L’ACQUISITION DE VOTRE NOUVELLE CUISINE EXTÉRIEURE HOME REFINEMENTS. Tous nos produits sont fabriqués avec le plus grand soin et soumis à des standards rigoureux de qualité. Le design de chaque module combine esthétisme et fonctionnalité, dans le but de vous faire vivre une expérience unique et remarquable.
- Page 3 IMPORTANT Installateur : laissez ces instructions de montage au propriétaire. Propriétaire : conservez ces instructions de montage pour vous y référer plus tard et pour l’inspecteur en électricité. AVERTISSEMENTS Les avertissements résumés ci-dessous sont les plus critiques. AVERTISSEMENT Que faire si vous sentez du gaz •...
-
Page 4: Table Of Contents
TABLE DES MATIÈRES PIÈCES DIMENSIONS INSTALLATION DE LA BASE DU MODULE MONTAGE DU GRIL À GAZ INTÉGRÉ INSTALLATION DU GRIL À GAZ ENCASTRÉ ELEMENT (HR-ELGG32-P) GARANTIE CUISINES D’EXTÉRIEUR DE LA COLLECTION ELEMENT... -
Page 5: Pièces
PIÈCES... - Page 6 PIÈCES...
- Page 7 LISTE DES PIÈCES N° sur la vue Nom de la pièce N° de la pièce Quantité en éclatée Couvercle supérieur du gril Thermomètre Logo Support de poignée gauche Couvercle de la lumière Lumière 1 Grille de réchaud supérieure Rôtisserie Cavité du gril Goupille du couvercle supérieur Moteur Support du moteur...
- Page 8 LISTE DES PIÈCES (SUITE) N° sur la vue Nom de la pièce N° de la pièce Quantité en éclatée Lumière 2 Brûleur de gril arrière Couvercle du collecteur de gaz Tige de température Panneau à clapet Panneau latéral gauche A Poutre Glissière pour la base de la bouteille de propane Base de la bouteille de propane...
-
Page 9: Dimensions
DIMENSIONS DU PRODUIT... -
Page 10: Installation De La Base Du Module
INSTALLATION DE LA BASE DU MODULE ÉTAPE 1 Retournez la base de la bombonne de propane (pièce n° 49) pour installer les pattes et les roues. 2. Installez deux (2) pattes de soutien (pièce n° 55) sur la base de la bombonne de propane (pièce n° 49). 3. - Page 11 ÉTAPE 2 Une fois les roues et les pattes installées, retournez la base de la bombonne de propane. 2. Utilisez quatre (4) vis à tête plate Phillips de 5/32" x 5/16" (pièce n° 72) pour fixer le support de la base pour la bombonne de propane (pièce n°...
- Page 12 ÉTAPE 3 Utilisez six (6) vis à tête ronde antidérapantes Phillips de 1/4" x 1/2" (pièce n° 71) pour fixer le panneau latéral gauche A (pièce n° 46) et le panneau latéral droit A (pièce n° 61) à la base de la bombonne de propane (pièce n°...
- Page 13 ÉTAPE 4 Prenez le transformateur aux normes américaines (pièce n° 27) dans l’emballage du gril. 2. Utilisez quatre (4) vis à tête ronde Phillips de 5/32" (pièce n° 70) pour installer le transformateur (pièce n° 27) sur le panneau arrière A (pièce n° 63). Faites attention de ne pas endommager la fiche d’alimentation en bas et la boucle en haut.
- Page 14 ÉTAPE 5 Utilisez trois (3) vis à tête ronde antidérapantes Phillips de 1/4" x 1/2" (pièce n° 71) pour installer le panneau arrière A (pièce n° 63) sur la base de la bombonne de propane (pièce n° 49). 2. Utilisez trois (3) vis à tête ronde antidérapantes Phillips de 1/4" x 1/2" (pièce n° 71) pour connecter le panneau arrière A (pièce n°...
- Page 15 ÉTAPE 6 Utilisez cinq (5) vis à tête ronde antidérapantes Phillips de 1/4" x 1/2" (pièce n° 71) pour connecter le panneau à clapet (pièce n° 45) avec la base (pièce n° 49) et le panneau arrière A (pièce n° 63).
- Page 16 ÉTAPE 7 Utilisez cinq (5) vis à tête ronde antidérapantes Phillips de 1/4" x 1/2" (pièce n° 71) pour raccorder la poutre (pièce n° 47) au panneau latéral gauche A (pièce n° 46), au panneau à clapet (pièce n° 45) et au panneau latéral droit A (pièce n°...
- Page 17 ÉTAPE 8 Vérifiez le rebord de la plaque centrale du tiroir (pièce n° 52.3) et confirmez qu’il est orienté vers le haut. Sinon, le pliage se fera dans le mauvais sens (voir l’image ci-dessous qui montre le mauvais sens de pliage avec un « × »).
- Page 18 ÉTAPE 9 Insérez les deux (2) tiroirs assemblés (pièce n° 52) dans le module. 2. Divisez la charnière de porte en deux parties (pièce n° 66) et utilisez douze (12) vis à tête plate Phillips de 5/32" x 5/16" (pièce n° 72) pour installer les charnières sur le panneau latéral droit A (pièce n° 61) et la porte (pièce n°...
- Page 19 ÉTAPE 10 Utilisez deux (2) vis à tête ronde Phillips de 5/32" (pièce n° 70) pour installer le panneau stratifié (pièce n° 65) sur le panneau latéral gauche A (pièce n° 46). 2. Utilisez deux (2) vis à tête ronde Phillips de 5/32" (pièce n° 70) pour installer le bouclier thermique de la bombonne de propane (pièce n°...
-
Page 20: Montage Du Gril À Gaz Intégré
MONTAGE DU GRIL À GAZ INTÉGRÉ ÉTAPE 1 Ouvrez le couvercle du gril. Retirez les trois (3) grilles de cuisson (pièce n° 29) des brûleurs principaux pour éviter tout dommage potentiel. 2. Utilisez deux (2) vis à tête ronde antidérapantes Phillips de 1/4" x 1/2" (pièce n° 71) pour installer le support du moteur (pièce n°... - Page 21 ÉTAPE 2 Installez les broches dans le milieu de la rôtisserie (pièce n° 8) et serrez-les. 2. Installez le poids et la poignée sur le côté droit de la rôtisserie (pièce n° 8). 3. Insérez le côté pointu de la rôtisserie (pièce n° 8) dans le moteur (pièce n° 11) et l’autre côté sur le support de la rôtissoire (pièce n°...
- Page 22 ÉTAPE 3 Enlevez les tiroirs et ouvrez la porte droite du module. 2. Utilisez quatre (4) vis à tête ronde antidérapantes Phillips de 1/4" x 1/2" (pièce n° 71) pour connecter le gril au module (consultez le manuel d’utilisation pour l’essai d’étanchéité). 3.
-
Page 25: Installation Du Gril À Gaz Encastré Element (Hr-Elgg32-P)
GUIDE D’INSTALLATION ET D’ENTRETIEN INSTALLATION DU GRIL À GAZ ENCASTRÉ ELEMENT (HR-ELGG32-P) - Page 26 FÉLICITATIONS POUR L’ACQUISITION DE VOTRE NOUVELLE CUISINE EXTÉRIEURE HOME REFINEMENTS. Tous nos produits sont fabriqués avec le plus grand soin et soumis à des standards rigoureux de qualité. Le design de chaque module combine esthétisme et fonctionnalité, dans le but de vous faire vivre une expérience unique et remarquable.
- Page 27 IMPORTANT Installateur : laissez ces instructions de montage au propriétaire. Propriétaire : conservez ces instructions de montage pour vous y référer plus tard et pour l’inspecteur en électricité. DANGER Si vous sentez une odeur de gaz : Coupez l’alimentation en gaz de l’appareil. 2.
- Page 28 TABLE DES MATIÈRES SÉCURITÉ DES GRILS EXTÉRIEURS CONSIGNES IMPORTANTES DE SÉCURITÉ EXIGENCE D’INSTALLATION SPÉCIFICATIONS DU GRIL EXTÉRIEUR INTÉGRÉ RACCORD AU GAZ PROPANE INSTRUCTIONS POUR LE GRIL UTILISATION DE VOTRE GRIL À GAZ UTILISATION DE VOTRE BRÛLEUR DE LA RÔTISSOIRE ENTRETIEN DU GRIL EXTÉRIEUR REMPLACEMENT DE LA PILE DE L’ALLUMEUR NETTOYAGE GÉNÉRAL ACIER INOXYDABLE...
-
Page 29: Sécurité Des Grils Extérieurs
SÉCURITÉ DES GRILS EXTÉRIEURS VOTRE SÉCURITÉ ET CELLE DES AUTRES SONT TRÈS IMPORTANTES. Ce guide contient plusieurs mesures de sécurité importantes pour votre appareil. Lisez et suivez toujours tous les avertissements de sécurité. • Ce pictogramme est le symbole d’alerte de sécurité. •... -
Page 30: Consignes Importantes De Sécurité
CONSIGNES IMPORTANTES DE SÉCURITÉ AVERTISSEMENT Conservez ces instructions pour pouvoir vous y référer ultérieurement. Suivez les précautions de base ci-dessous pour réduire le risque d’incendie, de choc électrique, de blessure ou de dommage lorsque vous utilisez l’appareil de cuisson au gaz extérieur : •... -
Page 31: Exigence D'installation
EXIGENCE D’INSTALLATION OUTILS ET PIÈCES Rassemblez les outils et les pièces nécessaires avant de commencer le montage. Lisez et suivez les instructions fournies avec tous les outils énumérés ici. Outils nécessaires • Ruban à mesurer • Ciseaux pour retirer les attaches •... -
Page 32: Spécifications Du Gril Extérieur Intégré
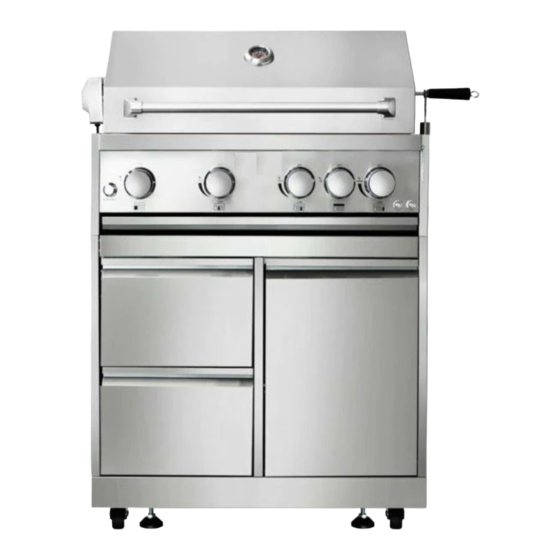
SPÉCIFICATIONS DU GRILL EXTÉRIEUR INTÉGRÉ AVERTISSEMENT Risque d’incendie N’installez pas le gril sur des matériaux combustibles ou à proximité sans un couvercle isolé pour éviter les risques d’incendie pouvant causer des blessures ou la mort. Ce gril d’extérieur encastré a été conçu uniquement pour être installé dans une enceinte encastrée construite avec des matériaux incombustibles tels que des briques, un pare-feu ou de l’acier. - Page 33 DIMENSIONS DE HR-ELGRB32 ELEMENT BASE POUR GRIL AU GAZ 32" 1 PORTE 2 TIROIRS DIMENSIONS DE HR-ELKGGB32-P ELEMENT GRIL AU GAZ ET BASE 32" 1 PORTE 2 TIROIRS, PROPANE...
-
Page 34: Raccord Au Gaz Propane
RACCORD AU GAZ PROPANE RÉGULATEUR DE PRESSION DE GAZ Utilisez toujours le régulateur de pression de gaz fourni avec ce gril. La pression d’entrée du régulateur (fourni) doit être la suivante pour un bon fonctionnement : • Utilisez le tuyau pour raccorder le régulateur à votre bombonne de gaz liquéfié. - Page 35 INSTALLATION DE LA BOMBONNE DE PROPANE Ce gril est conçu pour être utilisé avec une bombonne de propane (non fournie). Il vient avec un régulateur de pression et la tuyauterie pour le gaz. Le plateau de la bombonne est compatible avec la plupart des bombonnes de propane sur le marché.
- Page 36 SÉCURITÉ ÉLECTRIQUE L’équipement électrique fourni avec l’appareil de cuisson au gaz extérieur doit être utilisé et installé selon les instructions suivantes : • Pour vous protéger contre les chocs électriques, ne plongez pas le cordon ou les fiches dans l’eau ou tout autre liquide.
-
Page 37: Instructions Pour Le Gril
INSTRUCTIONS POUR LE GRIL Le gril que vous avez acheté peut avoir seulement certaines des caractéristiques ci-dessous ou toutes. L’emplacement et l’apparence des caractéristiques présentées ici peuvent ne pas correspondre parfaitement à votre modèle. PANNEAU DE CONTRÔLE A. Boîtier de pile (pour l’allumage) B. -
Page 38: Utilisation De Votre Gril À Gaz
UTILISATION DE VOTRE GRIL À GAZ AVERTISSEMENT Risque d’explosion. Ne rangez pas le gril avec une bombonne de gaz dans un garage ou à l’intérieur. Le non-respect de ces instructions peut entraîner une explosion ou un incendie et causer des blessures ou la mort. - Page 39 INSTALLATION DE LA PILE DE L’ALLUMEUR Dévissez (dans le sens inverse des aiguilles d’une montre) le capuchon sur le bouton d’allumage du boîtier de la pile (A). 2. Placez une nouvelle pile alcaline « AA » en commençant par l’extrémité négative. 3. Revissez le capuchon du bouton d’allumage (dans le sens des aiguilles d’une montre). ALLUMAGE DU GRIL PRINCIPAL IMPORTANT : Si le brûleur ne s’allume pas immédiatement, tournez le bouton du brûleur à...
-
Page 40: Utilisation De Votre Brûleur De La Rôtissoire
UTILISATION DE VOTRE BRÛLEUR DE LA RÔTISSOIRE Pour éviter d’endommager la grille, retirez-la lorsque vous utilisez le brûleur de la rôtissoire. N’utilisez pas les brûleurs principaux lorsque le brûleur de la rôtissoire est en service. ALLUMER LE BRÛLEUR DE LA RÔTISSOIRE Ne vous approchez pas du gril et évitez de vous pencher au-dessus. -
Page 41: Entretien Du Gril Extérieur
ENTRETIEN DU GRIL EXTÉRIEUR REMPLACEMENT DE LA PILE DE L’ALLUMEUR Si les allumeurs ne produisent plus d’étincelles, remplacez la pile. Dévissez le capuchon du bouton de l’allumeur (tournez dans le sens inverse des aiguilles d’une montre). 2. Retirez la pile du compartiment. 3. -
Page 42: Grille De Réchaud
GRILLE DE RÉCHAUD Méthode de nettoyage : • Utilisez un détergent liquide ou un nettoyant tout usage. • Rincez à l’eau claire et séchez avec un chiffon doux et non pelucheux. • Pour les taches tenaces ou les graisses cuites, utilisez un dégraissant commercial pour l’acier inoxydable. IMPORTANT : Confirmez que l’alimentation en gaz est coupée et que tous les boutons de commande sont en position « Off ». -
Page 43: Brûleurs De La Rôtissoire
Intérieur des brûleurs : (suite) 3. Utilisez une lampe de poche pour inspecter le brûleur par l’entrée pour Brûleur/Orifice à gaz confirmer qu’il n’est pas obstrué. Si vous voyez une obstruction, utilisez un cintre métallique redressé pour la dégager. 4. Après avoir inspecté l’intérieur du brûleur pour vérifier qu’il n’est pas obstrué, rassemblez le brûleur en faisant glisser le tube central du brûleur à... -
Page 44: Dépannage
DÉPANNAGE Le gril ne s’allume pas La flamme est bruyante, faible ou irrégulière. • Le robinet de la bombonne de propane est-il • L’alimentation en gaz est-elle complètement fermé ? ouverte ? Ouvrez le robinet. Vérifiez si le robinet de la bombonne de propane est complètement ouvert. -
Page 46: Garantie
Produit ou ses composants. À sa discrétion, Home Refinements peut exiger des photos avant d’analyser la réclamation. Cette garantie limitée est nulle et non avenue si le produit ou ses composants ont été réparés, altérés ou modifiés autrement que par Home Refinements ou sous sa supervision. -
Page 47: Cuisines D'extérieur De La Collection Element
CUISINES EXTÉRIEURES DE LA COLLECTION ELEMENT Home Refinements offre une garantie de DEUX (2) ANS contre tout défaut de fabrication ou de matériaux sur les régulateurs de gaz propane et les brûleurs à gaz des cuisines extérieures de la collection ELEMENT, à condition que le client ou l’utilisateur final fasse un usage normal, résidentiel et raisonnable des produits. - Page 49 INSTALLATION AND MAINTENANCE GUIDE INSTALLATION OF ELEMENT GAS GRILL AND BASE CABINET (HR-ELKGGB32-P )
- Page 50 CONGRATULATIONS ON THE PURCHASE OF YOUR NEW HOME REFINEMENTS OUTDOOR KITCHEN. All our products are manufactured with the utmost care and subjected to rigorous quality standards. Each design unit combines aesthetics and functionality to give you a unique and remarkable experience.
- Page 51 IMPORTANT Installer: Leave these installation instructions with the homeowner. Homeowner: Keep these installation instructions for future reference and for the electrical inspector’s use. WARNING Read this Installation and User Care Guide carefully before using your built-in grill and cabinet to reduce the risk of fire hazards, burns or other injuries WARNING What to do if you smell gas •...
- Page 52 TABLE OF CONTENTS PARTS DIMENSIONS BASE CABINET INSTALLATION BUILT-IN GAS GRILL INSTALLATION ELEMENT BUILT-IN GAS GRILL PROPANE (HR-ELGG32-P) INSTALLATION WARRANTY ELEMENT OUTDOOR KITCHEN COLLECTION...
-
Page 53: Parts
PARTS... - Page 54 PARTS...
- Page 55 PARTS LIST Explosive # Part Name Part # Quantity Grill top cover Thermometer Logo Left handle holder Light cover Light #1 Top warming rack Rotisserie Grill cavity Top cover rotary pin Motor Motor holder Burner valve holding plate Main manifold 5-point spark module Main burner ignition harness Main burner knob...
- Page 56 PARTS LIST Explosive # Part Name Part # Quantity Light #2 Back broil burner Gas-collecting hood Temperature rod Clapboard Left-side panel A Beam LP tank supporting slide Tank base Snap bolt Slide way Drawer 52,1 Drawer front panel welding plate 52,2 Drawer front panel lining 52,3...
-
Page 57: Dimensions
PRODUCT DIMENSIONS... -
Page 58: Base Cabinet Installation
BASE CABINET INSTALLATION STEP 1 Flip the tank base (part #49) to install the legs and casters. 2. Install two (2) supporting legs (part #55) to the tank base (part #49). 3. Use sixteen (16) 1/4” x 1/2” Phillips roundhead screws with anti-slip design (part #71) to install two (2) fixed casters (part #56) and two (2) universal swivel casters with brake (part #57) to the tank base #49). - Page 59 STEP 2 Once the casters and legs are installed, flip back the tank base. 2. Use four (4) 5/32” x 5/16” Phillips flathead screws (part #72) to connect the tank base support (part #59) to the tank base (part #49). 3.
- Page 60 STEP 3 Use six (6) 1/4” x 1/2” Phillips roundhead screws with anti-slip design (part #71) to the left-side panel A (part #46) and the right-side panel A (part #61) to tank base (part #49). 2. Attach two (2) rubber gaskets (part #62) to designated areas on the left-side panel A (part #46) and the right-side panel A (part #61).
- Page 61 STEP 4 Get the American-standard transformer (part #27) from the grill packaging. 2. Use four (4) 5/32” Phillips roundhead screws (part #70) to install the American-standard transformer (part #27) on the back panel A (part #63). Be careful not to damage the power plug on the bottom and the buckle on the top.
- Page 62 STEP 5 Use three (3)/4” x 1/2“ Phillips roundhead screws with anti-slip design (part #71) to install the back panel A (part #63) to the tank base (part #49). 2. Use three (3)/4” x 1/2“ Phillips roundhead screws with anti-slip design (part #71) to connect the back panel A (part #63) with the left-side panel A (part #46) and the right-side panel A (part #61).
- Page 63 STEP 6 Use five (5)/4” x 1/2“ Phillips roundhead screws with anti-slip design (part #71) to connect the clapboard (part #45) with the tank base (part #49) and the back panel A (part #63).
- Page 64 STEP 7 Use five (5) 1/4” x 1/2” Phillips roundhead screws with anti-slip design (part #71) to connect the beam (part #47) with the left-side panel A (part #46), the clapboard (part #45), and the right-side panel A (part #61).
- Page 65 STEP 8 Check the drawer middle plate edge (part #52.3) and ensure the edge side is facing up. Otherwise, the folding will be in the wrong direction (see the picture below showing the wrong folding direction with a “×”). Be careful with the folding process.
- Page 66 STEP 9 Insert the two (2) assembled drawers (part #52) into the cabinet. 2. Divide the door hinge into two parts (part #66) and use twelve (12) 5/32” x 5/16” Phillips flathead screws (part #72) to install the hinges to the right-side panel A (part #61) and the door (part #53) 3.
- Page 67 STEP 10 Use two (2) 5/32” Phillips roundhead screws (part #70) to install the laminate board (part #65) to the left-side panel A (part #46). 2. Use two (2) 5/32” Phillips roundhead screws (part #70) to install the gas tank heat shield (part #64) to the right-side panel A (part #6).
-
Page 68: Built-In Gas Grill Installation
BUILT-IN GAS GRILL INSTALLATION STEP 1 Open the grill cover. Remove all three (3) cooking grids (part #29) from the main burners to avoid potential damage. 2. Use two (2) 1/4” x 1/2” Phillips roundhead screws with anti-slip design (part #71) to install the motor holder (part #12) to the grill cavity (part #9). - Page 69 STEP 2 Install and tighten the meat holders in the middle of the rotisserie (part #8). 2. Install the weight and handle on the right side of the rotisserie (part #8). 3. Insert the sharp side of the rotisserie (part #8) to the motor (part #11), and the other side on top of the rotisserie holder (part #32).
- Page 70 STEP 3 Take off the drawers and open the right cabinet door. 2. Use four (4) 1/4” x 1/2” Phillips roundhead screws with anti-slip design (part #71) to connect the grill with the cabinet (refer to the use manual for gas leak test). 3.
-
Page 73: Element Built-In Gas Grill Propane (Hr-Elgg32-P) Installation
INSTALLATION AND MAINTENANCE GUIDE INSTALLATION OF ELEMENT BUILT-IN GAS GRILL PROPANE (HR-ELGG32-P) - Page 74 CONGRATULATIONS ON THE PURCHASE OF YOUR NEW HOME REFINEMENTS OUTDOOR KITCHEN. All our products are manufactured with the utmost care and subjected to rigorous quality standards. Each design unit combines aesthetics and functionality to give you a unique and remarkable experience.
- Page 75 IMPORTANT Installer: Leave these installation instructions with the homeowner. Homeowner: Keep these installation instructions for future reference and for the electrical inspector’s use. Read this Installation and User Care Guide carefully before using your built-in grill to reduce the risk of fire hazards, burns or other injuries.
- Page 76 TABLE OF CONTENTS OUTDOOR GRILL SAFETY IMPORTANT SAFETY INSTRUCTIONS INSTALLATION REQUIREMENT BUILT-IN OUTDOOR GRILL SPEC PROPANE GAS CONNECTION GRILL INSTRUCTIONS USING YOUR GAS GRILL USING YOUR ROTISSERIE BURNER OUTDOOR GRILL CARE REPLACE THE IGNITER BATTERY GENERAL CLEANING STAINLESS STEEL GRILL GRATES WARMING RACK EXTERIOR INTERIOR...
-
Page 77: Outdoor Grill Safety
OUTDOOR GRILL SAFETY YOUR SAFETY AND THE SAFETY OF OTHERS ARE VERY IMPORTANT. This guide contains several important safety measures for your appliance. Always read and follow all safety messages. • This is the safety alert symbol. • This symbol alerts you of potential hazards that can kill or hurt you and others. -
Page 78: Important Safety Instructions
IMPORTANT SAFETY INSTRUCTIONS WARNING To reduce the risk of fire, electrical shock injury to persons, or damage when using the outdoor cooking gas appliance, follow basic precautions, including the following: • An outdoor cooking gas appliance is not intended to be installed in or on boats. •... -
Page 79: Installation Requirement
INSTALLATION REQUIREMENT TOOLS AND PARTS Gather the required tools and parts before starting installation. Read and follow the instructions provided with any tools listed here. Tools Needed • Measuring tape • Scissors to remove tie downs • Pipe wrench • #2 and #3 Phillips screwdriver •... -
Page 80: Built-In Outdoor Grill Spec
BUILT-IN OUTDOOR GRILL SPEC WARNING Fire Hazard Do not install grill on or near combustible materials without an insulated cover to avoid death or fire. This built-in outdoor grill was designed only to be installed in a built-in enclosure constructed with noncombustible materials such as bricks, a firewall or steel. - Page 81 HR-ELGRB32 ELEMENT BASE FOR GAS GRILL 32” 1 DOOR 2 DRAWER DIMENSIONS HR-ELKGGB32-P ELEMENT GAS GRILL AND BASE 32” 1 DOOR 2 DRAWER, PROPANE DIMENSIONS...
-
Page 82: Propane Gas Connection
PROPANE GAS CONNECTION GAS PRESSURE REGULATOR Always use the gas pressure regulator supplied with this grill. The inlet (supplied) pressure to the regulator should be as follows for proper operation. • Use the hose to connect the regulator to your LP gas tank. •... - Page 83 INSTALL PROPANE TANK This grill was designed to be used with a propane tank (not supplied). A gas pressure regulator/hose assembly is supplied. The grill tank tray is compatible with most propane tanks in the market. The propane tank must be mounted and secured.
- Page 84 ELECTRICAL SAFETY The electrical equipment provided with the outdoor cooking gas appliance shall be used and installed following these instructions: • To protect against electric shock, do not immerse cord or plugs in water or other liquid; • Unplug the grill from the outlet when not in use and before cleaning. Allow to cool before adding or removing parts;...
-
Page 85: Grill Instructions
GRILL INSTRUCTIONS The grill you have purchased may have some of the features below or all of them. The locations and appearances of the features shown here may not perfectly match your model. CONTROL PANEL A. Battery box (for ignition) B. -
Page 86: Using Your Gas Grill
USING YOUR GAS GRILL WARNING Explosing Hazard Do not store a fuel tank in a garage or indoors. Do not store the grill with a fuel tank in a garage or indoors. Failure to follow these instructions can result in death, explosion, or fire. WARNING Fire Hazard Do not use the grill near combustible materials. - Page 87 INSTALL THE IGNITER BATTERY Unscrew the battery box igniter button cap (A) counterclockwise to remove it. 2. Place a new alkaline “AA” size battery. Install the battery with the negative end first. 3. Screw back the igniter button cap back on (turn clockwise). LIGHTING THE MAIN GRILL IMPORTANT: If the burner does not light immediately, turn the burner knob to “OFF”...
-
Page 88: Using Your Rotisserie Burner
USING YOUR ROTISSERIE BURNER To avoid damage to the warming rack, remove the grill grates when using the rotisserie burner. Do not use the main burners when the rotisserie burner is in use. LIGHTING THE ROTISSERIE BURNER Stay away from the grill and do not lean over it. 2. -
Page 89: Outdoor Grill Care
OUTDOOR GRILL CARE REPLACE THE IGNITER BATTERY If the igniters stop sparking, replace the battery. Unscrew the igniter button cap (turn counterclockwise) to remove it. 2. Remove the battery from the compartment. 3. Replace with a new alkaline “AA” size battery. Install the battery with the negative end first. 4. -
Page 90: Warming Rack
WARMING RACK Cleaning Method: • Use Liquid detergent or an all-purpose cleaner. • Rinse with clean water and dry with a soft, lint-free cloth. • For tough spots or baked-on grease use a commercial degreaser designed for stainless steel. IMPORTANT: Make sure the gas supply is “OFF” and that all control knobs are in the “OFF” position. EXTERIOR This quality material resists most stains and pits, providing that the surface is kept clean, polished, and covered. -
Page 91: Rotisserie Burner
Interior of the burners: 3. Use a flashlight to inspect the burner through the burner inlet to ensure Burner/Orifice connection there is no blockage. If you see any obstruction, use a metal coat hanger that has been straightened to clear them. 4. -
Page 92: Troubleshooting
TROUBLESHOOTING The grill will not light The flame is noisy, low or erratic • Is the propane tank valve turned “OFF”? • Is the gas supply fully turned on? Turn “ON” the valve. Check if the propane tank valve is fully open. •... -
Page 94: Warranty
In no case, even if the Product or its components are defective, shall the liability of Home Refinements exceed the price paid for the Product. Home Refinements reserves the right to inspect the installation prior to replacing or repairing the Product or its components. -
Page 95: Element Outdoor Kitchen Collection
ELEMENT OUTDOOR KITCHEN COLLECTION Home Refinements offers a TWO (2)-YEAR warranty against any manufacturing or materials defect on propane gas regulators and gas burners for the ELEMENT outdoor kitchen collection, provided that the Client or end user makes a normal, residential, and reasonable use of the products. - Page 96 955, rue Lachance, Quebec (Quebec) Canada G1P 2H3 T 1 866 901-5624 · 418 687-3630 | F 1 866 397-9090 · 418 687-9129 homerefinements.ca...
Need help?
Do you have a question about the JULIEN HR-ELGG32-P and is the answer not in the manual?
Questions and answers