Advertisement
IPTV STREAM SERVER
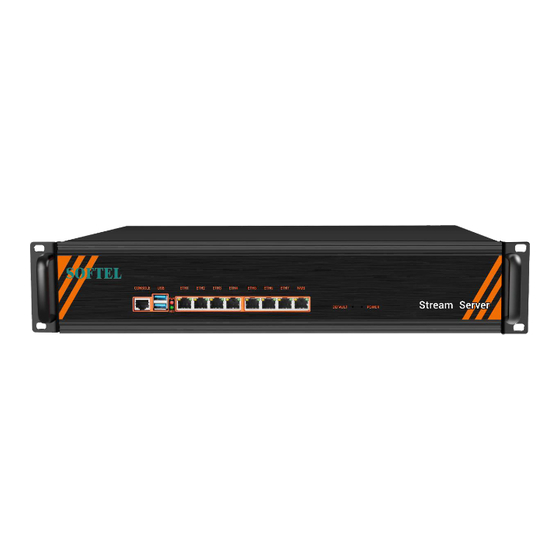
SFT-IPSR33
INTRODUCTION
SFT-IPSR33 is a 2RU rack-mount IPTV streamer server. It is optimal for small and medium internet service
providers to initial setup in large network.
FEATURES
1. Support all kinds of IP protocol
2. Support MPTS/SPTS
3. Support UDP and HLS
4. Support Set Top Box management
5. Support Subtitles and teletext
6. Support theme customization
7. Support channel list management
8. Support channel list management
TO REDUCE THE RISK OF ELECTRICAL SHOCK, DO NOT REMOVE COVER FROM THIS UNIT.
WARNING:TO PREVENT SHOCK HAZARD, DO NOT EXPOSE THIS UNIT TO RAIN OR
MOISTURE
NO USER-SERVICEABLE PARTS INSIDE.
REFER SERVICING TO QUALIFIED SERVICE PERSONNEL.
CAUTION
RISK OF ELECTRIC SHOCK
DO NOT OPEN
Advertisement
Table of Contents

Summary of Contents for Softel SFT-IPSR33
- Page 1 IPTV STREAM SERVER SFT-IPSR33 INTRODUCTION SFT-IPSR33 is a 2RU rack-mount IPTV streamer server. It is optimal for small and medium internet service providers to initial setup in large network. FEATURES 1. Support all kinds of IP protocol 2. Support MPTS/SPTS 3.
-
Page 2: Safety Instructions
SAFETY INSTRUCTIONS 1. Read all safety and operating instructions before you operate the modulator 2. Retain all safety and operating instructions for future reference 3. Heed all warnings on the modulator and in the safety and operating instructions 4. Follow all installation, operating and use instructions. 5. -
Page 3: Installation
Seller. INSTALLATION Please follow the instructions below to install the SFT-IPSR33 1. Connect the power plug to the jack. Do not power up the modulator at this step. 2. Connect to the proper earthing wire 3. -
Page 4: Web Management
WEB MANAGEMENT 1. Connect the modulator and the computer by the RJ45 port. 2. Open your Google Chrome and input default IP address 192.168.1.30, and press enter. 3. The default user name is user and the default password is user The Menu Setting Page 1. - Page 5 Interface Type: Select from INPUT or OUTPUT type NOTICE: The ETH1 to ETH7 can be set as input or output. Access Type: DHCP, STATIC IP AND PPPOE In DHCP mode, the streamer will get the IP address automatically. In Static IP mode, the streamer will inquiry you to input the IP address.
- Page 6 In this page, you can check, edit and delete all the channels Delete: Delete the selected channel Square box: Select all. And then click the Delete to delete all. Enable: To enable the signal output UDP: Output as UDP HLS: Output as HLS Details: See the channel information...
- Page 7 Edit: To program the channel Input: Select the input port Output: Select the output port Program Name: Enter the name you like Program Provider: Enter the name you like DIP: The destination IP address DPORT: The destination port SRC Program No.: The source program number DST Program No.: The destination program number SRC Pmt PID: The source PMT PID DST Pmt PID: The destination PMT PID...
- Page 8 Program Analysis Type of program analysis: Manual Input Manual Input: The streamer will read the date from the port you select and the IP address you input. Device Access The streamer will read the data automatically. Import File: This function is to save your work when you have two same system to install.
- Page 9 2.3 Local Channel Local channel is to provide extra programs. We can upload the video from the others place and make it as a channel. Press New Channel> Input the channel name> Click Upload Video>the streamer will list out the video in the dish. Select the videos and click Upload.
- Page 10 Device ID: The unique ID for this device Connect Switch: Yes Server IP: For SOUKA CLOUD Correcting Time: YES to enable the function Device Time: input the right time for this device 2. System Configuration We offer System Upgrade/Reboot and shutdown here to manage the system. 3.
Need help?
Do you have a question about the SFT-IPSR33 and is the answer not in the manual?
Questions and answers