
Related Manuals for SANDIA aerospace SA 3/L/NVG

Summary of Contents for SANDIA aerospace SA 3/L/NVG
- Page 1 MARC70 Installation Manual SA 3/L/NVG SR 34 SA 15 SR 263 SR 54 SRU 1 SA 24 SR 342 SR 64 SRU 5 SR 623 SRU 10 3700 Osuna Rd. NE, Suite 711 Albuquerque, NM 87109 505.341.2930 305147-00 www.sandia.aero...
-
Page 2: Record Of Revisions
This document and the information contained herein is the proprietary data of SANDIA aerospace, Inc. No part of this document may be transmitted, reproduced, or copied in any form or by any means without the prior written consent of SANDIA aerospace, Inc. Due to SANDIA aerospace’s continued product and quality improvement programs, information contained in this document is subject to change without prior notice. -
Page 3: Table Of Contents
Table Of Contents Record of Revisions .............1 Table of Contents . -
Page 4: List Of Illustrations
Table Of Contents con’t 3.4 Calibration Procedures ........... .25 3.4.1 SA 3 / SA 3L . -
Page 5: Section 1 General Description
Section 1 General Description 1.1 Introduction This manual describes the installation of the SANDIA aerospace MARC70 line of interface mod- ules. It is intended for use by FAA certified repair stations to install the MARC70 modules. It includes both the mechanical and electrical installation information for all MARC70 components, including the individual modules and enclosures. Where applicable, alignment and checkout proce- dures are included. -
Page 6: Sru 5
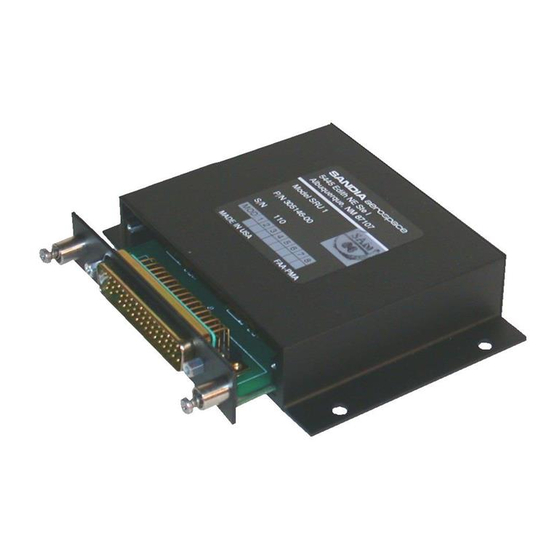
The SRU 5 is a multi-card enclosure that accepts up to five MARC70 interface modules. The SRU 5 can be mounted either inside or outside the pressure vessel. When less than five interface modules are used with the SRU 5, cover plates are placed over the unused card slots. If additional cards are required at a later date, the cover plates can be removed and the appropriate interface card installed. When installing the SRU 5 ample room should be allowed for both connector clearance and for inserting and removing the interface modules. -
Page 7: Operational Characteristics
1.2.2 Operational Characteristics Unit Part Number Operating Temp Altitude Voltage Current Req. SA 3 305005-01 to +70 70,000 Ft. 28Vdc SA 3L 305005-02 to +70 70,000 Ft. 28Vdc SA 3NVG 306070-00 to +70 35,000 Ft. 28Vdc SA 15 305004-01 to +70 70,000 Ft. -
Page 8: Environmental Qualification Form (Sa3, Sa15, Sa24, Sr263, Sr343, Sr623)
MARC70 INSTALLATION MANUAL 305147-00 ENVIRONMENTAL TEST PLAN SR343, SR263, SR623, SA24, SA15, SA3 Doc # MK700020 MANUFACTURER: SANDIA AEROSPACE ADDRESS: 3700 OSUNA RD NE, STE 711, ALBUQUERQUE, NM 87109 REVISION & CHANGE NUMBER OF DO-160: REV D. DATED JULY 27, 1997... -
Page 9: Environmental Qualification Form (Sr34, Sr54, Sr64)
TSO NUMBER: DO160Env. Cat.[A1D1]-CA9MN0XXXXXXZBABATZXXX MANUFACTURER’S SPECIFICATION AND/OR OTHER APPLICABLE SPECIFICATIONS: MARC70 INSTALLATION MANUAL 305147-00 MANUFACTURER: SANDIA AEROSPACE ADDRESS: 3700 OSUNA RD NE, STE 711, ALBUQUERQUE, NM 87109 REVISION & CHANGE NUMBER OF DO-160: REV D. DATED JULY 27, 1997 CONDITION... -
Page 10: Envrionmental Qualification Form, Sa 3Nvg
TSO NUMBER: DO160Env. Cat. [C2X]BBA[(SBM)(UG)]XXXXXXZZAZ[ZC][SS]LXXXXX MANUFACTURER’S SPECIFICATION AND/OR OTHER APPLICABLE SPECIFICATIONS: MARC70 INSTALLATION MANUAL 305147-00 ENVIRONMENTAL TEST PLAN: 901073-QTP, QTP, SA 3 NVG DIMMER MANUFACTURER: SANDIA AEROSPACE ADDRESS: 3700 OSUNA RD NE, STE 711, ALBUQUERQUE, NM 87109 CONDITION SECTION DESCRIPTION OF TESTS CONDUCTED... -
Page 11: Section 2 Installation
Introduction The MARC70 family of enclosures and interface modules has been designed to simplify and standardize installation of avionics systems. SANDIA aerospace supplies each mounting enclosure and interface module separately. The installer can mix and match the modules in the enclosures to meet specific requirements. Except for the SR 34, SR 54 and SR 64, each of the module’s connectors is keyed to prevent inadvertently attaching the wrong connector. -
Page 12: Sru 1 Outline Dimensions
3.2.1 SRU 1 Outline Dimensions Figure 3-1 SRU 1 Outline Dimensions Page 11... -
Page 13: Sru 5 Mounting Instructions
3.2.2 SRU 5 Mounting Instructions The SRU 5 is attached to an aircraft structure by using four #10-32 screws as shown in the outline drawing. 3.2.2.1 SRU 5 & SRU 5-01 Outline Dimensions Top View Side View Front View Figure 3-2 SRU 5 & SRU 5-01 Outline Dimensions 305147-00 Page 12... -
Page 14: Figure 3-3 Sru 10 Outline Dimension
3.2.3 SRU 10 Mounting Instructions The SRU 10 is attached to an aircraft structure by using four #10-32 screws as shown in the outline drawing. 3.2.3.1 SRU 10 Outline Dimensions Top View Side View Front View Figure 3-3 SRU 10 Outline Dimensions Page 13... -
Page 15: Interconnect Wiring
Interconnect Wiring 3.3.1 SA 3 & SA 3L Regulator/ Dimming Modules The SA 3 & 3L Regulator/ Dimming Modules provide a source of power to drive up to .5 amps of continuous current for aircraft annunciators. The SA 3 & 3L will provide 1 amp short term for testing of annunciators. -
Page 16: Sa 24 Diode Isolation/Test Module
3.3.4 SA 24 Diode Isolation/Test Module The SA 24 provides 23 lines of diode isolation. The SA 24 also provides a test input for testing annunciators. The test input can be either a high or a low. Pin 48 on the SA 24 is the keying pin and has been removed at the factory. -
Page 17: Sr 263 12 Pole Switching Module
3.3.8 SR 263 12 Pole Switching Module The SR 263 provides 12 poles of switching through two MIL Qualified, hermetically sealed, and nitrogen filled relays. The relays contacts are gold plated hardened silver alloy with a 2 amp resistive load capacity at 28Vdc. Coil power is 2.6 watts max. at 25 degrees C. Each relay can be activated independently by supplying the switching logic to their coil through pins 38 & 40 for K1 and 43 & 44 for K2. Or they can be switched as a pair by sup- plying the switching logic to pins 39 &... -
Page 18: Sa 3/Sa 3L Schematic And Pinout
Figure 3-4 SA 3/SA 3L Schematic and Pinout Page 17... -
Page 19: Sa 3Nvg Schematic And Pinout
Figure 3-5 SA 3 NVG Schematic and Pinout Page 18... -
Page 20: Sa 24 Schematic And Pinout
Figure 3-6 SA 15 Invertor Module-Rev A 305147-00 Page 19... -
Page 21: Sr 34 & Sr 64 Schematic And Pinout
Figure 3-7 SA 24 Diode Isolation/Test Module Page 20... -
Page 22: Sr 54 Schematic And Pinout
Figure 3-8 SR 34, 12 Pole and SR 64, 24 Pole Switching Modules 305147-00 Page 21... -
Page 23: Sr 263 Schematic And Pinout
Figure 3-9 SR 54, 20 Pole Switching Module Page 22... -
Page 24: Sr 343 Schematic And Pinout
Figure 3-10 SR 263, 12 Pole Switching Module - Rev A1 305147-00 Page 23... -
Page 25: Sr 623 Schematic And Pinout
Figure 3-11 SR 343, 12 Pole Switching Module Page 24... - Page 26 Figure 3-12 SR 623, 12 Switching Module 305147-00 Page 25...
-
Page 27: Calibration Procedures
Calibration Procedures 3.4.1 SA 3 With the SA 3/SA3 3L removed from the enclosure, connect the mating connector. Apply power to the SA 3/SA3 3L by activating the system which is being annunciated by the SA 3/SA3 3L. With the annunciator dimming switch in the bright position, adjust R9 to the desired brightness. -
Page 28: Sa 3Nvg
Calibration Procedures con’t 3.4.2 SA 3NVG 1. With the SA 3NVG removed from the enclosure, connect the mating connector. 2. Apply power to the SA 3NVG by activating the system which is being annunciated by the SA 3NVG. 3.. With the annunciator dimming switch in the Day (Bright) bright position, set the DAY adjustment to the desired brightness. Place the annunciator dimming switch in the Night (dim), and set the NIGHT to the desired brightness. Place the annunciator dinning switch in the NVG and set the NVG adjustment to the desired NVG setting. Press the annunciator test button and ensure that all annunciators illuminate to their maximum adjusted brightness. NIGHT Figure 3-14 SA 3NVG Adjustment Locations... -
Page 29: Continued Airworthiness
Continued Airworthiness Maintenance of all MARC70 products contained in this manual is on condition only. No scheduled maintenance is required. Page 28...
Need help?
Do you have a question about the SA 3/L/NVG and is the answer not in the manual?
Questions and answers