Advertisement
www.costway.com
USER'S MANUAL
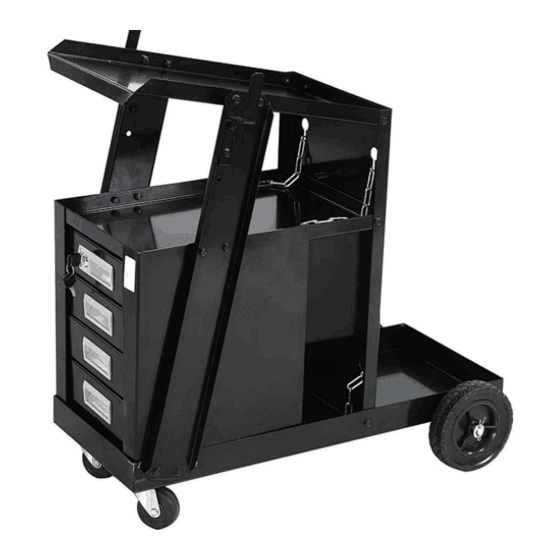
Welding Cart with 4 Drawers
TL30207
THIS INSTRUCTION BOOKLET CONTAINS IMPORTANT SAFETY INFORMATION. PLEASE READ AND KEEP FOR FUTURE REFERENCE.
Follow Costway
Please give us a chance to make it right and do better!
Visit us: www.costway.com
Contact our friendly customer service department for help first.
Replacements for missing or damaged parts will be shipped ASAP!
Advertisement
Table of Contents

Subscribe to Our Youtube Channel
Related Manuals for Costway TL30207


Summary of Contents for Costway TL30207
- Page 1 THIS INSTRUCTION BOOKLET CONTAINS IMPORTANT SAFETY INFORMATION. PLEASE READ AND KEEP FOR FUTURE REFERENCE. Follow Costway Please give us a chance to make it right and do better! Visit us: www.costway.com Contact our friendly customer service department for help first. Replacements for missing or damaged parts will be shipped ASAP!
- Page 2 Contact Us! Do NOT return this item. Contact our friendly customer service department for help first. E-mail US: cs.us@costway.com UK: cs.uk@costway.com Before You Start Before You Start Please read all instructions carefully. Retain instructions for future reference. Separate and count all parts and hardware.
- Page 3 Note: When attaching hardware, hand tighten only until the unit is together, then use the appropriate tools to tighten the hardware.
- Page 4 1.Put a wheel (2) on the end of the Axle (9) and secure it with Flat Washer (11) and Cotter Pin (12). See Figure A. Repeat on the other side. 2.Using four Bolts, Washer, and Nuts (10), attached a Caster (3) to...
- Page 5 3.Connect the bottom (note the hole locations in the diagram) of the Left Support (7a) and Left Plate (15a) to the Bottom Shelf (1) using Bolts, Washers, and Nuts (10). See Figure C. Repeat on other side with Right Support (7b) and Right Plate (15b not shown).
- Page 6 February 24, 2019 Great products so far. Fast delivery, easy setup, and working without any issues. With your inspiring rating, COSTWAY will be more consistent to offer you EASY SHOPPING EXPERIENCE, GOOD PRODUCTS and EFFICIENT SERVICE! US office: Fontana, California...
Need help?
Do you have a question about the TL30207 and is the answer not in the manual?
Questions and answers