Table of Contents
Advertisement
Available languages
Available languages
Quick Links
Advertisement
Chapters
Table of Contents

Related Manuals for TOGU FLOW perfect


Summary of Contents for TOGU FLOW perfect
- Page 1 Benutzerhandbuch User Manual Seite 1 von 14 V06-22...
- Page 2 ändern. Abweichungen der auf den Abbildungen gezeigten Produkten von den aktuell gelieferten Produkten sind möglich. Die Bitte lesen Sie in jedem Fall, bevor Sie mit der Nutzung des TOGU Flow Perfect® beginnen, • die Dokumente mit dem Titel ‚IMPORTANT SAFETY AND PRODUCT INFORMATION‘ und •...
-
Page 3: Copyright
© Copyright 2022 DMB soweit gekennzeichnet Alle Inhalte, insbesondere Texte, Fotografien und Grafiken sind urheberrechtlich geschützt. Alle Rechte, einschließlich der Vervielfältigung, Veröffentlichung, Bearbeitung, Nachahmung und Übersetzung, sind verboten bzw. benötigen der schriftlichen Zustimmung der TOGU GmbH bzw. von DMB. TOGU GmbH info@togu.de... -
Page 4: Wichtige Sicherheits- Und Produktwarnungen
Titel ‚IMPORTANT SAFETY AND PRODUCT INFORMATION‘ befinden. Sollten Sie keinen Zugriff auf diese Dokumente haben, dann beschaffen Sie sich diese Dokumente www.togu.de bevor Sie mit der Nutzung dieses Produktes beginnen. Beachten Sie die Warnungen in den Dokumenten ‚IMPORTANT SAFETY AND PRODUCT INFORMATION‘, um Unfälle oder Sachschäden zu vermeiden. -
Page 5: Table Of Contents
Anwendungsbereich 1 – ‚Motion Plate‘ in Verbindung mit Smart Trainern und Fahrrad ....7 Anwendungsbereich 2 – ‚Balance-Trainings-Platform‘ ..............8 Montage des Smart Trainers ......................... 8 ® Wahoo KICKR V5 auf TOGU Flow Perfect montieren ..............8 ® Wahoo KICKR Core auf Flow Perfect montieren ................ -
Page 6: Lieferumfang Und Produktübersicht
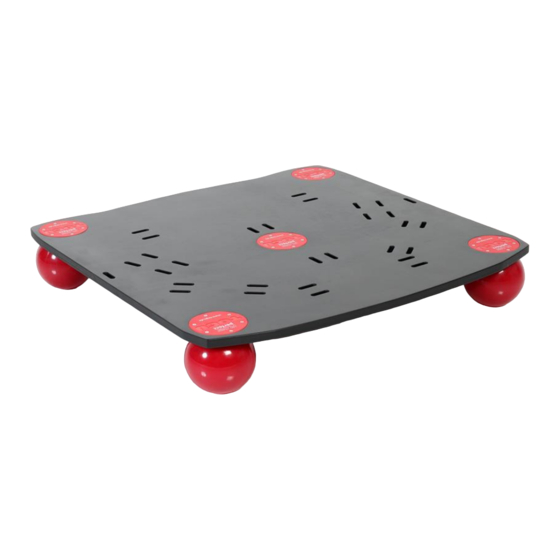
Die Basiseinheit ist bei jeder Variante des TOGU Flow Perfect im Lieferumfang enthalten. Air Buffer ® Ein Satz Air Buffer ist bei jeder Variante des TOGU Flow Perfect Lieferumfang enthalten und mit der Plattform der Basiseinheit montiert. Air Buffer können getauscht werden und sind als Zubehör erhältlich. Gurte ®... -
Page 7: Optionale Vorderradstütze
Bandschleife bewegen können. ® Optionale TOGU FLEXVIT Bänder Das TOGU FLEXVIT ® Multiband ist ein Zubehör zu Flow ® Perfect , das von TOGU bezogen werden kann. Das ® FLEXVIT Multiband ist ein Widerstandsband, mit dem Flow Perfect ® für Stabilisations-... -
Page 8: Anwendungsbereich 2 - 'Balance-Trainings-Platform
KICKR V5 umschlingt und fest sitzt. • Wiederholen Sie dies für alle weiteren Nut-Paare. • Überzeugen Sie sich, ob die Position des wahoo KICKR V5 auf dem TOGU Flow Perfect ® optimal ist und alle Klettbänder festgezogen sind. •... -
Page 9: Tacx Neo 2T Auf Flow Perfect Montieren
• Wiederholen Sie dies für alle weiteren Nut-Paare. • Überzeugen Sie sich, ob die Position des Tacx NEO 2T auf dem TOGU Flow Perfect® optimal ist und alle Klettbänder festgezogen sind. • Damit sind die Voraussetzungen gegeben, das Fahrrad zu montieren. Folgen Sie dabei den Anweisungen des Herstellers des Tacx NEO 2T. -
Page 10: Weitere Smart/Rollentrainer-Modelle Auf Flow Perfect Montieren
® Weitere Smart/Rollentrainer-Modelle auf Flow Perfect montieren Kompatibilität: Flow Perfect ist für die Verwendung in Verbindung allen sogenannten Smart bzw. Rollentrainern bestimmt, welche vollumfänglich auf der Plattform platziert und mit dem mitgelieferten Befestigungsmaterial sicher befestigt werden können (Maße der Plattform 80x80cm) Vorderrad auf Vorderradstütze montieren... -
Page 11: Anpassung An Ihren Anwendungsbereich
Sie, dass die Größe einen Durchmesser von 14cm nicht überschreiten darf. ® Umso größer die Air Buffer sind, umso härter fühlen sich die Bewegungen der Flow Perfect an. Umso kleiner die Air Buffer sind, umso weicher fühlen sich die Bewegungen der Flow ®... - Page 12 Air Buffer direkt vor ® Ihnen steht. Bitte drehen Sie ggf. die Flow Perfect so, dass Sie bequem mit ihren Daumen auf den Flansch der Air Buffer drücken können. (Der Flansch der Air Buffer liegt direkt unter der Abdeckplatte.)
- Page 13 ® 7.) Stellen Sie die Flow Perfect senkrecht, so dass die Öffnung in der Basiseinheit, in die der Air Buffer eingesetzt werden soll, direkt vor Ihnen steht. Bitte drehen Sie ggf. die Flow ® Perfect so, dass Sie den besten Zugang haben.
-
Page 14: Wartung Und Reinigung
Zum Montieren der Ersatz-Klettbänder gehen Sie bitte wie in Kapitel 6 beschrieben, vor. Reinigung ® Zum Reinigen des Flow Perfect können Sie alle milden, handelsüblichen Reinigungs- sowie Desinfektionsmittel verwenden. Bitte keine lösungsmittelhaltigen, säurehaltigen, ätzenden oder mit Schleifmitteln versehenen Reiniger verwenden. Diese greifen die verwendeten Materialien und deren Oberflächen an. - Page 15 The TOGU Flow Perfect ® is not available in all countries or regions. The scope of delivery of the TOGU Flow Perfect is not identical in all countries or regions. The availability of parts and accessories of the ®...
- Page 16 Tacx B.V. This trademark is used exclusively for the purpose of designating only those products of the trademark owner that can be used in connection with the TOGU product presented here and that are used exclusively to describe their functions in connection with joint use.
- Page 17 There are specific safety and product warnings for each application, which can be found in the document titled 'IMPORTANT SAFETY AND PRODUCT INFORMATION'. If you do not have access to these documents, please obtain them from www.togu.de before you begin using this product.
- Page 18 Application area 1 - 'Motion Plate' in conjunction with Smart Trainers and bicycle ...... 7 Application Area 2 - 'Balance Training Platform ................8 Mounting the Smart Trainer ........................8 Mount Wahoo KICKR V5 on TOGU Flow Perfect ® ..............8 Mount Wahoo KICKR Core on Flow Perfect ................
-
Page 19: Scope Of Delivery And Product Overview
The base unit is included in every version of the TOGU Flow Perfect . ® air buffer A set of Air Buffer is included with each version of the TOGU Flow Perfect ® and mounted with the platform of the base unit. Air Buffer can be exchanged and are available as accessories. -
Page 20: Optional Front Wheel Support
Optional front wheel support Dimensions (WxLxH): approx. 200 x 200 x 110 mm The TOGU front wheel support should always be used with a Velcro fastening strap. It loops around the front wheel support through the two grooves and the front wheel. The strap must not be tightly mounted, i.e. -
Page 21: Mounting The Smart Trainer
Please proceed as follows. Place the wahoo KICKR V5 on the TOGU Flow Perfect ® Align the wahoo KICKR V5. Please note that you may need to rotate the Flow Perfect ® 180 degrees. The Flow Perfect ®... -
Page 22: Mount Tacx Neo 2T On Flow Perfect
Repeat this for all further groove pairs. Make sure that the position of the Tacx NEO 2T on the TOGU Flow Perfect® is optimal and that all Velcro straps are tightened. This means that you are ready to mount the bike. Follow the instructions of the manufacturer of the Tacx NEO 2T. -
Page 23: Mounting The Front Wheel On The Front Wheel Support
Information on this can be found in chapter 3. Air Buffer - To change the size of the Air Buffer By changing the size of the Air Buffer, the character of the movement of the Flow Perfect ® be adapted to your wishes. To simplify, this can be compared to the tire pressure on a bicycle. -
Page 24: Replace Air Buffer
1.) Push the air pump piston rod all the way in 2.) Moisten valve needle 3.) Insert the valve needle into the needle valve, but do not apply pressure to the air buffer. 4.) Now perform as many pumping movements as you need. If the Flow Perfect ® was too hard for you, then select 3 pump strokes. - Page 25 7.) Place the Flow Perfect vertically so that the opening in the base unit where the Air Buffer ® is to be inserted is directly in front of you. If necessary, please turn the Flow Perfect ® that you have the best access.
- Page 26 11.) Now press with your thumb on the parts of the flange that have not yet passed through the opening. Gradually slide more parts of the flange through the opening until only a small part remains. 12.) Press on the point where the ends of the flange touch each other that have not yet been passed through the opening.
-
Page 27: Maintenance And Cleaning
Please check the Velcro straps regularly for wear. The Velcro straps can wear out during use. Please replace the Velcro straps when they are worn. You can find replacements at www.togu.de. To mount the replacement Velcro straps, please proceed as described in chapter 6.
Need help?
Do you have a question about the FLOW perfect and is the answer not in the manual?
Questions and answers