Table of Contents
Advertisement
Advertisement
Table of Contents

Summary of Contents for Pantone X-Rite eXact 2
- Page 1 User Guide...
- Page 3 X - R i t e e X a c t 2 Consult this documentation in all cases where the Attention symbol appears. This symbol is used to inform you of any potential HAZARD or actions that may require your attention. CE Declaration Hereby, X-Rite, Inc.
- Page 4 X - R i t e e X a c t 2 Le présent appareil est conforme aux CNR d'Industrie Canada applicables aux appareils radio exempts de licence. L'exploitation est autorisée aux deux conditions suivantes : (1) l'appareil ne doit pas produire de brouillage, et (2) l'utilisateur de l'appareil doit accepter tout brouillage radioélectrique subi, même si le brouillage est susceptible d'en compromettre le fonctionnement.
- Page 5 X - R i t e e X a c t 2 ATTENTION : Risque d‘explosion si la batterie est remplacée par une batterie de type incorrect. Utilisez uniquement le blocbatterie X-Rite au lithium-ion rechargeable et à autoprotection (n° de réf. SE15-48). Dispose of used battery promptly.
-
Page 6: Table Of Contents
X - R i t e e X a c t 2 Table of Contents Introduction and Setup User Manual Information Packaging Power Button Brake Button Adjusting the Display Screen Charging the Battery Pack ... - Page 7 X - R i t e e X a c t 2 Density Measurement Condition Density Functions Available Density Functions Density Display Settings Measurement Procedure Digital Loupe Color Main Screen Color Settings ...
- Page 8 Select a Tool Create a Tool Delete a Tool Clone a Tool Rename a Tool Pantone LIVE Access PantoneLIVE Account Selecting PantoneLIVE Libraries Calibration Calibration Settings Calibration Valid (Hours) ...
- Page 9 X - R i t e e X a c t 2 Cleaning the Touch Display Cleaning the Filters Cleaning the Optics Area Cleaning the White Tile Cleaning Device Wheels Replacing the Battery Pack Troubleshooting ...
-
Page 10: Introduction And Setup
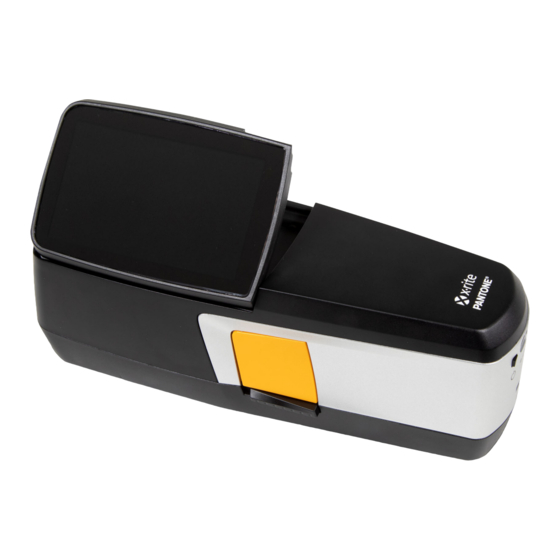
X - R i t e e X a c t 2 INTRODUCTION AND SETUP The X-Rite eXact 2 provides the following key features. Tilt display with touch screen operation Media flattener Wi-Fi network connectivity Supports the following measurement modes according to ISO standards: M3 (not in eXact 2 Xp). -
Page 11: User Manual Information
Packaging Your device packaging should contain all the items listed below. If any of these items are missing or damaged, contact X-Rite or your Authorized Representative. X-Rite eXact 2 device Docking station with integrated calibration tile USB-C interface cable with a USB-C to USB-A adapter ... -
Page 12: Brake Button
X - R i t e e X a c t 2 Brake Button The button on the left side of the device is used to disengage the brake. When the brake is disengaged, the device is easily rolled over the sample for measuring. Pressing and holding the brake button disengages the brake. - Page 13 X - R i t e e X a c t 2 Verify the voltage indicated on the AC adapter complies with the AC line voltage in your area. Operational hazard exists if AC adapters other than X-Rite SE30-377 is used. AC Adapter Ratings Input: 100-240V 50-60 Hz, Output: 12.0 VDC @ 2.5 A Standard X-Rite Power Supply SE30-377 Connection (Wireless Charging Using the Docking Station)
-
Page 14: Connecting The Usb Cable
X - R i t e e X a c t 2 LED Charging Indicators Indicator LEDs are located on the device (5) and the docking station (4). The LEDs show the different charging stati of the battery. Device LED The indicator (2) is located on the back of the device. -
Page 15: Exchanging The Filter Glass
X - R i t e e X a c t 2 2. Turn the device right side up and proceed with the measurements. Storing the Media Flattener When not in use, push the media flattener back into to the device using your finger. Exchanging the Filter Glass The device comes with an Xp filter glass or standard filter glass installed depending on model. - Page 16 X - R i t e e X a c t 2 6. Lower the front edge (4) of the filter glass into the opening and press down until it snaps into place. NOTE: After changing the filter glass, you need to match the Polarizer Status in the Device Settings. 7.
-
Page 17: Exact 2 Suite Software Application
X - R i t e e X a c t 2 eXact 2 Suite Software Application NOTE: You will need to register your eXact 2 device before you have access to download the eXact 2 Suite software. Refer to the Registration section in the Appendix for additional information. You should install the software application before connecting the device to your computer. -
Page 18: User Interface
Device Settings: Set the global settings of the device, for example Wi-Fi, Display, Language etc. See the corresponding sections of this manual for additional information on Tools and Utilities. Navigating the Screen The X-Rite eXact 2 device contains a graphical touch screen display. All functionality is accessed directly through the screen. Opening Tools Tap the icon in the upper right corner of the screen to open the eXact 2 menu. -
Page 19: Selecting A Tool
X - R i t e e X a c t 2 Selecting a Tool The eXact 2 menu shows a list of tools and utilities. Swipe the screen up to view entries at the end of the list and swipe down to view entries at the top of the list. - Page 20 X - R i t e e X a c t 2 2. Tap Region and then select the desired region in the list. Tap the icon to return to the Setup screen and continue. 3. Tap to continue. Enter the device name in the field and tap to continue.
-
Page 21: Basic Sample Measurement Technique
X - R i t e e X a c t 2 9. Tap to finish setup and exit. Continue with the main measurement screen 10. Tap Continue Setup to configure additional settings. Refer to the Device Settings section if continuing the setup. - Page 22 X - R i t e e X a c t 2 2. If required, extend out the media flattener into the aperture area. 3. Select Density or Color. This example explains the steps for Color. 4. Activate targeting mode by pressing the Measure button once. Measure button 5.
-
Page 23: Device Settings
X - R i t e e X a c t 2 DEVICE SETTINGS Use the Device Settings to set the global settings of the device. To access Device Settings: 1. Tap the icon in the upper left corner of the screen to open the eXact 2 menu. 2. -
Page 24: Power Settings
X - R i t e e X a c t 2 NOTE: If you have multiple SSIDs available, please select one in the 2.4 GHz band. This is often displayed in the network name, for example “MyNetwork-2G” and “MyNetwork -5G”. Viewing Saved Networks The Saved Network option displays a list of networks that are saved on the device. -
Page 25: Language
X - R i t e e X a c t 2 Language This option is used to set the language that appears on the device (English, German, French. etc.). Tap Language and select desired language. Date and Time This option is used to set the Time and Date. Tap the desired option and adjust as needed. Regional Settings This option is used to set the Region, Number Separator, Time Format, and Date Format. -
Page 26: Restore To Factory Defaults
X - R i t e e X a c t 2 Polarizer: Displays the device filter status. Options are Standard or Xp. Device Status: Battery Gauge: Depicts the current condition of the battery pack. Indicates the battery pack is fully charged. Indicates the battery pack has a sufficient charge for a substantial number of measurements. -
Page 27: Density
X - R i t e e X a c t 2 DENSITY The main purpose for the Density tool is to automatically detect patch types and colors. Each measurement gets automatically displayed with the function or list of functions determined by a predefined job for different patch types. -
Page 28: Density Settings
X - R i t e e X a c t 2 Solids: The Solids patch type contains a variety of functions that you can select here. Refer to the section Density Functions later in this manual for additional details. Paper: Select Paper and then select Substrate on the right. -
Page 29: Averaging
X - R i t e e X a c t 2 Averaging Used to set the number of measurements required to obtain an average. The number of measurements can be set from 2 to 5 and Off. The number of measurements taken in the sequence is displayed (1) in the bottom left side during the measurement. - Page 30 X - R i t e e X a c t 2 Density Functions The functions determine what measurement values are displayed after a measurement. The available functions are specific to density measurements. To select a solids function: 1. Tap the icon (1) next to the function name at the top of the screen to open the Density View Options.
- Page 31 X - R i t e e X a c t 2 NOTE: Your own jobs appear indented below the menu item Jobs. Refer to the Jobs section that follows for information on Jobs. 3. Review or edit the settings (3) if required. See Density Settings section earlier for additional information. 4.
- Page 32 X - R i t e e X a c t 2 6. Take additional images if required. 7. Refer to the Digital Loupe Manager section later in this document for additional information.
- Page 33 X - R i t e e X a c t 2 COLOR This feature is used to measure solid patches with or without standard comparisons. You can create temporary standards, use a color library, or measure stand-alone samples. Settings and functions can be reviewed and edited as needed before using Color. To access Color: 1.
- Page 34 X - R i t e e X a c t 2 Sample: The sample patch type contains a variety of functions that you can select here. Refer to the section Sample Functions later in this manual for additional details. Paper: Select Paper and then select Substrate on the right.
- Page 35 X - R i t e e X a c t 2 Density Display Settings: Used to configure which color responses are shown. Auto color picks the dominant color response and also displays the last measurements for the other colors (C, M, Y, and K). Spot color picks the dominant spectral density wavelength.
- Page 36 X - R i t e e X a c t 2 M2(UVC) – UV Cut Filter M3(Pol) – Polarization Filter (not in eXact 2 Xp). Active Delta E Method Used to select the ∆E method for color measurements. Options are: CIE ∆E*76, ∆Ecmc, CIE ∆E*00, and CIE ∆E*94.
- Page 37 X - R i t e e X a c t 2 Density & CIE L*a*b* Opacity Density & CIE L*C*h° Printing Plate Density Absolute Color Strength Density Trend Relative Color Strength All Densities NOTE: Refer to the Color and My Tool section in the Appendix for a description of each function. *Some advanced functions are only available in the eXact 2 Plus model.
- Page 38 X - R i t e e X a c t 2 The following graphs are available for selection: Lab Graph Lch Graph These two graphs visualize the measurement values on a color wheel and brightness bar graph. The sample and the standard (if using) are displayed relative to each other and show their location on the color wheel and the L bar.
- Page 39 X - R i t e e X a c t 2 5. Select Paper as the patch type, to take a substrate measurement (if required). Position the device on the substrate and press the Measure button to take a measurement. 6.
- Page 40 X - R i t e e X a c t 2 NOTE: You can tap the icon (5) to open the Density Display Settings to see other density responses or the icon (1) at the bottom of the screen to open the Graph view. See sections Density Display Settings or Graph view earlier for additional information.
- Page 41 X - R i t e e X a c t 2 1. Measure the sample you want to use as a standard. 2. Tap the icon (7) to replace the active standard data with the current measurement. The standard is added to the Quick Standards list.
- Page 42 X - R i t e e X a c t 2 JOBS Jobs are collections of color specifications, specifically grouped to run a print job. Jobs include tolerances, pass/fail tolerances, measurement parameters and contain the standard values for the different patch types (paper, solids, tints, overprints, gray balance, and black CMY).
- Page 43 X - R i t e e X a c t 2 3. Tap the setting (2) you want to change. Additional settings can be accessed by swiping up on the screen. A description of each available setting follows below. 4.
- Page 44 X - R i t e e X a c t 2 CMY Balance Tolerance: Used to set the value for the density balance. The value can range from 0.01 to 0.99. Tone Value Formula: Used to set the tone value formula for dot calculation. The formulas are individually configurable for C, M, Y, K and Spot Colors.
- Page 45 X - R i t e e X a c t 2 M2(UVC) – UV Cut Filter M3(Pol) – Polarization Filter (not in eXact 2 Xp). Illuminant Observer Used to select the illuminant and observer combination. Colorimetric Measurement Condition Used to select the measurement condition for colorimetric (e.g.
- Page 46 X - R i t e e X a c t 2 LabCh LabCh Delta E Trend Paper QC Density & Lab Delta E Trend LabCh Delta E Trend LabCh Inks QC Density & LCh Density & LCh Density Delta E Trend Density Trend Metamerism Contrast...
- Page 47 X - R i t e e X a c t 2 NOTE: If the CMY 100 patch is not measured and the job uses paper compensation, the job is running in G7 Static mode. If the CMY 100 patch is measured, the job is running in G7 Dynamic mode. G7 Gray Balance The G7 job function provides w∆L (Weighted Delta L) and w∆Ch (Weighted Delta Ch) along with the black channel density.
- Page 48 X - R i t e e X a c t 2 Spot Check The function is used to measure a spot color “on the fly” without the need to customize an existing job. The measurements are temporary and the values are deleted once the user leaves this screen and returns to the Job tool.
- Page 49 X - R i t e e X a c t 2 MY TOOL My Tool is a custom tool you can create. It can contain color libraries and different settings. You can edit, copy, and delete tools under My Tool. A tool selected under My Tool is opened as a custom color tool.
- Page 50 X - R i t e e X a c t 2 Create a Tool 1. Select My Tool (1) from the eXact 2 menu. 2. Tap the icon (2). 3. Enter a new tool name using the virtual keyboard (3). 4.
- Page 51 X - R i t e e X a c t 2 3. A list with options to edit the tool opens. 4. Tap Clone (2) to make a copy of the tool. 5. Enter a new tool name using the virtual keyboard (3). 6.
- Page 52 5. Tap Login to access the library selection screens. Selecting PantoneLIVE Libraries 1. After logging in, a list of Pantone libraries that you have access to appears. Tap the search field, enter the library name using the virtual keyboard 2. Tap Enter or swipe the screen until you see the desired PantoneLIVE library.
- Page 53 X - R i t e e X a c t 2 CALIBRATION IMPORTANT: The white tile is dramatically affected by smudge marks and dust, and must be kept clean. It is recommended that the device is cleaned regularly. Refer to the Cleaning section later in this manual for procedure on cleaning the white tile and optics area.
- Page 54 X - R i t e e X a c t 2 NOTE: If the docking station is not connected to power, the device does not automatically detect if it has been placed on the docking station. Tap Manual Calibration to start the calibration process manually. The device looks for the QR code in the docking station and calibrates the device.
- Page 55 X - R i t e e X a c t 2 NETPROFILER NetProfiler includes desktop software and calibration media, that verify and optimize the performance of your eXact 2. You need to purchase NetProfiler and create a NetProfiler account if you are a new user. You can find additional information in the NetProfiler user manual included with your purchase.
- Page 56 X - R i t e e X a c t 2 DIGITAL LOUPE MANAGER The Digital Loupe Manager is used to manage the images that are stored on your device. Images can be selected and deleted from this screen. To access the Digital Loupe Manager: 1.
- Page 57 X - R i t e e X a c t 2 SCAN Jobs can include color bars that require a scan measurement. This is indicated by the color bar icon above the targeting area. In the scan targeting mode, the device display shows guide bars to help you scan the color bars with your eXact 2 device.
- Page 58 X - R i t e e X a c t 2 7. Viewing the targeting screen, position the circle (reticle) (6) in the targeting window over the first patch of the color bar. 8. Press and hold the Measure button and roll the device across the color bar in one continuous motion without stopping.
- Page 59 X-Rite Service Center to find out more about recertification. Service Do not try to disassemble the X-Rite eXact 2 for any reason. Unauthorized disassembly of the equipment will void all warranty claims. Contact X-Rite Support or the nearest X-Rite Service Center if you believe that the device does not work anymore or does not work correctly.
- Page 60 X - R i t e e X a c t 2 Cleaning the Optics Area The optics should be cleaned once a week in a normal environment. If the device is used in a dirty or dusty environment, more frequent cleaning may be required. Carefully lift the device and open the target base.
- Page 61 X - R i t e e X a c t 2 3. Carefully return the calibration cover to its closed position. Cleaning Device Wheels The wheels (1) should only be wiped clean with a cotton cloth dampened (not wet) in water or isopropyl alcohol.
- Page 62 X - R i t e e X a c t 2 Replacing the Battery Pack CAUTION: Risk of explosion if battery is replaced by an incorrect type. Replace only with X-Rite part number SE15-48, self-protected rechargeable lithium-ion battery pack. ATTENTION : Risque d'explosion si la batterie est remplacée par une batterie de type incorrect.
- Page 63 X - R i t e e X a c t 2 Troubleshooting Prior to contacting the support department for device problems, try the applicable solution(s) described below. If the condition persists, contact us using one of the methods listed in the Service Information section. Problem Cause/Solution Wi-Fi network not...
- Page 64 X - R i t e e X a c t 2 Measurement error or Sample being measured is dirty or damaged (e.g. scratched). results appear Obtain new sample. inaccurate. Device requires calibration. Perform a calibration on the device (see Calibration section). Device optics are dirty.
- Page 65 X - R i t e e X a c t 2 Technical Specifications SPECTRAL ENGINE Spectral analyzer: DRS spectral engine Spectral range: 400 nm - 700 nm with 10 nm interval OPTICS Measurement geometry: 45°:0° ring illumination optics, ISO 13655:2017 Measurement aperture: 1.5 mm, 2 mm, 4 mm or 6 mm Light source:...
- Page 66 X - R i t e e X a c t 2 Supports IEEE 802.11 WEP, WPA, WPA2, WPA2-Enterprise Security Power supply: X-Rite P/N: SE30-377 100-240VAC 50/60Hz, 12VDC @ 2.5A Battery: X-Rite P/N: SE15-48 Lithium Ion, 3.60V, 4900 mAh Physical Dimensions: 3.05”H (7.75 cm) 3.2”W (8.13 cm) 8.4”L (21.34 cm) Weight: 1.46 lbs.
- Page 67 X - R i t e e X a c t 2 Color and Density Functions The following is a description of each function. Absolute Color Strength The absolute color strength “K/S” is a measure for the concentration of a color. To determine the color strength you must first choose one of the available calculation methods: Max K/S: K/S is calculated at Point of minimum reflectance in the spectral curve.
- Page 68 X - R i t e e X a c t 2 CIE L*C*h° This function is a colorspace equivalent to CIEL*a*b*, the main difference is that in L*a*b* the color values are plotted in a Cartesian coordinate system, while L*C*h° is polar coordinate system. L* stays the same, but C* refers to chroma or strength which is the radius and h°...
- Page 69 X - R i t e e X a c t 2 Density Trend This function displays a bar graph of the density values of up to the last ten readings taken towards a particular density color response. An overall average for that particular density color response is shown at the top for all readings taken in the trend graph (even if more than 10 readings are taken).
- Page 70 X - R i t e e X a c t 2 Depending on the circumstances, different formulas can be selected for the calculation of the absolute color strength K/S. For transparent inks, the sample color must be applied in an equally thick layer as the standard color.
- Page 71 Corporate Headquarters X-Rite, Incorporated 4300 44th Street SE Grand Rapids, Michigan 49512 Phone 1 800 248 9748 or 1 616 803 2100 Fax 1 800 292 4437 or 1 616 803 2705 European Headquarters X-Rite Europe GmbH Althardstrasse 70 8105 Regensdorf Switzerland Phone (+41) 44 842 24 00 Fax (+41) 44 842 22 22...
Need help?
Do you have a question about the X-Rite eXact 2 and is the answer not in the manual?
Questions and answers