
Related Manuals for HOMCOM 920-077V70


Summary of Contents for HOMCOM 920-077V70
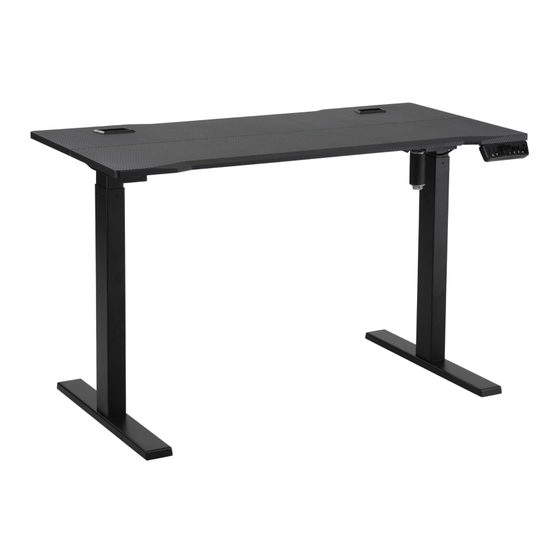
- Page 1 INcfb062_UK_DE 920-077V70_920-077V90 IMPORTANT, RETAIN FOR FUTURE REFERENCE: READ CAREFULLY ASSEMBLY & INSTRUCTION MANUAL...
-
Page 2: Caution / Information
CAUTION / INFORMATION IMPORTANT: Please read this manual carefully. 1. This height adjustable desk has electric motors and is designed for use in dry work areas only 2. Make sure no obstacles are in the desk’s path. Make sure the desktop is not touching any walls. Make sure all cords are appropriate length to accommodate the change in height. -
Page 3: Safety Instructions
SAFETY INSTRUCTIONS 1. Keep all electrical components away from liquids. There is a risk of injury and electric shock. 2. Keep children away from electric height adjustable desks, control units and memory controller. There is a risk of injury and electric shock. 3. - Page 4 EXPLODED DRAWING/EXPLOSIONSZEICHNUNG: Input voltage 100-240 Input AC frequency 50/60 Output voltage DC29 Output current 52.2 Output power Average active efficiency Efficiency at low load (10 %) No-load power consumption...
- Page 5 Parts/Teile:...
- Page 9 Firstly Left Right NOTE When installing, first install the thin end, then pull the thick end. Make sure assemble to the end position. Rotate slightly part for easy assembling. HINWEIS Montieren Sie bei der Montage zuerst das dünne Ende und ziehen Sie dann das dicke Ende.
- Page 10 NOTE Make sure all the screws are tightened up after finish the desk frames Make sure the desk legs are vertical to the ground Hinweis Stellen Sie sicher, dass alle Schrauben nach Fertigstellung der Tischrahmen fest angezogen sind. Stellen Sie sicher, dass die Tischbeine senkrecht zum Boden stehen. 100%...
- Page 11 -10-...
- Page 12 NOTE Connect all the plugs before connecting the external power source (100-240V). Hinweis Schließen Sie alle Stecker an, bevor Sie die externe Stromquelle (100-240 V) anschließen. -11-...
- Page 13 The useage of cable tie clamps. 1.The surface must be clean, uniform, and dry. Do not use it on concrete, rough, or loose surfaces. 2.Carefully remove the body paper when using it, then quickly place the product in the proper position and press it firmly to maintain complete contact.
- Page 14 Die Verwendung von Kabelbinderklemmen. 1. Die Oberfläche muss sauber, gleichmäßig und trocken sein. Verwenden Sie das Gerät nicht auf Beton, rauen oder losen Oberflächen. 2. Entfernen Sie bei der Verwendung vorsichtig das Schutzpa pier, bringen Sie das Produkt dann schnell in die richtige Posi tion und drücken Sie es fest an, um einen vollständigen Kontakt zu gewährleisten.
-
Page 15: Reset Procedure
I. Reset Procedure IMPORTANT: You must reset the desk prior the use. Make sure no obstacles are in the desk’s path. Make sure the desktop is not touching any walls. Make sure all cords are appropriate length to accommodate the change in height. RESET : In the "E10, E20, E60"... -
Page 16: Parameter Setting
V . Memory height Setting In normal state ,press the s button ,the height start to flash.If press button ,the LED display will show “1”and record the current height to the height . If press button ,the LED display will show “2” and record the current height to the height . - Page 17 description Main menu interface Submenu interface. Press button ,it displayed the last set height unit SI Metric value .Use button to flip in the option (SI ,IN- )After selecting ,Press button to save the current option value and keep the current for 2 seconds to exit Unit Inch the setting mode .
-
Page 18: Troubleshooting
VII. Trouble Shooting Below are the possible errors which can be displayed. The errors will only be displayed when a button is pressed. Description Error code Resolve Hot: This protection may be initiated for continuous Over-heating protection long-term operation and should be re-powered or waited for at least 18 minutes before use. - Page 19 I. Rücksetzablauf WICHTIG: Sie müssen den Tisch vor der Benutzung zurücksetzen. Stellen Sie sicher, dass sich keine Hindernisse im Weg des Tisches befinden. Stellen Sie sicher, dass die Tischplatte keine Wände berührt. Vergewissern Sie sich, dass alle Kabel die richtige Länge haben, um die Höhenverstellung zu ermöglichen.
- Page 20 V. Einstellung der Memory-Höhe Im Normalzustand, wenn Sie die Taste s drücken, beginnt die Höhe zu blinken. Wenn Sie die Taste drücken, wird auf dem LED-Bildschirm „1“ angezeigt und dies zeichnet die aktuelle Höhe bis zur Höhe auf. Wenn Sie die Taste drücken, wird auf dem LED-Bildschirm „2“...
- Page 21 Hauptmenü- Untermenü-Ober beschreibung Oberfläche fläche. Drücken Sie die Taste , es wird der zuletzt eingestellte Wert der Höheneinheit angezeigt. Verwenden Sie die Tasten Metrisch um die Option (SI, IN-) auszuwählen. Nach der Auswahl drücken Sie die Taste , um den aktuellen Optionswert zu Einheit Zoll speichern und halten Sie den Strom für 2 Sekunden, um den...
- Page 22 VII. Fehlerbehebung Nachfolgend sind die möglichen Fehler aufgeführt, die angezeigt werden können. Die Fehler werden nur angezeigt, wenn eine Taste gedrückt wird. Fehlercode Beschreibung Beheben Heiß: Dieser Schutz kann bei kontinuierlichem Langzeitbetrieb ausgelöst werden sollte HEISS Überhitzungsschutz mindestens 18 Minuten vor der Verwendung erneut eingeschaltet werden oder pausiert werden.
Need help?
Do you have a question about the 920-077V70 and is the answer not in the manual?
Questions and answers