Advertisement
Quick Links
MQ-L500 User's Manual
Digital Voice Recorder & Cellphone Portable Charger
Caution in use
Please be sure to read user's manual before use and use product safely and properly.
Warning -
Do not leave product alone in high temperature more than 40 degrees like a car, or that can be the cause of explosion and fire.
* The pictures in user's manual can be different from the real thing and contents can be changed without prior notice to improve performance.
* To use product with other devices, check the compatibility each other first.
* We are not responsible for the loss of recordings caused by misuse, after-sale service, others.
* We are not responsible for the damage caused by the use of product and for the third party's claim for compensation.
* Decomposition, remodeling, impact or usage at low temperature, high temperature, humid place can be the cause of breakdown.
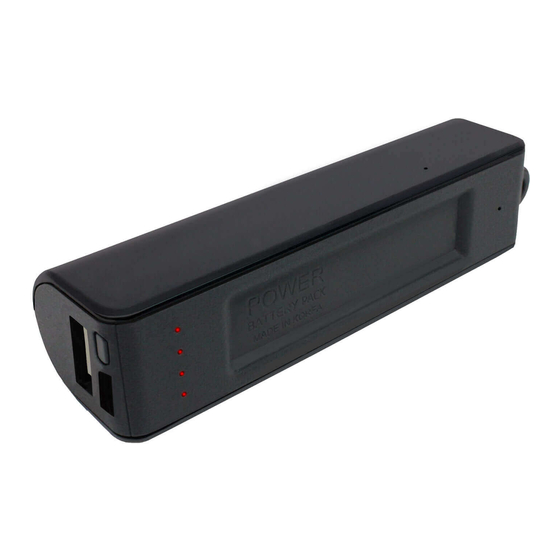
Name of each part
ⓐ
ⓐCharging terminal for external device
ⓑCharging/USB terminal for body
ⓒBattery button
ⓓBattery remains LED
ⓔRecording LED
ⓑ
ⓒ
ⓕMicrophone
ⓖRecording switch
Composition
Using magnet
You can install product easily by using magnet.
* Attach magnet on the groove of product and put product near steel desk,
steel electronic appliances, etc. and product is attached.
* When you detach product in separating, magnet can be attached to the installation place.
Detach magnet and keep it.
Body
Magnet
USB cable
User's Manual
Charging body
After connectng USB cable to body charging terminal(ⓑ), charge it by connecting to the charging adaptor(option) or PC USB port.
* In charging by connecting product to PC with USB cable, in case of low power supply current, charging speed can be slow.
* During charging, product and charger can be a little hot. That is normal phenomenon and does not influence the life or function of product.
* During charging, like below picture, blinking LED is changed to lighting in order according to battery capacity.
When charging is completed, all LED are turned on.
<Battery status during charging>
0% . . 25% . . 50% . . 70% . . 100%
Battery type
Li-ion
Battery capacity
3,000mAh(3.7V)
Power input
DC 5V, 1A
*Charging time condition :
Power output
DC 5V, 2A(Max)
- AC/DC adaptor is data measured by using 5V/2A product.
Body charging time
AC/DC adaptor - about 3 hours, PC - about 5 hours
- PC is data measured by connecting USB cable to the USB port at the rear of PC.
Checking battery remains
You can check battery remains by pressing batteryr button(ⓒ).
* Battery remains is indicated for 20 seconds.
Charging external device from body
After connecting USB cable to charging terminal for external device,
connect the other end to the connector of external device.
Press battery button(ⓒ), and the charging of external device starts.
* When charging is completed, power is turned off automatically.
* This product is used as an auxiliary battery and
the batteries of some devices can not be charged completely.
* During recording, it can not charge external device.
Certification No.:
MSIP-REM-ESO-MQ-L500
ⓕ
ⓔ
ⓖ
ⓓ
Place to attach magnet
Magnet
Charging
USB
Body
adaptor
cable
<Battery remains indication>
Lights-out(turned off)
Blinking(flickering)
Lighting(turned on)
0% . . 25% . . 50% . . 70% . . 100%
* In charging cellphone, battery is consumed a lot.
For recording, use it after recharging body.
MQ-L500 User's Manual
Digital Voice Recorder & Cellphone Portable Charger
Connecting it to PC
After connecting USB cable to the USB terminal(ⓑ) of body, connect the other end to the USB port of PC.
* To use it on PC, keep recording switch(ⓖ) in the state of stop.
* You can use the functions of "copy, delete, playback, format" on PC in the same way as general USB memory.
* When it is connected to PC, "MemoQ(removable disk)" is created, double-click it, and there is the folder of VOICE.
Stop
* In separating product from PC, perform "safe removal of hardware" to prevent data damage.
Date & time setup
* After connecting USB cable to USB terminal(ⓑ) of body, connect the other end to the USB port of PC.
* Double-click "MEMOQ(removable disk), and there is "Time Setup".
* Double-click "Time Setup", the window of "date_time.cfg creator" is opened on wallpaper.
Click the button of "Start".
* After checking the creation of date_time.cfg file, separate product from PC,
and recording LED(ⓔ) blinks rapidly and time setup is completed.
**Caution1 : date and time configured in PC is set up automatically.
**Caution2 : When battery is discharged, date is initialized. Perform time setup again before recording.
**Caution3 : Copy the program of Time Setup into PC and keep it.
In case that product is formatted or program is deleted, you can copy the program into product and use it.
Recording
(continuous recording / super voice operated recording system / recording by external power)
When recording starts, recording LED(ⓔ) is turned on for about 5 seconds,
and it is not turned on in case of the shortage of memory storage and excess of 9,999 file numbers.
* When you turn recording switch(ⓖ) to the direction of 『
』,continuous recording starts after about 5 seconds.
(Recording files are split by 5 hours and are saved.)
* When you turn recording switch(ⓖ) to the direction of 『
』, super voice operated recording system(SVOS) starts after about 5 seconds.
In case of super voice operated recording system(SVOS), if there is no sound for 1 minute during recording, it saves recording and is converted
to standby mode and start recording again automatically when sound is detected.
* When you move the groove of recording switch(ⓖ) to the center, recording stops and current recordings are saved.
Recording file is saved in the folder of VOICE as a format of MP3.
* Recording by using external power :
When you connect product to PC or charging adaptor during recording, you can record for a long time. (refer to "charging body")
During recording by using external power, recording LED(ⓔ) blinks in the interval of 5 seconds
and you can record up to the recording time per memory.
Super Voice Operated Recording System(SVOS)
Deleting recording files
* When you format MemoQ(removable disk), all data of product are deleted.
** Caution : It supports the format type of FAT32 only. If you change to other type, product does not work properly.
** Caution : Data deleted once can not be restored.
Specification
USB Memory
8GB
16GB
32GB
In SVOS, recordable time after
Recording time
about 288 hrs / about 576 hrs / about 1152 hrs
standby time of no recording
about 14 days(336hrs) in continuous recording
Battery remains
Hours of battery use
about 150 days in SVOS standby recording
(Recordable time)
[sound detection level : about 60dB(A)]
336
268
No of recording file
9,999 files
Dimension,Weight
93(W) x 27(H) x 23(D) mm, 75g
Power
Li-ion, 3.7V, 3,000mAh
0
Operating environment
temperature:0~ 40℃, humidity:20~80%
0
30
Accessories
USB cable, magnet, user's manual
MADE IN KOREA
USB cable
Body
『
』
Continuous Recording
ⓔ
Stop
ⓖ
『
』
Warranty Card
Product Name
Voice Recorder & Portable Charger
Model No.
Purchasing Date
Purchasing Place
Tel
201
Others
134
1 year from purchasing date
Warranty Period
67
0
Name
Address
60
90
120
150(Standby day)
Tel.
Paid service
- Defect caused by careless use.
- Defect caused by user's internal modification.
- Defect caused by natural disasters like fire,
salt damage, flood, earthquake, etc.
- Defect out of warranty period.
MQ-L500
Advertisement

Summary of Contents for Memoq MQ-L500
- Page 1 * The pictures in user's manual can be different from the real thing and contents can be changed without prior notice to improve performance. * When it is connected to PC, "MemoQ(removable disk)" is created, double-click it, and there is the folder of VOICE.
- Page 2 Die Abbildungen im Benutzerhandbuch können von der Realität abweichen, und der Inhalt kann ohne vorherige Ankündigung geändert werden, um die Leistung zu verbessern. Wenn es mit dem PC verbunden ist, wird „MemoQ (Wechseldatenträger)“ erstellt, doppelklicken Sie darauf und es erscheint der Ordner VOICE.
- Page 3 Les images du manuel de l'utilisateur peuvent être différentes de la réalité et le contenu peut être modifié sans préavis pour améliorer les performances. Lorsqu'il est connecté au PC, "MemoQ (disque amovible)" est créé, double-cliquez dessus, et il y a le dossier de VOICE.
- Page 4 Las imágenes del manual del usuario pueden diferir de las reales y el contenido se puede cambiar sin previo aviso para mejorar el rendimiento. Cuando está conectado a la PC, se crea "MemoQ (disco extraíble)", haga doble clic en él y aparecerá la carpeta de VOZ.
- Page 5 6912 – 150 Gün Bekleme Özellikli USB Güç Bankası Ses Kayıt Cihazı Pil Nasıl Şarj Edilir: • Ses kaydediciyi sağlanan USB kablosuyla bir PC'ye veya USB güç kaynağına bağlayın • Güç için takıldığında, cihazın şarj olduğunu gösteren dört ışığı vardır. • Tamamen şarj olması 5 saat sürer •...
- Page 6 Pil Ömrü Nasıl Test Edilir: • Göstergeden pil durumunu kontrol etmek için Mikro USB bağlantı noktasının yanındaki düğmeye tıklayın ışıklar Ses Dosyası Nasıl Kaydedilir: • Cihazın üstünde bölmeli bir geçiş tekerleği bulunur • USB ve MQ U310'lu yan taraftaki Divot'un altında görülmesi zor iki sembol (-) &...
- Page 7 Bilgisayardaki Dosyalar Nasıl Silinir: • Cihazı PC'ye bağlayın • Bağlandığında PC, cihazı çıkarılabilir disk olarak tanıyacaktır. • SES klasörünü açın • Çalmak istediğiniz dosyaya çift tıklayın. • Bir dosyayı SİLMEK için sağ tıklayın ve açılır menüden SİL'i seçin. NOT: Dosyaları bu cihazlarda oynatmak için .MP3 formatını çalabilen bir medya oynatıcı indirmeniz gerekebilir. VLC medya oynatıcısını...
- Page 8 • Ses Klasörü • Zaman Kurulum Programı • date_time.cfg Not: Zaman Kurulum Programı mevcut değilse, zaman çalışmayacaktır. • Aygıtı bilgisayardan güvenli bir şekilde çıkarın ve içeri aktarmak için yeni bir kayıt oluşturun. düzeltilmiş saat ve tarih damgası • Cihaz bilgisayara tekrar bağlandığında, cihazın yeni saat ve tarihi kabul ettiğini gösteren date_time.cfg dosyası...
- Page 9 Google Chromebook'ta SAAT ve TARİH Nasıl Ayarlanır: • Cihazı Chromebook'un USB bağlantı noktasına bağlayın • Yapılacak ilk şey, yeni bir .txt dosyası oluşturmaktır • Windows simge düğmesine benzer şekilde O simgesini (uygulama başlatıcısı olarak adlandırılır) seçin. ekranın sol alt köşesi. •...
- Page 10 Google Chromebook'ta dosyalar nasıl oynatılır: • Cihazı Chromebook'un USB bağlantı noktasına bağlayın • Bir açılır menü oluşabilir, bu durumda “Dosyaları Görüntüle”yi seçin • Bir açılır pencere oluşmazsa, O simgesini seçin (uygulama başlatıcısı olarak adlandırılır) “benzer ekranın sol alt köşesinde bulunan bir Windows simgesi düğmesi”. •...
- Page 11 Android Akıllı Telefon veya Tablet ile SAAT ve TARİH Nasıl Ayarlanır: • Bu işlem için bir OTG kablosu gereklidir. • Daha fazla adım için spycentre.com'daki OTG kablo kılavuzuna bakın. *OTG Kablosu Ayrı Satılır. Web sitemizden 19.99$'a satın alın Parça #4159* • Cihazınızın Deposuna gidin ve Harici Belleği arayın.
- Page 12 Dosyaları bir Android Akıllı Telefon veya Tablette Nasıl Oynatılır: • Bu işlem için bir OTG kablosu gereklidir. • Cihaz Deponuza gidin ve Harici Belleği arayın. İçeride tüm dosyalar olacak yakalananları gözden geçirmek için üzerine tıklayabilirsiniz. • Diğer tüm adımlar için spycentre.com adresindeki OTG kablo kılavuzuna bakın *OTG Kablosu Ayrı...
- Page 13 VLC ortamı nasıl indirilir ve kullanılır (Windows) • www.videolan.org adresine gidin • “VLC'yi İndir”e tıklayın • Yeni bir pencere açacak ve indirmeye başlayacaktır • İndirmeye otomatik olarak başlamazsa, Burayı tıklayın'a basın ve aşağıdakilerden birini seçin. yansıtılmış siteler • İndirme işlemi tamamlandıktan sonra Çalıştır ve kur'u seçin • Bittiğinde artık PC'nizde bir VLC simgesi mevcut olacaktır •...
- Page 14 6912 – USB Power Bank Audio Recorder s pohotovostním režimem 150 dní Jak nabíjet baterii: • Připojte audiorekordér k PC nebo USB napájecímu zdroji pomocí dodaného USB kabelu • Když je zařízení připojeno k napájení, má čtyři kontrolky indikující nabíjení. • Plné nabití trvá 5 hodin • Blikající kontrolky LED = Nabíjení...
- Page 15 Jak otestovat výdrž baterie: • Klepnutím na tlačítko vedle portu Micro USB zkontrolujte stav baterie pomocí indikátoru světla Jak nahrát zvukový soubor: • Na horní straně zařízení je přepínací kolečko s drážkou • Pod čepem na straně s USB a MQ U310 jsou dva špatně viditelné symboly (-) &...
- Page 16 Jak smazat soubory na PC: • Připojte zařízení k počítači • Po připojení počítač rozpozná zařízení jako vyměnitelný disk. • Otevřete složku VOICE • Poklepejte na soubor, který chcete přehrát. • Chcete-li soubor ODSTRANIT, klepněte pravým tlačítkem myši az místní nabídky vyberte příkaz DELETE.
- Page 17 • Hlasová složka • Program nastavení času • date_time.cfg Poznámka: Pokud není k dispozici program nastavení času, čas nebude fungovat. • Bezpečně vyjměte zařízení z počítače a vytvořte nový záznam pro import opravené časové a datumové razítko • Když je zařízení znovu připojeno k počítači, soubor date_time.cfg by již neměl být přítomen, což znamená, že zařízení...
- Page 18 Jak nastavit ČAS a DATUM na Google Chromebooku: • Připojte zařízení k portu USB Chromebooku • První věc, kterou musíte udělat, je vytvořit nový soubor .txt • Vyberte ikonu O (nazývanou spouštěč aplikací), podobnou tlačítku ikony systému Windows, umístěnou v levém dolním rohu obrazovky.
- Page 19 Jak přehrávat soubory na Google Chromebook: • Připojte zařízení k portu USB Chromebooku • Může se zobrazit vyskakovací nabídka, pokud ano, vyberte možnost „Zobrazit soubory“ • Pokud se vyskakovací okno nezobrazí, vyberte ikonu O (nazývanou spouštěč aplikací) „podobnou tlačítko ikony Windows“ umístěné v levém dolním rohu obrazovky. •...
- Page 20 Jak nastavit ČAS a DATUM pomocí chytrého telefonu nebo tabletu Android: • Pro tento proces je vyžadován kabel OTG. • Další kroky naleznete v průvodci kabelem OTG na spycentre.com * Kabel OTG se prodává samostatně. Zakupte si jeden na našem webu za 19,99 $, část #4159* • Přejděte do úložiště...
- Page 21 Jak přehrávat soubory na chytrém telefonu nebo tabletu Android: • Pro tento proces je vyžadován kabel OTG. • Přejděte do Úložiště zařízení a vyhledejte Externí paměť. Uvnitř budou všechny soubory na který můžete kliknout a prohlédnout si, co bylo zachyceno. • Všechny ostatní...
- Page 22 Jak stahovat a používat média VLC (Windows) • Přejděte na www.videolan.org • Klikněte na „Stáhnout VLC“ • Otevře se nové okno a zahájí se stahování • Pokud se stahování nezačne automaticky, stiskněte tlačítko Klikněte sem a vyberte jednu z zrcadlené stránky •...
- Page 23 6912 – USB Power Bank-audiorecorder met 150 dagen stand-by Hoe de batterij op te laden: • Sluit de audiorecorder aan op een pc of USB-voeding met de meegeleverde USB-kabel. • Als het apparaat is aangesloten op de voeding, heeft het vier lampjes om aan te geven dat het wordt opgeladen. • Duurt 5 uur om volledig op te laden •...
- Page 24 De levensduur van de batterij testen: • Klik op de knop naast de Micro-USB-poort om de batterijstatus te controleren via de indicator lichten Hoe een audiobestand op te nemen: • Bovenop het apparaat zit een tuimelwiel met een divot • Onder de divot aan de zijkant met USB &...
- Page 25 Hoe bestanden op een pc te verwijderen: • Sluit het apparaat aan op de pc • Als het apparaat is aangesloten, herkent de pc het apparaat als een verwisselbare schijf. • Open de VOICE- map. • Dubbelklik op het bestand dat u wilt afspelen. • Om een bestand te VERWIJDEREN, klikt u met de rechtermuisknop en selecteert u VERWIJDEREN in het pop-upmenu.
- Page 26 • Spraakmap • Tijdinstellingsprogramma • date_time.cfg Opmerking: als het tijdinstellingsprogramma niet aanwezig is, werkt de tijd niet. • Werp het apparaat veilig uit de computer en maak een nieuwe opname om de gecorrigeerde tijd- en datumstempel • Wanneer het apparaat opnieuw op de computer wordt aangesloten, zou het date_time.cfg-bestand niet langer aanwezig moeten zijn, wat aangeeft dat het apparaat de nieuwe tijd en datum heeft geaccepteerd.
- Page 27 TIJD en DATUM instellen op een Google Chromebook: • Sluit het apparaat aan op de USB-poort van de Chromebook • Het eerste wat u moet doen is een nieuw .txt-bestand maken • Selecteer het O- pictogram (de app-opstartprogramma genoemd), vergelijkbaar met een Windows-pictogramknop, die zich in de linkerbenedenhoek van het scherm.
- Page 28 Bestanden afspelen op een Google Chromebook: • Sluit het apparaat aan op de USB-poort van de Chromebook • Er kan een pop-upmenu verschijnen, selecteer in dat geval "Bestanden bekijken" • Als er geen pop-up verschijnt, selecteer dan het O-pictogram (de app-opstartprogramma genoemd) "vergelijkbaar met een Windows-pictogramknop”...
- Page 29 TIJD en DATUM instellen met een Android-smartphone of -tablet: • Voor dit proces is een OTG-kabel vereist. • Raadpleeg voor meer stappen de OTG-kabelgids op spycentre.com *OTG-kabel apart verkrijgbaar. Koop er een op onze website voor $ 19,99 Part #4159* • Ga naar je apparaatopslag en zoek naar het externe geheugen.
- Page 30 Bestanden afspelen op een Android-smartphone of -tablet: • Voor dit proces is een OTG-kabel vereist. • Ga naar je apparaatopslag en zoek naar het externe geheugen. Binnenin zullen alle bestanden zijn waarop u kunt klikken om te bekijken wat er is vastgelegd. • Raadpleeg voor alle andere stappen de OTG-kabelgids op spycentre.com *OTG-kabel apart verkocht.
- Page 31 VLC-media downloaden en gebruiken (Windows) • Ga naar www.videolan.org • Klik op “Download VLC” • Het opent een nieuw venster en begint met downloaden • Als het niet automatisch begint met downloaden, drukt u op Klik hier en selecteert u een van de gespiegelde sites •...
- Page 32 Bilderna i användarmanualen kan skilja sig från den verkliga varan och innehållet kan ändras utan föregående meddelande för att förbättra prestandan. När den är ansluten till PC skapas "MemoQ(flyttbar disk)", dubbelklicka på den och där finns mappen VOICE. För att använda produkten med andra enheter, kontrollera kompatibiliteten med varandra först.
- Page 33 6912 – Rejestrator audio USB Power Bank z 150-dniowym trybem czuwania Jak naładować baterię: • Podłącz dyktafon do komputera lub zasilacza USB za pomocą dostarczonego kabla USB. • Po podłączeniu do zasilania urządzenie ma cztery kontrolki wskazujące ładowanie. • Pełne naładowanie zajmuje 5 godzin • Migające diody LED = Ładowanie •...
- Page 34 Jak sprawdzić żywotność baterii: • Kliknij przycisk obok portu Micro USB, aby sprawdzić stan baterii na wskaźniku światła Jak nagrać plik audio: • Na górze urządzenia znajduje się pokrętło z wgłębieniem • Pod wgłębieniem z boku z USB i MQ U310 znajdują się dwa trudne do zobaczenia symbole (-) &...
- Page 35 Jak usunąć pliki na komputerze: • Podłącz urządzenie do komputera • Po podłączeniu komputer rozpozna urządzenie jako dysk wymienny. • Otwórz folder VOICE • Kliknij dwukrotnie plik, który chcesz odtworzyć. • Aby USUNĄĆ plik, po prostu kliknij prawym przyciskiem myszy i wybierz USUŃ z menu podręcznego. UWAGA: Aby odtworzyć...
- Page 36 • Folder głosowy • Program do ustawiania czasu • date_time.cfg Uwaga: Jeśli program ustawiania czasu nie jest obecny, czas nie będzie działał. • Bezpiecznie wysuń urządzenie z komputera i utwórz nowe nagranie, aby zaimportować poprawiony znacznik czasu i daty • Gdy urządzenie zostanie ponownie podłączone do komputera, plik date_time.cfg nie powinien już być obecny, co oznacza, że urządzenie zaakceptowało nowy czas i datę.
- Page 37 Jak ustawić GODZINĘ i DATĘ Chromebooka Google: • Podłącz urządzenie do portu USB Chromebooka • Pierwszą rzeczą do zrobienia jest utworzenie nowego pliku .txt • Wybierz ikonę O (zwaną uruchamianiem aplikacji), podobną do przycisku ikony systemu Windows, znajdującą się w w lewym dolnym rogu ekranu.
- Page 38 Jak odtwarzać pliki na Chromebooku Google: • Podłącz urządzenie do portu USB Chromebooka • Może pojawić się wyskakujące menu, jeśli tak, wybierz „Wyświetl pliki” • Jeśli wyskakujące okienko się nie pojawi, wybierz ikonę O (zwaną uruchamianiem aplikacji) „podobną do przycisk z ikoną systemu Windows” znajdujący się w lewym dolnym rogu ekranu. •...
- Page 39 Jak ustawić GODZINĘ i DATĘ za pomocą smartfona lub tabletu z systemem Android: • Do tego procesu wymagany jest kabel OTG. • Więcej kroków znajdziesz w przewodniku po kablach OTG na stronie spycentre.com *Kabel OTG sprzedawany oddzielnie. Kup jeden na naszej stronie internetowej za 19,99 USD Część #4159* • Przejdź...
- Page 40 Jak odtwarzać pliki na smartfonie lub tablecie z systemem Android: • Do tego procesu wymagany jest kabel OTG. • Przejdź do pamięci urządzenia i poszukaj pamięci zewnętrznej. Wewnątrz będą wszystkie pliki które możesz kliknąć, aby sprawdzić, co zostało przechwycone. • Wszystkie inne kroki można znaleźć...
- Page 41 Jak pobrać i używać nośnika VLC (Windows) • Wejdź na www.videolan.org • Kliknij „Pobierz VLC” • Otworzy się nowe okno i rozpocznie pobieranie • Jeśli pobieranie nie rozpocznie się automatycznie, naciśnij Kliknij tutaj i wybierz jeden z witryny lustrzane • Po zakończeniu pobierania wybierz Uruchom i zainstaluj • Po zakończeniu ikona VLC będzie teraz dostępna na Twoim komputerze •...
- Page 42 6912 – USB Power Bank Audio Recorder with 150 Day Standby How to Charge the Battery: ● Connect the audio recorder to a PC or USB power supply with the provided USB cable ● When plugged in for power, the device has four lights to indicate charging. ●...
- Page 43 How to Test Battery life: ● Click the button next to the Micro USB port to check the battery status from the indicator lights How to Record an Audio File: ● On top of the device is a toggle wheel with a divot ●...
- Page 44 How to Delete Files on a PC: ● Connect the device to the PC ● When connected the PC will recognize the device as a removable disk. ● Open the VOICE folder ● Double click the file you wish to play. ●...
- Page 45 ○ Voice Folder ○ Time Setup Program ○ date_time.cfg Note: If the Time Setup Program is not present the time will not work. ● Safely eject the device from the computer and create a new recording to import the corrected time and date stamp ●...
- Page 46 How to Set TIME and DATE a Google Chromebook: ● Connect the device to the USB port of the Chromebook ● The first thing to do is to create a new .txt file ● Select the O icon (called the app launcher), similar to a windows icon button, located in the bottom left corner of the screen.
- Page 47 How to Playback files on a Google Chromebook: ● Connect the device to the USB port of the Chromebook ● A pop-up menu may occur, if so select “View Files” ● If a pop-up does not occur, select the O icon (called the app launcher) “similar to a windows icon button”...
- Page 48 How to Set TIME and DATE with an Android Smartphone or Tablet: ● An OTG cable is required for this process. ● For More steps refer to the OTG cable guide on spycentre.com *OTG Cable Sold Separately. Purchase one on our website for $19.99 Part #4159* ●...
- Page 49 How to Playback files on an Android Smartphone or Tablet: ● An OTG cable is required for this process. ● Go to your Device Storage and look for the External Memory. Inside will be all the files that you can click on in order to review what was captured. ●...
- Page 50 How to download and use VLC media (Windows) ● Go to www.videolan.org ● Click the “Download VLC” ● It will open a new window and begin downloading ● If it does not automatically begin downloading, press the Click here and select one of the mirrored sites ●...
-
Page 51: Kratka Navodila
Kratka navodila 1) Za polnjenje naprave, napravo priključite prek USB kabla v adapter PC ali moči 2) Če vklopite stikalo za snemanje položaj "-" naprava začne po približno 5 sekundah samodejno neprekinjeno snemanje 3) Če vklopite stikalo v položaj snemanja. " "Naprava začne po približno 5 sekundah samodejno zabeležijo v"... - Page 52 3. polnjenje Naprava ima vgrajeno baterijo za polnjenje. Za polnjenje naprave, napravo priključite preko USB kabla na računalnik ali napajalnika. Po priključitvi naprave na LED baterijska LED bo osvetljena s polnjenjem baterije. 4. status baterije Preverjanje stanja baterije s pritiskom na "stanje baterije" - LED zasveti za 20 sekund.
- Page 53 ko popolna izpraznitev baterije, se nastavitve izbrišejo in je treba narediti še TIP: enkrat. Nastavitev kakovosti zvoka Kakovost zvoka je določeno v "času Setup". Narediti spremembo v polje "Način (Record kakovosti)." Nastavitev aktivacije zvok glasnosti Obseg zvok, ki se začne s snemanjem nastaviti v "času Setup". Sprememba, ki jo bo v stolpcu "SVOS Level".
-
Page 54: Tehnični Podatki
6. snemanje Če vklopite stikalo za snemanje položaj "-" naprava začne po približno 5 sekundah samodejno neprekinjeno snemanje. Če vklopite stikalo v položaj snemanja. " "Naprava začne po približno 5 sekundah samodejno zabeležijo v" glasovnim upravljanjem ". Če naprava ne posname zvok za več...
Need help?
Do you have a question about the MQ-L500 and is the answer not in the manual?
Questions and answers
can I run this device off of an apple Mac computer ?
Yes, the Memoq MQ-L500 device can be run on an Apple Mac computer. When connected via USB, the Mac recognizes it as a removable disk, allowing access to files and time/date settings.
This answer is automatically generated
hi I need time setup.exe and system_setting.ini files where can I download it ? thx