Table of Contents
Advertisement
Available languages
Available languages
Quick Links
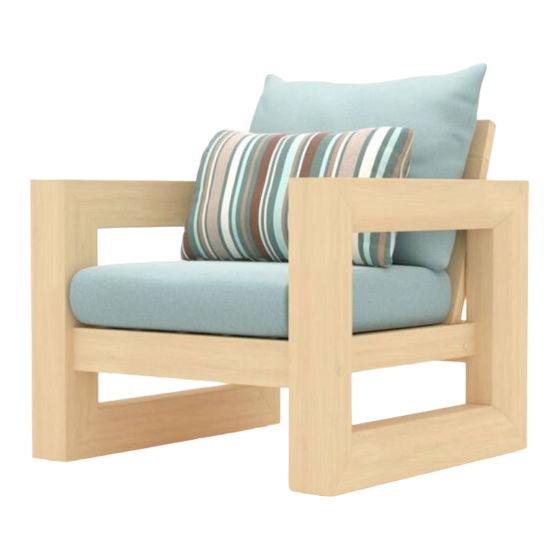
Benson club chair
Model: OP-AWCLB-BEN
ASSEMBLY INSTRUCTIONS
IMPORTANT, RETAIN FOR FUTURE REFERENCE.
READ CAREFULLY.
For assistance with assembly or customer service,
call 1-877-924-2090 (English) Monday-Friday, 8 a.m. to 5 p.m. Mountain
Time, North America. Email: customerservice@rstbrands.com or visit
our website at www.rstbrands.com
Advertisement
Table of Contents

Related Manuals for rst brands Benson OP-AWCLB-BEN


Summary of Contents for rst brands Benson OP-AWCLB-BEN
- Page 1 Benson club chair Model: OP-AWCLB-BEN ASSEMBLY INSTRUCTIONS IMPORTANT, RETAIN FOR FUTURE REFERENCE. READ CAREFULLY. For assistance with assembly or customer service, call 1-877-924-2090 (English) Monday-Friday, 8 a.m. to 5 p.m. Mountain Time, North America. Email: customerservice@rstbrands.com or visit our website at www.rstbrands.com...
-
Page 2: Parts List
PARTS LIST PICTURE PART DESCRIPTION QTY. Chair back Chair seat Leg frame Cross rail Screw (M7 x 110) Bolt (M8 x 110) Bolt (M6 x 60) Barrel nut (M8) Barrel nut (M6) Screw (M6 x 45) Allen wrench #4 Wood cap Plastic cap Barrel nut extension bolt (M8 x 40) - Page 3 ATTACH BACK AND CROSS RAIL TO LEG FRAME 1. Attach the top of back (A) to the leg frame (C) using screw (E), and allen wrench (K). 2. Attach the bottom of back (A) to the leg frame (C) using bolt (G), barrel nut (I), and Step 1.
- Page 4 ATTACH REMAINING LEG FRAME TO BACK AND CROSS RAIL - Repeat the Step 2. process in the same order from step one on the opposite side of the frame. NOTE: Use bolt (N) as an extension to insert barrel nut (H) into the hole found on the cross rail (D).
- Page 5 SCREW SEAT TO CROSS RAIL AND BACK - Place seat (B) into position on the chair Step 3. frame and screw seat (B) to the chair back (A) and cross rail (D) using screws (J) and allen wrench (K).
- Page 6 INSERT CAPS INTO BOLT HEADS - Insert wood caps (L) and plastic caps (M) into Step 4. exposed bolt heads found on the chair's leg frames.
-
Page 7: Care And Maintenance
FABRICS Wipe off spills with a cloth and water. RST Brands uses Sunbrella® fabrics designed to protect and last for several years. Sunbrella fabrics are treated with a proprietary water and stain repellent. -
Page 8: Warranty
WARRANTY Welcome to the RST Family Here at RST Brands® we are committed to your satisfaction by offering you a competitive warranty to ensure all of our products are free from defects, in material and workmanships, to the original purchaser for a period of one year from the date of your purchase. -
Page 9: Instruction D'assemblage
Chaise club Benson Modèle: OP-AWCLB-BEN INSTRUCTION D’ASSEMBLAGE IMPORTANT, À CONSERVER À TITRE DE RÉFÉRENCE. À LIRE ATTENTIVEMENT. Pour de l’aide à l’assemblage ou le service à la clientéle, composez le 1-877-924-2090 (anglais) Lundi - Vendredi 8 heures - 17 heures des Rocheuses, en Amérique du Nord. Email: customerservice@rstbrands.com ou visitez notre site Web à... -
Page 10: Liste Des Pièces
LISTE DES PIÈCES PICTURE PART DESCRIPTION QTY. Dossier de chaise Siège de chaise Cadre de jambe Rail transversa Vis (M7 x 110) Bolt (M8 x 110) Boulon (M6 x 60) Écrou de baril (M8) Écrou de baril (M6) Vis (M6 x 45) Clé... - Page 11 ATTACHEZ LE DOSSIER ET LE RAIL TRANSVERSAL À LA PATTE DE CADRAGE 1. Fixez le haut du dos (A) au cadre de jambe (C) à l’aide de la vis (E) et de la clé Allen (K). 2. Fixez le bas du dos (A) au cadre de la jambe (C) à l’aide du boulon (G), de l’écrou de Étape 1.
- Page 12 Étape 2. ATTACHEZ LES PATTES DE CADRAGE RESTANTES AU DOSSIER ET AU RAIL TRANSVERSAL Répétez la processus dans le même ordre de la première étape sur le côté opposé du cadre. REMARQUE: Utilisez le boulon (N) comme extension pour insérer un écrou de cylindre (H) dans le trou trouvé...
- Page 13 VISSEZ LE SIÈGE AU RAIL TRANSVERSAL ET AU DOSSIER - Placez le siège (B) en Étape 3. position sur le cadrage de la chaise et vissez le siège (B) au dossier de la chaise (A) et le rail transversal (D) en utilisant les vis (J) et la clé Allen (K).
- Page 14 INSÉRER LES CAPUCHONS DE PLASTIQUE DANS LES TÊTES DE BOULONS Étape 4. Insérez les capuchons en bois (L) et les capuchons en plastique (M) dans les têtes de boulons exposées qui se trouvent sur les cadres des pieds du fauteuil.
-
Page 15: Soins Et Entretien
à l’ intérieur lorsqu’il ne sont pas utilisés, est suffisant. CADRES EN ALUMINIUM Les meubles RST Brands incorporent des cadres recouverts en aluminium qui sont conçus pour nécessiter un entretien mini- mum. Évitez de laisser trop de poussière s’empiler en les lavant avec du savon doux et de l’eau. -
Page 16: Garantie
GARANTIE Bienvenue dans la famille RST Chez RST Brands®, nous nous engageons à votre satisfaction en vous offrant une garantie compéti- tive pour garantir que tous nos produits sont exempts de défauts, de matériaux et de fabrication, à l'acheteur d'origine pour une période d'un an à compter de la date de votre achat. - Page 17 Silla del club Benson Modelo: OP-AWCLB-BEN MANUAL DE INSTRUCCIONES Y ENSAMBLE IMPORTANTE, RETENER PARA FUTURAS CONSULTAS. LEA CUIDADOSAMENTE Para asistencia con el ensamblaje e instalación de las partes y servicio al cliente llame: 1-877-924-2090 (Inglés) Lunes-Viernes 8 a.m- 5 p.m. Hora de la Montaña, Norte América. Póngase en contacto con nosotros por correo electrónico a customerservice@www.rstbrands.com o visite nuestro sitio web en www.rstbrands.com.
- Page 18 LISTA DE PARTES PICTURE PART DESCRIPTION QTY. Respaldo de la silla Asiento de la silla Estructura de la pata Riel transversal Tornillo (M7 x 110) Perno (M8 x 110) Perno (M6 x 60) Tuerca de barril (M8) Tuerca de barril (M6) Tornillo (M6 x 45) Llave Allen #4 Tapa de madera...
- Page 19 FIJE LA PARTE POSTERIOR Y EL RIEL TRANSVERSAL AL MARCO DE LA PIERNA 1. Una la parte superior del respaldo (A) a la estructura de la pata (C) utilizando el tornillo (E) y la llave Allen (K). Paso 1. 2. Conecte la parte inferior de la parte posterior (A) al marco de la pata (C) con el perno (G), la tuerca de barril (I) y la llave Allen (K).
- Page 20 UNA LA ESTRUCTURA DE LA PATA RESTANTE AL RESPALDO Y AL RIEL Paso 2. TRANSVERSAL - Repite el procese en el mismo orden desde el paso uno en el lado opuesto del marco. NOTA: Use el perno (N) como una exten- sión para inserte la tuerca del barril (H) en el orificio encontrado en el travesaño (D).
- Page 21 ATORNILLE EL ASIENTO AL RIEL TRANSVERSAL Y AL RESPALDO - Coloque el Paso 3. asiento (B) sobre la estructura de la silla y atornille el asiento (B) al respaldo (A) y al riel transversal (D) utilizando los tornillos (J) y la llave Allen (K).
- Page 22 INSERTE TAPAS EN LAS CABEZAS DE LOS PERNOS - Inserte tapas de madera (L) y Paso 4. tapas de plástico (M) en las cabezas de los pernos expuestos que se encuentran en los marcos de las patas de la silla.
-
Page 23: Cuidados Y Mantenimiento
TEJIDOS Limpie los derrames con un paño y agua. RST Brands utiliza teji- dos Sunbrella® que están diseñados para proteger y durar varios años. Los tejidos Sunbrella se tratan con un repelente de agua y manchas de fórmula patentada. -
Page 24: Cómo Funciona
GARANTÍA Bienvenido a la familia RST Aquí en RST Brands® estamos comprometidos con su satisfacción al ofrecerle una garantía compet- itiva para garantizar que todos nuestros productos estén libres de defectos, materiales y mano de obra, al comprador original por un período de un año a partir de la fecha de su compra.
Need help?
Do you have a question about the Benson OP-AWCLB-BEN and is the answer not in the manual?
Questions and answers