
Related Manuals for Morphy Richards KR-F20RL-E1Dkh


Summary of Contents for Morphy Richards KR-F20RL-E1Dkh
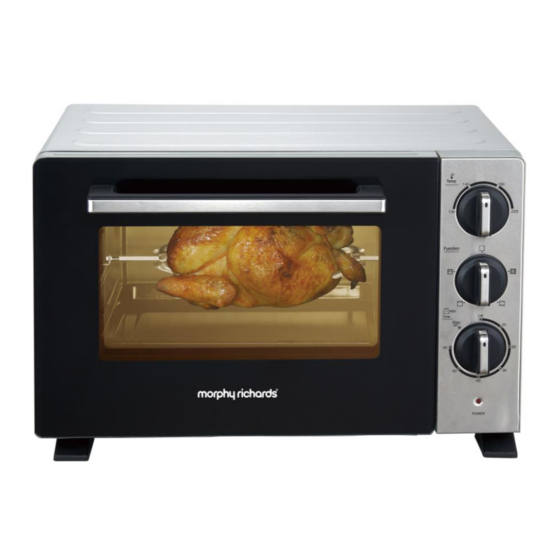
- Page 1 23L Rotisserie Mini Oven Installation & User Instructions – KR-F20RL-E1Dkh Please keep for future reference Issue 2 26/07/2021...
-
Page 2: Table Of Contents
Contents Safety Information……………………………………………….. Parts ……………………………………………………………… Oven functions………………………………………………….. Before first use..…………………………………………………. Fitting the crumb tray and racks………………………………. Using the racks and other cooking vessels…………………… Assembling and fitting the rotisserie spit.…………………….. Basic oven operation…………………………………………… Rotisserie operation..…………………………………………… Cleaning your oven……………………………………………… Replacing the bulb……………………………………………… Technical Specification…………………………………………. -
Page 3: Safety Information
Safety information Important – Please read these instructions fully before installation Electrical safety • You should only plug the appliance into a 220V‐240V AC, 50Hz supply. Connecting it to other power sources may damage the appliance and will invalidate the guarantee. •... - Page 4 Warning! • This appliance is intended exclusively for use in domestic households. It is not suitable for commercial use. • The surfaces of the oven and the containers inside will become hot during and immediately after use; wear oven gloves when handling. Note the elements are subject to residual heat after use.
- Page 5 Food safety • Thoroughly defrost frozen meat, poultry, fish and seafood in the refrigerator before cooking unless cooking from frozen advice is provided by the food packaging. • Keep raw meat and poultry separate from cooked foods. • Always wash hands after handling raw meat and poultry, before handling any ready to eat foods.
-
Page 6: Parts
Parts Door handle Housing Timer knob Glass door Temperature 10. Indicator Lower heating control knob 11. Bracket for elements Function knob rotisserie spit Rack supports Air vents Grill rack Baking tray Rack / Tray handle Crumb tray Rotisserie spit Rotisserie handle Issue 2 26/07/2021... -
Page 7: Oven Functions
Oven functions Symbol Suggested use Hotplates and heating During storage and for timer use. elements off Upper heating elements Toasting and grilling Upper and lower heating Baking and roasting elements Rotisserie with upper Spit roasting meat and poultry heating elements Rotisserie with upper Faster spit roasting of meat and and lower heating... -
Page 8: Fitting The Crumb Tray And Racks
Fitting the crumb tray and racks • Slide the crumb tray underneath the lower heating elements so that it lays flush with the base of the oven (fig. 1) Fig. 1 • Slide the grill rack and / or baking tray onto the rack supports (fig. -
Page 9: Using The Racks And Other Cooking Vessels
Using the racks and other cooking vessels • Food can be placed directly onto the grill rack and the baking tray supplied. • If placing food directly onto the grill rack, fit the baking tray into the lower oven rack rest to act as a drip / crumb tray (fig 2 & 11). •... -
Page 10: Assembling And Fitting The Rotisserie Spit
Assembling and fitting the rotisserie spit • Fig. 5 Fig. 6 • Fit the claws onto the rotisserie spit with the claws facing inwards (figs. 5 & 6). • Fit the thumb screws into the holes in the claws and turn until secure (fig. -
Page 11: Basic Oven Operation
Basic oven operation The oven can be used in a similar manner to a conventional electric oven to bake, roast and grill food 1. Place the oven on a stable, flat, heat resistant surface and away from any flammable materials. 2. - Page 12 Basic Oven operation (continued) 11. If the timer has been selected – when the cooking time has finished, a bell will sound and the oven will turn off automatically. 12. If ‘stay on’ has been selected – it will be necessary to turn off the oven after use.
-
Page 13: Rotisserie Operation
Rotisserie operation Place the oven on a stable, flat, heat resistant surface and away from any flammable materials. Check that the TIMER knob is in the OFF position. Fully unwind the cable, plug in and switch on at the mains (no indicator should be lit). -
Page 14: Cleaning Your Oven
Rotisserie operation (continued) Notes: • The maximum weight of food that can be roasted using the rotisserie spit is 4.5kg • The baking tray can be used to roast vegetables at the same time as acting as a drip tray. •... -
Page 15: Replacing The Bulb
Replacing the bulb 1. Switch off the oven, unplug from the mains supply and allow the oven to cool completely. 2. Carefully unscrew the glass cover (figs. 14 & 15) and place to one side. Fig 14 3. Remove (unscrew) the spent bulb (figs. -
Page 16: Technical Specification
Technical specification Morphy Richards 23 Litre Rotisserie Mini Oven Model KR-F20RL-E1Dkh Rated Voltage & Frequency 220 - 240V AC 50/60Hz Rated Power Input 1500W Capacity Overall 23 litre Useable 16 litre Replacement bulb type Max 15 W E14 (SES) incandescent oven bulb... -
Page 17: Plug / Wiring Advice
Plug / Wiring advice The wires in this mains lead are coloured in accordance with the following UK electrical code: BLUE = NEUTRAL BROWN = LIVE GREEN + YELLOW = EARTH Non-rewireable plug This appliance may be fitted with a “non‐rewireable” plug. If you need to change the fuse in a “non‐rewireable”... -
Page 18: Guarantee
Issue 2 26/07/2021...
Need help?
Do you have a question about the KR-F20RL-E1Dkh and is the answer not in the manual?
Questions and answers