Table of Contents
Advertisement
Quick Links
ELECTRIC SCOOTER
OWNER'S MANUAL
Read and understand this entire manual before allowing
child to use this product! For assistance contact Razor.
DO NOT RETURN TO STORE.
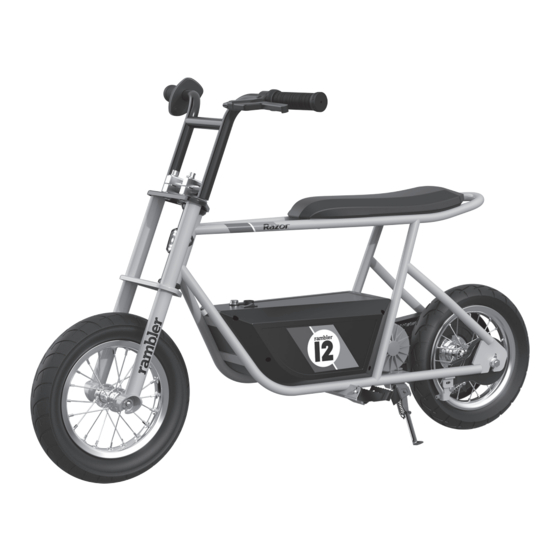
NOTE: Manual illustrations are for demonstration purposes only.
Illustrations may not reflect exact appearance of actual product.
Specifications subject to change without notice.
Please have your product along with the 19 character product I.D. code with you
before contacting Razor for warranty assistance and/or replacement parts.
Product I.D. Code: _____________ - ____________ - ____________
Advertisement
Table of Contents

Summary of Contents for Razer Rambler 12
- Page 1 ELECTRIC SCOOTER OWNER’S MANUAL Read and understand this entire manual before allowing child to use this product! For assistance contact Razor. DO NOT RETURN TO STORE. NOTE: Manual illustrations are for demonstration purposes only. Illustrations may not reflect exact appearance of actual product. Specifications subject to change without notice.
-
Page 2: Table Of Contents
Do not attempt or do stunts or tricks on the Rambler 12. The Rambler 12 is not made to withstand abuse from misuse, such as jumping, curb grinding or any Keep this product away from small children and remember that it is other type of stunts. - Page 3 The charger supplied with the Rambler 12 should be regularly examined for damage to the cord, plug, enclosure and other parts. In the event of such damage, the Rambler 12 must not be charged until the charger has been repaired or replaced.
-
Page 4: Before You Begin
NON-RAZOR PRODUCTS WITH Because the Rambler 12 is 95 percent assembled and packed at the factory, there should not be any problems, even if YOUR RAZOR RAMBLER 12. The the box has a few scars or dents. -
Page 5: Assembly And Set-Up
HEADLINE ASSEMBLY AND SET-UP Note: Make sure the brake cables/ Turn power switch off before conducting any assembly or maintenance procedures. wires are out of the way before Attaching the Handlebars inserting the handlebar into the handlebar clamps. Required Tool: 6 mm Allen Wrench (included) Place the handlebars in the handlebar clamps. -
Page 6: Charging The Battery
HEADLINE CHARGING THE BATTERY Your Rambler 12 may not have a fully charged battery; therefore you must charge the battery prior to use. WARNING: Use ONLY with Be sure to charge the battery in a clean, dry location away from direct sunlight, flames or sparks. -
Page 7: Pre-Ride Checklist / Usage
1 and 2 of this manual. HEADLINE USAGE Starting the Rambler 12 While seated place both hands on the handlebars. Slowly push forward with one foot and apply the throttle (A). Note: Keep both feet on the foot pegs when unit is in motion. -
Page 8: Repair And Maintenance
REPAIR AND MAINTENANCE Turn power switch “OFF” before beginning repair or maintenance: • Read the instructions • Exercise caution around • Repair and maintenance should be exposed parts performed by an adult only • Remove charger plug • Contact Razor customer •... - Page 9 HEADLINE REPAIR AND MAINTENANCE Replacing the Chain/Rear Wheel Required Tools: Phillips Screwdriver, 10 mm Wrench, Two (2) 8 mm Wrenches, Two (2) 15 mm Wrenches (not included) Using a Phillips screwdriver Using a 10 mm wrench loosen With two (2) 8 mm wrenches, remove the five (5) screws on the the brake cable anchor bolt and loosen brake housing anchor and...
- Page 10 HEADLINE REPAIR AND MAINTENANCE Replacing the Battery Required Tools: Phillips Screwdriver and 4 mm Allen Wrench (not included) Using a Phillips screwdriver, remove the ten (10) screws from the side of the battery box. Remove the battery box and set aside. Be careful not to pull the wires from the power switch and the charger. Unplug the power cord connector.
- Page 11 HEADLINE REPAIR AND MAINTENANCE Battery Care and Disposal Do not store in freezing or below freezing temperatures. To properly maintain your battery and ensure maximum battery life, carefully read the “Charging the Battery” section on page 5 of this owner’s manual. CONTAINS SEALED NON-SPILLABLE LEAD-ACID BATTERIES.
-
Page 12: Troubleshooting Guide
HEADLINE TROUBLESHOOTING *Product(s) should be turned OFF and fully charged prior to doing any Troubleshooting. NOTE: All troubleshooting steps should be performed by an adult only. Problem Possible Cause Solution Does not work out of the box Loose connection(s) Check for loose connections/wires No longer works Blown fuse Replace if needed... -
Page 13: Rambler 12 Parts
HEADLINE RAMBLER 12 PARTS Keep your Rambler 12 running for years with genuine Razor parts. Visit our website or e-mail us for more information on spare part availability. (Specifications subject to change without notice.) Handlebar Grip (Right/Left) Front Fork Battery... - Page 14 NOTICE: INSURANCE YOUR INSURANCE POLICIES MAY NOT PROVIDE COVERAGE FOR ACCIDENTS INVOLVING THE USE OF THIS SCOOTER/ELECTRIC RIDE-ON PRODUCT. TO DETERMINE IF COVERAGE IS PROVIDED, YOU SHOULD CONTACT YOUR INSURANCE COMPANY OR AGENT.
-
Page 16: Warranty And Contact Information
Copyright ©2003-2021 Razor USA, LLC. All rights reserved. Razor ® and the Razor logo design are among the registered trademarks of Razor USA LLC in the United States and/or select foreign countries. Rambler 12 and the Rambler 12 logo design are trademarks of Razor USA LLC. ™ US_210831...
Need help?
Do you have a question about the Rambler 12 and is the answer not in the manual?
Questions and answers