Table of Contents
Advertisement
Quick Links
The Dangerous Monitor Manual
Thank you for choosing products from the exciting line of Dangerous
recording equipment. Many years of dependable and trouble free service can
be expected from our gear. This has been made possible by careful design,
construction, and top shelf component choices by recording industry
veterans. We are committed to providing equipment that brings you the
highest quality for your purchase.
This manual will assist you in the installation and use of the Monitor. There
are helpful hints for safety, grounding, and terminology that apply to all
recording equipment. Please take a few minutes to read the manual and
familiarize yourself with the outstanding features of your purchase.
Contents
Introduction ............................ 1
Safety Review ......................... 2
Overview and hook up ............... 3
Usage Examples ....................... 5
Meter Wiring ........................... 6
Balanced Audio Connections......... 7
Internal Jumpers ....................... 8
Equipment Interface................... 9
Alignment .............................. 10
Specifications and Pinouts ............ 11
Advertisement
Table of Contents

Related Manuals for Dangerous Music Dangerous Monitor


Summary of Contents for Dangerous Music Dangerous Monitor
-
Page 1: Table Of Contents
The Dangerous Monitor Manual Thank you for choosing products from the exciting line of Dangerous recording equipment. Many years of dependable and trouble free service can be expected from our gear. This has been made possible by careful design, construction, and top shelf component choices by recording industry veterans. -
Page 2: Safety Review
While we feel your pain, (been there) subsequent damage is not covered by the warranty. Dangerous Music Incorporated reserves the right to change the specifications or modify the designs of its equipment. Sending in the registration card is our way of keeping in touch with users of our equipment should this become necessary. -
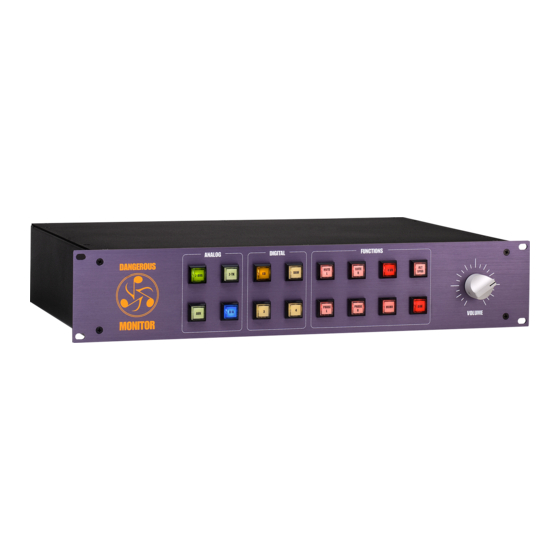
Page 3: Overview And Hook Up
Monitor lets the engineer concentrate on the music and not the process. Hooking up your Dangerous Monitor The connectors on the back of Monitor are arranged into 5 groups. The first is the AES IN and THRU connectors. The user is to plug AES signals into the female XLR connectors. - Page 4 The pinout of this connector is in the “Specifications” section of this booklet and there is a circuit example for those who wish to set up a pair of VU meters in the “Metering Circuits” section. The D-MTR jack feeds the selected AES signal to a digital meter or phase scope.
-
Page 5: Usage Examples
Usage Examples The ANALOG switches select from four sources to be listened to. The selected source is sent to the “Functions” group and the “A-MTR” feed on the back panel. The fourth analog selection is a built in D/A converter which is fed by the selected “Digital”... -
Page 6: Meter Wiring
The techniques discussed while not infallible, have been used for many years by the engineers at Dangerous Music with a fantastic success rate setting up dozens of world class facilities. -
Page 7: Balanced Audio Connections
Balanced Audio Connections The beauty of balanced connections is that they promote the idea that current should be prevented from flowing down cable shields while letting the audio pass. Pins 2 and 3 carry a signal across them (transverse mode) and any interference that gets through the shield is picked up equally by the wires (common mode). -
Page 8: Internal Jumpers
Internal Jumpers Monitor is shipped from the factory with its internal jumpers set to interface with balanced equipment. There are rare cases that certain gear may cause a buzz in the speakers with the factory presets. The following sections have information that can help the installer achieve quiet performance. -
Page 9: Equipment Interface
Equipment Interface The Difference between Grounds and Shields While the usual scenario in hooking up equipment is that one plugs in the cables and starts to work, the more complicated a system, the more likely it is that something will not work correctly as far as hum and noise performance is concerned. -
Page 10: Alignment
Alignment The Dangerous Music Monitor is carefully aligned at the factory. The alignment procedure is provided here in case the user wants different levels on the D/A, Meter, or Dim circuitry. Please don’t attempt to align this unit without proper laboratory equipment and knowledge of its use. -
Page 11: Specifications And Pinouts
The ‘D’-sub connector is used for access to the Dim function by the Dangerous MQ. Pin# function Dim (for connection to MQ) Relay common Europe Dangerous Music, Inc. Dangerous Music, Inc. 231 Stevens Road Stieleichenweg 55 Edmeston, NY 13335 50999 Köln Phone: 607 965-8011 Tel: +49.0.2236.393731...
Need help?
Do you have a question about the Dangerous Monitor and is the answer not in the manual?
Questions and answers