Advertisement
Quick Links
Advertisement

Related Manuals for Silex technology SX-NEWAH-EVK

Summary of Contents for Silex technology SX-NEWAH-EVK
- Page 1 SX-NEWAH-EVK Start-UP Guide silex Technology, Inc.
- Page 2 Introduction Outline Feature Notifications Specifications Before You Begin EVK Composition Environment Setup Device Connection Wireless Communication Check Troubleshooting Appendix Revision History...
- Page 3 Introduction ・ ・ ・...
- Page 4 1. Outline SX-NEWAH is a wireless LAN module that complies with the 915MHz band standard IEEE 802.11ah. Transmission of over 1 Mbps of 1km wireless distance (*). By connecting this product to Raspberry Pi, the functions of SX-NEWAH can be used. (*) The wireless distance and throughput vary depending on your environment.
- Page 5 3. Notifications ✓ This equipment uses 915MHz band radio. ✓ As this product communicates by radio wave, it is strongly recommended to use some security system to prevent unexpected information leakage to others. ✓ This product will effect to some other device or be affected by the some other device using the same frequency band.
-
Page 6: Specifications
4. Specifications Evaluation KIT Model number SX-NEWAH-EVK Wireless module SX-NEWAH Operating voltage 5.0V Dimensions 90mm×80mm×25mm Wireless LAN Module Chipset NRC7292 Wireless LAN standard IEEE 802.11ah Wireless mode AP, STA Frequency (*1) 1MHz 903.5, 904.5, 905.5, 906.5, 907.5, 908.5, 909.5, 910.5, 911.5, 912.5, 913.5, 914.5, 915.5, 916.5, 917.5, 918.5, 919.5, 920.5,... -
Page 7: Before You Begin
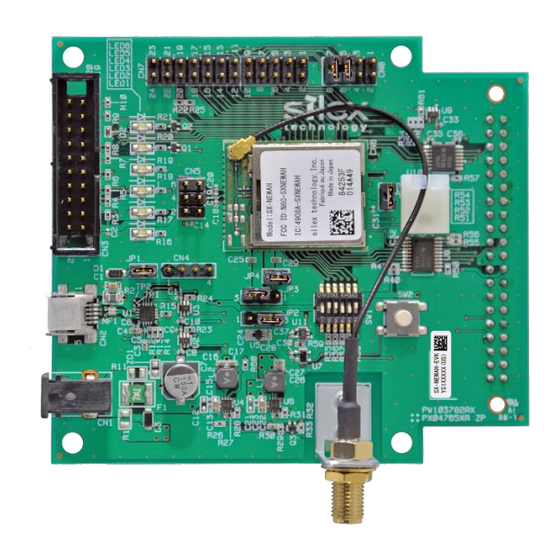
5. Before You Begin □SX-NEWAH-EVK (SX-NEWAH (IEEE 802.11ah wireless module) is installed) □Antenna for SX-NEWAH □AC adaptor for SX-NEWAH-EVK □Raspberry Pi 3 Model B (hereinafter, “Raspberry Pi”) □AC adaptor for Raspberry Pi (5V/3A or higher) - Recommended for the radio to operate properly in accordance to the module specification □Micro SD card (8GB or higher・UHS-I / Class 10 or higher) - Page 8 6. EVK Composition ⚫ Outline...
-
Page 9: Environment Setup
7. Environment Setup ⚫ Before turning on SX-NEWAH-EVK, turn on/off the SW1 according to the below image. (1) Connect SX-NEWAH-EVK and Raspberry Pi according to the image below. (2) Connect the antenna of SX-NEWAH to the SMA connector. (3) Connect the AC adaptor of SX-NEWAH-EVK to the power connector. - Page 10 Before turning on SX-NEWAH-EVK, prepare a micro SD card to which an OS image is written. To use SX-NEWAH-EVK via SSH, install the terminal software on your PC. In this document, Tera Term is used as an example. Following explains how to write an image using Win32 Disk Imager to the Windows environment.
- Page 11 Click the button to show the file selection window. Select the image file to write. * The file name will vary depending on the version.
- Page 12 (4) Select the image to write and then click “Write”. (5) When the confirmation message appears, check the drive and click “Yes”. (6) When the write process is completed successfully, the message below appears. Click “OK”.
- Page 13 (7) Click "Exit". (8) Remove a micro SD card from the PC. (9) Insert the micro SD card to Raspberry Pi.
-
Page 14: Device Connection
8. Device Connection There are two methods for console connection; one is the connection using HDMI(GUI) of Raspberry Pi, and the other is the connection using a network access (SSH) from a PC. Connect a monitor, mouse and keyboard to Raspberry Pi. (1) When Raspberry Pi is turned on, the login performs automatically and the desktop screen appears. - Page 15 (2) Start Terminal (LXTerminal) from the menu.
- Page 16 * It is necessary to set the static IP address of the wired LAN adaptor of the PC to the same segment as the Raspberry Pi. Setting example: IP address: 192.168.0.1 Subnet mask: 255.255.255.0 Connect a PC and Raspberry Pi using an Ethernet cable. (1) Start the terminal software.
- Page 17 If the below window is displayed, click “Continue” (5) Enter "User name" and "Passphrase" and click "OK". ➢ User name : pi ➢ Passphrase : raspberry (6) When the below screen appears, the login is completed.
- Page 19 If a specific low-power radio station is operated, interference may occur. Necessary Items Prepare two SX-NEWAH-EVK units to which the configuration has been made according to Chapter 7. For the IP address of eth0 (Ethernet I/F) of Raspberry Pi, configure the appropriate one.
- Page 20 ⚫ Sample command to start in AP mode sudo insmod /lib/modules/$(uname -r)/nrc.ko fw_name=nrc7292_cspi.bin hifspeed=16000000 ① sudo ifconfig wlan0 up ② cli_app set txpwr 23 ③ cli_app set maxagg 1 8 ④ cli_app set gi short ⑤ sudo hostapd -B ~/sx-newah/conf/US/ap_halow_sae.conf ⑥...
- Page 21 ⑥ Hostapd start ⑦ IP address configuration for a wireless interface...
- Page 22 ⚫ Sample Command to Start in STA Mode sudo insmod /lib/modules/$(uname -r)/nrc.ko fw_name=nrc7292_cspi.bin hifspeed=16000000 ① sudo ifconfig wlan0 up ② cli_app set txpwr 23s ③ cli_app set maxagg 1 8 ④ cli_app set gi short ⑤ sudo wpa_supplicant -i wlan0 -D nl80211 -B -c ~/sx-newah/conf/US/sta_halow_sae.conf ⑥...
- Page 23 For a wireless connection between the units operating in AP/STA mode, communication can be checked using the ping command. ⚫ Sample Ping command (when the ping command is executed from the AP-mode unit to the STA-mode unit) ping 192.168.200.2 -c 100 -i 0.2 -s 100 ①...
- Page 24 For a wireless connection between the units operating in AP/STA mode, communication speed can be checked using the iperf command. ⚫ Sample iperf command (UDP communication) ➢ Start the AP-mode unit as a server of iperf iperf -s -u -i 10 ①...
- Page 25 The communication performs correctly if the result of the command is output from the server as shown below, after the client unit is turned on and the specified period (the period specified by ‘t’ option) has elapsed. ⚫ NOTE Make sure that the AP-mode unit and STA-mode unit are not placed too close together. Wireless communication may not be stable in an environment where signal strength is strong as the distance is too short.
-
Page 26: Troubleshooting
I/F(eth0) using the ifconfig command. ⚫ Even if a wireless driver is loaded, the wireless interface (wlan0) is not generated. ➢ Check the DIPSW setting of SX-NEWAH-EVK (7.1.1 DIP Switch Setting). ➢ Check the connection between Raspberry Pi and SX-NEWAH-EVK. ➢... - Page 27 11. Appendix File or Folder Path Description ap_halow_open.conf [SX_PKG]/conf/US AP configuration file (open mode) ap_halow_wpa2.conf [SX_PKG]/conf/US AP configuration file (WPA2-PSK) ap_halow_owe.conf [SX_PKG]/conf/US AP configuration file (WPA3-OWE) ap_halow_sae.conf [SX_PKG]/conf/US AP configuration file (WPA3-SAE) sta_halow_open.conf [SX_PKG]/conf/US STA configuration file (open mode) sta_halow_wpa2.conf [SX_PKG]/conf/US STA configuration file (WPA2-PSK) sta_halow_owe.conf...
- Page 28 Following explains how to change the IP address of Raspberry Pi’s eth0 (Ethernet I/F). When SSH is Used ⚫ Login according to “8.2 ”. ⚫ On the SSH console, execute "sudo nano /etc/dhcpcd.conf".
- Page 29 ⚫ Change the below IP address to a desired one.
- Page 30 ⚫ Press Ctrl + O. ⚫ Press the Enter key and press Ctrl + X.
- Page 31 ⚫ Execute "sudo poweroff". ⚫ Restart Raspberry Pi. * When Raspberry Pi is started next time, the specified value is used as an IP address of eth0.
- Page 32 Revision History...
Need help?
Do you have a question about the SX-NEWAH-EVK and is the answer not in the manual?
Questions and answers