
Summary of Contents for PICOLAS LDP-C 120-40 NG
- Page 1 User Manual -preliminary- LDP-C/CW 120-40 NG LDP-C/CW 80-40 NG PicoLAS GmbH Burgstrasse 2 52146 Würselen Phone: +49 (0) 2405-64594-60 Fax: +49 (0) 2405-64594-61 E-Mail: info@picolas.de Web: www.picolas.de...
-
Page 2: Table Of Contents
Description of the Ethernet Interface .......................... 25 The Serial Text Interface ..............................26 Structure ....................................26 Commands for the LDP-C / CW............................. 27 The PicoLAS Protocol ............................... 30 Structure ....................................30 General Commands ................................31 Commands for the Driver ..............................32 Register Description ................................. -
Page 3: Product Family Overview And Parameters
Product Family Overview and Parameters LDP-C/CW 120-40 LDP-C/CW 80-40 Load Current 10 .. 120 A 10 .. 80 A Range Compliance 40 V 40 V Voltage Max. Output 4800 W 3200 W Power Ripple < 1 A < 1 A Current <... -
Page 4: Please Pay Attention To All Safety Warnings
Please pay attention to all safety warnings! Risk of electrical hazard Please pay special attention Do not Valuable information, remark Change Notes Rev 01/2021: - Initial release Rev. 01/2021... -
Page 5: How To Use The Manual
How to use the Manual Remark: The LDP-C/CW described in this manual are baseplate cooled devices. Improper cooling may cause an internal overtemperature shutdown. The two fans in one side of the unit prevent local thermal hot spots inside the unit. They can not compensate a baseplate cooling. -
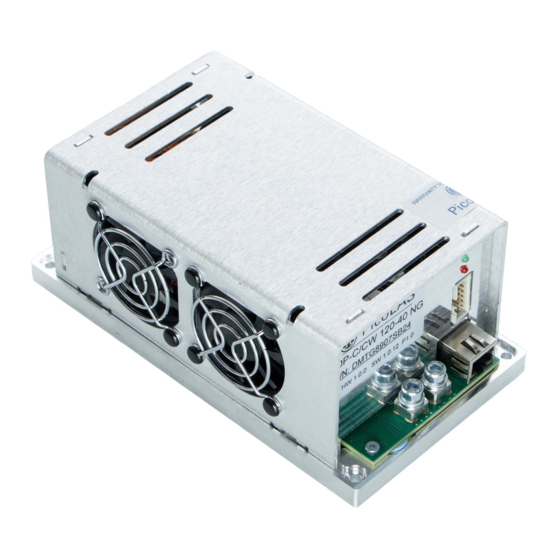
Page 6: How To Get Started (Refer To Drawings On Next
How to get started (refer to drawings on next 2 pages) Step What to do Check Unpack your device and place it in front of you as shown on the next page. Connect a load (for example your laser Make sure to use both anode diode) to the output. -
Page 7: Connecting And Interfacing
Connecting and Interfacing The baseplate is internally not connected to GND to avoid GND loop currents. The chassis / baseplate must be grounded by the user! The maximum voltage between GND and chassis is 48 V. Exceeding this voltage will damage the driver and / or will cause communication errors. This is not covered by warranty! Strictly avoid ground loop currents through the controlling interface! Front view... - Page 8 Rear view Digital interface for PLB-21 (RS-232) LD + LD – (Anode) (Cathode) LD anode and cathode must be floated and must have no contact to GND! The drawing shows all connections which are available to the user. LDP-C BOB See section “Interface Specifications”...
-
Page 9: Interface Specifications
recommended to use both connectors parallel, especially for high currents. Ethernet Ethernet connector for linking the driver to a network. For a more convenient use of the driver (e.g. in laboratory use) we recommend the optional available product accessories LDP-C BOB or the PLB-21. Please see LDP-C BOB and PLB-21 manual for further details. - Page 10 Rev. 01/2021...
-
Page 11: Settings And Readings
Settings and Readings Isetpoint (Pin 10) This input signal is used to provide an analog setpoint value (amplitude modulation). In order to use the analog setpoint, it must be configured in the PC via USB or the PLB-21. Please apply a voltage corresponding to the desired current settings. The scaling is 50 A/V. For analog modulation the best results are obtained when modulating between 50 and 100% of the maximum values. -
Page 12: Functional Description
Pulser OK (Pin 1) This signal informs the user about any error condition. It is pulled low by the driver when no internal error is detected (remark: The word “pulser” here refers to the “driver” itself). Functional Description The driver operates with four parallel buck converters (S1, S2, D1, D2, L1; S3, S4, D3, D4, L2;... - Page 13 Element Function Security switch C1, S1, S2, S3, S4, S5, S6, S7, Buck converter S8, D1, D2, D3, D4, D5, D6,D7 L1, L2, L3, L4 Input buffer capacitor Shunt MosFETs short output D9, D10 Laser diode and driver protection diodes Shunt LD current monitor Rev.
-
Page 14: Dos And Don'ts
Mount the driver on an appropriate heat sink! Please be aware that there might be hot surfaces, be careful not to touch them! Do never connect the oscilloscope to the output connectors!!! (Please note: the picture above shows another but similar PicoLAS driver) Rev. 01/2021... -
Page 15: Test Load
Test Load A common method to test the driver is to connect a regular silicon rectifier diode to the driver output. Attention has to be paid to the junction capacitance of the diode. Only fast recovery diodes (or similar) have as low a parasitic capacitance as laser diodes have. To achieve reasonable test results, the parasitic elements of the test diode and the connection must be very similar to a laser diode. -
Page 16: Overtemperature Shutdown
P_loss [W] I_out [A] power dissipation Power dissipation as a function of output current Overtemperature Shutdown To protect the laser diode and the driver the unit automatically disables itself if its temperature rises above the configured shutdown temperature. This condition is latched and the diode driver will not start working until temperature drops five degrees below the shutdown temperature and the ENABLE pin is toggled. -
Page 17: Led Blink Codes
LED Blink Codes The driver has two status LEDs located above the BOB connector. The green LED indicates the readiness and the red LED an error condition of the driver. The following table shows the meaning of the different blink codes: Green LED Red LED Meaning... -
Page 18: Trigger Modes
Trigger Modes The driver can be configured by the user for internal, external or cw trigger. When the cw mode is configured the LDP-C behaves like the LDP-CW series. See above for more details. External The output stage is controlled by the PULSE signal. Like the cw mode, the current regulator is controlled by the ENABLE signal and L_ON bit, but the output stage is controlled separately. -
Page 19: Mechanical Dimensions
Mechanical Dimensions All dimensions in mm Over all height: 69.0 mm Rev. 01/2021... -
Page 20: Power On Self Test
Power on Self Test Each time the driver is powered on, it performs a test of its internal safety features. The MEN pin (pin 8, Master Enable) has to be HIGH, while the ENABLE pin (pin 7) has to be LOW for the self test to work properly. Changing either of the signals during the self test will result in a failure. -
Page 21: Controlling The Driver Using A Plb-21
Controlling the Driver using a PLB-21 To control the driver with a PLB-21 it must be connected via the enclosed cable. The PLB- 21 will not work if the USB and the PLB-21 are connected at the same time. When the PLB-21 is connected the first time to the driver the user is asked to download a new driver. -
Page 22: Pulse Parameters
Pulse Parameters In this menu the setpoint current and the simmer current can be modified. See the datasheet of the specific device for detailed information. Width This value defines the width of the pulses generated by the internal pulse generator if the internal trigger is used. -
Page 23: Defaults
Defaults The driver can load a default setting each time it powers up or the user commands it to do so. This is done within this submenu. Def. pwron When enabled, the driver loads the saved settings each time it powers up. Load When activated via turning the Jog-dial or the ENTER key all internal registers are changed to the previously saved values. -
Page 24: If An Error Occurs
If an Error Occurs If an error occurs during operation the pulse output is switched off, the “pulser_ok_ext” signal on the BOB connector is pulled low and a message is displayed on the PLB-21. If no other action is described on the display, a toggle (switch on and off) of the ENABLE pin resets the error condition and re-enables the driver. -
Page 25: Controlling The Driver Via Pc
Controlling the Driver via PC Introduction Since the PLB-21 connector houses a standard RS-232 interface it can also be used to connect the driver to a PC. This can be done by connecting a USB-Serial converter cable using the PLB-21 cable. However, since the PLB-21 receives its poser through the same connector, it is recommended to cut the +12 V line when using the cable to connect to a USB-Serial converter. -
Page 26: Description Of The Ethernet Interface
Description of the Ethernet Interface In the current hardware revision (1.0) the Ethernet interface is considered experimental and should not be used in a productive environment. The Ethernet interface supports direct connection to a 10/100/1000 Mbit Ethernet switch. It is by default configured to use DHCP to obtain an IP address, but can be configured to static mode with the serial interface. -
Page 27: The Serial Text Interface
The Serial Text Interface The following section describes the structure and commands of the text interface. Structure Every command that is sent to the driver must be completed with a CR (Enter). It consists of a command word followed by a parameter. If the command was successfully executed a “0” is sent, otherwise a “1”. -
Page 28: Commands For The Ldp-C / Cw
Commands for the LDP-C / CW The following table contains a command reference for the LDP-C/CW series. Command Parameter Answer Description gserial serial number Returns the device serial number current settings Prints out an overview of all settings loaddef Loads previously saved settings savedef Saves the current settings as defaults ghwver... - Page 29 Command Parameter Answer Description gwidthmax pulse width in Outputs the maximum pulse width µs sreprate repetition rate repetition rate Sets the repetition rate to the in Hz in Hz indicated value greprate repetition rate Outputs the present repetition rate in Hz grepratemin repetition rate Outputs the min.
- Page 30 Command Parameter Answer Description gerror 32 bit number Outputs the content of the ERROR register. gerrtxt Text Outputs a text describing any pending error. gvcc Supply voltage Outputs the actual measured supply in V voltage gudiode Output voltage Outputs the actual measured output in V voltage gidiode...
-
Page 31: The Picolas Protocol
The PicoLAS Protocol The following section describes the structure and possible commands of the PicoLAS protocol. Structure Each transmission consists of 12 bytes – called a frame as follows – which must be sent consecutively. Otherwise the system times out and the transmission must start again from the beginning. -
Page 32: General Commands
General Commands The following list contains an overview of the general commands which are supported by every product from PicoLAS which makes use of this protocol. The explanation of the individual commands is given further below. Command Name Sent Frame... -
Page 33: Commands For The Driver
Commands for the Driver The following table contains a list of the commands which the driver supports in addition to the generally applicable commands. An explanation of the individual commands and its parameters follows afterwards. The commands are internally organised in the following groups: Temperature The driver is equipped with tree temperature sensors, which will monitor the base plate. - Page 34 Current The current commands controls any aspect of the current settings. The CURLIMIT registers defines the borders of the GETCURMIN/GETCURMAX commands. The GETCUREXT command reads the value of the analogue set point pin of the BOB connector Command Sent Frame Received Frame Command Parameter Command Parameter...
- Page 35 Pulse control The pulse commands controls any aspect of the internal trigger generator. They are only used when using the internal trigger mode. Command Sent Frame Received Frame Command Parameter Command Parameter SETWIDTH 0x0900 Width in us 0x8900 Width in us GETWIDTH 0x0901 0x8900...
-
Page 36: Register Description
Register Description Description of the LSTAT Register The following list contains a description of the individual LSTAT bits. These can be read with GETLSTAT and written with SETLSTAT. With SETLSTAT a complete 32 bit word must always be written. Thus, to change individual bits, first of all the register must be read out with GETLSTAT, then the desired bits are changed and then passed back with SETLSTAT. - Page 37 Name Read/Write Meaning ENABLE_LOCK Read Indicates that the driver is locked in the disable state. Set Enable to 0 to release the lock MEF_IN Read Indicates that a falling edge on the Master Enable has been detected. Set Enable to 0 to clear. 16-18 IOFF_CAL Read Internal use...
-
Page 38: Description Of The Error Register
Description of the ERROR Register The following list contains a description of the individual bits of the ERROR register. A “1” as a bit leads to a deactivation of the drivers output. Bit 11 is excluded of this directive as it is just a warning. - Page 39 Name Read/Write Meaning IOFFSET _FAIL Read Indicates an internal error POST_FAILED Read Indicates that the power on self test has failed TEMP_SENSOR_1 Read Indicates a malfunction of an internal NTC TEMP_SENSOR_2 Read Indicates a malfunction of an internal NTC TEMP_SENSOR_3 Read Indicates a malfunction of an internal NTC...
-
Page 40: Impressum
Impressum PicoLAS GmbH Burgstrasse 2 52146 Würselen Germany Phone: +49 (0) 2405-64594-60 Fax: +49 (0) 2405-64594-61 E-Mail: info@picolas.de Web: www.picolas.de CEO: Dr.-Ing. Markus Bartram Registration Court: Amtsgericht Aachen Registration Number: HRB 13040 Tax ID (Ust.IdNr.): DE 243221335 WEEE-Reg.-Nr.: DE 28806084 No liability will be accepted for errors and omissions.
Need help?
Do you have a question about the LDP-C 120-40 NG and is the answer not in the manual?
Questions and answers