Table of Contents
Advertisement
Quick Links
Advertisement
Table of Contents

Summary of Contents for H2O Innovation smartrek
-
Page 2: Table Of Contents
3.2 Adding a New Node to the Network .................... 14 3.3 Vacuum Node Installation ......................16 3.4 Calibration of the Tank-level Node ..................... 17 3.5 Sugarheld App: Downloading the Map ..................20 3.6 Remote Access by Webapp 3.0 ....................20 3.7 Access the Smartrek YouTube Channel ..................21... -
Page 3: Typical Deployment (Mesh Network)
1. Typical Deployment (MESH Network) Cloud... -
Page 4: Preparing The System
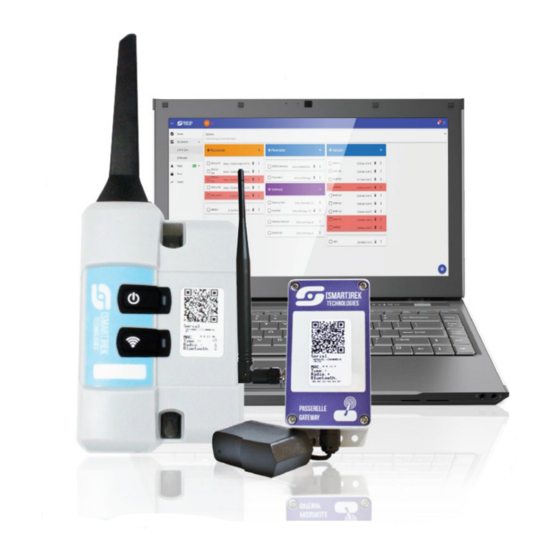
2. Preparing the System Each Smartrek monitoring system includes a starter kit along with the sensors. In the starter kit, you will find: A long-range gateway; 2. An Android tablet with the Sugarheld app already installed and programmed. The long-range gateway is the basis of your system. It is creating the communication for the entire network. - Page 5 If possible, install the gateway on the closest wall to your first sensor in the woods (white circle), and not on the opposite direction (red circle). Figure 1: Installation of the long-range gateway It is better to install the gateway on the edge of a window, the radio signal travels more easily through a window than a wall.
-
Page 6: Unboxing
ON/OFF button. Look at the LED flashing. The gateway is ready once it starts blinking at a regular pace. The Smartrek system is sending/receiving data when the LED blinks. -
Page 7: Enabling The Gateway
2.2 Enabling the Gateway Here are the steps to follow if you skip the installation wizard. You are now in the Sugarheld app. You are ready to add the gateway to your network. To add a new device, here are the steps to follow: You must open the options by pressing the 3 dots at the top of the screen on the right. - Page 8 Your gateway is now registered in your system. The last step before installing the other nodes is to activate the gateway. Hold your finger for 3 seconds on the name of the gateway to open the options 2. Tap ‘’Activate node’’. The Sugarheld app will automatically reboot to save the changes Now, it is suggested to put your system on the fastest mode to install your sensors.
-
Page 9: Hop Counts (Gateway)
To make sure the gateway is activated, you should have *** on each side of your gateway name. *** Name of the gateway *** Figure 9 : Gateway enabled Your gateway is now activated, and you are now ready to install your nodes in the sugarbush. -
Page 10: Radio Channel
Before installing your nodes in the sugarbush, it is very important to check the radio channel. All H O-Smartrek nodes are factory-made on the radio channel #1. Be careful when choosing the radio channel because two nodes on the same channel can communicate with each other up to 4 miles (in direct line of sight). -
Page 11: How To Change A Node's Radio Channel
2.4.2 How to Change a Node’s Radio Channel YouTube Tutorial If you do not have Internet access to view the YouTube tutorial, please follow these steps: Hold down the “PROGRAM” button (bottom one) 2. While still holding down the bottom button, press “POWER” (top one) 3. -
Page 12: Installing Nodes In The Field
6. Finally, the next time you start the node, it should blink on the bottom button according to the programmed channel #. To start the node, just press the “POWER” button (top button). ** It is possible to know the node’s channel at any time. You simply need to turn on the node to see it. -
Page 13: Checking The Node Communication With The Network
3.1 Checking the Node Communication with the Network You need to create your radio signal network by installing your nodes, starting with the closest one to the gateway. After that, always install the closest node from the last one to make sure that the signal is created, and all the nodes are interconnected. -
Page 14: Adding A New Node To The Network
3.2 Adding a New node to the Network ** To get the real GPS position of your device, add it with the tablet to its real position in the sugarbush. ** You must open the options by pressing the 3 dots at the top of the screen on the right. The menu will appear at the bottom of the screen 2. - Page 15 Swipe right to left to navigate the different columns. Figure 13 : Navigation in the app Figure 12 : Navigation in the app...
-
Page 16: Vacuum Node Installation
Figure 16 : Vacuum node installation It is also possible to secure the node on a tree using the Smartrek strap (SMART-ATTACH). Equipped with a quick release buckle, the strap allows the device to be fixed to a tree without having to screw into it. -
Page 17: Calibration Of The Tank-Level Node
3.4 Calibration of the Tank-level Node Before fixing the node to its final position, first turn on your node and add it to your network as explained in section 3.2. Make sure that the signal with the other nodes is good by looking at the blinking of the LED on the device (section 3.1). - Page 18 To calibrate the tank-level node: Once the node is correctly positioned, over the tank and added to your Smartrek network, go to your gateway with the tablet so that the network is active in the application (Bluetooth connection). Go to the Sugarheld app and click on the tank-level node you want to calibrate 2.
- Page 19 20.0 inches or more. When your Smartrek network is complete, you can reset the speed to “Economy” mode as shown in figure 5 (section 2.2). This will allow you to have a longer battery life. You can adjust the speed at any time to speed up or slow down the refreshing of your data according to your needs.
-
Page 20: Sugarheld App: Downloading The Map
You can watch our seminar on YouTube to follow the procedure (at 24:55 min). www.YouTube.com – h2o innovation Érablière Maple – playlist – Smartrek English – Smartrek webinar at 24:55. 3.6 Remote Access by Webapp 3.0 To access your system remotely and to take advantage of the various functionality of the Web 3.0, you must have Internet access on your tablet. -
Page 21: Access The Smartrek Youtube Channel
3.7 Access the Smartrek YouTube Channel Scan the following QR code to go directly to H O Innovation YouTube channel: Otherwise, go to www.youtube.com. Do a search to find the channel “H2O Innovation Érablière- Maple”. Follow these steps:...
Need help?
Do you have a question about the smartrek and is the answer not in the manual?
Questions and answers