
Summary of Contents for iolloi ID-CD01
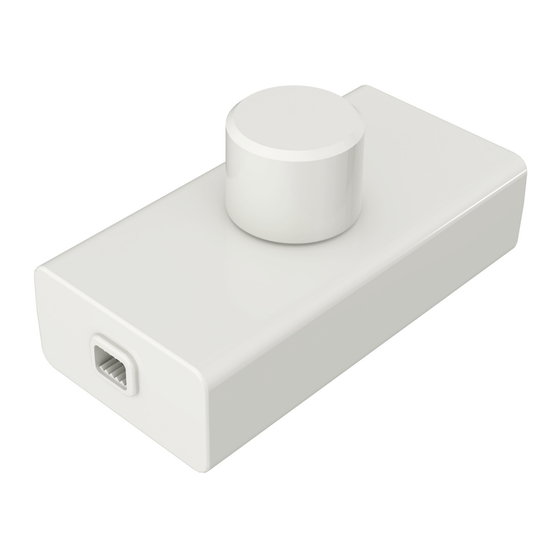
- Page 1 LED CORD DIMMER SKU:ID-CD01 Product Description washer & nut Light modulator Metal gasket 6mm adaptor Knob...
-
Page 2: Specification
This cord dimmer has been specially designed for dimmable LED and incandescent lamps with a capacity of 0 Watt to a maximum of 50 Watt, but is of course also suitable for incandescent and halogen lamps up to 100 Watt. •... -
Page 3: Installation
English Installation 1. Unscrew the closing screws 2. Take out the front cover and the knob 3. Unscrew the cord anchorage 4. Strip the cable to be connected 5. Connect supply cable to the terminals L and N of the electronic board. 6. -
Page 4: Bedienung
Deutsch Installation 1. Lösen Sie die Schließschrauben 2. Nehmen Sie die vordere Abdeckung und den Knopf heraus 3. Lösen Sie die Kabelverankerung 4. Ziehen Sie das anzuschließende Kabel ab 5. Schließen Sie das Versorgungskabel an die Klemmen L und N des an Elektronikplatine. 6. -
Page 5: Opération
Français Installation 1. Dévissez les vis de fermeture E 2. Retirez le capot avant et le bouton 3. Dévissez l'ancrage du cordon C 4. Dénudez le câble à connecter 5. Connectez le câble d'alimentation aux bornes L et N du carte électronique. 6. -
Page 6: Instalación
Español Instalación 1. Desatornille los tornillos de cierre 2. Saque la cubierta frontal y la perilla 3. Desatornille el anclaje del cable C 4. Pele el cable a conectar 5. Conecte el cable de alimentación a los terminales L y N del pizarra electronica. -
Page 7: Installazione
Italiano Installazione 1. Svitare le viti di chiusura 2. Estrarre il coperchio anteriore e la manopola 3. Svitare l'ancoraggio del cavo C 4. Spelare il cavo da collegare 5. Collegare il cavo di alimentazione ai terminali L e N del scheda elettronica. 6. -
Page 8: Customer Service
Customer Service...
Need help?
Do you have a question about the ID-CD01 and is the answer not in the manual?
Questions and answers