
Related Manuals for G&D PersonalWorkplace Pro Video

Summary of Contents for G&D PersonalWorkplace Pro Video
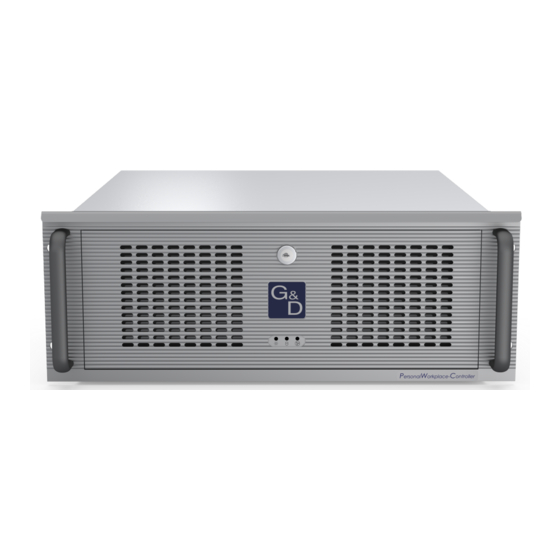
- Page 1 G&D PersonalWorkplace-Controller Pro Video DE Installationsanleitung EN Installation Guide A9100394-1.00...
- Page 2 Zu dieser Dokumentation Diese Dokumentation wurde mit größter Sorgfalt erstellt und nach dem Stand der Technik auf Korrektheit überprüft. Für die Qualität, Leistungsfähigkeit sowie Marktgängigkeit des G&D-Produkts zu einem bestimmten Zweck, der von dem durch die Produktbeschreibung abgedeck- ten Leistungsumfang abweicht, übernimmt G&D weder ausdrücklich noch still- schweigend die Gewähr oder Verantwortung.
- Page 3 FCC-Erklärung Die in diesem Handbuch genannten Geräte erfüllen Teil 15 der FCC-Bestimmun- gen. Für den Betrieb gelten die folgenden Bedingungen: (1) die Geräte dürfen keine schädlichen Störungen erzeugen und (2) die Geräte müssen alle empfangenen Stö- rungen aufnehmen, einschließlich Störungen, die den Betrieb beeinträchtigen. HINWEIS: Dieses Gerät wurde getestet und erfüllt die Grenzwerte für ein digitales Gerät der Klasse A entsprechend Teil 15 der FCC-Bestimmungen.
-
Page 4: Table Of Contents
Inhaltsverzeichnis Inhaltsverzeichnis Sicherheitshinweise ..................1 Die »PersonalWorkplace-Controller«-Serie ............3 Verfügbare Varianten ..................3 Lieferumfang ....................5 Vorbereitung ..................... 6 Standortwahl ..................... 6 Planung der Videobandbreite ................6 Planung der maximalen Pixelfläche, Anzahl der Ausgabemonitore und virtuellen Ausgaben ......................7 Standardmodus (Legacy-Modus) ..............7 Dynamischer Modus .................. -
Page 5: Sicherheitshinweise
Sicherheitshinweise Sicherheitshinweise Bitte lesen Sie die folgenden Sicherheitshinweise aufmerksam durch, bevor Sie das G&D-Produkt in Betrieb nehmen. Die Hinweise helfen Schäden am Produkt zu ver- meiden und möglichen Verletzungen vorzubeugen. Halten Sie diese Sicherheitshinweise für alle Personen griffbereit, die dieses Produkt benutzen werden. - Page 6 Sicherheitshinweise Korrekte Einbaulage bei Geräten mit Lüftungsöffnungen sicherstellen Aus Gründen der elektrischen Sicherheit ist bei Geräten mit Lüftungsöffnungen nur eine aufrechte, horizontale Einbauweise zulässig. Keine Gegenstände durch die Öffnungen des Geräts stecken Stecken Sie keine Gegenstände durch die Öffnungen des Geräts. Es können gefähr- liche Spannungen vorhanden sein.
-
Page 7: Die "Personalworkplace-Controller"-Serie
Die »PersonalWorkplace-Controller«-Serie Die »PersonalWorkplace-Controller«- Serie Auf den am angeschlossenen Monitoren können Sie die PersonalWorkplace-Controller Videosignale mehrerer Quellen gleichzeitig ausgeben. Die Monitore können Sie nach Ihren Anforderungen platzieren und die Videosig- nale nach Belieben zeitgleich auf den Monitoren anordnen. Jedes Videosignal können Sie individuell skalieren, einrahmen und/oder dessen anzuzeigenden Ausschnitt fest- legen. - Page 8 Die »PersonalWorkplace-Controller«-Serie Die Varianten unterscheiden sich in der Anzahl der Videoeingänge, der Anzahl bedienba- rer Rechner sowie der Anzahl der Monitore im Dynamischen Modus (s. Seite 7): Variante Video- Bedienbare anschließbare anschließbare eingänge Rechner Monitore im Monitore im Standardmodus Dynamischen Modus Basic KVM 1 (auf 2 erweiterbar) Pro KVM...
-
Page 9: Lieferumfang
Lieferumfang Lieferumfang 1 × PersonalWorkplace-Controller Pro Video 2 × Netzanschlusskabel (CEE 7/4) 1 × Sicherheitshinweise-Flyer 1 × Installationshandbuch HINWEIS: Das separate Konfigurationshandbuch ist auf der G&D-Website www.gdsys.com ) verfügbar. G&D PersonalWorkplace-Controller Pro Video · 5... -
Page 10: Vorbereitung
Vorbereitung Vorbereitung Standortwahl Stellen Sie bei der Standortwahl des Geräts sicher, dass die zulässige Umgebungs- temperatur (siehe Technische Daten auf Seite 18) in der unmittelbaren Nähe einge- halten und nicht durch andere Geräte beeinflusst wird. Die Luftein- und Luftauslässe dürfen nicht blockiert werden. Planen Sie an der Rück- und Vorderseite des Gerätes jeweils mindestens 10 cm Freiraum ein, um einen starken Luftstrom zu gewährleisten. -
Page 11: Planung Der Maximalen Pixelfläche, Anzahl Der Ausgabemonitore Und Virtuellen Ausgaben
Vorbereitung Planung der maximalen Pixelfläche, Anzahl der Aus- gabemonitore und virtuellen Ausgaben PersonalWorkplace-Controller unterstützt zwei verschiedene Ausgabemodi: den Standardmodus (Legacy-Modus) und den dynamischen Modus Standardmodus (Legacy-Modus) Standardmodus (Legacy-Modus) werden bis zu fünf Ausgabemonitore mit den festen Seitenverhältnissen 16:9 16:10 unterstützt. Die Variante kann in diesem Modus standard- PersonalWorkplace-Controller Pro Video... -
Page 12: Anschluss Von Hdmi- Bzw. Dvi-Signalen
Vorbereitung Anschluss von HDMI- bzw. DVI-Signalen Die Videokarten verwenden zwei verschiedene technische Lösungen für die Video- eingänge: Ein Teil der Videoeingänge (s. Tabellen auf Seite 9) verwendet HDMI- HDMI: Buchsen und verarbeitet HDMI-Signale DVI: Der andere Teil der Videoeingänge (s. Tabellen auf Seite 9) verwendet eben- falls HDMI-Buchsen, verarbeitet aber DVI-Signale HINWEIS:... -
Page 13: Installation
Installation Installation Videoeingänge anschließen Display 3 Display 3 Display 4 Display 4 Display 1 Display 1 Display 2 Display 2 HINWEIS: Die Videoeingänge sind mit Nummern von gekennzeichnet. Schließen Sie die Videoquellen an die verschiedenen HDMI-Anschlüsse an. Beachten Sie hierbei die unterschiedlichen technischen Voraussetzungen der HDMI- Buchsen der insgesamt drei Videokarten: EINGANG SIGNALART (INTERN) -
Page 14: Ausgangsmonitore Anschließen
Installation Ausgangsmonitore anschließen Display 3 Display 3 Display 4 Display 4 Display 1 Display 1 Display 2 Display 2 Schließen Sie die Ausgangsmonitore an die fünf zur Verfügung stehenden Video- ausgänge an: AUSGANG ANSCHLUSS DisplayPort DisplayPort DisplayPort HDMI DVI-DL Verwenden Sie an Ausgang einen Bildschirm mit einer Auflösung von Pixeln, um die Bilder der Videoeingänge zu sehen. -
Page 15: Weitere Schnittstellen Verbinden
Installation Weitere Schnittstellen verbinden Display 3 Display 4 Display 1 Display 2 Netzwerkverbindung herstellen Verbinden Sie diese Schnittstelle mit dem lokalen Netzwerk. Maus, Tastatur und USB-Stick anschließen An jede der vier USB-Schnittstellen können Sie eine Tastatur, eine Display 1…4: Maus oder einen USB-Stick anschließen. TIPP: Für den gleichzeitigen Anschluss einer Tastatur, einer Maus und eines USB- Sticks schließen Sie diese Geräte an einen USB-Hub an. -
Page 16: Anschluss Der Stromversorgung
Installation Anschluss der Stromversorgung Display 3 Display 3 Display 4 Display 4 Display 1 Display 1 Display 2 Display 2 Power 1/Power 2: Stecken Sie in die Buchsen beider Netzteile je ein mitgeliefertes Kaltgerätekabel ein. HINWEIS: Die Stromversorgung kann jederzeit ein- und ausgeschaltet werden, solange der Protokollierungsmodus deaktiviert ist. -
Page 17: Erste Schritte
Erste Schritte Erste Schritte Stromversorgung herstellen Schalten Sie den PersonalWorkplace-Controller ein, indem Sie die Stromversor- gung mindestens eines Netzteils ( ) einschalten. Power 1/Power 2 Erstkonfiguration der Netzwerkeinstellungen Für den Zugriff auf die Webapplikation konfigurieren Sie die Netzwerkeinstellun- gen des Gerätes. HINWEIS: Im Auslieferungszustand sind folgende Einstellungen vorausgewählt: ... -
Page 18: Freischaltung Kostenpflichtiger Weiterer Display-Lizenzen
Erste Schritte 6. Klicken Sie auf Save 7. Klicken Sie auf Reboot now Freischaltung kostenpflichtiger weiterer Display-Lizenzen Bei Erwerb kostenpflichtiger weiterer Display-Lizenzen erhalten Sie einen Lizenz-Key. TIPP: Durch den Kauf weiterer Display-Lizenzen (Artikel-Nummer: A8200053 können Sie die Pixelfläche im Standardmodus (Legacy-Modus) jeweils um weitere erweitern oder im Dynamischen Modus jeweils einen zusätzlichen Ausgabemo- 8 MP nitor anschließen bzw. -
Page 19: Inbetriebnahme
Erste Schritte Inbetriebnahme Nach dem ersten Start des Geräts werden alle Videoeingänge auf dem Ausgabe- monitor angezeigt (Werkseinstellung). Abbildung 1: Anzeige aller Videoeingänge auf dem Monitor (Abb. ähnlich, hier Beispiel PersonalWorkplace-Controller Pro KVM) Grundlegende Konfiguration prüfen bzw. ändern Über die Registerkarten der Webapplikation können Sie das Gerät einrichten und verwalten. - Page 20 Erste Schritte 2. Wählen Sie auf der Registerkarte die Option Configuration Display Settings und folgen Sie den Anweisungen. 3. Wählen Sie auf der Registerkarte die Option Configuration Network Settings falls Sie die Netzwerkeinstellungen ändern möchten. 4. Wählen Sie die Registerkarte Administration , um die Videokanäle zu konfigurieren.
-
Page 21: Statusanzeigen
Statusanzeigen Statusanzeigen Frontseite Die LEDs an der Frontseite des Geräts signalisieren den Betriebsstatus. Position Status Bedeutung grün Das Gerät wird mit Spannung versorgt. Links ( Das Gerät ist ausgeschaltet. [Diese LED hat keine Verwendung] Mitte ( ) gelb Stromversorgung fehlerfrei Rechts ( Stromversorgung fehlerhaft WICHTIG:... -
Page 22: Technische Daten
Technische Daten Technische Daten Allgemeine Eigenschaften PERSONALWORKPLACE-CONTROLLER PRO VIDEO Videoeingänge Anzahl: Buchse: siehe Abschnitt »Videokarten« auf Seite 21 Signal: siehe Abschnitt »Videokarten« auf Seite 21 Eigenschaften: siehe Abschnitt »Videokarten« auf Seite 21 Videoausgänge Schnittstellen: 3 × DisplayPort 1.2 (max 600 MP/s) 1 ×... - Page 23 Technische Daten PERSONALWORKPLACE-CONTROLLER PRO VIDEO Standardmodus: Videoverarbeitung Anzahl Monitore: max. 5 Dynamischer Modus: 2 (kostenpflichtig erweiterbar) unterstützte Pixelfläche Standardmodus: ab Werk: 16 MP (kostenpflichtig erweiterbar) Dynamischer Modus: beliebig innerhalb der max. Pixelfläche Standardmodus: max. Pixelfläche: max. 8192 Pixel horizontal ...
- Page 24 Technische Daten PERSONALWORKPLACE-CONTROLLER PRO VIDEO Sonstige Schnittstellen Netzwerk: 1 × RJ45-Buchse (10/100/1000 MBit/s) USB: 4 × USB-A-Buchse ( Display 1…4 Stromversorgung Typ: internes Spannungsversorgungsmodul Anzahl: Anschluss: Kaltgerätestecker (IEC-320 C14) Stromaufnahme: 100 - 240 VAC/63 - 47Hz/5,00 - 2,50A Gehäuse Material: Stahlblech Dimensionen (B ×...
-
Page 25: Eigenschaften Der Videokarten
Eigenschaften der Videokarten VIDEOKARTE #1 Eingang 1: Buchse: HDMI-Buchse Signal: HDMI H-Display: min. 320 Pixel; max. 4096 Pixel V-Display: min. 200 Lines; max. 2560 Lines Pixelrate: min. 16 MP/s; max. 550 MP/s Eingänge 2,3,4: Buchse: HDMI-Buchse Signal: HDMI H-Display: min. 320 Pixel; max. 4096 Pixel V-Display: min. - Page 26 VIDEOKARTE #2 Eingang 10: Buchse: HDMI-Buchse Signal: HDMI H-Display: min. 320 Pixel; max. 4096 Pixel V-Display: min. 200 Lines; max. 2560 Lines Pixelrate: min. 16 MP/s; max. 550 MP/s Eingänge 11,12,13: Buchse: HDMI-Buchse Signal: HDMI H-Display: min. 320 Pixel; max. 4096 Pixel V-Display: min.
- Page 27 VIDEOKARTE #3 Eingänge Buchse: HDMI-Buchse 19,20,21,22,23: Signal: HDMI H-Display: min. 320 Pixel; max. 2560 Pixel V-Display: min. 200 Lines; max. 2560 Lines Pixelrate: min. 16 MP/s; max. 165 MP/s Eingänge 24,25,26: Buchse: HDMI-Buchse Signal: Single-Link-DVI H-Display: min. 320 Pixel; max. 2560 Pixel V-Display: min.
- Page 28 About this manual This manual has been carefully compiled and examined to the state-of-the-art. G&D neither explicitly nor implicitly takes guarantee or responsibility for the qual- ity, efficiency and marketability of the product when used for a certain purpose that differs from the scope of service covered by this manual.
- Page 29 FCC Statement The devices named in this manual comply with Part 15 of the FCC Rules. Opera- tion is subject to the following two conditions: (1) the devices may not cause harm- ful interference, and (2) the devices must accept any interference received, including interference that may cause undesired operation.
- Page 30 Table of contents Contents Safety guidelines ....................1 The »PersonalWorkplace-Controller« series ............. 3 Available variants ....................3 Scope of delivery ....................5 Preparation ....................... 6 Choosing a location ................... 6 Planning the video bandwidth ................6 Planning the maximum pixel area, number of output monitors and virtual outputs . 7 Standard mode (legacy mode) ...............
-
Page 31: Safety Guidelines
Safety guidelines Safety guidelines Please read through the following safety guidelines before putting the G&D product into operation. The guidelines help to avoid damage to the product and prevent potential injuries. Keep these safety guidelines ready to hand for all persons who use this product. Observe all warnings and operating information given at the device or in this operat- ing manual. - Page 32 Safety guidelines Ensure correct installation position for devices with ventilation openings For reasons of electrical safety, devices with ventilation openings must only be installed in an upright, horizontal position. Do not insert any objects through the device’s openings Objects should never be inserted through the device’s openings. Dangerous voltage could be present.
-
Page 33: The "Personalworkplace-Controller" Series
The »PersonalWorkplace-Controller« series The »PersonalWorkplace-Controller« series You can display the video signals of multiple sources simultaneously on the moni- tors connected to the PersonalWorkplace-Controller Place the monitors according to your requirements and arrange the video signals on the monitors simultaneously as you like. You can scale and frame each video signal individually and/or define the section to be displayed. - Page 34 The »PersonalWorkplace-Controller« series The variants differ in the number of video inputs, the number of operable computers and the number of monitors in dynamic mode (see page 7): Variant Video Operable Connectable Connectable inputs computers monitors in monitors in default mode dynamic mode Basic KVM 1 (expandable to 2)
-
Page 35: Scope Of Delivery
Scope of delivery Scope of delivery 1 × PersonalWorkplace-Controller Pro Video 2 × power cable (CEE 7/4) 1 × flyer “Safety Instructions” 1 × installation manual NOTE: You can download the separate Configuration Manual on G&D’s website www.gdsys.com G&D PersonalWorkplace-Controller Pro Video ·... -
Page 36: Preparation
Preparation Preparation Choosing a location When choosing the location of the device, ensure that the permitted ambient tempe- rature (see Technical data on page 18) in the direct vicinity is observed and that it is not influenced by other devices. The air inlets and outlets must not be blocked. -
Page 37: Planning The Maximum Pixel Area, Number Of Output Monitors And Virtual Outputs
Preparation Planning the maximum pixel area, number of output monitors and virtual outputs PersonalWorkplace-Controller supports two different output modes: standard mode (legacy mode) dynamic mode Standard mode (legacy mode) standard mode (legacy mode) up to five output monitors with fixed aspect ratios of are supported. -
Page 38: Connecting Hdmi Or Dvi Signals
Preparation Connecting HDMI or DVI signals The video cards use two different technical solutions for the video inputs: Some of the video inputs (see tables on page 9) use HDMI sockets and pro- HDMI: cess HDMI signals DVI: The other video inputs (see tables on page 9) also use HDMI sockets, but pro- cess DVI signals... -
Page 39: Installation
Installation Installation Connecting video inputs Display 3 Display 3 Display 4 Display 4 Display 1 Display 1 Display 2 Display 2 NOTE: The video inputs are labelled with numbers from Connect the video sources to the various HDMI connections. Observe the various technical requirements of the HDMI sockets of the total of three video cards: INPUT SIGNAL TYPE (INTERNAL) MAX. -
Page 40: Connecting Output Monitors
Installation Connecting output monitors Display 3 Display 3 Display 4 Display 4 Display 1 Display 1 Display 2 Display 2 Connect the output monitors to the five available video outputs: OUTPUT CONNECTION DisplayPort DisplayPort DisplayPort HDMI DVI-DL Connect a monitor with a resolution of pixels to output to display the 3840 ×... -
Page 41: Connecting Other Interfaces
Installation Connecting other interfaces Display 3 Display 4 Display 1 Display 2 Establishing network connection Connect this interface to the local network. Connecting mouse, keyboard and USB stick You can connect a keyboard, a mouse or a USB stick at each of the Display 1 to 4: four USB interfaces. -
Page 42: Connection The Power Supply
Installation Connection the power supply Display 3 Display 3 Display 4 Display 4 Display 1 Display 1 Display 2 Display 2 Power 1/Power 2: Insert one cold-device cable included in delivery into each of the two power packs. NOTE: The power supply can be switched on and off at any time as long as logging mode is deactivated. -
Page 43: Getting Started
Getting started Getting started Establish the power supply Switch on the PersonalWorkplace-Controller by switching on the power supply of at least one power supply unit ( Power 1/Power 2 Initial configuration of the network settings Configure the network settings to access the web application of the device. NOTE: In the defaults, the following settings are pre-selected: ... -
Page 44: Activating Further Paid Display Licenses
Getting started Activating further paid display licenses After purchasing further display licenses, you will get a license key. ADVICE: By purchasing additional (article number: display licenses A8200053 you can expand the pixel grid in default mode (legacy mode) by another 8 MP or con- nect an additional output monitor in dynamic mode or use an additional virtual out-... -
Page 45: Commissioning
Getting started Commissioning After the first start of the device, all video inputs are displayed on the output moni- tor (default setting). Figure 1: Displaying all video inputs on a monitor (Fig. similar, here: PersonalWorkplace-Controller Pro KVM) Checking or changing the general configuration Using the tabs of the web application, you can set up and manage the device. - Page 46 Getting started 3. On the tab , select the option Configuration Network Settings if you want to change the network settings. 4. Select the tab to configure the video channels. Administration 5. Check and configure the other parameters of the device. 16 ·...
-
Page 47: Status Displays
Status displays Status displays Front panel The LEDs on the front of the device show the operating status. Position Status Meaning Green The device is supplied with power. Left ( The device is switched off. [This LED has no function] Middle ( ) Yellow Error-free power supply... -
Page 48: Technical Data
Technical data Technical data General features PERSONALWORKPLACE-CONTROLLER PRO VIDEO Video inputs Quantity: Socket: see paragraph »Video cards« on page 21 Signal: see paragraph »Video cards« on page 21 Features: see paragraph »Video cards« on page 21 Video outputs Interfaces: 3 ×... - Page 49 Technical data PERSONALWORKPLACE-CONTROLLER PRO VIDEO Default mode: Video processing No. of monitors: Max. 5 Dynamic mode: 2 (expandable for a fee ) Supported pixel grid Default mode: Ex works: 16 MP (expandable for a fee ) Dynamic mode: Any within the max. pixel grid Max.
- Page 50 Technical data PERSONALWORKPLACE-CONTROLLER PRO VIDEO Other interfaces Network: 1 × RJ45 socket (10/100/1000 MBit/s) USB: 4 × USB-A socket (Display 1…4) Power supply Type: Internal power supply unit Quantity: Connection: IEC plug (IEC-320 C14) Power consumption: 100 - 240 VAC/63 - 47 Hz/5.00 - 2.5 0A Housing Material: Steel plate...
-
Page 51: Features Of The Video Cards
Features of the video cards VIDEO CARD #1 Input 1: Socket: HDMI socket Signal: HDMI H display Min. 320 pixel; max. 4096 pixel V display: Min. 200 lines; max. 2560 lines Pixel rate: Min. 16 MP/s; max. 550 MP/s Inputs 2, 3, 4 Socket: HDMI socket Signal:... - Page 52 VIDEO CARD #2 Input 10: Socket: HDMI socket Signal: HDMI H display Min. 320 pixel; max. 4096 pixel V display: Min. 200 lines; max. 2560 lines Pixel rate: Min. 16 MP/s; max. 550 MP/s Inputs 11, 12, 13: Socket: HDMI socket Signal: HDMI H display...
- Page 53 VIDEO CARD #3 Inputs 19, 20, 21, 22, 23: Socket: HDMI socket Signal: HDMI H display Min. 320 pixel; max. 2560 pixel V display: Min. 200 lines; max. 2560 lines Pixel rate: Min. 16 MP/s; max. 165 MP/s Inputs 24, 25, 26: Socket: HDMI socket Signal:...
- Page 56 G&D. AND KVM FEELS RIGHT. Hauptsitz | Headquarter US-Büro | US-Office Guntermann & Drunck GmbH Systementwicklung G&D North America Inc. Obere Leimbach 9 | D-57074 Siegen | Phone +49 271 23872-0 4001 W. Alemada Avenue | Suite 100, Burbank, CA 91505 | Phone +1-818-748-3383 sales.us@gdsys.com | www.gdsys.com sales@gdsys.com | www.gdsys.com...
Need help?
Do you have a question about the PersonalWorkplace Pro Video and is the answer not in the manual?
Questions and answers