
Summary of Contents for laguna IQ HHC
- Page 1 CNC ROUTER Model IQ HHC LAGUNA TOOLS 17101 Murphy Ave. Irvine, California 92614 Part No. MCNC IQ HHC Ph: 800.234.1976 © 2013 Laguna Tools, Inc. All rights reserved. www.lagunatools.com...
- Page 2 Dear Woodworker, Thank you for your purchase and welcome to the Laguna Tools group of discerning woodworkers. I understand that you have a choice of where to purchase your machines and appreciate the confidence you have shown in our products.
-
Page 3: Table Of Contents
Table of contents Page number Safety Rules Warranty Noise emission Specification sheet Receiving your IQ Machine Glossary of terms Introduction to your IQ Machine Parts of your IQ Machine Where to locate your IQ Machine Unpacking your IQ Machine Assembly and set up Control button functions Getting Started Maintenance and troubleshooting... -
Page 4: Safety Rules
Safety Rules As with all machinery there are certain hazards involved with the operation and use of your machine. Using it with caution will considerably lessen the possibility of personal injury. However, if normal safety precautions are overlooked or ignored, personal injury to the operator may result. If you have any questions relating to the installation and operation, do not use the equipment until you have contacted your supplying distributor. -
Page 5: Warranty
Limited Warranty New woodworking machines sold by Laguna Tools carry a one-year warranty from the date of shipping. Laguna Tools guarantees all new machines sold to be free of manufacturers’ defective workmanship, parts, and materials. We will repair or replace, without charge, any parts determined by Laguna Tools, Inc. -
Page 6: Noise Emission
You must then contact the seller, [Laguna Tools] within 24 hours. Note: Laguna Tools, Inc. endeavors to test each machine prior to shipping and you may find sawdust in or on your machine. -
Page 7: Receiving Your Iq Machine
Glossary of terms. Ball End Milling Cutter - A milling cutter that has a rounded cutting diameter at its end that is equal to the cutting diameter. DXF file - Drawing exchange Format file that was created as a standard to freely exchange 2 and 3 dimensional drawings between different CAD programs. - Page 8 MDI – Manual Data Entry, used for entering commands manually, line by line. CAD – Computer Aided Design, the using of computers to assist and develop design. CAM – Computer Aided Manufacturing, the use of computers to assist in manufacturing. CNC –...
-
Page 9: Introduction To Your Iq Machine
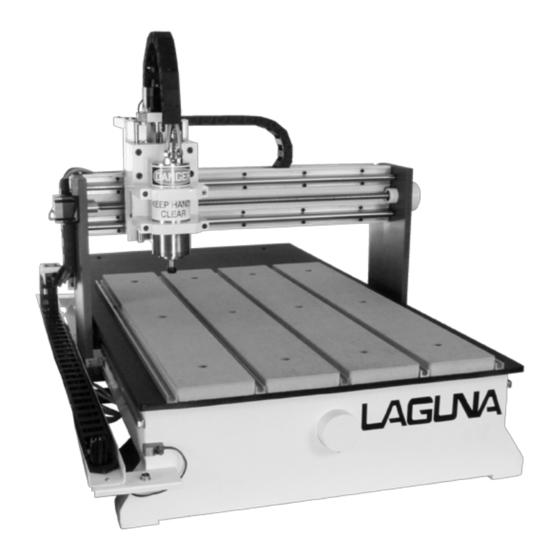
Introduction to IQ machines. The IQ is designed to give you years of safe service. Read this owner’s manual in its entirety before assembly or use. The advantage of the IQ machine is that it can, in most cases, fully machine the complete job without it being removed from the table so that you have finished parts of high accuracy that are totally repeatable. - Page 10 5. Hand held controller & electrical control box. The Hand held controller controls all the functions of the IQ. The electrical control box is attached to the machine by a flexible conduit and can be located close to the machine [on a shelf under the machine]. Hand held controller Electrical control box...
-
Page 11: Parts Of Your Iq Machine
Where to locate your Machine The IQ is table mounted [TABLE NOT SUPPLIED]. The table must be of a robust construction as the IQ is heavy and need to be adequately supported. The table should have a shelf to support the electrical control box. Before you unpack your machine, select the area where you will use your machine. - Page 12 Leveling the IQ. It is suggested that the machine is mounted on a strong table . You might find that it is an advantage to mount the IQ on rubber pads [not supplied] to act as anti vibration mounts. This will be dependent on your set up. Electrical connections for the machine.
- Page 13 You will connect one tube to the water pump and the other will be placed in the water container for the return water. It is not important which pipe is used as the return. Fit the 90 degree connector to the pump. Connect one of the pipes to the water pump by pushing it into the 90 deg connector.
- Page 14 Fitting touch off puck. The touch off puck is plugged in to the socket on the trough as shown. The puck is magnetic to allow it to be stored in a convenient place on the machine. Fitting the router bit into the router head.
- Page 15 Note: Use this process for all other router bits that you need to fit, but note, you will have to change the collet if the shank of the router bit is a different size. Types of router bits. There are five basic types of router bits: straight, up shear, down shear, combination [also called compression], and form tools [round over, ogee, etc.].
- Page 16 Cleaning the IQ. Clean off any protection grease with WD40 or something similar. Re-lubricate the IQ with a Teflon based lubricant or wax. The machine has steel parts that if not protected will rust. Teflon has a tendency to dry and has fewer tendencies to accumulate dust and dirt.
-
Page 17: Control Button Functions
Cabinet socket Controller cable fitted to cabinet socket Memory stick Controller Controller button functions. Note. Controller may vary form that shown. X+ / 1 = Moves the gantry in the X direction away from the home end of the bed. Y+ / 2 = Moves the gantry in the Y direction away from the home end of the bed. - Page 18 HOME / 9= Causes the machine to move to the “Home” position, First in the Z axis, followed by X and then Y. (Home is a mechanically determined position using mechanical switches/sensors.) HIGH/LOW / 0 = Toggles jogging speeds between High and Low ranges. ONOFF/.
- Page 19 To move the router head. There are 3 different methods of moving the router head. 1. Continuous mode. Press the mode button until Continuous is displayed. The display will show [bottom row of the screen] the changing location of the router head as it moves location.
- Page 20 3. Press the Y+ button and hold until the router gantry stops moving, note the displayed AY value. 4. Typically on the Laguna IQ CNC machine the work envelope is 24½" x 35½" 5. Machining can only be performed if the tool path centerlines fall within the work envelope.
- Page 21 Setting the Z origin point [tool touch off]. The machine needs to know when the router bit is just touching the top of the spoil board. When you fit the router bit into the collet the tip of the router bit will be at a different height above the spoil board and will have to be zeroed.
-
Page 22: Getting Started
5. Use the arrow keys to select the file that you need to load into the controller. 6. Select, then press OK button. 7. Once the code / program has been down loaded the machine will start to operate. Note. Ensure that you are clear of the machine as the spindle will start to turn and could cause injury. - Page 23 and re-use it, but the likelihood is that it is scrap. Fitting a spoil board. The machine is supplied with sacrificial plastic strips on the bed. The strips are designed so that they will not damage the cutter should it come in contact. The plastic strips have not been machined as some movement may take place during shipping.
- Page 24 Fitting a job to the spoil board. You can use double sided tape to attach the job to the spoil board. If you are using double sided tape, ensure that the spoil board and the job are clean and do not have sawdust or chips as this will affect the ability of the tape to hold the job securely.
-
Page 25: Maintenance And Troubleshooting
Maintenance. As with any machine, to ensure optimal performance you must conduct regular maintenance. Lubrication. You must regularly [Minimum every 12 hours] lubricate the bearing surfaces and the ball screws. Use a thin Lithium spray or a Teflon based spray lubrication. Spray daily and wipe off the excess. - Page 26 Troubleshooting. Machine will not start. 1. Check that the start switch is being pressed full in. 2. Check that the red stop switch is fully out. 3. Check that the electrical power cord is plugged into the power outlet. 4. Check that the electrical supply is on [reset the breaker]. 5.
- Page 27 LAGUNA TOOLS 17101 Murphy Ave. Irvine, California 92614 Ph: 800.234.1976 www.lagunatools.com © 2013 Laguna Tools, Inc. All rights reserved.
Need help?
Do you have a question about the IQ HHC and is the answer not in the manual?
Questions and answers