
Related Manuals for Tiviar Alpha+


Summary of Contents for Tiviar Alpha+
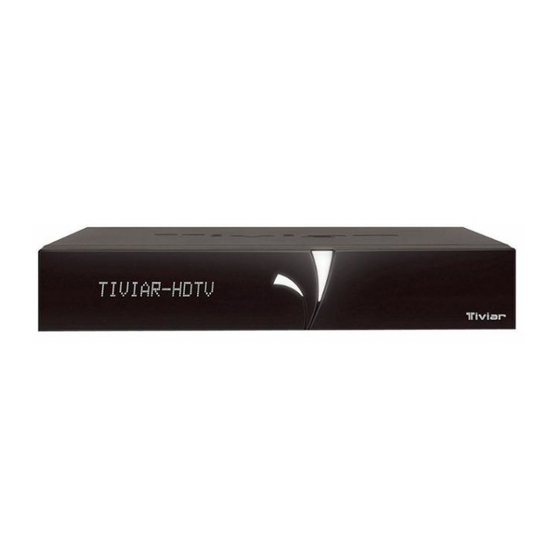
- Page 1 Full HD - Triple Tuner Hybrid PVR Discover Your Smart Life User's Manual Tiviar α+...
-
Page 3: Table Of Contents
INDEX Precautions ............................5 1. Important Safety Instructions...................... 5 2. Notice ............................5 3. Copyright ............................ 6 4. Disclaimer ........................... 6 5. Trademarks ..........................6 Before You Begin ..........................7 1. Main Features ..........................7 2. Accessories ..........................8 Hardware Description ........................... 9 1. - Page 4 Guide of Function ..........................21 1. Selecting a service ........................21 2. Information Window ........................21 3. Multi-picture display ........................21 4. PVR ............................21 4.1 Recording ..........................21 4.2 Time shift ..........................22 4.3 playback ..........................23 5. Playlist ............................23 6.
-
Page 5: Precautions
Precautions 1. Important Safety Instructions Read these instructions. Keep these instructions. Heed all warnings. Follow all instructions. Do not use this apparatus near water. Clean only with dry cloth. Do not block any ventilation openings. Install in accordance with the manufacturer’s instructions. Do not install near any heat sources such as radiators, heat registers, stoves, or other apparatus (including amplifiers) that produce heat. -
Page 6: Copyright
To reduce the risk of electric shock, do not remove the cover (or back). No user serviceable parts are inside. Refer servicing to qualified service personnel. The Lightning Flash with arrowhead symbol The exclamation point within an within an equilateral triangle, is intended to equilateral triangle is intended to alert alert the user to the presence of un-insulated the user to the presence of important... -
Page 7: Before You Begin
Before You Begin 1. Main Features For the use of DVB-S/S2, Satellite tuner only Supports MPEG4 /MPEG2 - HD/SD and Fully DVB-S2 /DVB-S Compliant Intelligent Blind Scan for both SD and HD TV & Multi-Satellite Search Multi-LNB Controlled by DiSEqC Control Version 1.0, 1.1, 1.2 and USALS For the use of DVB-C, Cable tuner only ... -
Page 8: Accessories
2. Accessories User's Manual Remote Control USB WiFi Loop through Cable AAA size Batteries x2 HDMI Cable AC Power Cord NOTE : If any accessories listed above are missing, contact the sales representative where you purchased this device. -
Page 9: Hardware Description
Hardware Description 1. Front Panel Configuration 1. POWER Button : Press to switch between STANDBY and POWER ON modes. 2. CH Up/Down Button : Press to change services in normal mode, or to move highlighted-bar in menu mode. 3. Remote IR Sensor : Receives IR(Infrared) signal from remote controller. 4. -
Page 10: Rear Panel Configuration
3. Rear Panel Configuration The 3rd tuner can be installed in different combination as follows. For the professional installation of these tuners, please ask your local agent or dealers for further assistance. 1. RS-232C : Serial port for firmware update and data transfer. 2. - Page 11 In case of T(T2) 1. ANT IN Terrestrial broadcasting signal input socket for the first tuner (TUNER 1). Connects an aerial antenna. 2. LOOP OUT Terrestrial broadcasting signal output socket through the first tuner (TUNER 1). Connects to second tuner for loop- through.
-
Page 12: Remote Control Unit
4. Remote Control Unit 1. POWER : Turns the STB On/Off. 2. TV : Press this TV button first, to control your TV set with this remote control unit. 3. STB :Press this STB button first, to control your STB with this remote Control unit. 4. - Page 13 7. Information : Shows the information box of the current program. If you press one more time, a detail information box will be shown. 8. Recall : Moves to previous service. 9. ARROW Buttons Up & Down Key : To change the value of a selected item with preprogrammed values in menu. Left &...
- Page 14 19. Color Buttons RED : Used for special function in menu. RED key is used to sort lists in service list or go to previous day search in EPG or make/delete the current position as a bookmark. GREEN : Used for special function in menu. GREEN key is used to set favorites setting in service list or go to the next bookmark position.
-
Page 15: Multi-Brand Ir Remote Controller Setting
5. Multi-Brand IR Remote Controller Setting NOTE : When there is no input during about 10 seconds from set mode, set mode is canceled. Direct Code Entry Step 1 : Turn on the DEVICE what you want to set up(TV / DVD / VCR) Step 2 : Press DEVICE and OK button during about 2 seconds at the same time. -
Page 16: Connecting Diagram
Connecting diagram 1. Receiver to A/C power Connect the A/C power cord between A/C power cord socket of receiver and A/C outlet. 2. Receiver to TV with Digital A/V Output Connect the HDMI Cable to the HDMI Connector of the TV. Connect SPDIF to Digital audio input of the equipment(Digital Audio) NOTE : Depending on the A/V equipment you own, there are various ways you can connect the STB. -
Page 17: Receiver To Tv With Analog A/V Output
3. Receiver to TV with Analog A/V Output Connect the TV SCART to the SCART input of the TV. Connect the Component to the Component input of the TV. Connect the RCA to the RCA input of the TV. NOTE : The component connection(YPbPr) is recommended for Digital TV. The SCART cable connection is recommended for analogue TV or VCR The composite connection(RCA cable) is recommended for analogue TV You cannot view high definition video with the SCART and the composite video... -
Page 18: Connecting To Antenna Cable
4. Connecting to Antenna Cable 4.1 In case of S2 (Satellite + Satellite) tuners Connecting one dish to both tuners by Loop through 4.2 In case of S2 + T(T2) (Satellite + Terrestrial) tuners Connecting dish antenna to LNB IN of the tuner Connecting aerial antenna to ANT IN of the Tuner 4.3 In case of S2 + C (Satellite + Cable) tuners Connecting dish antenna to LNB IN of the tuner... -
Page 19: Installation
Installation This is for setting language, time and search functions for the first time you turned on the STB. Please follow the sequence: Settings->Installation->System restore to factory reset. Go back to Installation after you selected Reset configuration data. Step1. Choose the language of your choice. Step2. - Page 20 Step4-2. Select the Daylight Saving region. You can see the changed Daylight on the bottom of the screen. Step5. First, select the searchable type list then, select the Search Mode. Now you can start searching. page00 Hardware Description->4. Refer to Connecting to Antenna Cable.
-
Page 21: Guide Of Function
Guide of Function 1. Selecting a service Press [OK] Key, you can see the different functions like sort, favorite, find, ch list option by using the color key. [Up/Down] Key is for changing the channel function. Settings->Configuration->Display Setting->Up/Down Key->Service Change, Simple Service List, HD Service Change 2. -
Page 22: Time Shift
4.1.3 Time Scheduled Recording In Schedule menu, you may set the time & program to record your desired service program. Note. You can set up the Start/Finish function with the following sequence: Setting->Configuration- >Recording Option->Extra Recording Time Before Start/Finish. You can also set up to 1min~15min before and after of the Start/Finish Time for the extra recording. -
Page 23: Playback
4.3 playback Press [Playlist] Key to show the Playlist. You can see the preview of the desired video in the Recording folder. You can also see the file information such as date, time, recording time and capacity. Press [Info] Key to see the Extended EPG. It is possible to show HDD on Default. -
Page 24: Hbbtv
7. HbbTV What is HbbTV? Hybrid Broadcast Broadband TV (HbbTV) is both an industry standard and promotional initiative for hybrid digital TV born in 2009 with the aim of harmonizing the broadcast, IPTV, and broadband delivery of entertainment to the end consumer through connected TVs (Smart TVs) and set-top boxes. -
Page 25: Shortcut Menu
Shortcut Menu 1. By pressing [Menu] Key shortcut menu appears. To display the menu, press the Setting at any time. You can select the sub menus by using the ARROW buttons. The selected sub menu becomes highlighted. After selecting (highlighting) the sub menu you want to access, press the OK button. - Page 26 1.2.3 Display Setting From Display Setting menu Display effect can be set or selected. Setting of Info Box Position, Display Time and Volume Bar Display Time is possible. Whether to show Black Screen or the Last Screen can be chose when switching channels. While watching service, selection of remote controller Up/Down button effect is possible.
-
Page 27: Installation
1.3 Installation 1.3.1 Dish Setting After selecting Satellite, choose and insert value of Tuner Connection(Loop Through/Separate) , Frequency, LNB Power(On/Off), LNB Type(Single/ Universal/ Unicable), LNB Frequency, DiSEqC Switch(1.0, 1.1) to do Dish Setting of each Satellite. Positioner Setting menu allows support of DiSEqc 1.2 and USALS mode. 1.3.2 Satellite Search Search Mode has options like Auto/ Manual/ Blind/ Advanced mode. -
Page 28: Utilities
1.4 Utilities 1.4.1 You can check the information of the inserted Smart Card and CAM, and also set the CI Message On/Off. 1.4.2 Free TV+ What is Free TV+? Free TV+ is a unique feature that enables you to play & enjoy FREE web media contents like Youtube and other free (but premium) contents from various internet websites such as documentary and more. - Page 29 Category (Yellow button): Press this Yellow button to view the list of categories, then choose the one you prefer to watch in the list of contents. Service (Green button): You can select among various free contents provided from web-site. Note: Each web-site is removable by pressing Green key on the list.
-
Page 30: It Is Possible To Save Maximum 10 Favorite Menus In The Shortcut Menu
2. It is possible to save maximum 10 favorite Menus in the shortcut menu. Press [Red] key after moving icon to shortcut Menu from extended Menu Press [Down] key to move the selected shortcut Menu to the bottom and press [OK]key to the desired place. -
Page 31: Extended Menu Will Display When Pressing The Key
3. Extended Menu will display when pressing the key. Network: Setting->Installation->Network Setting Storage: Setting->System Tools->Storage Manager Schedule: Setting->System Tools->Schedule CH Edit: Setting->System Tools->Service List Manager Download: You can update the higher version of software via Network. You can also download Channel list, Free TV+, add-on, Internet TV and Internet Radio list. - Page 32 Freetv+: Free TV+ is a unique feature that enables you to play & enjoy FREE web media contents like Youtube and other free (but premium) contents from various internet websites such as documentary and more. So, you can enjoy watching and also downloading various free web contents with our HD receiver.
- Page 33 iTV+: Internet TV+ feature enables you to watch the ‘Media contents’ being served from the Internet through a specific URL. It is just like a web-browsing but watching TV instead of web contents. This feature is not only supporting the streaming of the live broadcast service, but also supports FMS (Flash Media Server) and Wowza server (RTMP) Note : RTMP, RTMPT, HTTP protocol is available only.
- Page 34 Music: When a Music file is selected, the picture of that Album jacket will show (If available). Here you are able to select the play types of Repeated, Random play. And you can also make our own MP3 Play list. Photo: In this menu, use the [Red] key to play your Photo slide show.
-
Page 35: Troubleshooting
Troubleshooting Problem Solution Check the main power cable and check that it is plugged into a Does not display any message suitable power outlet. on the front panel. Check the STB main power switch ‘ON’ at the rear of the STB. See ‘Does not display any message on the front panel’... -
Page 36: Specifications
Specifications Tuner & Channel Decoder (Satellite, Twin DVB-S2) Input Connector F-type, IEC 169-24, Female Loop through out F-type, IEC 169-24, Female Frequency Range 950MHz ~ 2150MHz Input Impedance 75Ω, unbalanced Signal Level -65 to -25dBm LNB Power 13/18VDC, max.400mA 22KHz Tone (22±2)KHz, (0.6±0.2)V DiSEqC Control V1.0/1.2/USALS Compatible... - Page 37 (Terrestrial multi, DVB-T/T2/C) Tuner & Channel Decoder Input Connector IEC-DIN-JACK Loop through out IEC-DIN-PLUG Receiving Channel VHF(S Band I/II, VHF I/III) UHF(S Band III, UHF VI, V) Input Impedance 75 Ω, unbalanced Demodulation QPSK, 16, 64, 256 QAM Channel Bandwidth 6, 7, 8 MHz FET mode 1K, 2K,, 4K, 8K, 16K, 32K...
- Page 38 Audio / Video & Data IN/OUT TV SCART RGB, CVBS Video, Audio L,R Output CVBS Video, Audio L, R Output YPbPr Component Video Output(up to 1080p) HDMI Video & Audio Output OPTIC AC3 digital audio Output RS-232C 9-pin D-SUB(Male)type, Transfer rate 115Kbps USB 2.0 Host Support(1 Front &...
-
Page 39: Code Table For Universal Remote Control Unit
Code Table for Universal Remote Control Unit 1. Key Table KEY NAME Custom Subtitle Info Recall Menu Exit Play List VOL+ VOL- GREEN... - Page 40 KEY NAME Custom YELLOW BLUE (play) TV/Radio Resolution...
-
Page 41: Tv Brands
2. TV Brands Refer to ‘5.Multi-Brand IR Remote Controller Setting’ in the 16 page of this manual TV Brands Code A.R. Systems 8644 7213 6896 5090 7014 7647 8644 6896 3637 Accent Acer 3857 Action 4523 5510 3637 4648 4884 Adcom 7855 Admiral... - Page 42 TV Brands Code 6764 8377 3840 3451 7066 3637 Anam 8644 6896 7647 4526 Anam National 8644 6896 4526 5319 7660 Andersson Anglo 7647 3488 3637 Anitech 7647 3488 8644 6896 5896 4523 3637 4648 7287 8644 6896 7647 5355 5090 5090 2620...
- Page 43 TV Brands Code 4016 5896 7014 6559 3840 Bauer 8484 7647 7647 6640 5265 3835 8644 6896 3518 3350 Baur 6736 3637 5874 4648 Beaumark 5393 4648 Becrese 4523 3802 5874 4648 8060 6482 2590 7287 8644 5553 3840 6896 Beko 6305 6381...
- Page 44 TV Brands Code 4523 3802 5874 Broksonic Brother 3488 Bruns 2590 5605 3350 4016 5355 4016 5605 7647 6812 8644 4530 5896 7384 2438 5090 7350 3488 3350 3840 6230 Bush 7910 5952 5905 2924 6896 8060 5832 7733 5453 3802 4648 4523...
- Page 45 TV Brands Code Cobolt 5397 5510 4648 Colortyme 7733 Combitech Computron 3637 Concorde 7647 3637 8644 6896 7287 4469 7647 5896 5531 5553 Condor 2620 5605 3488 3637 4648 Conia 3491 7837 4706 8033 4523 3802 4648 Conic Conrac 7361 Conrad 8644 6896...
- Page 46 TV Brands Code Dayton 4979 7647 5090 8644 6896 4523 3637 Daytron 4167 7314 5397 Decca 8568 8644 6896 6286 7733 4648 de Graaf 7910 5605 4783 2438 8644 6896 5090 4016 Deitron Denko 3488 Denver 8644 6896 6305 4485 8299 3637 6127...
- Page 47 TV Brands Code Eaton 5510 2335 8435 Ecco 3802 Edison-Minerva 6230 3444 8377 7287 5605 8644 6896 4016 3518 Elbe 2620 2696 8568 3350 Elbe-Sharp 8568 Elbit 4648 5531 8568 5605 Elcit Elecs 4648 Electratune 4523 3637 Electro Tech Electrobrand 5874 Electrohome 4523...
- Page 48 TV Brands Code Exquisit 8644 6896 5531 8644 6896 Fagor Fairtec 4156 Family Life 8644 6896 Fast 3634 5090 7647 3637 Fenner 5301 4884 4422 3270 6127 7430 3847 8644 Ferguson 6896 6482 6982 4638 5620 3350 4783 5119 3840 4648 Fidelis 3637...
- Page 49 TV Brands Code Galeria 7647 3637 5605 7647 5090 4016 2438 3637 6982 5393 5896 3847 4422 7430 3270 4884 Geant Casino 5605 5605 3350 8644 8568 6896 5531 7647 2438 5605 5090 3637 Geloso Gemsound 3637 General 7430 4422 3637 6982 4422...
- Page 50 TV Brands Code 6948 5393 4698 6982 Grunkel 5319 3637 7361 H&B Haaz 8435 2924 3488 Haier 3488 4469 Halifax Hallmark 4523 3802 5874 Hammerstein 3488 4469 Hampton Hanimex 4016 7733 8644 6896 4874 7350 5605 3350 5896 3158 Hanseatic 5295 7287 3876...
- Page 51 TV Brands Code 4648 5620 3952 Hitachi Fujian Hitsu 7647 2696 7014 4016 6127 8060 5952 4677 6305 Home Electronics Horizont 4648 Hornyphon 8644 6896 4648 4016 7014 5896 Hoshai Huanyu 5090 4469 Hugoson 3094 7855 4469 Hygashi Hyper 7647 4469 5531 3637...
- Page 52 TV Brands Code 8644 6896 3835 7839 5605 3350 7287 7430 Interfunk 5531 6538 4648 Internal 8644 6896 4874 5090 2499 International 4469 5896 7014 8644 4530 2796 7350 2590 7287 Intervision 3488 5531 7647 6896 3158 6230 4016 5605 Irradio 7647 8644...
- Page 53 TV Brands Code 2696 8644 6896 5605 7350 3835 7287 2796 2438 2620 5531 8377 3451 3840 4917 2590 Kendo 3637 4648 Kendwood 4523 Kennedy 5605 3444 3840 Kennex Kenwood 4819 Kingsley 4469 4709 3637 Kiota Kiton 6896 8644 5355 4523 3802 5874...
- Page 54 TV Brands Code Lenoir 3637 7647 5531 Lesa Levis Austria 8644 6896 Lexsor 3453 Leyco 3488 8644 6896 4648 8644 5393 7287 7647 7430 2924 6381 8265 2796 5447 4709 6896 4156 6944 4312 5531 8060 4469 5605 6305 3350 7839 8644 6896...
- Page 55 TV Brands Code 3802 Marcys Mark 8644 6896 4469 5090 7647 8060 6381 4648 Master's 4874 8644 4016 4530 7647 3488 8644 6896 Masuda 8644 6896 6230 7647 5605 8568 6482 7910 Matsui 7507 7384 6812 4530 5265 3518 3270 8060 5739 5119...
- Page 56 TV Brands Code 6764 8644 6896 4648 Minoka Mirror 5832 Mistral Electronics 6127 5620 3193 3835 8644 5393 6812 6127 6640 Mitsubishi 6896 7910 3840 3802 3637 4648 Mitsuri General 5605 Mivar 7287 4469 4318 8568 7647 Monaco Monitor 5510 8644 6896 Morgan's...
- Page 57 TV Brands Code 4016 New World Nicamagic 4469 4016 8644 6896 3488 6482 4469 7647 6812 Nikkai 4523 4648 Nikkei 8060 Nikko 5393 Nissan 5510 3637 Noblex Nobliko 4265 4469 7430 Nogamatic 3350 5605 8020 4783 5090 8394 6305 6092 Nokia 6753 4659...
- Page 58 TV Brands Code 8060 7507 7647 3488 3453 3637 5874 4648 4523 3802 Orline 8644 4016 6896 5355 3840 8644 6896 Ormond Orsowe 8568 Osaki 4016 3488 8644 6764 5090 7384 6896 Osio 8644 6896 4016 Osume 6812 4016 8644 6896 3637 3802...
- Page 59 TV Brands Code 6982 5090 3350 7647 4648 Phocus 3730 6948 8060 Phoenix 8644 6896 7287 2590 5605 4469 4648 8644 6896 6127 4469 4648 Phonola Pilot 6896 8644 5716 8435 5510 4174 7507 8644 4849 3350 7430 5605 4422 Pioneer 6896 8209...
- Page 60 TV Brands Code 8644 6736 7507 7430 5355 6896 5265 6538 3835 6640 3518 3350 3488 3840 6092 7647 Quelle 6812 5531 4752 7839 4523 3802 3637 5874 4648 Questa 6812 3802 R Line 4648 Radialva 7430 4016 5605 8644 6896 4422 4523...
- Page 61 TV Brands Code 3637 Royal Royal Lux 7287 6764 3270 Rukopir 6896 8644 5510 Runco 4884 7430 3847 6982 2104 3270 4783 4526 Saba 4422 5605 8568 3350 8060 Sagem 2696 7014 5896 2820 2517 8568 7647 7507 5605 3488 4648 Saisho Saivod...
- Page 62 TV Brands Code 3488 5295 6812 5531 4523 3802 6736 5605 8568 8644 6896 Sei-Sinudyne 8568 6736 8644 6896 5874 4648 7855 Seitech 2438 8377 5605 2620 3444 3488 6092 6812 Seleco 4530 Semua 4523 7647 3637 Sencora Sentra 6482 4016 7647 2696...
- Page 63 TV Brands Code 4016 Sonawa Soniko 8644 6896 Soniq 2519 7910 7287 6559 Sonitron Sonneclair 8644 6896 Sonoko 8644 6896 7647 3488 3637 5896 4648 Sonolor 7910 5605 6736 4783 3350 5896 8644 6896 7287 7647 4648 Sontec Sony 6736 2762 7507 6219...
- Page 64 TV Brands Code 4262 3118 Swisstec SYC Line 3637 Sydney 4469 4648 Sylvania Symphonic 4523 3802 5874 Sysline 8644 6896 Sytong 4469 6975 Tandberg 2410 2620 7430 8377 3350 5605 4016 5531 3193 5605 Tandy 6812 4849 4469 5605 2438 3802 Tashiko 5952...
- Page 65 TV Brands Code 7430 2924 6982 5716 5301 8644 6896 2590 2104 8033 2707 3491 8060 5952 6092 7837 Telefusion 8644 6896 8644 5605 4016 3488 6896 Telegazi Telemeister 8644 6896 Teleopta 3637 Telesonic 8644 6896 7647 8644 6896 6764 3637 Telestar Teletech...
- Page 66 TV Brands Code 4523 Totevision Toyoda 7647 4530 3488 Trakton 7647 3488 5355 3840 8644 6896 2590 4677 TRANS-continents 8644 6896 7014 8299 3835 3488 2924 5716 Transonic 5553 7647 Transtec 4469 3637 Trevi 3637 8644 6896 4016 4648 Triad 8568 Trident Trilux...
- Page 67 TV Brands Code 4469 5090 Videotechnic Videoton 5605 Vidion 3637 6812 5393 Vidtech ViewSonic 5991 Visiola 4469 Vision 8644 3488 6896 3637 4648 3350 Vistar Vocson 4648 8644 6896 4648 Vortec 8644 6896 2438 5553 5605 5393 Voxson 5553 4422 8644 6896 5355...
- Page 68 TV Brands Code 4016 Yorx Zanussi 2438 Zenith 2499 5874 4648 6559 Zenor 7733...
- Page 69 Memo...
- Page 70 Memo...
- Page 72 Full HD - Triple Tuner Hybrid PVR Tiviar V.13011(Eng)
Need help?
Do you have a question about the Alpha+ and is the answer not in the manual?
Questions and answers