Table of Contents
Advertisement
Advertisement
Table of Contents

Related Manuals for HTC S710


Summary of Contents for HTC S710
- Page 1 Smart Phone User Manual www.htc.com...
- Page 2 Congratulations on the purchase of your new Windows Mobile® Smartphone! Please Read Before Proceeding. THIS PHONE IS NOT FULLY CHARGED WHEN YOU TAKE IT OUT OF THE BOX. DO NOT REMOVE THE BATTERY PACK WHEN THE PHONE IS CHARGING. YOUR WARRANTY IS INVALIDATED IF YOU OPEN OR TAMPER WITH THE PHONE'S OUTER CASING.
- Page 3 The information is provided “as is” without warranty of any kind and is subject to change without notice. HTC also reserves the right to revise the content of this document at any time without prior notice.
- Page 4 Important Health Information and Safety Precautions When using this product, the safety precautions below must be taken to avoid possible legal liabilities and damages. Retain and follow all product safety and operating instructions. Observe all warnings in the operating instructions on the product. To reduce the risk of bodily injury, electric shock, fire, and damage to the equipment, observe the following precautions.
- Page 5 FIRE OR WATER. REPLACE ONLY WITH SPECIFIED BATTERIES. RECYCLE OR DISPOSE OF USED BATTERIES ACCORDING TO THE LOCAL REGULATIONS OR REFERENCE GUIDE SUPPLIED WITH YOUR PRODUCT. Note This product should be operated only with the following designated Battery Pack(s). • HTC, Model LIBR160 • Simplo, Model LIBR160...
- Page 6 SAFETY PRECAUTIONS FOR DIRECT SUNLIGHT Keep this product away from excessive moisture and extreme temperatures. Do not leave the product or its battery inside a vehicle or in places where the temperature may exceed 60°C (140°F), such as on a car dashboard, window sill, or behind a glass that is exposed to direct sunlight or strong ultraviolet light for extended periods of time.
- Page 7 When in any area with a potentially explosive atmosphere or where flammable materials exist, the product should be turned off and the user should obey all signs and instructions. Sparks in such areas could cause an explosion or fire resulting in bodily injury or even death. Users are advised not to use the equipment at refueling points such as service or gas stations, and are reminded of the need to observe restrictions on the use of radio equipment in fuel depots, chemical plants, or where blasting operations...
-
Page 8: General Precautions
HEARING AIDS Some digital wireless phones may interfere with some hearing aids. In the event of such interference, you may want to consult your service provider, or call the customer service line to discuss alternatives. NONIONIZING RADIATION This product should be operated in the suggested normal condition only to ensure the radiative performance and safety of the interference. - Page 9 Never use the product in a wet location. • Avoid using your device after a dramatic change in temperature When you move your device between environments with very different temperature and/or humidity ranges, condensation may form on or within the device. To avoid damaging the device, allow sufficient time for the moisture to evaporate before using the device.
-
Page 10: Table Of Contents
Contents Chapter 1 Getting Started 1.1 Getting to Know Your Phone and Its Accessories ...16 1.2 Inserting the SIM Card ...22 1.3 Inserting the Battery ...23 1.4 Installing a microSD Card ...23 1.5 Turning On and Off the Phone ...24 1.6 Home Screen ...24 1.7 Programs On Your Phone ...25 1.8 Start Menu ...28... - Page 11 2.6 SIM Tool Kit (STK) ...44 2.7 Setting Up Bluetooth SIM Access for Car Kit Phones ...45 Chapter 3 Synchronizing Information with Your Computer 3.1 About Synchronization ...48 3.2 Using Microsoft Windows Mobile® Device Center ...49 3.3 Installing and Using Microsoft ActiveSync® ...50 3.4 Synchronizing with Your Computer ...51 3.5 Synchronizing via Bluetooth ...53 3.6 Synchronizing Music and Video ...54...
- Page 12 5.4 Tasks ...76 5.5 Quick Notes ...77 5.6 Voice Notes ...77 Chapter 6 Exchanging Messages 6.1 Messaging ...80 6.2 Text Message ...81 6.3 MMS Messages ...82 6.4 Setting Up E-mail Accounts ...86 6.5 E-mail ...88 Chapter 7 Working with Company E-mails and Meeting Appointments 7.1 Synchronizing Your Phone with Your Company E-mail Server ...94...
- Page 13 8.5 Dial-up ... 110 8.6 Internet Explorer Mobile ... 112 8.7 Internet Sharing ... 113 8.8 Bluetooth ... 114 8.9 Windows Live Mobile ... 121 Chapter 9 Experiencing Multimedia 9.1 Camera ... 126 9.2 Pictures & Videos ... 130 9.3 Windows Media Player Mobile ... 132 9.4 Audio Manager ...
-
Page 15: Chapter 1 Getting Started
Chapter 1 Getting Started 1.1 Getting to Know Your Phone and Its Accessories 1.2 Inserting the SIM Card 1.3 Inserting the Battery 1.4 Installing a microSD Card 1.5 Turning On and Off the Phone 1.6 Home Screen 1.7 Programs On Your Phone 1.8 Start Menu 1.9 Quick List 1.10 Entering Information... -
Page 16: Getting To Know Your Phone And Its Accessories
16 Getting Started 1.1 Getting to Know Your Phone and Its Accessories... - Page 17 Item Function 1. LED Indicators The left LED indicators (blue/green) notify you of Bluetooth and Wi-Fi connectivity status, while the right indicators (green/red/ orange) notify you of the battery and network status of your phone respectively . For more information about LED Indicators, see the table at the end of this section.
- Page 18 18 Getting Started 22 23...
- Page 19 25 microSD slot Pry open the rubber cover to insert the microSD card. 26 HTC ExtUSB™ port Pry open the rubber cover to connect the USB cable to synchronize data or recharge the battery. You can also connect the earphone to listen to audio media or use the phone’s hands-free kit.
-
Page 20: Led Indicator Lights
LED indicator lights Various colors that might display in the two LED Indicators are summarized here. Left LED Status Flashing blue Bluetooth mode set to “On” or “Visible” mode. Flashing green Connected to Wi-Fi network. Right LED Status Solid green Battery is fully charged. - Page 21 Accessories The following accessories are provided with the phone: Accessory Function 1. AC adapter Recharge the phone battery. 2. USB cable Connect your phone to a PC to synchronize data and/or to charge the phone. 3. Stereo headset Provide a volume control slider and a Send/End button. You can press the button to pick up a call or put a call on hold or press and hold the button to end the call.
-
Page 22: Inserting The Sim Card
1.2 Inserting the SIM Card Your SIM (Subscriber Identity Module) card is given to you by your wireless service provider and contains your basic subscriber information, such as your phone number and your address book. Before you begin, make sure the phone is turned off. To insert the SIM card Slide out the QWERTY keyboard. -
Page 23: Inserting The Battery
1.3 Inserting the Battery Slide the battery cover down to remove it. Align the exposed metal contacts on the edge of the battery with the prongs in the body of the phone. Push the bottom of the battery into place and then replace the battery cover. -
Page 24: Turning On And Off The Phone
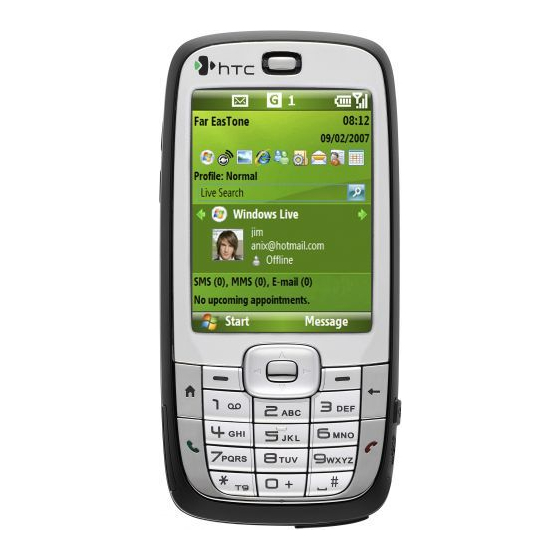
1.5 Turning On and Off the Phone Press and hold the POWER button for about 3 seconds to turn on or off the phone. 1.6 Home Screen The Home screen displays important information, such as upcoming appointments, status indicators, the current date, time, and profile, and icons of programs that you have recently used. -
Page 25: Programs On Your Phone
Click to view the details of a missed call. Click to open the Messages folder. Displays the time of your next appointment. Click to open the Calendar program. Click to display the available programs in your phone. Displays notifications, such as missed calls or new messages. Displays the network or connectivity status. - Page 26 Icon Program Description Calendar Keeps track of your appointments, and creates meeting requests. Call History Keeps track of all phone calls made, received, and missed. Camera Captures photos in various modes. Clear Storage Clears the memory and restores the phone back to factory default settings.
- Page 27 Icon Program Description Quick Notes Type and save often used text messages. SAPSettings Enables Bluetooth Remote SIM access on your phone. See chapter 2 for more details. Settings Personalize your phone to suit the way you use it. SIM Manager Manage the contacts that are stored on your SIM card. . STK (SIM Tool Access information and other services offered by your Kit) Service...
-
Page 28: Start Menu
1.8 Start Menu Your phone comes with several bundled programs that you can start using immediately. You can also install additional programs from the included Windows Mobile® Getting Started Disc or from other sources and install them on your phone. To see the available programs on your phone On the Home screen, click Start. -
Page 29: Using The Keypad
You can enter text, numbers, and symbols using the keypad or QWERTY keyboard. The status indicator on the top-right side of the display screen displays the input mode that you are currently using. Lowercase text input Uppercase text input, caps lock Uppercase text input Numeric or symbol (labeled in blue color) input, locked (Keyboard only) Numeric or symbol (labeled in blue color) input... -
Page 30: Using Numeric Mode
You can change the length of time to pause between keypresses on the same numeric key. On the Home screen, click Start > Settings > Accessibility. In Multipress time out, select the length of the pause between keypresses. Using XT9 mode To form a word in XT9 mode, press the numeric keys that contain the letters you want. -
Page 31: More Text Entry Tasks
More text entry tasks In both Multipress and XT9 modes, the first letter of a sentence is by default capitalized. To change between uppercase, lowercase, and caps lock • Press the *T9 key to change between uppercase, lowercase, and caps lock within a text input mode. -
Page 32: Battery Information
LED indicators for Cap and Fn keys The LED indicators corresponding to the Cap and Fn keys on the keyboard display solid orange color when the on their functionality. Pressing a desired corresponding key after use turns them off. You can do the following with the QWERTY keyboard: •... - Page 33 Battery performance depends on many factors, including but not limited to your wireless service provider’s network configuration, signal strength, and the temperature of the environment. Battery life estimates (approximations): • Talk time: Up to 7 hours • Standby time: Up to 175 hours •...
- Page 34 turned on, do not charge the battery when connected to the PC, select To manage low battery When the low-battery warning appears, do the following: Immediately save your current data. Synchronize with your PC or use the AC adapter to charge the battery. Turn off...
-
Page 35: Status Indicators
1.12 Status Indicators The following table lists common status indicators. Icon Description New SMS message New e-mail message Roaming New MSN Messenger message Dialing while no SIM card is inserted Voice call in progress Data call in progress Calls forwarded Call on hold Missed call Battery level... - Page 36 36 Getting Started...
-
Page 37: Chapter 2 Using Phone Features
Chapter 2 Using Phone Features 2.1 Using the Phone 2.2 Making a Call 2.3 Receiving a Call 2.4 In-Call Options 2.5 Additional Dialing Information 2.6 SIM Tool Kit (STK) 2.7 Setting Up Bluetooth SIM Access for Car Kit Phones... -
Page 38: Using The Phone
2.1 Using the Phone You can use your phone to make, receive, and keep track of voice calls, and send text messages (SMS, Short Message Service) and MMS (Multimedia Messaging Service) messages. The Phone screen From the Phone screen, you can open, call, or find a contact, and even save a new number in Contacts. -
Page 39: Making A Call
2.2 Making a Call With your phone, you can make calls from the Home screen, the Phone screen, from Contacts, Speed Dial, Call History, or SIM Contacts (contacts stored on your SIM card). Make a call from the Home screen •... -
Page 40: Make A Call From Contacts
Make a call from Contacts On the Home screen, click Contacts (if displayed) or click Start > Contacts. Select the desired contact, and press ( To specify the number to dial By default, the mobile telephone number (m) of a contact is dialed when you make a call from Contacts;... -
Page 41: Receiving A Call
Make a call from Speed Dial You can make calls using Speed Dial. To learn how to use Speed Dial, see “Using Speed Dial” in chapter 10. Make a call from SIM Manager Click Start > Expert > SIM Manager. Wait for the contents of your SIM card to load. -
Page 42: In-Call Options
2.4 In-Call Options Your phone lets you manage multiple calls at the same time. During a call, click Menu to access in-call options. Call Waiting should be enabled and supported for you to be notified of an incoming call when you are using the phone. -
Page 43: Additional Dialing Information
To turn on and off the Speakerphone • During a call, click Menu > Speakerphone On. The at the top of the screen. • To turn off the Speakerphone, click Menu > Speakerphone Off. Alternatively, the speakerphone can be toggled on and off by pressing and holding ( WARNING! To avoid damage to your hearing, do not hold your phone against... -
Page 44: Sim Tool Kit (Stk)
Insert a pause or long pause in a dialing sequence Some international calls or phone numbers require a pause or long pause in the dialing sequence in order for the call to process successfully. On the Home screen, click Start > Contacts. Select the contact and press CENTER OK to open the contact card. -
Page 45: Setting Up Bluetooth Sim Access For Car Kit Phones
2.7 Setting Up Bluetooth SIM Access for Car Kit Phones Car kits that support the SIM Access Profile (SAP) can connect to your phone and access its SIM card via Bluetooth. • Notes Make sure that all phone contacts are stored in the SIM card and not in the phone memory. - Page 46 46 Using Phone Features...
-
Page 47: Chapter 3 Synchronizing Information With Your Computer
Chapter 3 Synchronizing Information with Your Computer 3.1 About Synchronization 3.2 Using Microsoft Windows Mobile® Device Center 3.3 Installing and Using Microsoft ActiveSync® 3.4 Synchronizing with Your Computer 3.5 Synchronizing via Bluetooth 3.6 Synchronizing Music and Video... -
Page 48: About Synchronization
3.1 About Synchronization You can take information from your computer wherever you go by synchronizing them to your phone. The following types of information can be synchronized: • Microsoft Outlook® information, which include Outlook e-mail, contacts, calendar, tasks, and notes •... -
Page 49: Using Microsoft Windows Mobile® Device Center
Center Microsoft Windows Mobile® Device Center is the replacement for Microsoft® ActiveSync® on Windows Vista™. Set up synchronization between your phone and PC Connect your phone to your PC. Windows Mobile Device Center configures itself and then opens. On the license agreement screen, click Accept. On the Windows Mobile Device Home screen, click Set up your device. -
Page 50: Installing And Using Microsoft Activesync
3.3 Installing and Using Microsoft ActiveSync® Follow the steps below to install and set up ActiveSync 4.5 or later on Windows XP or other compatible Windows systems. Note For a list of compatible Windows systems, please go to http://www.microsoft.com/windowsmobile/activesync/activesync45.mspx Install and set up ActiveSync Insert the Getting Started Disc into the disc drive on your PC. -
Page 51: Synchronizing With Your Computer
3.4 Synchronizing with Your Computer Connect your phone to your PC to synchronize the information between your phone and PC. While your phone is connected, ActiveSync (or Windows Mobile Device Center on your PC) synchronizes every time you make a change on either the PC or your phone. You can also manually start and stop synchronization any time. - Page 52 To synchronize with more than one computer You can set up your phone to synchronize with more than one PC or with a combination of one or more PCs and Exchange Server. When synchronizing with multiple computers, the items that you synchronize will appear on all of the computers with which they are synchronized.
-
Page 53: Synchronizing Via Bluetooth
3.5 Synchronizing via Bluetooth You can connect and synchronize your phone with the PC using Bluetooth. To synchronize with a computer via Bluetooth Set up the synchronization software (Windows Mobile Device Center or ActiveSync) on your computer to use a Bluetooth connection. For more information, see the software Help on your computer. -
Page 54: Synchronizing Music And Video
3.6 Synchronizing Music and Video If you want to carry your music or other digital media along with you while you travel, set up Microsoft Windows Media Player on your computer to synchronize music and video with your phone. Other than selecting the media information type in ActiveSync to be synchronized, all media synchronization settings must be set in Windows Media Player. -
Page 55: Chapter 4 Managing Your Phone
Chapter 4 Managing your Phone 4.1 Personalizing Your Phone 4.2 Adding and Removing Programs 4.3 Using Task Manager and Managing Memory 4.4 Managing and Backing Up Files 4.5 Protecting Your Phone 4.6 Restarting Your Phone 4.7 Resetting Your Phone... -
Page 56: Personalizing Your Phone
4.1 Personalizing Your Phone Set up the Home screen The Home screen is your starting place for most tasks. You can gain access to all features and programs from the Home screen. To customize the Home screen On the Home screen, click Start > Settings > Home Screen. In Home screen layout, Color scheme, Background image, and Time out, select the options you want, and click Done. -
Page 57: Choose How To Be Notified About Events Or Actions
To set the date and time On the Home screen, click Start > Settings > Clock & Alarm > Date and Time. Set the Time zone, Date, and Time, and then click Done. Choose how to be notified about events or actions A profile is a group of settings that determine how your phone will alert you to phone events such as incoming calls and notifications. -
Page 58: Set Personal Information
To set sound for the keypad and keyboard On the Home screen, click Start > Settings > Sounds. In Keypad control, select a sound. Select None if you do not want to hear any sound while pressing a key. Click Done. To copy a sound to your phone After a sound file is located on your phone, you can use it for a ring tone, notification, or reminder. -
Page 59: Set Performance And Maintenance Options
Set performance and maintenance options To change accessibility settings On the Home screen, click Start > Settings > Accessibility. Select your preference for the following: • In System font size, set the size of the font that is displayed on the screen. -
Page 60: Adding And Removing Programs
To find the operating system version number • On the Home screen, click Start > Settings > About. To find the phone specification • On the Home screen, click Start > Settings > Device Information. To turn on and off error reporting On the Home screen, click Start >... -
Page 61: Using Task Manager And Managing Memory
4.3 Using Task Manager and Managing Memory To see how much memory is available On the Home screen, click Start > Settings > About. Scroll down to Available Memory. Use Task Manager Task Manager allows you to view all the programs currently running on your phone in the form of a list. -
Page 62: Managing And Backing Up Files
4.4 Managing and Backing Up Files You can back up files to your PC using Windows Mobile Device Center or ActiveSync or copy files to a storage card that is installed on your phone. You can also efficiently manage your files and folders using File Explorer installed on your phone. -
Page 63: Protecting Your Phone
File Explorer - List View In File Explorer, click Menu to open a list that lets you send or beam the file, view the file’s properties, sort the files, and more. Storage Card is only available if a microSD is installed on your phone. To send a file as an e-mail attachment In File Explorer, select a file and click Menu >... - Page 64 You can protect your phone from unauthorized use by requiring a PIN (personal identification number) in order to make calls. Additionally, you can also lock the keypad/keyboard or the entire phone . To enable the SIM PIN On the Home screen, click Start > Settings > Security > Enable SIM PIN.
-
Page 65: Restarting Your Phone
To enable the phone lock On the Home screen, click Start > Settings > Security > Device lock. Select Prompt if device unused for then select the amount of time for the phone to be inactive before automatically locking. Select the Password type, then enter and confirm your password. Click Done. -
Page 66: Resetting Your Phone
4.7 Resetting Your Phone Resetting your phone will remove all the data from its memory and restore the phone back to the factory default settings. WARNING! All your data will be deleted, it is recommended that you back up your data first before resetting your phone. -
Page 67: Chapter 5 Organizing Phone Information
Chapter 5 Organizing Phone Information 5.1 Contacts 5.2 SIM Manager 5.3 Calendar 5.4 Tasks 5.5 Quick Notes 5.6 Voice Notes... -
Page 68: Contacts
5.1 Contacts Contacts is your address book and information storage for the people and businesses you communicate with. If you use Outlook on your PC, you can synchronize contacts between your phone and PC. Create a contact on your phone To create a new contact on your phone On the Home screen, click Contacts (if available) or click Start >... -
Page 69: Edit And Call A Contact
Edit and call a contact To view and edit a contact information On the Home screen, click Start > Contacts. Select the contact whose information you want to view or edit and click Menu > Edit. When finished making changes, click Done. To call a contact from the contact list On the Home screen, click Start >... -
Page 70: Share Contact Information
Share contact information To beam contact information to another device via Bluetooth On the Home screen, click Start > Contacts and then select the contact whose information you want to beam. Click Menu > Send Contact > Beam. Select the device where you want to beam the contact details to and click Beam. -
Page 71: Sim Manager
5.2 SIM Manager SIM Manager allows you to view the contents of your SIM card and transfer contacts from your SIM card to your phone and vice versa. To create a contact on your SIM card Click Start > Expert > SIM Manager. Click New and enter the contact name and phone number. - Page 72 Click Menu > Contacts to SIM. Select the check boxes of the contact’s phone numbers that you want to copy to your SIM card, then click Save. To display your phone number in SIM Manager On the SIM Manager screen, click Menu > Tools > List of Own Numbers.
-
Page 73: Calendar
5.3 Calendar Use Calendar to schedule appointments, including meetings and other events. If you use Outlook on your PC, you can synchronize appointments between your phone and PC. Create a personal appointment To set Calendar options On the Home screen, click Start > Calendar. Click Menu >... -
Page 74: View Your Appointments
View your appointments To view your schedule You can view your schedule in three different views: Month, Week, and Agenda. On the Home screen, click Start > Calendar. Click the left SOFT KEY or click Menu and choose the view you want. Highlighted areas represent time segments that have scheduled... - Page 75 Note You can only specify if an attendee is required or optional if your phone is connected to a Microsoft Exchange 2007 server. Otherwise, all attendees are designated as required. For more information, see chapter 7. Choose the contact(s) you want to send the meeting request to and click Select.
-
Page 76: Tasks
5.4 Tasks Use Tasks to keep track of things you need to do. To create a task On the Home screen, click Start > Tasks. Click Menu > New Task. Enter the necessary task information and click Done. Set a Priority for the task. This item can be referenced when •... -
Page 77: Quick Notes
5.5 Quick Notes Quick Notes lets you type messages that you frequently use and save them on your phone. You can then send them via e-mail, text message, or MMS. To create a new note On the Home screen, click Start > Quick Notes. Click New: Enter the text and click Done. - Page 78 If you delete a voice note that has a default name, such as Recording1, this name becomes available for a new voice note. To listen to a voice note On the Home screen, click Start > Office > Voice Notes. Select the voice note to play, and press CENTER OK.
-
Page 79: Chapter 6 Exchanging Messages
Chapter 6 Exchanging Messages 6.1 Messaging 6.2 Text Message 6.3 MMS Messages 6.4 Setting Up E-mail Accounts 6.5 E-mail... -
Page 80: Messaging
6.1 Messaging Messaging is where all of your e-mail, text message, and MMS accounts are located. When you receive a new message, you can open that particular message from the Home screen. Simply scroll to the row where the new message is and click it To access your message accounts, click Start >... -
Page 81: Text Message
6.2 Text Message Send short text messages to your contacts. Compose and send text messages To compose and send a text message On the Home screen, click Start > Messaging. Select Text Messages and click Select. Click Menu > New. Enter the mobile phone number of one or more recipients, separating them with a semicolon (;). -
Page 82: Mms Messages
6.3 MMS Messages Creating and sending Multimedia Message Service (MMS) messages to your friends and family is fun and easy. To access MMS • On the Home screen, click Start > Messaging > MMS. To access MMS message folders • Click Start >... - Page 83 To configure MMS settings On the Messaging screen, select MMS and click Menu > Settings to open the Preferences screen. Select or clear the provided check boxes according to your needs. On the Preferences screen, click Menu > MMSC Settings to access Multimedia Messaging Service Center (MMSC) settings.
-
Page 84: Create And Send Mms Messages
Create and send MMS messages You can compose MMS messages in a combination of various slides, where each slide can consist of a photo, audio or video clip, and/or text. Notes • MMS is a charged service. In order to use MMS successfully, this has to be provisioned on your mobile account. -
Page 85: View And Reply To Mms Messages
Click Insert Audio to insert an audio clip. Select an audio clip on the Select Audio screen. To record a new audio clip, click Menu > Capture Audio Click Send to send the message. Notes • To send a copy of this message to others, access Cc and Bcc by clicking Menu >... -
Page 86: Setting Up E-Mail Accounts
6.4 Setting Up E-mail Accounts Before you can send and receive e-mail, you need to set up your e-mail account on your phone. You can set up the following types of e-mail accounts on your phone: • Outlook e-mail that you synchronize with your PC or your company’s Exchange Server •... - Page 87 Set up a POP3/IMAP4 e-mail account You can easily set up an e-mail account that you have with an Internet service provider (ISP), a web-based e-mail or an account that you access using a VPN server connection (typically a work account) on your phone. On the Home screen, click Start >...
-
Page 88: E-Mail
6.5 E-mail After setting up e-mail accounts on your phone, you can start sending and receiving e-mail messages. Create and reply to e-mails To compose and send an e-mail Click Start > Messaging then select an e-mail account. Click Menu > New. Enter the e-mail address of one or more recipients, separating them with a semicolon. - Page 89 Filter the e-mail messages in your Inbox to only display the e-mails that contain the sender or e-mail subject you are searching for. Enter the sender name or e-mail subject you want to look for using the keypad or keyboard. As you press keys, the list narrows down to the conditions you set.
- Page 90 To download an attachment In an open message with an attachment to download, click the attachment. If there is more than one attachment, click the other attachments to download them. You can directly open the file in the associated program after you download them by clicking the attachment again.
-
Page 91: Send And Download E-Mails
Click Reply or click Menu > Reply and choose whether to reply to the sender(s) or forward the message. Enter your response and click Send. E-mail can contain hyperlinks to Web pages. Send and download e-mails The manner in which you send and receive e-mails depends on the type of e-mail account you have. -
Page 92: Customize E-Mail Settings
Customize e-mail settings To change the download size and format for Outlook e-mail Disconnect your phone from the computer. Click Start > ActiveSync. Click Menu > Options, select E-mail, then click Settings. On the E-mail Sync screen, set the Download size limit and Message format. -
Page 93: Chapter 7 Working With Company E-Mails And Meeting Appointments
Chapter 7 Working with Company E-mails and Meeting Appointments 7.1 Synchronizing Your Phone with Your Company E-mail Server 7.2 Working with Company E-mails 7.3 Managing Meeting Requests 7.4 Finding Contacts in the Company Directory 7.5 E-mail Security... -
Page 94: Synchronizing Your Phone With Your Company E-Mail Server
7.1 Synchronizing Your Phone with Your Company E-mail Server Synchronize your phone with your company’s Microsoft Exchange Server to keep you connected with your e-mails, contacts, calendar, and other information. Set up a company e-mail server connection Use your phone to access your company e-mails by setting up an Exchange Server connection. -
Page 95: Working With Company E-Mails
Start synchronization Before you start synchronizing with the Exchange Server, make sure your phone has been set up with a data connection to the Internet so that you can synchronize wirelessly. See chapter 8 for details. After you finish setting up an Exchange Server connection, your phone automatically starts synchronization. -
Page 96: Scheduled Synchronization
Click Start > Comm Manager. On the Comm Manager screen, click the Microsoft Direct Push button. The button you will receive e-mails as they arrive. When the button is in the retrieve your e-mails. To enable Direct Push via ActiveSync In ActiveSync on your phone, click Menu >... -
Page 97: Instant Download Through Fetch Mail
Instant download through Fetch Mail Fetch Mail downloads an entire e-mail immediately without the need for you to perform a full Send/Receive action. Requirement Fetch Mail works for your phone only if your company is using Microsoft Exchange Server 2007 or higher. Click Start >... -
Page 98: Flag Your Messages
Flag your messages Flags serve as a reminder to yourself to follow-up on important issues or requests that are indicated in the messages. Requirement Flags are enabled only if e-mails are synchronized with Microsoft Exchange Server 2007 or higher. Flags are disabled or hidden if e-mails are synchronized with earlier versions of Microsoft Exchange Server. -
Page 99: Managing Meeting Requests
Out-of-office auto-reply Outlook Mobile allows you to retrieve and change your out-of-office status. Just like desktop Outlook E-mail, Outlook Mobile automatically sends an auto-reply message when you’re not available. Requirement Your company must be using Microsoft Exchange Server 2007 or higher. To send out-of-office auto-reply messages Click Start >... - Page 100 Wait for the attendees to respond. When their responses are sent back to you, your calendar is updated as well. To check the status of the attendees who responded, click Start > Calendar and then click the scheduled meeting. In the meeting details, click Attendees. To reply to a meeting request When there’s an incoming e-mail with a meeting request, a notification message will be displayed on your phone’s Home screen.
-
Page 101: Finding Contacts In The Company Directory
In addition to having contacts on your phone, you can access contact information from your organization’s Company Directory. Requirement Access to the Company Directory is available only if your organization is running Microsoft Exchange Server 2003 SP2 or higher, and you have completed your first synchronization with the Exchange Server. -
Page 102: E-Mail Security
Notes • You can save the contact from the Company Directory to your phone by selecting the contact then clicking Menu > Save to Contacts. • You can search on the following information as long as that information is included in your organization’s Company Directory: First name, Last name, E-mail name, Display name, E-mail address, or Office location. - Page 103 message only, or do both. Click Done. To verify the digital signature on a signed message you receive Open the Outlook e-mail message that has been digitally signed. At the top of the message, click View signature status. Click Menu > Check Certificate. To view the details of the certificate in the message, click Menu >...
-
Page 104: Set Permissions On An E-Mail Message
Select Encrypt messages to protect your e-mails from being viewed except by the intended recipients. Select Sign messages so that recipients are certain that e-mails are sent by you and have not been altered. Click Menu > Choose Certificate to select a certificate for signing or encrypting outgoing e-mail messages. -
Page 105: Chapter 8 Getting Connected
Chapter 8 Getting Connected 8.1 Comm Manager 8.2 Ways of Connecting to the Internet 8.3 Wi-Fi 8.4 GPRS 8.5 Dial-up 8.6 Internet Explorer Mobile 8.7 Internet Sharing 8.8 Bluetooth 8.9 Windows Live Mobile... -
Page 106: Comm Manager
8.1 Comm Manager Comm Manager acts like a central switch that lets you enable or disable phone features as well as manage your data connections easily. To open Comm Manager: • Click Start > Comm Manager. Click to toggle between turning on or off Flight mode. Turning on Flight mode turns off the phone, Bluetooth and WLAN functions. -
Page 107: Ways Of Connecting To The Internet
8.2 Ways of Connecting to the Internet Your phone’s networking capabilities allow you to access the Internet or your corporate network at work through wireless and conventional connections. You can connect to the Internet by using one of the following: •... - Page 108 Notes • Wi-Fi connects to the default network that is available on your phone. However, GPRS starts by default if your phone does not detect any Wi-Fi signal. • In Comm Manager, click Settings > WLAN Settings > Connection Status to check the current connection status and signal quality of each Wi-Fi channel.
-
Page 109: Gprs
To increase security on the Wi-Fi network The LEAP (Lightweight Extensible Authentication Protocol) feature of Comm Manager helps increase security on your phone, and ensures that nobody is able to access your network without your permission. On the WLAN Settings screen, select LEAP. Click Menu >... -
Page 110: Dial-Up
To set up a new GPRS connection On the Home screen, click Start > Settings > Connections > GPRS > New. In Description, enter a name for the connection. In Connects to, select The Internet. Enter the name of the GPRS Access point of your wireless service provider. -
Page 111: Advanced Options
To set up a dial-up connection to your corporate network On the Home screen, click Start > Settings > Connections > Dial-up > Add. In Description, enter a name for the connection. In Connects to, select Work. Enter the appropriate information in the remaining fields. Click Done. -
Page 112: Internet Explorer Mobile
8.6 Internet Explorer Mobile Internet Explorer Mobile is a full-featured Internet browser, optimized for use on your phone. To open Internet Explorer • On the Home screen, click Start > Internet Explorer. Browsing the Web In Internet Explorer, click Menu > Address Bar. Enter the address and click Go. -
Page 113: Internet Sharing
8.7 Internet Sharing With Internet Sharing, you can use your phone as an external modem for another device such as a PDA or notebook computer. Notes • Make sure your phone has a SIM card installed, and you have set up a GPRS or phone dial-up modem connection on your phone. -
Page 114: Bluetooth
8.8 Bluetooth Bluetooth is a short-range wireless communications technology. Phones with Bluetooth capabilities can exchange information within a distance of about 10 meters without requiring a physical connection. Bluetooth modes Bluetooth on your phone operates in three different modes: On. Bluetooth is turned on. Your phone can detect other Bluetooth- enabled devices, but not vice versa. -
Page 115: Bluetooth Partnerships
Bluetooth partnerships A Bluetooth partnership is a relationship that you create between your phone and another Bluetooth-enabled device in order to exchange information in a secure manner. To create a Bluetooth partnership On the Home screen, click Start > Settings > Connections > Bluetooth. -
Page 116: Connect A Bluetooth Hands-Free Or Stereo Headset
Select the check boxes of services that you want to use from the paired device. Click Done. You can now exchange information with the other device. To change the display name of a Bluetooth device On the Home screen, click Start > Settings > Connections > Bluetooth. - Page 117 Select the name of the headset, and click Next. In Passcode, enter the alphanumeric passcode for the Bluetooth headset, then click Next. The passcode is usually “0000”. A message will appear saying that your phone has connected to the headset, click OK.
-
Page 118: Beam Information Using Bluetooth
Beam information using Bluetooth You can beam information, such as contacts, calendar items, and tasks, as well as files from your phone to your computer or to another Bluetooth- enabled device. Notes • If your computer does not have built-in Bluetooth capabilities, you need to connect and use a Bluetooth adapter or dongle on your computer. -
Page 119: Bluetooth Explorer And Bluetooth File Sharing
Now you are ready to beam. On your phone, select an item to beam. The item can be an appointment in your calendar, a task, a contact card, or a file. Click Menu > Beam [type of item]. Select the device name to which you want to beam to. Click Beam. -
Page 120: Use The Phone As A Bluetooth Modem
Bluetooth Explorer then scans for other Bluetooth-enabled devices. From the list, select a Bluetooth device you want to connect to. You may need to enter a passcode in order for you to connect to the device. If there are files contained in the Bluetooth shared folder on the other device, you will be able to see them on the Bluetooth Explorer screen. -
Page 121: Windows Live Mobile
In the Bluetooth Personal Area Network Devices dialog box, select your phone, then click Connect. • For Windows Vista Click Start > Control Panel > Network and Sharing Center. Click Manage network connections and then under Personal Area Network, double-click Bluetooth Network Connection. In the Bluetooth Personal Area Network Devices dialog box, select your phone, then click Connect. - Page 122 Set up Windows Live Mobile The first time you use Windows Live Mobile, sign in by using your Windows Live ID, which is your Windows Live Mail or Hotmail address, and password. To set up Windows Live Mobile for the first time Click Start >...
- Page 123 The Windows Live Mobile interface On the main interface of Windows Live Mobile, you will see a search bar, navigation bar, and an area where you can customize to show your picture. If you chose to display the search bar and Windows Live applications on the Today screen when you were setting up Windows Live, you’ll see them on the Today screen: Search bar and...
- Page 124 124 Getting Connected...
-
Page 125: Chapter 9 Experiencing Multimedia
Chapter 9 Experiencing Multimedia 9.1 Camera 9.2 Pictures & Videos 9.3 Windows Media Player Mobile 9.4 Audio Manager 9.5 Midlet Manager... -
Page 126: Camera
9.1 Camera Taking photos and shooting video clips are easy with your phone’s built-in camera. To open Camera Do any of the following: • Press the CAMERA button on the right side of the phone. • On the Home screen, click Start > Camera. To exit Camera Press ( •... -
Page 127: Camera Mode Icons And Indicators
Using the above capture modes, the camera captures files in the following formats: Capture type Format Still Image JPEG Video Motion-JPEG AVI (.avi) MPEG-4 (.mp4) H.263 baseline (.3gp) MMS Video MPEG-4 (.mp4) H.263 baseline (.3gp) To change the capture mode On the Camera screen, click to select Press NAVIGATION right to open the Mode list. -
Page 128: Use Zooming
Depending on the capture mode, this shows the remaining, available shots of pictures that you can take or remaining duration that can be recorded. While recording video, this shows the recorded duration. Click to open the Camera Settings screen. Indicates the current Metering mode being used, either Center Area ( ) or Average ( Adjust the exposure value from -2 EV to +2 EV (increments of 0.5) by pressing NAVIGATION left or right. -
Page 129: The Review Screen
The camera zoom range for a picture or video depends on the capture mode and capture size. Also, please note the capture sizes available for certain capture formats also vary from one capture mode to another. The Review screen After capturing a photo or video, you will be presented with options that you can do with the captured media file. -
Page 130: Pictures & Videos
Option Allows you to Only available in Sports mode. The Capture Speed option determines the interval between shots. The Snapshots option determines how many shots to take with a single press of CENTER OK. Specify the white balance setting such as Auto, Daylight, Night, Incandescent, and Fluorescent to suit the lighting environment. - Page 131 Note If you cannot find the media file in the default My Pictures folder, click Menu > Folders > My Device to go to other folders. Pictures & Videos menu Select a media file onscreen and click Menu to open a list of options that you can do with the selected media file.
-
Page 132: Windows Media Player Mobile
9.3 Windows Media Player Mobile You can use Microsoft® Windows Media® Player Mobile for Smartphone to play digital audio and video files that are stored on your phone or on a network, such as on a Web site. To open Windows Media Player Mobile, click Start >... -
Page 133: About The Screens And Menus
About the screens and menus Windows Media Player Mobile has three primary screens: Playback screen The default screen that displays the playback controls and the video window. Click Menu to open a list of options that you can do in a particular screen The commands on this menu vary, depending upon which screen you are viewing. -
Page 134: Copy Files To Your Phone
Copy files to your phone Use the Sync feature in Windows Media Player on your PC to synchronize (copy) digital media files from your PC to your phone. Using Sync ensures that protected files and album art (for skins) are copied to your phone correctly. - Page 135 Playlists and Library list Playlist or library content list Notes • Always use Windows Media Player 11 on your PC to synchronize (copy) files to your phone. • Audio files copy faster if Windows Media Player is configured to automatically set the quality level for audio files copied to your phone. For more information, see the Windows Media Player Help.
-
Page 136: Play Media
Play media To play media on your phone Use the library to find and play songs, videos, and playlists that are stored on your phone or storage card. If you are not on the Library screen, click Menu > Library. If necessary, on the Library screen, click Menu >... -
Page 137: Audio Manager
9.4 Audio Manager Audio Manager is a music browser and player in one. It gives you access to all the music files on your phone, and allows you to easily browse for the music that you want to play by organizing music into categories. To open Audio Manager •... - Page 138 No. Description Open the All Songs submenu where you can browse music files by file name or song title. Open the Playlists submenu where you can create playlists and play them back. Open a submenu where you can browse music files by the selected category. Switch to the Music Player screen.
-
Page 139: Music Player
Music Player Music Player is integrated with Audio Manager, and lets you play back music files. After selecting a song in the Library, Music Player opens and automatically plays it. Note If the last screen you were in was the Music Player when you closed Audio Manager, next time you launch Audio Manager, it will open Music Player directly. - Page 140 Manager and can be edited. Notes • Audio Manager searches for playlists in the following locations: Phone: \Playlists\Application Data\HTC\AudioManager\playlists Storage card: \Storage Card\Playlist • If a Windows Media Player playlist contains a combination of music, video and image files, Audio Manager accesses the music files only and filters out the other media types.
-
Page 141: Set Music As Ring Tone
To create a playlist On the Library’s Main screen, select Playlists and press CENTER OK. On the Playlists screen, click Menu > New. Enter a Playlist name then click OK. On the Playlists screen, select the playlist you have just created and then click Edit. -
Page 142: Mp3 Trimmer
MP3 Trimmer Use MP3 Trimmer to trim MP3 files. You can choose to save it as a new file or set it as a ring tone. This control Title Duration Time Play/Stop Mark in/ Mark out Mark in/Mark out points Cancel Does this Shows the name for the song. - Page 143 To trim the MP3 file In the Trim screen, use the NAVIGATION CONTROL to select Mark in. Use NAVIGATION left/right to set the Mark in point. After you set the Mark in point, the song will play back starting from the Mark in point. Use NAVIGATION left/right to adjust the Mark in point if needed.
-
Page 144: Midlet Manager
9.5 Midlet Manager The MIDlet Manager allows you to download Java-based applications, such as games and tools that are specifically designed for mobile devices. To install MIDlets from the Internet On the Home screen, click Start > MIDlet Manager. Click Menu > Install > Browse to open Internet Explorer Mobile. Locate the MIDlet/MIDlet suite while connected to the Internet. - Page 145 To install MIDlets from a local folder On the Home screen, click Start > MIDlet Manager. Click Menu > Install > Local to install the MIDlets currently saved in the My MIDlets folder. Select the MIDlet/MIDlet suite from the list using the NAVIGATION CONTROL and press CENTER OK.
- Page 146 146 Experiencing Multimedia...
-
Page 147: Chapter 10 Using Other Applications
Chapter 10 Using Other Applications 10.1 Office Mobile 10.2 Adobe Reader LE 10.3 Speed Dial 10.4 Voice Speed Dial... -
Page 148: Office Mobile
10.1 Office Mobile Office Mobile consists of three applications that let you view various types of documents, such as Word documents, Powerpoint presentation files, and Excel worksheets. The Office Mobile consists of the following: • Excel Mobile (displays Excel files) •... -
Page 149: Powerpoint Mobile
PowerPoint Mobile PowerPoint Mobile is a complete PowerPoint viewer solution with the ability to view native PowerPoint presentations. Note PowerPoint Mobile only supports Powerpoint files created in Office 97 or later versions. To open a presentation file Click Start > Office Mobile > PowerPoint Mobile and locate the .ppt or .pps file. -
Page 150: Adobe Reader Le
10.2 Adobe Reader LE Adobe Reader LE allows you to view Portable Document Format (PDF) files. When you open a password-protected PDF file, you will be prompted to enter the password before the file can be opened. To open a PDF file on your phone Click Start >... -
Page 151: Speed Dial
10.3 Speed Dial You can create speed dial entries for frequently-called numbers or frequently-accessed items so you can dial a number or access an item by pressing a single key. To create a speed dial entry for a contact On the Home screen, click Start > Calls > Contacts. Select a contact. -
Page 152: Voice Speed Dial
To make a call or launch a program using Speed Dial • If you have assigned a speed dial (for example, the second location) to a contact or a program in Speed Dial, you can simply press and hold the 2 key on the phone keypad to dial the contact’s number or open the program. - Page 153 To create a voice tag for a program To create a voice tag for a program, for example, Camera, do the following: On the Home screen, click Start > Camera. (Do not press CENTER OK when Camera is selected.) Click Menu > Add Voice Tag. After the message/beep, say “Camera.
- Page 154 154 Using Other Applications...
-
Page 155: Appendix
Appendix A.1 Regulatory Notices A.2 Specifications... -
Page 156: Regulatory Notices
A.1 Regulatory Notices Regulatory Agency Identifications For regulatory identification purposes, your product is assigned a model number of VOX0101. To ensure continued reliable and safe operation of your device, use only the accessories listed below with your VOX0101. The Battery Pack has been assigned a model number of LIBR160. This product is intended for use with a certified Class 2 Limited Power Source, rated 5 Volts DC, maximum 1 Amp power supply unit. - Page 157 • ETSI EN 301 489-7 – Electromagnetic compatibility and Radio spectrum Matters (ERM); ElectroMagnetic Compatibility (EMC) for radio equipment and services; Part 7: Specific conditions for mobile and portable radio and ancillary equipment of digital cellular radio telecommunications systems (GSM and DCS). •...
-
Page 158: Safety Precautions For Rf Exposure
Safety precautions for RF exposure Use only original manufacturer-approved accessories, or accessories that do not contain any metal Use of non-original manufacturer-approved accessories may violate your local RF exposure guidelines and should be avoided. Heed service markings Except as explained elsewhere in the Operating or Service documentation, do not service any product yourself. - Page 159 Telecommunications & Internet Association (TIA) safety information Pacemakers The Health Industry Manufacturers Association recommends that a minimum separation of six inches be maintained between a handheld wireless phone and a pacemaker to avoid potential interference with the pacemaker. These recommendations are consistent with the independent research by and recommendations of Wireless Technology Research.
-
Page 160: Weee Notice
Appendix 153 WEEE Notice The Directive on Waste Electrical and Electronic Equipment (WEEE), which entered into force as European law on 13th February 2003, resulted in a major change in the treatment of electrical equipment at end-of-life. The purpose of this Directive is, as a first priority, the prevention of WEEE, and in addition, to promote the reuse, recycling and other forms of recovery of such wastes so as to reduce disposal. -
Page 161: A.2 Specifications
A.2 Specifications System information Processor/Chipset Memory Operating system Display Type Resolution Orientation GSM/GPRS/EDGE Quad-band module GSM 850 GSM 900 GSM 1800 GSM 1900 Camera module Type Resolution • TI's OMAP 850 201 MHz • ROM-Nand Flash: 128 MB (Standard) • RAM: 64 MB DDR Figures are the total ROM and RAM memory available for use and storage. -
Page 162: Specifications
Weight Controls and lights Navigation Buttons HTC ExtUSB™ : an 11-pin mini-USB and audio jack in (ExtUSB is a proprietary connection interface that is trademarked by HTC) V 2.0 without EDR, Class 2 transmit power IEEE 802.11b/g compliant, Internal WLAN antenna... - Page 163 Controls and lights Lights Expansion slot microSD slot Power supply Battery Talk time Standby AC adapter • Event notification • Charge status • GSM/GPRS signals • Bluetooth/Wi-Fi connection microSD memory card Li-Ion Polymer 1050 mAh removable, rechargeable battery Up to 7 hours Up to 175 hours •...
- Page 164 Appendix 157...
-
Page 165: Index
Index... - Page 166 Accessibility settings - confirmation time out 59 - in-call alert volume 59 - multipress time out 59 - system font size 59 ActiveSync 50 - overview 25 - synchronize 51, 95 Add and remove programs 60 Add attachment to message 89 Adobe Reader 25, 151 Alarm 58 Alarm settings 57...
- Page 167 Contacts 26, 68 - Beam contact information 70 - Call a contact 69 - Create a new contact 68 - Find a contact 69 - Send contact information via a text message 70 - Send contact information via MMS - View and edit a contact 69 Contacts picture (capture mode) 126 Copy - contacts to SIM card 71...
- Page 168 Insert a long pause in dialing sequence Insert pause in dialing sequence 44 Insert SIM Card 22 Install - Microsoft ActiveSync 50 - Microsoft Windows Mobile Device Center 49 Install microSD Card 23 Install MIDlets - from Internet 144 - from PC 144 - locally 145 International call 43 Internet 107...
- Page 169 Phone specification 60 Photo (capture mode) 126 Pictures & Videos 27, 130 Picture theme (capture mode) 126 PIN 38, 64 Playlists (Audio Manager) Play media 136 POP3 87 Power management 59 Profile 57 Programs 25 - ActiveSync 25 - Adobe Reader 25 - Audio Manager 25, 137 - Bluetooth Explorer 25 - Calculator 26...
- Page 170 SAPSettings 27, 45 Search for e-mails on the Exchange Server 97 Secure/Multipurpose Internet Mail Extension (S/MIME) 102 Securing Wi-Fi Connection 109 Send - email/SMS message 88 - MMS message 84 Send and download e-mails 91 Send appointments 74 Send messages 88 Settings 27 Setting Up E-mail Accounts 86 Set music as ring tone 141...
- Page 171 Windows Live Mobile 121 Windows Media Player - file formats 132 - menus 133 - overview 27 - troubleshooting 136 Windows Mobile Device Center 49 Windows Mobile software version 60 Zoom 128...
Need help?
Do you have a question about the S710 and is the answer not in the manual?
Questions and answers