Table of Contents
Advertisement
Available languages
Available languages
Quick Links
Advertisement
Chapters
Table of Contents

Related Manuals for LG S5100


Summary of Contents for LG S5100
- Page 1 E S P A Ñ O L E N G L I S H S 5 1 0 0 MANUAL DE USUARIO S 510 0 MANUAL DE USUARIO Algunos de los contenidos que aparecen en este manual podrían diferir de las opciones del teléfono dependiendo del operador. P/N : MMBB0192607 ( 1.0 )
- Page 2 S5100 MANUAL DE USUARIO - ESPAÑOL Cómo deshacerse de aparatos eléctricos y electrónicos viejos 1. Si en un producto aparece el símbolo de un contenedor de basura tachado, significa que éste se acoge a la Directiva 2002/96/CE. 2. Todos los aparatos eléctricos o electrónicos se deben desechar de forma distinta del servicio municipal de recogida de basura, a través de puntos de recogida designados por el gobierno o las...
-
Page 3: Table Of Contents
INSTRUCCIONES PARA UN USO SEGURO Y EFICAZ Duración llamada Agenda Costes de llamada Menú de llamadas entrantes CARACTERÍSTICAS DEL Ajustes S5100 Llamadas múltiples o conferencias Info. GPRS Partes del teléfono Duración llamada Información de la pantalla ÁRBOL DE MENÚS Volumen datos SELECCIÓN DE FUNCIONES... - Page 4 ORGANIZADOR MENSAJES MULTIMEDIA Agenda Nuevo mensaje Cámara Videocámara Buscar Nuevo SMS Album fotos Añadir nuevo Nuevo MMS Buzón entrada Album vídeos Grupos usuarios Buzón salida Marcacion rápida Borrador Config. agenda Reproductor MP3 Escuchar buzón de voz Copiar todos Lista reproducción. Info.
- Page 5 CONTENIDOS AJUSTES DESCARGAS Selección red Fecha y Hora Juegos y más. Selección banda Fecha Juegos y más. GPRS Hora Perfiles Restablecer ajustes Teléfono Imágenes Estado memoria Sonidos Pantalla Mem. interna Archivos Aspecto menú Mem. multimedia Idioma Llamadas ACCESORIOS SERVICIOS Desvío llam. DATOS TÉCNICOS Modo respuesta Internet...
-
Page 6: Introducción
INTRODUCCIÓN Felicidades por la adquisición del avanzado y compacto teléfono móvil S5100, diseñado para funcionar con las redes de comunicación móvil digital más avanzadas. Esta guía contiene información importante sobre el uso y el funcionamiento de este teléfono. Lea toda la información atentamente para conseguir un rendimiento óptimo y evitar daños o usos... -
Page 7: Instrucciones Para Un Uso Seguro Y Eficaz
Rate, Tasa específica de absorción) 2 W/kg medido sobre diez (10) gramos de tejido. El teléfono móvil modelo S5100 ha sido diseñado • El valor de SAR más alto para este modelo de para cumplir la normativa de seguridad válida en teléfono evaluado por DASY4 para uso auditivo es... - Page 8 su utilización con este modelo de • No coloque el teléfono cerca de tarjetas de crédito o billetes de transporte, podría afectar a la información teléfono concreto. De lo contrario, de las bandas magnéticas. puede quedar invalidada cualquier • No golpee la pantalla con un objeto punzante, puede aprobación o garantía válida para el estropear el teléfono.
- Page 9 INSTRUCCIONES PARA UN USO SEGURO Y EFICAZ • También pueden generar pequeñas interferencias en DERRIBOS televisores, radios, ordenadores, etc. No utilice el teléfono mientras se realizan derribos. Respete las restricciones y siga las normativas vigentes. SEGURIDAD VIAL Compruebe las leyes y normativas locales de ENTORNOS POTENCIALMENTE utilización de teléfonos móviles durante la conducción.
- Page 10 NIÑOS • Utilice sólo las baterías y cargadores de LG. Los cargadores de LG han sido diseñados para maximizar Deje el teléfono en un lugar seguro fuera del alcance la vida de la batería. de los niños. Incluye piezas pequeñas que, si se tragan, •...
-
Page 11: Características Del
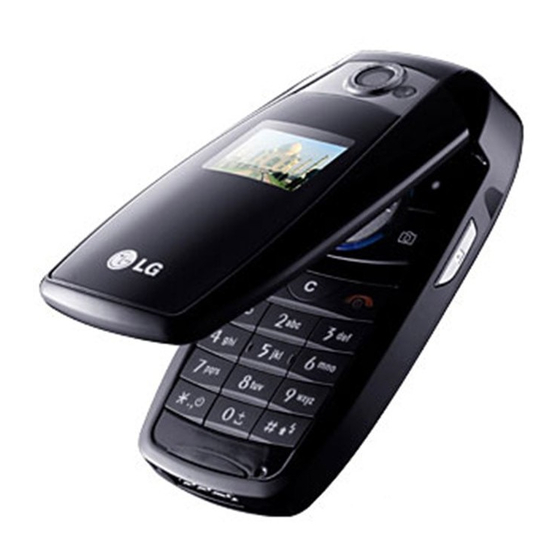
CARACTERÍSTICAS DEL S5100 PARTES DEL TELÉFONO Vista frontal Flash Lente de la cámara Nota Si la lente de la cámara Conector de auriculares está sucia, puede • Conectar aquí los auriculares. afectar a la calidad de la imagen. Botones laterales arriba/abajo •... - Page 12 Vista lateral Vista posterior Pestaña de la batería Libera la tapa de la batería Orificios para correa Tecla de cámara / de transporte Tapa de la Acceso directo a MP3 batería Activa la cámara de fotos y permite hacer fotos. Espacio Batería para...
- Page 13 CARACTERÍSTICAS DEL S5100 Teléfono abierto Auricular Pantalla principal Muestra iconos de estado del teléfono, elementos de menú, Tecla de finalización/encendido información Web, imágenes y Is‚ Is‚ Is‚ 7us‚ri 7us‚ri Is‚ Is‚ 7us‚ri 7us‚ri 7us‚ri 7us‚ri Is‚ Is‚ Is‚ Is‚ 7us‚ri 7us‚ri...
- Page 14 Tecla de función izquierda / tecla de función derecha cada una de estas teclas realiza la función indicada en la pantalla por el texto que aparece sobre ellas. Teclas de navegación utilícelas para desplazarse por los menús y mover el cursor.
-
Page 15: Información De La Pantalla
CARACTERÍSTICAS DEL S5100 INFORMACIÓN DE LA PANTALLA Nota La siguiente tabla describe varios indicadores o iconos *La calidad de la conversación puede cambiar que aparecerán en la pantalla del teléfono. según la cobertura. Cuando la potencia de la señal es inferior a 2 barras, es posible que se... - Page 16 Icono Descripción Icono Descripción Indica que la alarma está activada. Agenda Indica el estado de Cargar la batería. Permite desviar una llamada. Indica que se ha recibido un SMS. Bluetooth activado Indica que se ha recibido un mensaje de voz. Note Señales sonoras desactivadas.
-
Page 17: Inicio
INICIO INSTALACIÓN DE LA TARJETA SIM 2. Extraiga la batería. Y LA BATERÍA DEL TELÉFONO Sujete el borde superior de la batería y levántela del compartimento. Antes de extraer la batería, asegúrese que el teléfono está apagado. 1. Extraiga la tapa de la batería. Pulse la pestaña de liberación de la batería, deslice la tapa de la batería hacia la parte inferior del teléfono y extráigala. - Page 18 3. Inserte la tarjeta SIM. 4. Inserte la batería. Introduzca la tarjeta SIM en el soporte. Deslice la Inserte en primer lugar la parte inferior de la batería tarjeta SIM hacia el interior del soporte de la tarjeta. en el borde inferior del compartimento de la Asegúrese que la tarjeta SIM está...
-
Page 19: Cargar La Batería
INICIO CARGAR LA BATERÍA ¡ PRECAUCIÓN! No fuerce el conector o de lo contrario podrían resultar • Para conectar el cargador suministrado debe haber dañado el teléfono o el cargador. instalado antes la batería. Inserte el cargador de la batería en posición vertical en la •... -
Page 20: Desconexión Del Cargador
DESCONEXIÓN DEL CARGADOR Nota 1. Una vez cargado el teléfono, las barras en Asegúrese que la batería suministrada está movimiento del icono de batería se detienen y completamente cargada antes de utilizar el aparece “ ¡ Completa!” en pantalla. teléfono. 2. -
Page 21: Encendido Y Apagado Del
INICIO ENCENDIDO Y APAGADO DEL CÓDIGOS DE ACCESO TELÉFONO Puede utilizar los códigos de acceso para evitar el uso no autorizado del teléfono. Los códigos de acceso Encendido del teléfono (excepto los códigos PUK y PUK2) se pueden cambiar utilizando la función Cambiar código. (Menú 7.4.5) 1. -
Page 22: Contraseña De Restricción
Código PUK1 (4-8 dígitos) CONTRASEÑA DE RESTRICCIÓN El código PUK1 (clave de desbloqueo del código PIN) Cuando se utiliza la función de Restricción de es necesario para cambiar un código PIN bloqueado. llamadas se necesita la contraseña de restricción. Su El código PUK1 se suele suministrar con la tarjeta SIM. -
Page 23: Funciones Generales
FUNCIONES GENERALES HACER Y TERMINAR LLAMADAS Hacer llamadas internacionales 1. Mantenga presionada la tecla 0 para introducir Hacer una llamada el prefijo internacional. El carácter “ + ” selecciona automáticamente el código de acceso internacional. 1. Asegúrese de que el teléfono está encendido. 2. - Page 24 Ajuste del volumen Nota Si desea ajustar el volumen del auricular durante una Si ha establecido Cualquier tecla como modo llamada, utilice las teclas laterales (o). Pulse la tecla respuesta, podrá responder pulsando cualquier lateral superior para subir el volumen y el botón lateral tecla, excepto la tecla b de función derecha.
- Page 25 FUNCIONES GENERALES LCD del teléfono. La potencia de señal puede variar, Modo ABC especialmente en el interior de edificios, si le ocurre esto, colóquese cerca de una ventana para ver si Este modo le permite introducir letras pulsando la mejora la potencia de señal. tecla rotulada con la letra pertinente.
- Page 26 2. Cambie el modo de entrada de texto - Si la palabra sigue siendo incorrecta, pulse una o pulsando = . Podrá consultar en cualquier varias veces la tecla de navegación hacia abajo para momento, en qué modo de entrada de texto se consultar el resto palabras posibles.
- Page 27 FUNCIONES GENERALES Nota Nota Para salir del modo de entrada de texto sin Consulte la siguiente tabla para obtener más guardar el texto introducido, pulse b y el información sobre los caracteres disponibles teléfono volverá al modo de espera. utilizando las teclas alfanuméricas. Uso del modo ABC Caracteres en orden de visualización Tecla...
-
Page 28: Agenda
Uso del modo 123 (modo numérico) Durante una llamada El modo 123 le permite introducir números en un El menú que se muestra en la pantalla del teléfono SMS(por ejemplo, un número de teléfono). durante una llamada es distinto al menú principal Para pasar al modo 123 en un campo de entrada de predeterminado que aparece en modo de espera. - Page 29 FUNCIONES GENERALES auricular y una indicación en la pantalla informándole Desactivar el micrófono que hay una segunda llamada en espera. Esta Puede desactivar el micrófono durante una llamada función, denominada llamada en espera, sólo está pulse la tecla [Menú] y luego seleccione Silencio disponible si lo admite la red.
-
Page 30: Llamadas Múltiples Oconferencias
LLAMADAS MÚLTIPLES O Hacer una segunda llamada CONFERENCIAS Para realizar una segunda llamada mientras está hablando por el móvil, introduzca el segundo número y El servicio de llamadas múltiples o conferencias le pulse la tecla a . Al establecer la segunda llamada, permite mantener una conversación con más de una la primera llamada se pone en espera persona de forma simultánea si su operador de red... - Page 31 FUNCIONES GENERALES Adición de llamadas a la conferencia Finalización de una conferencia Para finalizar una llamada pulse la tecla b . Para Para añadir una llamada a una conferencia existente, pulse la tecla de función izquierda y seleccione finalizar una conferencia, pulse la teclamultifunción Conferencia/Unir.
-
Page 32: Árbol De Menús
ÁRBOL DE MENÚS El siguiente menu muestra la estructrua de menú disponible e indica: El número asignado a cada opción de menú. 1. Perfiles 3. Utilidades 5. Mensajes 3.1 Alarma 5.1 Nuevo mensaje 1.x.1 Activar 1.x.2 Personalizar 3.2 Bluetooth 5.2 Buzón entrada 1.x.3 Renombrar 3.3 Calculadora 5.3 Buzón salida... - Page 33 ÁRBOL DE MENÚS 6. Multimedia 7. Ajustes 8. Servicios 6.1 Cámara 7.1 Fecha y Hora 8.1 Internet 8.2 Servicio SIM 6.2 Videocámara 7.2 Teléfono 6.3 Album fotos 7.3 Llamadas 6.4 Album vídeos 7.4 Seguridad 6.5 MP3 7.5 Red 6.6 Grabadora 7.6 GPRS 6.7 Configuración 7.7 Restablecer ajustes...
-
Page 34: Selección De Funcionesy Opciones
SELECCIÓN DE FUNCIONES Y OPCIONES El teléfono ofrece un conjunto de funciones que le permiten personalizar el teléfono. Estas funciones se Is‚ Is‚ Is‚ 7us‚ri 7us‚ri Is‚ Is‚ 7us‚ri 7us‚ri 7us‚ri 7us‚ri Is‚ Is‚ 7us‚ri 7us‚ri 7us‚ri 7us‚ri Is‚ Is‚ 7us‚ri 7us‚ri Is‚... -
Page 35: Perfiles
PERFILES En el menú Perfiles puede ajustar y personalizar los Alerta llamada: establece el tipo de alerta para tonos del teléfono para diferentes situaciones, llamadas entrantes. entornos o grupos de usuarios. Tono timbre: selecciona el tono de timbre deseado Hay seis perfiles predeterminados: Sólo vibrac., de la lista. -
Page 36: Renombrar
Vol. efectos: establece el volumen de los efectos de 1. Para cambiar el nombre de un perfil, desplácese sonido. hasta el perfil en cuestión de la lista de perfiles y, después de pulsar la tecla de función Vol. enc./apag.: establece el volumen del tono de izquierda d o la tecla OK, seleccione Cambiar timbre al encender o apagar el teléfono. -
Page 37: Registro Llamadas
REGISTRO LLAMADAS Puede comprobar el registro de Llam. perdidas, LLAM. RECIBIDAS MENÚ 2.2 recibidas y enviadas sólo si la red admite la Esta opción le permite ver las últimas 10 llamadas Identificación de línea de llamada (ILL) dentro del área entrantes. -
Page 38: Borrar Lista Llamadas
BORRAR LISTA LLAMADAS Restablecer: Le permite eliminar la duración de todas las llamadas oprimiendo la tecla multifunción izquierda d [Sí ]. MENÚ 2.4 Le permite borrar las listas de Llam. perdidas, Llam. Costes de llamada recibidas, Llam. enviadas o Todas. de una sóla vez. (Menú... -
Page 39: Info. Gprs
REGISTRO LLAMADAS Mostrar automáticamente: Este servicio de red le permite ver automáticamente el coste de las últimas llamadas. Si está establecido en Activado, puede ver el coste de la última llamada al finalizar la llamada. INFO. GPRS MENÚ 2.6 Puede comprobar la cantidad de datos transferidos por la red mediante GPRS. -
Page 40: Utilidades
UTILIDADES ALARMA Cuando recibe datos de otros dispositivos Bluetooth, MENÚ 3.1 el teléfono solicita confirmación. Permite elegir entre uno de los fondos Después de confirmar la transferencia, el archivo se preconfigurados. copiará en su teléfono. 1. Seleccione Activ. y escriba la hora a la que desea Dependiendo del tipo de archivo, se almacenará... -
Page 41: Disp. Vinculados
UTILIDADES Disp. vinculados CALCULADORA (Menú 3.2.1) MENÚ 3.3 En el teléfono puede ver todos los dispositivos que La calculadora contiene las funciones estándar: +, –, Ω, son compatibles con Bluetooth. ÷(suma, resta, multiplicación y división). 1. Introduzca los números pulsando las teclas Disp. -
Page 42: Conversor
CONVERSOR MÓDEM MENÚ 3.4 MENÚ 3.6 Permite convertir cualquier medida en la unidad que Esta función permite usar el módem. desee. Existen 7 tipos de conversión de unidades: Moneda, Superficie, Longitud, Peso, Temperatura, Volumen y Velocidad. 1. Para seleccionar uno de los cuatro tipos de medidas pulse la tecla d [OK]. -
Page 43: Organizador
ORGANIZADOR AGENDA Editar: Puede editar el nombre, el número, el grupo, MENÚ 4.1 el carácter y la imagen pulsando las teclas de navegación. Nota Nuevo SMS/Nuevo MMS: Después de haber En modo de espera, pulse la tecla de función encontrado el número que desea, puede enviar un derecha e [Contactos] para acceder SMS/MMS al número seleccionado. -
Page 44: Grupos Usuarios
Podrá escribir hasta 20 caracteres por nombre en la Timbre grupo: Le permite seleccionar un tono de memoria del teléfono, mientras que en la tarjeta SIM, timbre para las llamadas de los miembros del grupo. el número de caracteres dependerá de la tarjeta. Icono grupo: Le permite seleccionar el icono 1. -
Page 45: Config. Agenda
ORGANIZADOR 4. Seleccione un nombre asignado a una marcación - Con fotos: Establece la lista de la agenda con rápida y elija Cambiar o Borrar para editar el información sobre el carácter y la fotografía. nombre. - Nombre y número: Establece la lista de la agenda para que muestre el nombre y el número. -
Page 46: Borrar Todas
Borrar todas (Menú 4.1.7) 4. Utilice i y j para seleccionar un servicio. Pulses a [Enviar]. Puede eliminar todas las entradas en la tarjeta SIM y el teléfono. Para esta función, es necesario introducir el Estado memoria código de seguridad. Esta función le permite ver las entradas libres y en 1. -
Page 47: Calendario
ORGANIZADOR CALENDARIO Añadir nuevo (Menú 4.2.1) MENÚ 4.2 Permite añadir un nuevo plan para el día seleccionado. Al acceder a este menú aparece un calendario. En la Escriba el asunto y luego seleccione la tecla de función parte superior de la pantalla hay varias secciones izquierdad d [OK]. -
Page 48: Establecer Tono De Alarma
Establecer tono de alarma (Menú 4.2.6) Si establece la alarma, se emitirá el sonido de alarma especificado. MEMO MENÚ 4.3 1. Seleccione la Nota pulsando la tecla de función izquierda d [OK]. 2. Si estuviera vacío, añada una nueva pulsando la tecla de función izquierda d [Añadir]. -
Page 49: Mensajes
MENSAJES Pulse la tecla Menú ( d ) y seleccione Mensajes Podrá recibir los mensajes SMS no enviados cuando vuelva a tener espacio suficiente en la memoria de con las teclas de navegación. mensajes. 1. Escriba el mensaje. Para obtener información sobre NUEVO MENSAJE cómo escribir el mensaje, Consulte las páginas 24 a MENÚ... -
Page 50: Nuevo Mms
Color: Le permite seleccionar el Color del texto y el Sonidos: Le permite insertar sonidos/melodías. fondo. Plantillas SMS: le permite utilizar plantillas de texto Alineación: Le permite alinear el contenido del ya establecidas en el teléfono. mensaje Izquierda, Centro o Derecha. Agenda: puede añadir números de teléfono al Agregar diccionario T9: Le permite agregar nuevas mensaje. - Page 51 MENSAJES 2. Añada una imagen, sonido o un video. Puede pasar a Eliminar diapo.: Le permite eliminar las diapositivas la sección siguiente utilizando las teclas de actuales. navegación arriba/abajo. Definir formato de la diapositiva 3. Puede incorporar una diapositiva desplazando el - Ajustar temporizador: Le permite establecer un cursor sobre , pulsando la tecla OK o la tecla de...
-
Page 52: Buzón Entrada
BUZÓN ENTRADA Si aparece el mensaje ‘Sin espacio para mensaje SIM’ MENÚ 5.2 tendrá que eliminar alguno de los mensajes Los mensajes que reciba se irán almacenando en la almacenados en al SIM. Si aparece el mensaje ‘No hay bandeja de entrada. Recibirá una alerta cuando reciba espacio para el mensaje’, tendrá... -
Page 53: Buzón Salida
MENSAJES Llamar: Le permite devolver la llamada al remitente. Cargar: Inicia la conexión WAP a la URL contenida en el mensaje descargado. El teléfono debe estar Información: Le permite ver información sobre los configurado para los servicios WAP (Menú 8.1.3) mensajes recibidos, la dirección del remitente, el para acceder a descargar mensajes. -
Page 54: Borrador
Enviado: Eliminar todos: permite enviar todos los mensajes no enviados. Ver: puede ver los mensajes enviados. Enviar: Le permite reenviar el mensaje a otros destinatarios. BORRADOR MENÚ 5.4 Borrar: Le permite eliminar el mensaje. En este menú puede ver la lista de mensajes guardados Información: Le permite ver información sobre los como borrador. -
Page 55: Escuchar Buzón De Voz
MENSAJES ESCUCHAR BUZÓN DE VOZ INFO. MENSAJE MENÚ 5.6 Los mensajes del servicio de información son mensajes MENÚ 5.5 de texto que envía la red a los usuarios de teléfonos Este menú le permite acceder rápidamente a su buzón móviles. Proporcionan información general sobre de voz (si existe en la red). -
Page 56: Asuntos
Asuntos Plantillas SMS (Menú 5.6.2) (Menú 5.7.1) Para crear temas nuevos, pulse la tecla de función • Por favor llámame izquierda [OK.] y, a continuación, seleccione Añadir • Llego tarde. Llegaré a las nuevo. Si ya existen temas, puede desactivarlos, •... -
Page 57: Plantillas Mms
MENSAJES Plantillas MMS Agregar diccionario T9: permite agregar nuevas (Menú 5.7.2) palabras. Este menú sólo se puede mostrar si el Previsualizar: muestra el mensaje multimedia en modo de edición es Predictivo. formato borrador. Idiomas T9: selecciona un modo de entrada T9. Guardar: guarda los mensajes multimedia como Salir: sale del menú. -
Page 58: Mms
Periodo validez: Este servicio de red le permite Descarga auto: Si selecciona Activ., recibirá establecer el período durante el que se almacenarán automáticamente mensajes multimedia. Si los SMS en el centro de mensajes. selecciona Desac., sólo recibirá un mensaje de notificación en la bandeja de entrada y luego podrá... -
Page 59: Info. Mensaje
MENSAJES Inicio: Seleccione esta opción para escuchar los Idiomas mensajes que hay en el buzón de voz. Puede seleccionar el idioma que desee si pulsa Itinerancia: Aunque esté en el extranjero, puede [Activado/ Desactivado]. A continuación, el escuchar los mensajes del buzón de voz si se admite mensaje del servicio de información se mostrará... -
Page 60: Multimedia
MULTIMEDIA CÁMARA Efecto: determina el efecto especial que se aplicará MENÚ 6.1 a la imagen. Esta aplicación permite tomar una imagen fija. Puede Flash: determina el funcionamiento del flash. realizar una imagen en el tamaño deseado y usarla como fotografía de contactos, pantalla de inicio u Zoom: determina el índice del zoom. -
Page 61: Album Fotos
MULTIMEDIA Calidad: Determina la calidad de un vídeo. Nuevo MMS: permite enviar la imagen a través de un mensaje MMS. Balance blancos : Permite cambiar los ajustes según el entorno. Como tapiz: permite establecer una imagen como papel tapiz. Tiempo de registro: Determina el tiempo de grabación. -
Page 62: Mp3
24KHz, velocidad en bits desde 32 Kbps hasta 192 Kbps, estereo MENÚ 6.5 • AAC: formatos DIF, ADTS (frecuencia de muestreo El S5100 dispone de un reproductor de MP3 hasta 48 kHz) integrado. Puede disfrutar escuchando archivos de música en MP3 alojados en una memoria del teléfono usando unos auriculares compatibles o a través del... - Page 63 MULTIMEDIA Puede transferir archivos MP3 de un PC compatible a Nota la memoria del teléfono usando la aplicación LG Contents Bank incluida en el CD-ROM del paquete del El PC debe funcionar con los sistemas teléfono. operativos Windows 98 SE, Windows ME, Cuando conecte el teléfono a un PC a través del cable...
-
Page 64: Reproductor Mp3
Reproductor MP3 - Modo reproducción (Menú 6.5.1) Este menú permite definir el modo de 1. Pulse el menú MP3, y a continuación seleccione reproducción: Reproducir todo, Repetir todo, Rep. reproductor de MP3. aleat. todas, Reproducir una, y Repetir una. 2. Pulse la tecla de función izquierda d [Opciones] - Reprod. -
Page 65: Lista Reproducción
MULTIMEDIA Lista reproducción (Menú 6.5.2) Nota También puede establecerlo como tono de timbre en El copyright de los archivos de música puede Perfil. Este menú permite ver toda la lista estar protegido por los tratados y leyes reproducción. Puede mover la pista pulsando la tecla nacionales e internacionales. -
Page 66: Ver Lista
1. Una vez iniciada la grabación, se muestra el mensaje Videocámara (Menu 6.7.2) Grabando y el tiempo restante. Borrar todas: este menú le permite eliminar todos 2. Si desea finalizar la grabación, pulse d los vídeos. [Guardar]. 3. Escriba el título de la nota de voz y pulse d [Aceptar]. -
Page 67: Ajustes
AJUSTES Puede establecer los menús siguientes según sus Hora (Menú 7.1.2) necesidades y preferencias. Establecer hora 1. Pulse d [Menú] en modo de espera. Le permite modificar la hora del teléfono. 2. Pulse 7 para acceder directamente a Ajustes. Formato hora Le permite establecer el formato de hora como 12 o 24 horas. -
Page 68: Aspecto Menú
Pantalla externa LLAMADAS MENÚ 7.3 Le permite seleccionar una imagen o animación Le permite establecer las opciones de las llamadas como papel tapiz. pulsando d [OK] en Ajustes. Texto pantalla: Si selecciona Activ., el menú le permitirá personalizar el texto que aparece en modo Desvío llam. -
Page 69: Modo Respuesta
AJUSTES Todas llamadas fax: Desvía de forma incondicional • Ver estado las llamadas de fax a un número con una conexión Permite ver el estado del servicio. de fax. Modo respuesta Cancelar todos: Cancela todos los desvíos. (Menú 7.3.2) Menús secundarios Tapa abierta: Si selecciona este menú, puede recibir una llamada entrante si abre la tapa del Dentro del menú... -
Page 70: Llam. En Espera
Llam. en espera SEGURIDAD (Menú 7.3.4) MENÚ 7.4 (depende de la red y la suscripción) Solicitar PIN (Menú 7.4.1) Activar: Si selecciona Activar, puede aceptar una llamada (entrante) en espera. En este menú, puede establecer el teléfono para que solicite el código PIN de la tarjeta SIM al encenderlo. Desactivar: Si selecciona Cancelar, puede rechazar una llamada (entrante) en espera. -
Page 71: Bloqueo Teléf
AJUSTES Bloqueo teléf. Llamadas salientes internacionales si en (Menú 7.4.2) itinerancia: Este servicio restringe todas las Puede utilizar el código de seguridad para impedir el llamadas salientes internacionales, excepto a la red uso no autorizado del teléfono. Cada vez que encienda propia cuando se está... -
Page 72: Marcación Fija
Marcación fija 2. Escriba el nuevo código de seguridad, código PIN2 (Menú 7.4.4) y compruébelo. (depende de la tarjeta SIM) Puede restringir las llamadas salientes a números de teléfono seleccionados. Los números están protegidos con el código PIN2. MENÚ 7.5 Puede seleccionar una red que se registrará... -
Page 73: Selección Banda
AJUSTES Preferidas: Puede establecer una lista de redes ESTADO MEMORIA MENÚ 7.8 preferidas para que el teléfono intente registrarle con éstas antes de intentarlo con otras. Esta lista Mem. interna (Menú 7.8.1) está establecida en la lista predefinida de redes conocidas del teléfono. -
Page 74: Servicios
SERVICIOS Puede acceder a varios servicios WAP (Wireless Utilización de las teclas del teléfono Application Protocol, Protocolo de aplicación Cuando navega por Internet, la función de las teclas inalámbrico) como banca, noticias e información del teléfono es distinta a la habitual en el modo meteorológica y de vuelos. -
Page 75: Internet Inicio
SERVICIOS INTERNET Una vez que haya seleccionado el marcador deseado, MENÚ 8.1 dispondrá de las siguientes opciones. Inicio Conectar: Le permite conectar al marcador (Menú 8.1.1) seleccionado. Le permite conectarse a una página de inicio. La página de inicio será el sitio definido en el perfil activado. Si Añadir nuevo: permite crear un nuevo marcador. - Page 76 - Ajustes datos: Sólo aparece si selecciona Datos Note como portadora o servicio. En caso de que la tarjeta SIM sea compatible Marcar núm.: Introduzca el número de teléfono con los servicios de SAT (SIM Application que desea marcar para acceder a la puerta de Toolkit), este menú...
- Page 77 SERVICIOS APN: Introduzca el APN de GPRS. Caché ID. usuario: Identificación del usuario en el Permite establecer si el intento de conexión se efectúa servidor APN. o no a través de la memoria caché. Contraseña: Contraseña requerida por el servidor Cookies APN.
-
Page 78: Servicio Sim
SERVICIO SIM MENÚ 8.2 Su proveedor de servicios puede ofrecer aplicaciones especiales a través de la tarjeta SIM, como banca doméstica, información de la Bolsa, etc. Si se ha registrado en uno de estos servicios, el nombre del servicio aparecerá al final del menú principal. Con el menú... -
Page 79: Descargas
DESCARGAS JUEGOS Y MÁS Opciones: algunas aplicaciones Java necesitan MENÚ 9.1 establecer una conexión de datos. 3Seleccione esta opción para establecer las opciones de conexión. Juegos y más (Menú 9.1.1) - Siempre: la conexión se realiza en ese mismo En este menú, puede administrar las aplicaciones Java momento, sin necesidad de notificación. - Page 80 Nota Java(TM) es una tecnología desarrollada por Sun Microsystems. Del mismo modo que descargaría El archivo JAR es un formato comprimido del el subprograma Java con los exploradores programa Java; a su vez, el archivo JAD es un estándar Netscape o MS Internet Explorer, puede archivo de descripción que incluye información descargar Java MIDlet con el teléfono activado detallada.
-
Page 81: Perfiles
DESCARGAS SONIDOS ATENCIÓN! Sólo los programas basados en J2ME MENÚ 9.3 (Java 2 Micro Edition) se pueden ejecutar en un entorno de La tecla de navegación izquierda d [Opciones] teléfono. Los programas basados en J2SE (Java 2 permite acceder a las opciones siguientes. Standard Edition) sólo se pueden ejecutar en un entorno Establecer como tono: establece el tono de timbre de PC. - Page 82 PC identificará el dispositivo periférico. Conectividad USB 2. El teléfono mostrará “USB” en la pantalla LCD El modelo S5100 se puede conectar al PC mediante principal. un cable USB para transferir archivos, contenidos y utilizar el módem integrado. Puede encontrar todos 3.
- Page 83 DESCARGAS Nota Nota Aunque puede cargar imágenes nuevas desde Puede cargar archivos de cualquier tamaño el PC, el teléfono no las mostrará en la lista del hasta que la memoria esté llena. menú Mis fotos. Así pues, le recomendamos Puede crear hasta 10 carpetas anidadas en las que no cargue nada en esta carpeta.
- Page 84 Programas de PC e Internet Puede conectar el teléfono al PC para administrar los contactos de la agenda, cargar contenidos nuevos como papeles tapiz y tonos de timbre o utilizar el módem integrado. 1. Instale los programas que se incluyen en el CD- ROM.
-
Page 85: Accesorios
Puede conectar su teléfono con un ordenador para intercambiar datos entre ellos. Auriculares Nota Cuando lo conecta al teléfono, le Utilice siempre accesorios LG originales. permite hablar sin sujetarlo con las Si no lo hace, la garantía puede quedar manos. invalidada. Cargador Los accesorios pueden variar según las... -
Page 86: Datos Técnicos
DATOS TÉCNICOS GENERAL Nombre del producto: S5100 Sistema : GSM 900 / DCS 1800 / PCS 1900 TEMPERATURAS AMBIENTE Máx: +55°C (en reposo) : +45°C (durante la recarga de la batería) Mín : -10°C... - Page 88 S5100 USER GUIDE - ENGLISH Disposal of your old appliance 1. When this crossed-out wheeled bin symbol is attached to a product it means the product is covered by the European Directive 2002/96/CE. 2. All electrical and electronic products should be disposed of separately from the municipal waste stream via designated collection facilities appointed by the government or the local authorities.
- Page 89 Call charges Making and answering calls GUIDELINES FOR SAFE AND EFFICIENT USE Call duration Contacts Call costs In-call menu S5100 FEATURES Settings Multiparty or conference calls Parts of the phone GPRS information Display information Call duration Data volumes GETTING STARTED...
-
Page 90: Contacts
ORGANISER MESSAGES MULTIMEDIA Contacts New message Camera Video camera Search Write text message My photos Add new Write multimedia message Inbox My Videos Caller groups Outbox Speed dial Drafts Settings MP3 player Listen to voice mail Copy all Playlist Info message Delete all Settings Voice recorder... - Page 91 TABLE OF CONTENTS SETTINGS Fixed dial number DOWNLOADS Change codes Date & Time Games & Apps Network settings Date Games & Apps Network selection Time Profiles Band selection Phone settings Images GPRS setting Sounds Display settings Reset settings File storage Theme Settings Memory status Language...
- Page 92 INTRODUCTION Congratulations on your purchase of the advanced and compact S5100 mobile phone, designed to operate with the latest digital mobile communication technology. This user’s guide contains important information on the use and operation of this phone. Please read all the information carefully for optimal performance and to prevent any damage to or misuse of the phone.
- Page 93 Read these simple guidelines. Breaking the rules may • While there may be differences between the SAR be dangerous or illegal. Further detailed information is levels of various LG phone models, they are all given in this manual. designed to meet the relevant guidelines for exposure to radio waves.
- Page 94 • Keep away from electrical appliances such as a TV, ELECTRONICS DEVICES radio or personal computer. All mobile phones may get interference, which could • The unit should be kept away from heat sources such affect performance. as radiators or cookers. •...
- Page 95 GUIDELINES FOR SAFE AND EFFICIENT USE • RF energy may affect some electronic systems in IN AIRCRAFT your motor vehicle such as car stereo or safety Wireless devices can cause interference in aircraft. equipment. • Turn off your mobile phone before boarding any •...
- Page 96 Unlike other battery systems, there is no memory effect that could compromise the battery’s performance. • Use only LG batteries and chargers. LG chargers are designed to maximize the battery life. • Do not disassemble or short-circuit the battery pack.
- Page 97 S5100 FEATURES PARTS OF THE PHONE Front view Flash Camera lens Note Dirt on the camera lens Headset jack could affect the image • Connect a headset here quality. Up/down side keys • When the phone is closed, press Front screen this key to display the current time on the front screen.
- Page 98 Right side view Rear view Battery latch Press this button to remove the battery cover. Holes for a carrying Camera / MP3 key strap Battery cover You can take pictures with the phone closed. Press and hold down this key to activate the camera mode.
- Page 99 S5100 FEATURES Open view Earpiece Main screen Displays phone status icons, menu items, Web information, pictures and more in full colour. Is‚‰ Is‚‰ Is‚‰ 9ƒ‚ˆiqˆ‡ 9ƒ‚ˆiqˆ‡ 9ƒ‚ˆiqˆ‡ Is‚‰ Is‚‰ 9ƒ‚ˆiqˆ‡ 9ƒ‚ˆiqˆ‡ Is‚‰ Is‚‰ 9ƒ‚ˆiqˆ‡ 9ƒ‚ˆiqˆ‡ Is‚‰ Is‚‰ Is‚‰ Is‚‰ 9ƒ‚ˆiqˆ‡...
- Page 100 Left soft key/ Right soft key Performs the function indicated by the text on the screen immediately above it. Navigation keys Use to scroll through menus and move the cursor. Confirm key Selects menu options and confirms actions. MP3 hot key Activate the MP3 menu directly.
- Page 101 S5100 FEATURES DISPLAY INFORMATION Note The table below describes various display indicators or *The quality of the conversation may change icons that appear on the phone’s display screen. depending on network coverage. When the signal strength is below 2 bars, you may On-Screen Icons experience muting, call drop and bad audio.
- Page 102 Icon Description Icon Description Indicates the alarm has been set and is on. Agenda event set Indicates the status of the battery charge. Call divert service active Indicates the receipt of a message. Bluetooth enabled Indicates the receipt of a voice message. Indicates that the vibration ringer has Note been set.
- Page 103 GETTING STARTED INSTALLING THE SIM CARD AND 2. Remove the battery. BATTERY Hold the top edge of the battery and lift the battery from the battery compartment. Make sure the power is off before you remove the battery. 1. Remove the battery cover. Press the battery release latch and slide the battery cover toward the bottom of the phone.
- Page 104 3. Install the SIM card 4. Install the battery. Insert the SIM card into the holder. Slide the SIM Insert the bottom of the battery first into the card into the SIM card holder. Make sure that the bottom edge of the battery compartment. SIM card is inserted properly and that the gold Push down the top of the battery until it snaps into contact area on the card is facing downwards.
- Page 105 GETTING STARTED CHARGING THE BATTERY CAUTION! • Do not force the connector as this may damage the To connect the mains adapter to the phone, you must phone and/or the charger. have installed the battery. • If you use the battery pack charger out of your own country, use an attachment plug adapter for the proper configuration.
- Page 106 DISCONNECTING THE ADAPTER Note 1. When charging is finished, the moving bars of the Ensure the battery is fully charged before using battery icon stop and ‘Full’ is displayed on the the phone for the first time. screen. Do not remove the battery or SIM card while 2.
- Page 107 GETTING STARTED TURNING YOUR PHONE ON ACCESS CODES AND OFF You can use the access codes described in this section to avoid unauthorised use of your phone. The access Turning your phone ON codes (except PUK1 and PUK2 codes) can be changed by using the Change codes feature (Menu 1.
- Page 108 PUK1 code (4 to 8 digits) BARRING PASSWORD The PUK1 (PIN Unblocking Key) code is required to The barring password is required when you use Call unlock a PIN blocked phone. The PUK1 code may be barring (Menu 7.4.3) function. You obtain the supplied with the SIM card.
- Page 109 GENERAL FUNCTIONS MAKING AND ANSWERING CALLS Making an international call 1. Press and hold the 0 key for the international Making a call prefix. The ‘+ ’ character automatically selects the international access code. 1. Make sure your phone is switched on. 2.
- Page 110 Adjusting the volume To reject an incoming call, press and hold one of the side keys on the left side of the phone If you want to adjust the earpiece volume during a call, without opening the phone. use the side keys ( o ) . Press the up side key to You can answer a call while using the address increase and down side key to decrease the volume.
- Page 111 GENERAL FUNCTIONS Entering text 123 mode (Number mode) You can enter alphanumeric characters by using the Type numbers using one keystroke per number. phone’s keypad. For example, storing names in the To change to 123 mode in a text entry field, phonebook, writing a message, creating a personal press the = key until 123 mode is displayed.
- Page 112 Using the T9 mode Example: Press 4 6 6 3 to type Good The T9 predictive text input mode lets you enter Press 4 663 [Down navigation key] to words easily with a minimum number of key presses. type Home As you press each key, the phone begins to display the characters that it thinks you are typing based on the - If the desired word is missing from the word choice...
- Page 113 GENERAL FUNCTIONS Using the ABC mode Note Use the 2 to 9 keys to enter your text. Refer to the table below for more information 1. Press the key labelled with the required letter: on the characters available using the alphanumeric keys.
-
Page 114: In-Call Menu
Using the 123 (Number) mode During a call The 123 mode enables you to enter numbers in a text The menu displayed on the handset screen during a message (a telephone number, for example). call is different to the default main menu displayed when in standby mode, and the options are described Press the keys corresponding to the required digits below. -
Page 115: Multiparty Or Conference Calls
GENERAL FUNCTIONS This feature, known as Call waiting, is only available if Switching DTMF tones on during a call your network supports it. For details of how to To turn DTMF tones on during a call, press the left activate and deactivate it see Call waiting soft key, and then select DTMF on. - Page 116 Making a second call Displaying callers in a conference call You can make a second call while currently on a call. To scroll through the numbers of the callers who make Enter the second number and press the a key. up a conference call on the handset screen, use the When the second call is connected, the first call is up/down navigation keys.
-
Page 117: Menu Tree
MENU TREE The following illustration shows the available menu structure and indicates the: Number assigned to each menu option. 1. Profiles 3. Tools 5. Messages 3.1 Alarm clock 5.1 New message 1.x.1 Activate 1.x.2 Personalise 3.2 Bluetooth 5.2 Inbox 1.x.3 Rename 3.3 Calculator 5.3 Outbox 3.4 Unit converter... - Page 118 6. Multimedia 7. Settings 8. Service 6.1 Camera 7.1 Date & Time 8.1 Internet 8.2 SIM service 6.2 Video camera 7.2 Phone settings This menu depends on 6.3 My photos 7.3 Call settings SIM and the network 6.4 My Videos 7.4 Security settings services.
-
Page 119: Selecting Functions And Options
SELECTING FUNCTIONS AND OPTIONS Your phone offers a set of functions that allow you to customise the phone. These functions are arranged in Is‚‰ Is‚‰ Is‚‰ 9ƒ‚ˆiqˆ‡ 9ƒ‚ˆiqˆ‡ 9ƒ‚ˆiqˆ‡ Is‚‰ Is‚‰ 9ƒ‚ˆiqˆ‡ 9ƒ‚ˆiqˆ‡ Is‚‰ Is‚‰ Is‚‰ Is‚‰ 9ƒ‚ˆiqˆ‡ 9ƒ‚ˆiqˆ‡ 9ƒ‚ˆiqˆ‡ 9ƒ‚ˆiqˆ‡... -
Page 120: Profiles
PROFILES In Profiles, you can adjust and customise the phone Ring volume: Set the volume of the ringing tone. tones for different events, environments, or caller groups. There are five preset profiles: Vibrate only, Note Silent, General, Loud and Headset. Each profile can To protect the sense of hearing while Folder be personalised. - Page 121 PROFILES • After 10 secs: After 10 seconds, the phone will answer automatically. Rename (Menu 1.x.3) You can rename a profile and give it any name you want. Note Vibrate only, Silent and Headset profiles cannot be renamed. 1. To change the name of a profile, scroll to the profile in the profile list and after pressing the left soft key d or the OK key, select Rename.
-
Page 122: Call Register
CALL REGISTER You can check the record of missed, received, and RECEIVED CALLS MENU 2.2 dialled calls only if the network supports the Calling This option lets you view the last 10 incoming calls. Line Identification (CLI) within the service area. You can also: The number and name (if available) are displayed •... -
Page 123: Delete Recent Calls
CALL REGISTER DELETE RECENT CALLS Call costs (Menu 2.5.2) MENU 2.4 Allows you to check the cost of your last call, all calls, Allows you to delete Missed calls and Received calls remaining and reset the cost. To reset the cost, you lists. -
Page 124: Call Duration
GPRS INFORMATION MENU 2.6 You can check the amount of data transferred over the network through the GPRS information option. In addition, you can also view how much time you are online. Call duration (Menu 2.6.1) You can check the duration of Last call and All calls. You can also reset the call timers. -
Page 125: Tools
TOOLS ALARM CLOCK After confirming the transfer, the file will be copied in MENU 3.1 your phone. You can set up to 5 alarm clocks to go off at a Depending on the file type, it will be stored in the specified time. -
Page 126: Handsfree Devices
5. Press the left soft key d [Reset] or enter numbers Handsfree devices (Menu 3.2.2) to repeat the procedure above. You can view the list of handsfree devices which are 6. To end Calculator, press the right soft key e compatible with your Bluetooth phone. -
Page 127: World Time
TOOLS 3. You can check the converted value for the unit you want. WORLD TIME MENU 3.5 You can view clocks of the world’s major cities. 1. Select the city belonged to the time zone by pressing k , l key. 2. -
Page 128: Organiser
ORGANISER CONTACTS Send via Bluetooth: You can send the data of MENU 4.1 phone book to devices which is compatible with Bluetooth through Bluetooth. Note Copy: You can copy an entry from SIM to phone or In standby mode, press right soft key e from phone to SIM. -
Page 129: Caller Groups
ORGANISER a. Press d [OK] to input a name. Remove member: You can remove the member from the Group member list. But the name and the b. Press d [Save], then you can input a number. number will remain in the phonebook. c. -
Page 130: Settings
Settings Copy all (Menu 4.1.5) (Menu 4.1.6) 1. Press the right soft e [Back] in standby mode. You can copy/move entries from SIM card memory to Phone memory and vice versa. 2. Scroll to Settings, then press the left soft key d [Select]. -
Page 131: Delete All
ORGANISER 4. Use i and j to select a service. Press Delete all (Menu 4.1.7) a [Send]. You can delete all entries in the SIM and Phone. This Memory status function requires the Security code. This feature allows you to see how many entries are 1. -
Page 132: Calendar
CALENDAR Add new (Menu 4.2.1) MENU 4.2 Allows you to add a new schedule for the chosen day. When you enter this menu a Calendar will be Input the subject and then press the left soft displayed. key d [OK]. The month and year are shown at the top of the screen. -
Page 133: Memo
ORGANISER MEMO MENU 4.3 1. Select the Memo by pressing the left soft key d [Select]. 2. If the entry is empty, add new by pressing the left soft key d [Add]. 3. Input the memo and then press the left soft key d [OK]. -
Page 134: Messages
MESSAGES Press the Menu key ( d ) and select Messages 2. After you complete the message, to select the required option, press the left soft key [Options]. using navigation keys. The following options are available. Send: Enter the number or select the number from NEW MESSAGE the phonebook or the recent numbers. -
Page 135: Write Multimedia Message
MESSAGES Add T9 dictionary: You can add your own words. Contacts: You can add phone numbers in the This menu will only be shown when the edit mode message. has been set to T9ABC/T9Abc/T9abc. Symbol: You can attach special characters. T9 languages: Select the desired language for T9 My business card: You can attach your name card. - Page 136 4. Press the left soft key [Options]. The following Add T9 dictionary: You can add your own word. options are available. This menu will only be shown when the edit mode has been set to T9ABC/T9Abc/T9abc. Send: Supports multiple numbers and email addresses.
-
Page 137: Inbox
MESSAGES INBOX If the phone shows ‘No space for SIM message’, you MENU 5.2 only have to delete the SIM messages from the Inbox. You will be alerted when you have received messages. If the phone displays ‘No space for message’, you will They will be stored in the Inbox. - Page 138 Information: You can view information about Load: Launches the WAP connection to the URL received messages; Sender’s address, Subject contained in the download message. The phone (only for Multimedia message), Message date & must be configured for WAP services to download time, Message type, Message size.
-
Page 139: Drafts
MESSAGES When you already sent the message: DRAFTS MENU 5.4 View: You can view the sent messages. Using this menu, you can preset up to five multimedia Forward: You can forward the current message to messages that you use most frequently. This menu other recipients. -
Page 140: Info Message
INFO MESSAGE TEMPLATES MENU 5.6 MENU 5.7 (DEPENDANT TO NETWORK AND There are pre-defined messages in the list. You can view and edit the template messages or create new SUBSCRIPTION) messages. Two types of templates are available: Text Info service messages are text messages sent by the and Multimedia. -
Page 141: Multimedia Templates
MESSAGES Delete all: Deletes all templates. My business card (Menu 5.7.3) This option helps you to make your own name card. Multimedia templates (Menu 5.7.2) Key in the name, mobile phone number, office number, Preview: Displays the draft multimedia message. Fax number, and E-mail address. -
Page 142: Multimedia Message
Delivery report: If you set to Yes, you can check Auto retrieve: If you select on, you receive whether your message is sent successfully. multimedia messages automatically. If you select Off, you receive only notification message in the Reply charging: When a message is sent, it allows inbox and then you can check this notification. -
Page 143: Info Message
MESSAGES Roaming: Even when you are in abroad, you can Push messages (Menu 5.8.5) listen to voice mails if a roaming service is You can set the option whether you will receive the supported. message or not. Info message (Menu 5.8.4) Receive Yes: If you select this menu, your phone will receive Info service messages. -
Page 144: Multimedia
In this case, the picture indicator will be displayed on the sub-LCD. Zoom level S5100 has a built-in 1.3M pixel digital camera, which Flash on/off allows to take pictures at 1280x960 pixel (also known as SXGA). The CMOS sensor allows high... - Page 145 MULTIMEDIA Brightness: changes the brightness of the Quality: You can select the desired quality of photo among 5 levels (-2, -1, 0, 1 and 2). You can picture by selecting either S-Fine, Fine or Normal. also change the brightness of the picture using the left/right directional keys from the viewfinder.
- Page 146 After checking the photos, you can either save Flash: Toggles the flash to take pictures in low them or delete them choosing the relative icons. light conditions. Note Note The multi shot function is only available if the You can toggle the flash also pressing the key resolution is set as 320x240 or 640x480.
-
Page 147: Video Camera
4. To exit the camera mode, long press the camera side key. VIDEO CAMERA MENU 6.2 S5100 includes a video camera which can take every Note kind of video at resolution of 176x144 or 128x96 Taking a self-portrait, you can’t change the pixel. - Page 148 Brightness: Changes the brightness of the Note video among 5 levels (-2, -1, 0, 1 and 2). You can A high quality setting will increase the also change the brightness of the video using the definition of the video, but the memory size will left/right directional keys from the viewfinder.
-
Page 149: My Photos
MULTIMEDIA Send via Bluetooth: You can send a pciture via Note Bluetooth. You can toggle the flash also pressing the = Write multimedia messages: You can send a key from the viewfinder. picture via MMS. Set as wallpaper: You can set a picture as a Zoom: The video camera integrates a zoom wallpaper. - Page 150 • AAC+: V1 : (Bit rate 16 28Kbps) MENU 6.5 V2 : (Bit rate 16 48Kbps) The S5100 has an integrated MP3 player built-in. (Sampling frequency from 8KHz to 48KHz) You can enjoy listening to MP3 music files on your •...
-
Page 151: Mp3 Player
MULTIMEDIA connect to PC via USB cable. If you use on win98 SE, View play list: You can view the play list on listening you have to install Mass storage drive for windows 98 to the music. on CD-ROM. Area repeat: The special area part of the current music is repeated when you select ON of the menu. -
Page 152: Playlist
- Flip setting Note Continue playing: Although you close the flip on The copyright of music files can be protected playing, the play mode is continued without a in international treaties and national copyright pause. laws. Stop playing: When you close the flip, you can Therefore, it may be necessary to obtain a stop the play mode. -
Page 153: View List
MULTIMEDIA 2. If you want to finish recording, press the left soft key d [Save]. 3. Key in Voice memo title, press the left soft key d [OK]. View list (Menu 6.6.2) The phone shows voice memo list. You can Playback and Delete the recorded voice memo. -
Page 154: Date & Time
SETTINGS You can set the following menus for your convenience Time format and preferences. Your can set the time format between 24-hour and 1. Press d [Menu] in standby mode. 12-hour. 2. Press 7 for direct access to enter Settings. PHONE SETTINGS MENU 7.2 DATE &... -
Page 155: Theme Settings
SETTINGS Standby text: If you select On, you can edit the Call divert (Menu 7.3.1) text which is displayed in standby mode. The Call divert service allows you to divert incoming Backlight time: You can set the light-up duration voice calls, fax calls, and data calls to another number. of the display. -
Page 156: Answer Mode
To voice mail centre Send my number (Menu 7.3.3) Forwards to message centre. This function is not (network and subscription dependent) shown at All data calls and All fax calls menus. Set by network: If you select this, you can send To other number your phone number depending on two line service Inputs the number for diverting. -
Page 157: Auto Redial
SETTINGS Auto redial 4. If you enter wrong PIN code more than 3 times, the (Menu 7.3.6) phone will lock out. If the PIN is blocked, you will On: When this function is activated, the phone will need to key in the PUK code. automatically try to redial in the case of failure to 5. -
Page 158: Fixed Dial Number
Outgoing international: The barring service for all Fixed dial number (Menu 7.4.4) outgoing international calls. (SIM dependent) Outgoing international when roaming: The You can restrict your outgoing calls to selected phone barring service for all international outgoing calls numbers. except home network. The numbers are protected by your PIN2 code. -
Page 159: Network Settings
SETTINGS NETWORK SETTINGS Preferred MENU 7.5 You can set a list of preferred networks phone will You can select a network which will be registered attempt to register with first, before attempting to either automatically or manually. Usually, the network register to any other networks. -
Page 160: Memory Status
MEMORY STATUS MENU 7.8 Internal memory (Menu 7.8.1) This function shows the status of the user memory of the handset. Multimedia memory (Menu 7.8.2) This function shows the status of the multimedia memory of the handset. -
Page 161: Service
SERVICE You can access various WAP (Wireless Application Description Protocol) services such as banking, news, weather Scrolls each line of the content area reports and flight information. These services are specially designed for mobile phones and they are Returns to the previous page maintained by WAP service providers. -
Page 162: Bookmarks
Bookmarks Go to URL (Menu 8.1.2) (Menu 8.1.3) This menu allows you to store the URL of favorite web You can connect directly to the site you want. After pages for easy access at a later time. Your phone has entering a specific URL, press the OK key. - Page 163 SERVICE - Homepage: This setting allows you to enter the Call speed: The speed of your data connection ; address (URL) of a site you want to use as 9600 or 14400 homepage. You do not need to type http:// at the - GPRS settings: The service settings are only front of each URL as the WAP Browser will available when GPRS is chosen as a bearer service.
-
Page 164: Sim Service
Rename: You can change the profile name. SIM SERVICE (SIM DEPENDENT) Delete: Deletes the selected profile from the list. MENU 8.2 Add new: You can add a new profile. Your service provider can offer special applications through the SIM card, such as home banking, stock Cache market, etc. -
Page 165: Downloads
DOWNLOADS GAMES & APPS - Always: The connection is created immediately MENU 9.1 without a notification. Games & Apps - Prompt: You will be asked before the application (Menu 9.1.1) makes the connection. In this menu, you can manage the Java applications installed in your phone. -
Page 166: Profiles
Profiles (Menu 9.1.2) Note This menu contains the same settings of the Internet The JAR file is a compressed format of the Java menu. In fact, in order to download new applications, a program and the JAD file is a description file WAP connection is needed. -
Page 167: Sounds
DOWNLOADS SOUNDS USB connectivity MENU 9.3 S5100 can be connected to a PC through a USB The left soft key d [Options] will bring up the cable in order to transfer files, contents and to use the following options. built-in modem. You can find all the details related to Set as ringtone: This sets the Ring Tone with this functionality in the following section. - Page 168 2. The phone will display “USB” on the main LCD Note 3. On the PC, the phone will be identified as Even though you can upload new pictures from “Removable disk” in My Computer folder. Also, a the PC, the phone won’t list them in the My system disk letter will be assigned, such as “E:\”.
- Page 169 DOWNLOADS PC programs and Internet Note You can connect the phone to your PC to manage You can upload files of any size, until the your phonebook contacts, upload new contents such memory is full. as wallpapers and ringtones or use the built in modem. You can create up to 10 nested folders in the 1.
-
Page 170: Accessories
PC to exchange the data between them. Headset Note Allows hands-free operation. Always use genuine LG accessories. Includes earpiece and microphone. Failure to do this may invalidate your warranty. Accessories may be different in different Travel Adapter regions; please check with our regional service company or agent for further enquires. -
Page 171: Technical Data
TECHNICAL DATA GENERAL Product name: S5100 System : GSM 900 / DCS 1800 / PCS 1900 AMBIENT TEMPERATURES Max: +55°C (discharging) : +45°C (charging) Min: -10°C...
Need help?
Do you have a question about the S5100 and is the answer not in the manual?
Questions and answers