Advertisement
Quick Links
Advertisement

Summary of Contents for XODO WP1
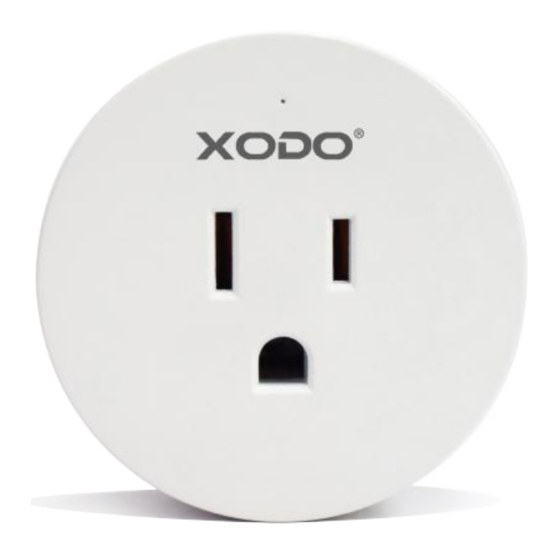
- Page 1 WiFi Smart Plug WP1 Quick Start Guideline...
-
Page 2: Table Of Contents
Welcome Thank you for purchasing Xodo Smart home products! We are commi�ed to bringing you excellence with smart technology products that make life more comfortable, convenient, and provide a more dynamic healthy lifestyle. General No�ce Always make sure to follow safety instruc�ons. -
Page 3: Package Contents
What’s included in the box You will find the following contents included to help you get started: WiFi Smart Plug User Manual Product Features Your smart home wall plug has the following featues: • Scheduled on/off • Timer Se�ng • Remote monitoring •... -
Page 4: Specifica�Ons
Specifica�ons Product Name: Xodo WiFi Smart Plug Model: WP1 Rated Voltage: 100V-240V AC 50Hz-60Hz Rated Current: 10A Max Power: 1100W Output Port: 1 AC (US) Working Temp: -10~50°C Support System: Android or IOS WiFi: 802.11 b/g/n 2.4GHz WiFi Smart Plug Introduc�on 1. -
Page 5: Xodo Smart App
Download and Install the Xodo Smart APP Download and install the APP. It can be also be found by searching "XODO Smart" by Con�xo Inc. in the App Store (for IOS) or Google Play Store (for Android). Xodo Smart Open the APP The welcome screen will appear and then you will be asked to login or register a profile. - Page 6 Adding Devices You will be able to manually add a device. Select Plug to con�nue. Detec�ng Device When detec�ng devices manually, power on the device and confirm the indicator light is blinking rapidly (Hold the reset bu�on for 5 seconds, the indicator light will blink twice per second.
- Page 7 Connect to a WiFi Network Now you want to connect the smart device to a local WiFi network. If the proper network is not listed on this page, click the " " bu�on to see a list of available networks. Your router may broadcast both 2.4Ghz and 5.0Ghz broadband frequency.
- Page 8 Confirma�on Screen The smart device is added once they are communica�ng on the same network. You can rename the smart device by clicking on the pencil icon. You can specify the loca�on. Press the Done bu�on at the bo�om of screen to con�nue to next step.
- Page 9 Home Screen Updated Now that your device has been added, it will show on the home screen along with all other paired Xodo Smart Products. Now you are all set. Smart Plug Home Screen The home screen will show the live plug status.
- Page 10 Countdown func�on This will keep the sock in ON/OFF posi�on for a specific dura�on of �me. 1. Click "Countdown". 2. Select countdown �me 3. Click "OK" to save the se�ngs. Timer func�on This will keep the sock in ON/OFF posi�on for a specific dura�on of �me.
-
Page 11: Configure The Smart Plug Se�Ngs
10. Check Device Network allows to check the network connec�on status. 11. Device Update allows to check so�ware or install updates to device. 12. Remove device will remove the wifi plug from the Xodo Smart app and remove pairing. This is necessary if pairing with a new device. -
Page 12: Link Google Home
Link Xodo Smart account to Google Home Screen 1. Open Google Play Store or Apple Store and download Google Home 2. Open the Google Home app. Click on Get Started. 3. Login with a Google Account or create a new account. - Page 13 9. The app will show se�ngs to add devices, setup rou�nes, and adjust se�ngs. 10. If the devices are already installed and setup through the Xodo app, you can select the "Works with Google" setup op�on to con�nue. 11. Configure the home se�ngs by adding address and name to a "Home"...
-
Page 14: Link Alexa
3. Ok Google, brighten bedroom light. 4. Ok Google, dim bedroom light. 5. Ok Google, set bedroom light to red. Link Xodo Smart account to Alexa 1. Download the free Alexa app from the Amazon Appstore, Google Play, or the Apple App Store. - Page 15 8. Click Se�ngs 9. Manage Smart Home Devices to verify Smart Life has been added. 10. You will be redirected to the account link page. Type in your Xodo Smart account and password, don't forget to select the country/region where your account belongs to.
-
Page 16: Customer Service And Tech Support
See our website for more products www.con�xo.com We enjoy your feedback! Xodo is a subdivision of the Con�xo Inc. group., and the respec�ve logos are registered trademarks of Con�xo Inc. and may not be used, reproduced, or altered without wri�en Permission. All other trademarks are the property of their respec�ve owners and used with permission.


Need help?
Do you have a question about the WP1 and is the answer not in the manual?
Questions and answers