Table of Contents
Advertisement
Quick Links
Advertisement
Table of Contents

Related Manuals for Penman Collection KASSEL

Summary of Contents for Penman Collection KASSEL
- Page 1 INSTALLATION INSTRUCTIONS KASSEL WOOD BURNING STOVE KAS - REV C - 10/19...
-
Page 3: Table Of Contents
CONTENTS USER INSTRUCTIONS Page 4 Welcome Fire Plus system Product drawing Cross section drawing Health and safety INSTALATION Page 7 Installation guide Installation preparation Ventilation Distance to combustibles and heat sensitive materials Connecting to the chimney OPERATING INSTRUCTIONS Page 10 Suitable fuels The Clean Air Act 1993 and smoke control areas After use and maintainingthe perfect burn... -
Page 4: User Instructions
Welcome A very warm welcome from Percy Doughty, and thank you for purchasing the Olsberg Kassel wood burning stove from the Pen- man Collection. The stove is one of our finest and we hope you enjoy years of pleasure once your new stove is installed. -
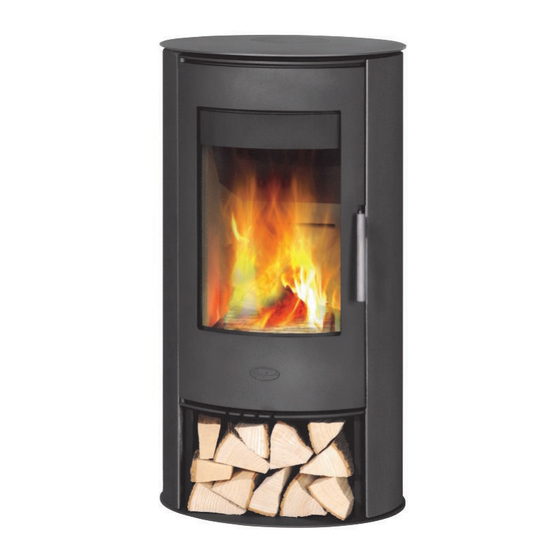
Page 5: Product Drawing
1.0 USER INSTRUCTIONS Product drawing Cross section drawing Primary air Secondary air ”Cold” air of room Warm air Escaping gases Hot gases Grate Chamotte or vermiculite lining 9/10 Tertiary air Charcoal pan PAGE 5... -
Page 6: Health And Safety
1.0 USER INSTRUCTIONS 1.5 Health and safety The necessary feed pressure for chimney examination given on the technical data sheet is the necessary minimum value at the flue outlet of the stove. This is necessary for safe operation of the stove. Practice shows that higher, sometimes too high, feed pressure exists in chimneys. -
Page 7: Instalation
2.0 INSTALLATION Installation guide In the absence of pertinent installation information, the British standards and current building regulations must be followed to ensure compliance and safety. This appliance must be installed by a HETAS registered engineer and the installation must be in accordance with the British standards and current building regulations. -
Page 8: Installation Preparation
2.0 INSTALLATION Installation preparation Consideration must be taken in relation to the appliance location and safe flue route in the first instance in accordance with the appliance instructions and technical data. The chimney must be suitable for operating the appliance safely and all selected components must be compliant in accordance to the relevant British standards. -
Page 9: Connecting To The Chimney
2.0 INSTALLATION Connecting to the chimney (including the connecting flue pipe) Diameter of flue outlet is 125mm The appliance is equipped with a top and rear outlet. We recommend the top outlet is used for best performance because of combustion technological reasons. However the stove can also be connected from the rear (technical data contains the connection height), remove the flue outlet from the top of the appliance and the blanking plate from the back. -
Page 10: Operating Instructions
3.0 OPERATING INSTRUCTIONS Suitable fuels Please note that HETAS Ltd Appliance Approval only covers the use of wood logs and approved smokeless fuels on this appliance. HETAS Ltd. Approval does not cover the use of other fuels either alone or mixed with the recommended fuels listed above, nor does it cover instructions for the use of other fuels. -
Page 11: The Clean Air Act 1993 And Smoke Control Areas
3.0 OPERATING INSTRUCTIONS The Clean Air Act 1993 and smoke control areas Under the Clean Air Act local authorities may declare the whole or part of the district of the authority to be a smoke control area. It is an offence to emit smoke from a chimney of a building, from a furnace or from any fixed boiler if located in a designated smoke control area. -
Page 12: Continued Use And Care
3.0 OPERATING INSTRUCTIONS Continued use and care Always empty the ash drawer before each use, while the unit and the ashes are cold, because a full ash drawer can: Obstruct air supply Damage the grate Always store the ash in a fire-proof container. Do not put the container close to combustible materials or place it on a combustible surface. -
Page 13: Cleaning
3.0 OPERATING INSTRUCTIONS Cleaning (to be performed only when stove is cold) What Frequency Utensil Combustion chamber of stove Min. once a year Hand broom but not limited to Vacuum cleaner Smoke outlet Min. once a year Hand broom but not limited to Vacuum cleaner Copper elements As necessary... -
Page 14: Troubleshooting
4.0 TROUBLE SHOOTING General troubleshooting Weather conditions may affect the performance of the appliance and temperatures above 15C may impede the flow pressure of the appliance. What can you do? Open the primary air regulator a bit more, and fully open the secondary air regulator. Use only a small amount of fuel at first. -
Page 15: Commissioning Checklist
COMMISSIONING CHECKLIST Ensure the serial number has been recorded on the front of this manual for any future use Ensure the door seals are in good condition and that the glass is secured correctly in the door (do not over tighten the glass as this will prohibit its expansion and could cause the glass to crack) Ensure that all internal components are fitted correctly (these may have shifted in transit) - Page 16 Brought to you by Imperial Point Express Trading Estate Stone Hill Road Farnworth Bolton BL4 9TN Tel: 01204 868 550 Fax: 01204 868 551 Email: sales@percydoughty.com www.penmancollection.com...