Table of Contents
Advertisement
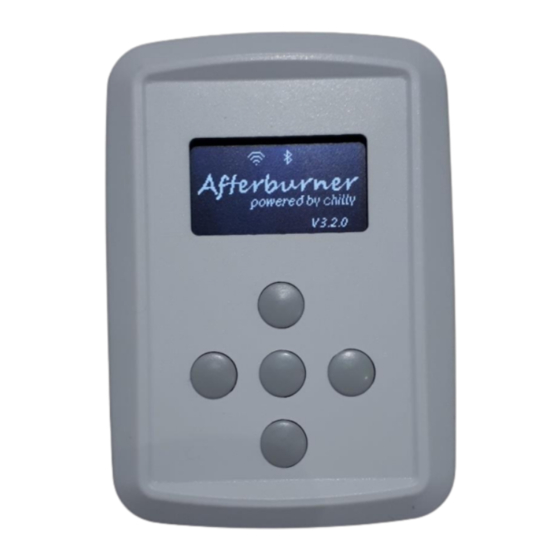
Quick Links
Advertisement
Table of Contents

Summary of Contents for AfterBurner GPIO CAPABILITY
- Page 1 The Afterburner USER MANUAL V3.4.6 GPIO CAPABILITY...
-
Page 2: Table Of Contents
Afterburner user manual, V3.4.5– GPIO Capability Table of Contents Hardware description ..........................3 GPIO Expansion port ........................... 3 Digital Outputs Orange or Yellow wires ..................4 Digital Inputs Blue or Green wires....................5 Analogue Input White wire ......................6 GPIO configuration (User Settings menu loop) .................. -
Page 3: Hardware Description
Afterburner user manual, V3.4.5– GPIO Capability Hardware description Production PCBs can be fitted with extra input and output conditioning circuitry to allow the ready addition of external switches or status indicators/relays. The prototype Mk1 PCB can still provide these GPIO functions, but care needs to be taken to protect the fragile inputs of the ESP32 processor. -
Page 4: Digital Outputs Orange Or Yellow Wires
Afterburner user manual, V3.4.5– GPIO Capability Digital Outputs Orange or Yellow wires User furnished equipment: User furnished Driving a relay, the diode must be equipment: included. Driving an LED Production Afterburner digital output circuitry The 2 digital outputs are offered as open collector devices, effectively providing a path to ground when active. -
Page 5: Digital Inputs Blue Or Green Wires
Afterburner user manual, V3.4.5– GPIO Capability Digital Inputs Blue or Green wires. : User furnished equipment Digital Input circuit of production Afterburner Digital Input topology summary Diode array: Blocks positive external voltages. Shunts negative external voltages to 0V. The external input is pulled up by the 10kΩ resistor; transistor conducts, logic 0 at ESP. -
Page 6: Analogue Input White Wire
The ESP32 analogue input accepts a voltage in the range from 0.0V to 3.3V. The power supplied from the Afterburner on the GPIO connector is 5V so if using a pot you must pad the top end with a resistor to limit the maximum expected voltage, as shown above. -
Page 7: Gpio Configuration (User Settings Menu Loop)
The GPIO Configuration menu is found in the User Settings menu loop and is only made available if GPIO capability was detected on the PCB. This menu only appears if GPIO hardware has been installed to the Afterburner PCB. The assignment of GPIO functions is only via this menu: The top 2 left hand entries show the input mode of the 2 digital inputs. -
Page 8: Digital Input Configuration
Afterburner user manual, V3.4.5– GPIO Capability Digital Input configuration Input #1 – Blue wire Input#2 – Green wire The 2 digital inputs can be configured as: • Disabled • Start • Stop • Start / Stop • • External Thermostat •... - Page 9 Afterburner user manual, V3.4.5– GPIO Capability Upon a momentary closure of the input, Start / Stop mode will either start the heater or stop the heater, according to the current state of the system. No time sensitivity exists. The heater will run whilst the input remains closed.
- Page 10 I2C EERAM chip is added to the system. A TL4704 is recommended for this. As the Afterburner does employ a watchdog timer, this is a recommended precaution. Permit Start The input must remain closed to allow the heater to start and keep running.
-
Page 11: Digital Output Configuration
Afterburner user manual, V3.4.5– GPIO Capability Digital Output configuration Output #1 – Orange wire Output #2 – Yellow wire Either of the two digital outputs can be configured as: • Disabled • User Controlled • Status LED • Absolute temperature (under or over) •... - Page 12 Normally this would also be the sensor being used for the thermostat role but can be another if more than one sensor is fitted to the Afterburner. There are also the same extended capabilities as the Absolute Temperature Threshold Extended Capabilities, as described previously.
- Page 13 Afterburner user manual, V3.4.5– GPIO Capability Conditional operation (“When” field) Despite the temperature condition being met, a condition may be specified before it is activated: Always Heater On Heater Off Input 1 active Input 2 active Output Mode (“Op” field) The output can be a pure digital on/off signal, or a pulse width modulated signal spanning the hysteresis range.
- Page 14 Afterburner user manual, V3.4.5– GPIO Capability Sensor ID Selection The sensor used for the temperature reading is selected according to its logical index. The primary thermostat is sensor ID 0. The next priority is sensor ID 1, etc. for as many sensors are fitted (maximum of 3 DS18B20s plus a possible BME280).
-
Page 15: Analogue Input Configuration
Afterburner user manual, V3.4.5– GPIO Capability Analogue input configuration Analogue input - White wire The single analogue input can be configured as: • Disabled • Enabled • Fuel Sender The allowed input voltage range is from 0.0V to 3.3V. Clamping diodes and a series resistor on the ADC input help protect against excess voltage but should not be relied upon. -
Page 16: Gpio Status Menu
The GPIO status menu lives in the Root Menu loop allows the current signal states of the GPIO port to be visualised. This menu only appears if GPIO hardware has been installed to the Afterburner PCB. Digital Inputs The 2 digital inputs are represented by the incoming arrow icons to the top left of the screen. -
Page 17: Digital Outputs
Afterburner user manual, V3.4.5– GPIO Capability The switch icon shows the state of the digital input: The input is open circuit. The input is closed to ground. Digital Outputs The 2 digital outputs are represented by the outgoing arrow icons to the top right of the screen. -
Page 18: Analogue" Gauges
Afterburner user manual, V3.4.5– GPIO Capability “Analogue” gauges If a GPIO digital input is configured as a Pulse counter, the GPIO analogue input is enabled, or the Maximum Fuel Usage has been defined, a bar graph style gauge will be created and can be viewed in the Root Menu loop. -
Page 19: Suggested External Hardware
Afterburner user manual, V3.4.5– GPIO Capability Suggested external hardware GPIO breakout PCB This circuit board offers: • Power MOSFET outputs for fans or pumps • Resistive Fuel Sender interface • A place to connect additional DS18B20 temperature sensors • Headers with 5V power for the Digital inputs (eg flow sensor inputs) •... - Page 20 Afterburner’s Absolute Temperature threshold (over temp) in PWM mode. In addition, a water flow meter is fitted to GPIO input #1 to measure water usage from the freshwater tank.
- Page 21 Afterburner user manual, V3.4.5– GPIO Capability http://www.mrjones.id.au/afterburner Page 21...
-
Page 22: Ventilation Mode Heater Modification
• A power MOSFET to drive the heater’s fan motor • A relay to swap the ECU’s fan control for the PWM drive from the Afterburner • Through hole parts, no fiddly SMD skills required. The board design is only offered as Gerber files. It is expected for people to build their own versions especially as a fair bit of skill is involved to fit within the heater’s body and picking up 12V power... - Page 23 Afterburner user manual, V3.4.5– GPIO Capability Prototype assembled and running inside a 2kW heater body. The Afterburner is supplying a PWM signal from a GPIO output. The blue LED illuminates when the relay is activated and is meant to signify “cool” mode.
- Page 24 Afterburner user manual, V3.4.5– GPIO Capability http://www.mrjones.id.au/afterburner Page 24...
Need help?
Do you have a question about the GPIO CAPABILITY and is the answer not in the manual?
Questions and answers