
Summary of Contents for Gin X
- Page 1 GIN Electric Bikes PLEASE READ CAREFULLY BEFORE USING YOUR GIN X FOR THE FIRST TIME User Manual www.ginebikes.com...
- Page 2 TABLE OF CONTENTS MAINTAINING YOUR ELECTRIC BIKE UNBOXING GETTING YOUR GIN X ROAD READY! INSTALLING HANDLEBAR INSTALLING THE FRONT TYRE INFLATING THE FRONT TYRE INSTALING THE FRONT HEAD LIGHT PG7 INSTALING THE PEDALS INSTALING THE SEAT POST INSTALING THE DISPLAY MONITOR...
- Page 3 SPEED LIMITATIONS Pg16 Pg17 7 SPEED GEAR SYSTEM Pg18 TAKING CARE OF YOUR BATTERY PREPARING TO RIDE Pg20 PRE-RIDE SAFETY CHECK AND INSPECTION Pg20 RIDING AT NIGHT Pg21 MAXIMUM WEIGHT Pg21 WARRANTY DISCLAIMER Pg22...
- Page 4 WARNING Read this entire manual before assembling or using your new GIN X electric bike. Do not modify, disassemble, or replace the original electrical components on your bike. Doing so will invalidate your warranty and could put you in danger.
- Page 5 • Before each ride ensure all electrical wires are connected • The GIN X is not waterproof. It is likely that components will not sustain damage in most rain showers, however GIN electric bikes recommends storing and riding the bike in a dry environment.
- Page 6 Shifting Shifting cables will stretch during the wear-in period. This may affect shifting performance and the derailleur may need to be adjusted. Ongoing Service Hardware All hardware should be torqued to the torque specified in the Recommended Torque Values section of this manual. Refer to the table of contents at the beginning of this manual for the page number of this section.
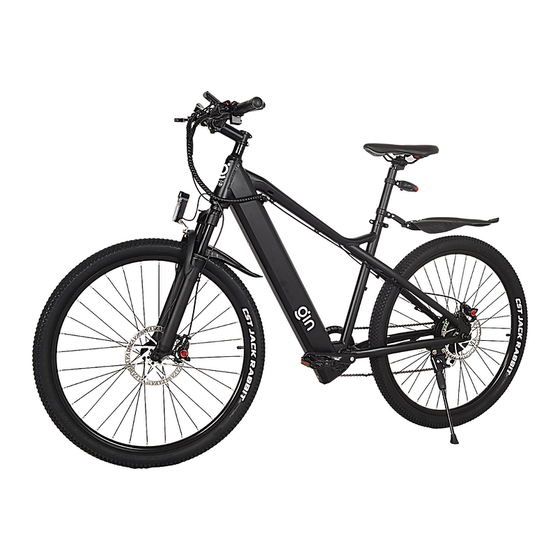
- Page 7 Unboxing Getting Started Congratulations on your purchase of a new GIN X e-bike! Your bike comes in the box 85% assembled. The instructions that follow are intended to serve as a guide in unboxing and getting familiar with your new e- bike.
- Page 8 You may also be asked to provide this number to law enforcement in the event that your bike is stolen. Thank you for your purchase of a GIN X. We appreciate your purchase and we hope you thoroughly enjoy riding your new e-bike.
- Page 9 Getting your GIN X road ready! Step 1 : Installing the handlebar Step 2 : Installing your front tyre Step 3 : Inflating the front tyre (to 40 psi air pressure) Step 4 : Installing the front headlight Step 5 : Installing the pedals...
- Page 10 1.4 Your finished handlebar assembly should look like the adjacent image Step 2 : Installing your front tyre 2.1 Your GIN X e-bike should have come along with a quick-release for the front tyre 2.2 Remove the suspension fork protector...
- Page 11 Step 3 : Inflating the front tyre (to 40 psi air pressure) Step 4 : Installing the front headlight 4.1 Mount the headlight on the from fork support bar 4.2 Ensure that the nut is tightened so that it does not remain loose Step 5 : Installing the pedals 5.1 Please note the pedals’...
- Page 12 Step 6 : Installing the seat post 6.1 Insert the seat post through the frame 6.2 Adjust the height accordingly 6.3 Lock the seat post to the frame using the quick release provided Step 7 : Installing the display monitor 7.1 Your display monitor has two slots for bolts and nuts.
- Page 13 Step 8 : Installing the battery 8.1 Lay down the bike on it’s right side so that it rests against the right pedal and the right side of the handlebar. GIN X houses the removable battery in the downtube for extra safety measures...
- Page 14 (you do not need it while riding the GIN X electric bike) Why is a FUSE present in my battery? The purpose of the FUSE is to prevent excess current to pass through the battery.
- Page 15 Step 9 : Installing the rear cargo rack The cargo rack maximum weight limit is 50 Kgs. It gets mounted into the rear end of your GIN X e-bike (just above the rear tyre) 9.1 Attach the cargo rack against the seat post through the quick release.
- Page 16 S830 display monitor Switching ON/OFF the monitor: Press button for 2 seconds To enter the programme modes (P1 to P17): Press button at the same time (Press 'M' to switch to the next programme mode) To access to various settings in your display monitor, you can toggle between several programme modes –...
- Page 17 Walk mode explained : Your GIN X has walk mode. This means that if you are walking uphill or on a road and want to carry your GIN X along with you, all you have to do is activate the walk mode! You won’t have to carry it.
- Page 18 Function Suggested About this programme mode Programme Backlight display brightness. The Brightness darkest level is 1, the brightest level is Distance Distance Units. units 0: KM; 1: MILE Voltage - DO NOT CHANGE THIS - LCD Display sleep timer. With chosen Display value as 3, the display will turn off sleep time...
- Page 19 0: PAS Active, Throttle Inactive PAS/Throttle 1: PAS Inactive, Throttle Active mode 2: Both PAS and Throttle Active Sensitivity of PAS sensor. When set to higher numbers, it will take more crank sensitivity rotations for the motor to turn on Strength of PAS mode.
- Page 20 Speed limitations You must check your local laws and regulations to determine if it is lawful to ride class 3 e-bikes on public roads before adjusting the bike’s top speed. Laws vary by trail, path, and road so be sure to check in each new location you will be riding.
- Page 21 7 Speed Gear System Your GIN X comes with a 7 speed Shimano freewheel (Note: the freewheel is the cluster of sprockets on the rear wheel of the bike). This allows the rider to maintain a comfortable level of effort and pedalling speed throughout different terrains.
- Page 22 Locate the charging port on the side of the battery. You can charge the battery from this port while the battery is on or off the bike. The battery on the GIN X e-bike comes with almost 40%-60% charged due to shipping regulations. You should plug your battery in when you first...
- Page 23 The light on the charger will be red when the battery is charging and will turn green when charging has finished Avoid leaving the charger plugged in when the battery is fully charged Do not charge the battery if you notice the battery is damaged, excessively hot, leaking, smells, or is discoloured Charging the battery should take approximately 4-6 hours if the battery is mostly empty...
- Page 24 Check the tire pressure of both wheels before riding to ensure the tires are inflated to the recommended pressure printed on the side of the tire walls (40psi for GIN X hybrid tyres). Pull the brake levers to make sure your brakes are working properly and adjust if necessary.
- Page 25 Riding at Night Riding at night comes with more risks than riding during the day due to decreased visibility so riders are encouraged to exercise increased caution. Before riding at night make sure that reflectors are installed on your e-Bike. For increased visibility also ensure the front headlight and rear tail light are turned on and adjusted such that other people on the road can see them clearly.
- Page 26 Warranty & Disclaimer Gin electric bikes should be operated in accordance with this GIN electric bikes user manual provided with the bike. this GIN electric bikes warrants to the original registered purchaser that this GIN electric bikes shall be free from all defects in material and workmanship for a period of 24 months from the date of shipment, when used in accordance with the owner’s manual...
- Page 27 GIN electric bikes. To determine if coverage is provided, you should contact your insurance company or agent. Damage as a result of an accident is not covered under this warranty, and GIN electric bikes is not responsible for repair or replacement of damaged bikes or parts.
- Page 28 GIN electric bikes makes no claims or guarantees that the brakes, battery, frame, motor, motor controller, LCD...
Need help?
Do you have a question about the X and is the answer not in the manual?
Questions and answers
How do I get battery indicator to work it currently shows 100%