
Related Manuals for Sub-Zero Wolf M Series

Summary of Contents for Sub-Zero Wolf M Series
- Page 1 https://appliancetechmanuals.com subzero.com 800.222.7820 M Series Wall Oven Service Manual General Information Controls & Operation Component Access & Removal Troubleshooting Guide Technical Data Wiring Diagrams...
-
Page 2: Important Safety Information
Sub-Zero Group, Inc. Neither this manual nor any information or images contained herein may be copied or used in whole or in part without the express written permission of Wolf Appliance, Inc., an affiliate of Sub-Zero Group, Inc. © Wolf Appliance, Inc., all rights reserved. -
Page 3: General Information
M Series M Series General Information WARRANTY INFORMATION This page contains a summary of the Warranty supplied with every Domestic Wolf M Series Oven. 2 & 5 Year Warranty Summary: • 2 Year Total Product Warranty, Parts and Labor. •... - Page 4 https://appliancetechmanuals.com M Series General Information M Series OVEN FEATURES MODEL NUMBER KEY • Three styles Refer to this key for an example of the model numbers. Professional M Series Transitional M Series Contemporary M Series Model: ICB SO 30 P M / S / PH •...
- Page 5 https://appliancetechmanuals.com M Series M Series General Information M SERIES CONFIGURATIONS Transitional Ovens 27” Single Oven - Transitional 30” Single Oven - Transitional Model Number: SO30TM/S/TH Model Number: SO27TM/S/TH Description: Single Oven, 27”, Transitional M Series / Description: Single Oven, 30”, Transitional M Series / Stainless / Tubular Handle Stainless / Tubular Handle 36”...
- Page 6 https://appliancetechmanuals.com M Series General Information M Series 27” Double Oven - Transitional 30” Double Oven - Transitional Model Number: DO27TM/S/TH Model Number: DO30TM/S/TH Description: Double Oven, 27”, Transitional M Series / Description: Double Oven, 30”, Transitional M Series / Stainless / Tubular Handles Stainless / Tubular Handles #824974 - Revision C - November, 2016...
- Page 7 https://appliancetechmanuals.com M Series M Series General Information Professional Ovens 30” Single Oven - Professional 30” Double Oven - Professional UPPER OVEN LOWER OVEN Model Number: SO30PM/S/PH Description: Single Oven, 30”, Professional M Series / Stainless / Professional Handle Model Number: DO30PM/S/PH Description: Double Oven, 30”, Professional M Series / Stainless / Professional Handles #824974 - Revision C - November, 2016...
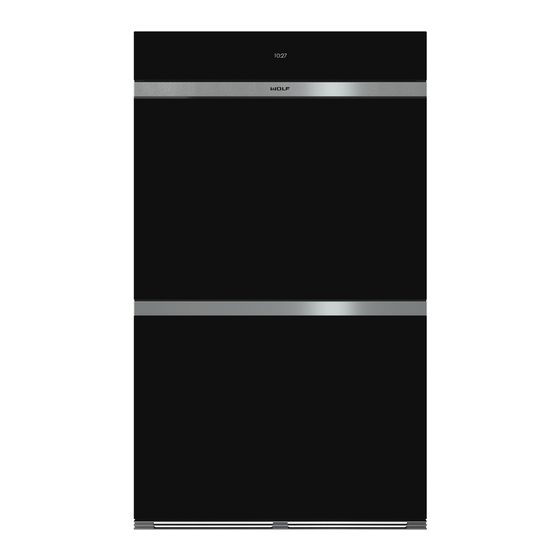
- Page 8 https://appliancetechmanuals.com M Series General Information M Series Contemporary Ovens - Black 30” Single Oven - Contemporary 30” Double Oven - Contemporary Model Number: SO30CM/B Description: Single Oven, 30”, Contemporary M Series / Black Glass Model Number: DO30CM/B Description: Double Oven, 30”, Contemporary M Series / Black Glass #824974 - Revision C - November, 2016...
- Page 9 https://appliancetechmanuals.com M Series M Series General Information Contemporary Ovens - Stainless Steel 30” Single Oven - Contemporary 30” Double Oven - Contemporary Model Number: SO30CM/S Description: Single Oven, 30”, Contemporary M Series / Stainless Steel Model Number: DO30CM/S Description: Double Oven, 30”, Contemporary M Series / Stainless Steel #824974 - Revision C - November, 2016...
- Page 10 https://appliancetechmanuals.com Electronics M Series Wall Oven M Series Wall Oven ELECTRONICS This section is divided into four parts. The General Oven Section lists the parameters the oven operates under given the power supply the oven is connected to. The Components section gives details on the electronic require- ments and programming of specific components.
- Page 11 https://appliancetechmanuals.com M Series Wall Oven Electronics M Series Wall Oven Graphic Users Interface (GUI) • Allows for a single-point touch operation. • Allows for a scroll or drag touch operation. • Allows for perceived movement of lists for a throw or flick of a finger. •...
- Page 12 https://appliancetechmanuals.com Electronics M Series Wall Oven M Series Wall Oven UIM and Relay Board Status Indicators The UIM and relay board have two visual status indicators. The red status indicator is always active when either board has power. The green status indicator flashes when communications are operating and is off when communi- cations cease.
- Page 13 https://appliancetechmanuals.com M Series Wall Oven Electronics M Series Wall Oven Cooling Fan Temperature Charts Low Fan On Low Fan Off Med. Fan On Med. Fan Off Hi Fan On Hi Fan Off Oven On Upper Oven 250° F 220° F 375°...
- Page 14 https://appliancetechmanuals.com Electronics M Series Wall Oven M Series Wall Oven Temperature Probe • Reading is displayed when the temperature probe is inserted and the probe setpoint is set. • Has the option for the user to enter a set temperature. •...
- Page 15 https://appliancetechmanuals.com M Series Wall Oven Electronics M Series Wall Oven Statistics The oven records and reports the following statistics for each cavity. The data is accessible through the USB interface: • Operation time (from start of preheat to mode cancel) •...
- Page 16 https://appliancetechmanuals.com Electronics M Series Wall Oven M Series Wall Oven Initial Power Up The initial power up sequence is only performed the first time the unit is turned on. The initial power up sequence is performed regardless of the voltage detected at power up. The following tests are performed at initial power up: POST Detect input voltage and input frequency.
- Page 17 https://appliancetechmanuals.com M Series Wall Oven Electronics M Series Wall Oven Standby Mode This mode is activated when the controls have been in the idle mode for 5 minutes without a touch event, an active timer, an active fault or a non-cooking event (cooling fan on, door movement). In this mode the controls shall comply with the standby power requirements.
- Page 18 https://appliancetechmanuals.com Electronics M Series Wall Oven M Series Wall Oven G. Temperature Offset Scroll to TEMPERATURE OFFSET, then touch TEMPERATURE OFFSET. Scroll to desired temperature offset. Negative numbers cause the oven to run at a cooler temperature, and positive numbers cause the oven to run at a hotter temperature. On double ovens temperature offset changes both ovens.
-
Page 19: Cooking Modes
https://appliancetechmanuals.com M Series Wall Oven Electronics M Series Wall Oven Cooking Modes General Cooking Mode Operation • Preheat stages are not active after the cavity reaches set temperature, even if the set temperature is changed without canceling the mode. • All element and fan operation is specified by factory settings. - Page 20 https://appliancetechmanuals.com Electronics M Series Wall Oven M Series Wall Oven Sabbath Mode • Enters a Sabbath mode standby, allowing mode, temperature, timed cook, and the light to be set. • Touching the “Star K” symbol in the upper right corner of the GUI moves the unit from standby into Sabbath. •...
- Page 21 https://appliancetechmanuals.com M Series Wall Oven Electronics M Series Wall Oven Self Clean Mode A single oven disables all other modes while any stage of self clean is active. A double oven will not allow another mode to be run in either oven while any stage of self clean is active in either oven. The self clean mode consists of the following stages.
- Page 22 https://appliancetechmanuals.com Electronics M Series Wall Oven M Series Wall Oven Dehydrate Mode • Is a cooking mode that operates with the door open and requires special exceptions. • Operates the convection fans with the door open. • Operates the heating elements according to the algorithm in factory settings with the door open. Cooking Stages - Except Broil The cooking stages in each mode control the element relays.
- Page 23 https://appliancetechmanuals.com M Series Wall Oven Electronics M Series Wall Oven Recovery • Is active after the cavity reaches the set point. • Is active when the cavity has dropped below a specified temperature. • Threshold is set in the factory settings as an offset below the target temperature Broil Cooking Stages Low Broil •...
- Page 24 https://appliancetechmanuals.com Electronics M Series Wall Oven M Series Wall Oven Convection - All ovens 240/208 VAC Transitional/Contemporary: Convection Mode Activation a. Scroll to approximate temperature - within 25° F. 1. Professional: Turn mode knob to Convection b. Touch + or - to adjust temperature in 5° Transitional/Contemporary: increments.
- Page 25 https://appliancetechmanuals.com M Series Wall Oven Electronics M Series Wall Oven 2. Professional: Turn slew knob to desired Low Broil - All ovens 240/208 VAC temperature. • CFH temperature is 1° F Transitional/Contemporary: • Broil element 0 to 40 seconds a. Scroll to approximate temperature - within 5° F. Medium Broil - All ovens 240/208 VAC b.
- Page 26 https://appliancetechmanuals.com Electronics M Series Wall Oven M Series Wall Oven Roast - All ovens 240/208 VAC Dehydrate - All ovens 240/208 VAC Pre-Heat 1 Lower Band • From room temperature to 80° F below set point • CFH temperature is 1° F •...
- Page 27 https://appliancetechmanuals.com M Series Wall Oven Electronics M Series Wall Oven Lower Band Regulation • Target temperature is 12° F above set point • Set point is 790° F • CFH temperature is 5° F • CHF temperature is 5° F •...
-
Page 28: Component Removal
https://appliancetechmanuals.com Component Removal M Series Wall Oven M Series Wall Oven COMPONENT ACCESS This section explains how to access components from a Wolf M-Series wall oven. Depending on which component you are going to access, you may have to remove other components first. Refer to the appropriate section in this manual that explains how to access those various components. -
Page 29: Door (All Models)
https://appliancetechmanuals.com M Series Wall Oven Component Removal M Series Wall Oven Door (All Models) 1. Rotate hinge lock towards oven door to engage door locks on both hinges. Retaining Screw 2. Use a T-25 to extract two door retaining screws (See Figure 3-1). - Page 30 https://appliancetechmanuals.com Component Removal M Series Wall Oven M Series Wall Oven Mid Panel Vent (Lower Oven) 1. Use a T-15 to extract two vent screws (See Figure 3-3). 2. Pull vent straight out. Mid-Vent (Lower Oven - not pictured) To remove the mid-vent, first remove the mid panel vent, then: 1.
- Page 31 https://appliancetechmanuals.com M Series Wall Oven Component Removal M Series Wall Oven Lower Trim Seal (Single & Lower Oven) To remove lower trim seal, first remove oven door and lower trim, then (See Figure 3-5): 1. Use a T-20 to extract screws from lower trim seal. 2.
- Page 32 https://appliancetechmanuals.com Component Removal M Series Wall Oven M Series Wall Oven Door Hinge (Single Oven) To remove door hinge, first remove the collar, lower trim and lower trim seal, then (See Figure 3-7): 1. Use a T-15 to extract screw from below door hinge arm.
- Page 33 https://appliancetechmanuals.com M Series Wall Oven Component Removal M Series Wall Oven Cavity Bottom (Single and Lower Oven) To remove the cavity bottom, first remove the collar, lower trim and lower trim seal, then (See Figure 3-9): 1. Remove bake pans spacers to reduce pressure on cavity bottom.
- Page 34 https://appliancetechmanuals.com Component Removal M Series Wall Oven M Series Wall Oven User Interface Panel (UIP) Board (All Models) Retaining To remove the UIP board, first remove the control panel Encoder from the unit, then (See Figure 3-12): Connector 1. Remove side ribbon cable from the connector on Side UIP board by prying up on the dark brown tab at the Ribbon Cable...
- Page 35 https://appliancetechmanuals.com M Series Wall Oven Component Removal M Series Wall Oven Display Board (All Models) To remove the Display board, first remove the UIP board, then: 1. Use an 11/32” nut driver to remove the nuts holding the control panel trim to the control panel front panel (See Figure 3-15).
- Page 36 https://appliancetechmanuals.com Component Removal M Series Wall Oven M Series Wall Oven Motorized Door Lock (MDL) Cover (Single and Upper Ovens) To remove the MDL cover, first remove the control panel, then (See Figure 3-18): 1. Use a 1/4” nut driver or T-20 to extract screws from MDL cover.
- Page 37 https://appliancetechmanuals.com M Series Wall Oven Component Removal M Series Wall Oven Door Switch Sensor (Single and Upper Oven) Spring Clip To remove the door switch sensor, first remove the vent, then (See Figure 3-21): 1. Use a T-10 to extract screws from door sensor switch.
- Page 38 https://appliancetechmanuals.com Component Removal M Series Wall Oven M Series Wall Oven Large Oven Light Bulb (All Models) To remove the large oven light bulb, first remove the rack guide, then (See Figure 3-23): Bulb 1. Use a small flat blade screwdriver pry light lens away from housing.
- Page 39 https://appliancetechmanuals.com M Series Wall Oven Component Removal M Series Wall Oven Convection Element (All Models) To remove the convection element, first remove the intake baffle, then (See Figure 3-26): 1. Use a 1/4” nut driver or T-20 to extract screws from convection element.
- Page 40 https://appliancetechmanuals.com Component Removal M Series Wall Oven M Series Wall Oven Smoke Catalyst (All Models) To remove the smoke catalyst, first remove the broil element panel, then (See Figure 3-29): 1. Use a 1/4” nut driver or T-20 to extract screws from smoke catalyst.
- Page 41 https://appliancetechmanuals.com M Series Wall Oven Component Removal M Series Wall Oven Relay Board (All Models) To remove the relay board, first remove the enclosure cover, then (See Figure 3-32): 1. Disconnect all electrical connectors from relay board. 2. Pull relay board and frame toward front of oven. 3.
- Page 42 https://appliancetechmanuals.com Component Removal M Series Wall Oven M Series Wall Oven Serial # Break: Single Oven: 16219812 - 16219842, and above 16223239 Double Oven: 16228579 - 16228656, and above 16230892 Upper Cover (Models Below Serial # Range) To remove the upper cover, first remove the unit from the installation, then (See Figure 3-35): 1.
- Page 43 https://appliancetechmanuals.com M Series Wall Oven Component Removal M Series Wall Oven Alternate Cooling Changes Serial # Break: Single Oven: 16219812 - 16219842, and above 16223239 Double Oven: 16228579 - 16228656, and above 16230892 Above the serial number break the cooling fan system was modified.
- Page 44 https://appliancetechmanuals.com Component Removal M Series Wall Oven M Series Wall Oven Serial # Break: Single Oven: 16219812 - 16219842, and above 16223239 Double Oven: 16228579 - 16228656, and above 16230892 Cooling Fan (Models Below Serial # Range) To remove the cooling fan, first remove the upper cover, then (See Figure 3-39): 1.
- Page 45 https://appliancetechmanuals.com M Series Wall Oven Component Removal M Series Wall Oven Convection Fan (All Models) To remove the convection fan, first remove the access panel, then (See Figure 3-42): 1. Fold insulation blankets back and tape to back and side of unit. 2.
- Page 46 https://appliancetechmanuals.com Component Removal M Series Wall Oven M Series Wall Oven Thermal Limiter (Single and Upper Oven) To remove the thermal limiter, first pull the unit from it’s installation, remove the upper cover, top back cover, enclosure cover, vent and control panel, then: 1.
- Page 47 https://appliancetechmanuals.com M Series Wall Oven Component Removal M Series Wall Oven Door Frame Assembly (All Models) 1. Rotate hinge lock towards oven door to engage door locks on both hinges. 2. Use T-25 to extract two door retaining screws. 3. Remove oven door. 4.
- Page 48 https://appliancetechmanuals.com Component Removal M Series Wall Oven M Series Wall Oven Push To Open (PTO) Clasp (Contemporary) To remove the clasp side of the PTO, open the oven door, and engage the locking tabs, then (See Figure 3- 51): 1. Use T-15 to extract screws from the PTO clasp. 2.
-
Page 49: Troubleshooting
https://appliancetechmanuals.com Troubleshooting M Series Wall Oven M Series Wall Oven TROUBLESHOOTING This section of the manual contains troubleshooting information which will help the Certified Service Technician trou- bleshoot a Wolf M-Series Wall Oven. The table of contents below shows how the troubleshooting section is laid out. Glossary Graphic User Interface - 7”... - Page 50 https://appliancetechmanuals.com M Series Wall Oven Troubleshooting M Series Wall Oven Diagnostics Entering Diagnostics (See Figure 4-1A and 4-1B) 1. From Idle mode touch any place on the Graphic User Interface (GUI) and the main menu will appear. 2. Touch SETTINGS. (Continued) Figure 4-1A Transitional Main Menu Figure 4-1B Professional Main Menu...
- Page 51 https://appliancetechmanuals.com Troubleshooting M Series Wall Oven M Series Wall Oven Entering Diagnostics 1. The SETTINGS menu will be displayed (See Figure 4-2A and 4-2B). 2. Use the pad of your finger to scroll the options until ABOUT is centered on the display (See Figure 4- 3A an 4-3B).
- Page 52 https://appliancetechmanuals.com M Series Wall Oven Troubleshooting M Series Wall Oven Entering Diagnostics 1. Touch ABOUT and the unit information screen will open (See Figure 4-4A and 4-4B). 2. Touch and hold Ok for 10 full seconds and the gen- eral diagnostics screen will open (See Figure 4-5A and 4-5B).
- Page 53 https://appliancetechmanuals.com Troubleshooting M Series Wall Oven M Series Wall Oven Reposition Screen From the general diagnostics screen touch Reposition Screen. A grid will appear on the GUI (See Figure 4-6). 1. Move the pad of your finger along the grid to reposition the display.
- Page 54 https://appliancetechmanuals.com M Series Wall Oven Troubleshooting M Series Wall Oven Faults Tab Fault codes are a four-digit numerical code that indicates the type, scope and specific component exhibiting the fault. First Digit: Fault Code Indicates main type of fault and/or suspected faulty component. Faults will be grouped according to type of fault, and suspected faulty component 0-2: Relay board related faults 3-4: External component or wiring faults...
- Page 55 https://appliancetechmanuals.com Troubleshooting M Series Wall Oven M Series Wall Oven Logging Faults Up to 20 faults can be logged and viewed on the Faults tab. Faults can be cleared manually or from self-correcting. If multiple instances of the same fault are detected the time stamp of the fault will updated to show the last occur- rence.
-
Page 56: Fault Message
https://appliancetechmanuals.com M Series Wall Oven Troubleshooting M Series Wall Oven Relay Board Related Faults Fault Fault Message Test Priority Action 0021 Bake element relay shorted Ohm P1-1 to P1-4. If continuity P1-1 to P1-4, replace the relay board. 0022 Bake element relay shorted Ohm P5-1 to P5-4. - Page 57 https://appliancetechmanuals.com Troubleshooting M Series Wall Oven M Series Wall Oven Fault Fault Message Test Priority Action 0931 Upper right convection fan triac Back pin J5-4 and test for See Procedure D. shorted voltage to ground with con- vection fan off. 0932 Lower right convection fan triac Back pin J6-5 and test for...
- Page 58 https://appliancetechmanuals.com M Series Wall Oven Troubleshooting M Series Wall Oven Fault Fault Message Test Priority Action 1421 Upper left convection element relay Back pin P3-6 and test for If no voltage, replace the open. voltage to ground with left relay board. convection element ener- gized.
- Page 59 https://appliancetechmanuals.com Troubleshooting M Series Wall Oven M Series Wall Oven Fault Fault Message Test Priority Action 1B21 Upper cooling fan triac shorted See Procedure D. Back pin J5-6 and test for voltage to ground with cooling fan off. 1B22 Lower cooling fan triac shorted See Procedure D.
- Page 60 https://appliancetechmanuals.com M Series Wall Oven Troubleshooting M Series Wall Oven Fault Fault Message Test Priority Action 2820 Relay board MDL relay circuit fault Relay board internal MDL See Procedure A. relay circuit fault. Not able to test. 2930 Relay board conversion circuit fault Relay board internal conver- See Procedure A.
- Page 61 https://appliancetechmanuals.com Troubleshooting M Series Wall Oven M Series Wall Oven Fault Fault Message Test Priority Action 3311 Upper TCO open See Procedure I. 1. Have environmental issue corrected. 2. Repair wiring or insulation. 3. Replace TCO. 3312 Lower TCO open See Procedure I.
- Page 62 https://appliancetechmanuals.com M Series Wall Oven Troubleshooting M Series Wall Oven Fault Fault Message Test Priority Action 3721 Upper MDL invalid switch position See Procedure F. Repair/replace wiring or replace MDL. 3722 Lower MDL invalid switch position See Procedure F. Repair/replace wiring or replace MDL.
- Page 63 https://appliancetechmanuals.com Troubleshooting M Series Wall Oven M Series Wall Oven Fault Fault Message Test Priority Action 4132 Lower right convection element not Ohm wire from P5-6 to wire If not 22 to 25.6 ohms detected from P6-6. replace convection element. 4231 Upper broil element not detected Ohm wire from P3-1 to wire...
- Page 64 https://appliancetechmanuals.com M Series Wall Oven Troubleshooting M Series Wall Oven Temperature Related Faults Fault Priority Fault Message Test Action 4910 Upper cooling fan HES stall detect- Cooling fan rotation is not reg- 1. Verify HES harness seated. istering/not rotating. 2. Verify correct relay board. 3.
- Page 65 https://appliancetechmanuals.com Troubleshooting M Series Wall Oven M Series Wall Oven UIP Board Related Faults Fault Fault Message Test Priority Action 1. Check RS485 cable and 6020 UIM RS485 network fault UIM network fault between relay board and/or UIP or RS485 connectors.
- Page 66 https://appliancetechmanuals.com M Series Wall Oven Troubleshooting M Series Wall Oven Knob Encoder Faults - Professional Knobs Fault Priority Fault Message Test Action 7021 Upper mode selector knob input Reseat cable. Replace mode select fault encoder. 7022 Lower mode selector knob input Reseat cable.
- Page 67 https://appliancetechmanuals.com Troubleshooting M Series Wall Oven M Series Wall Oven Fault Code Test Procedures Procedure A: Untestable Fault 1. Clear the fault through the Faults tab by pressing Clear Faults. 2. Cycle the power to the unit. Leave the power off at least five minutes. 3.
- Page 68 https://appliancetechmanuals.com M Series Wall Oven Troubleshooting M Series Wall Oven Procedure E: Testing a Triac for Open An open in a Triac means that it will not pass full voltage when energized. NOTE: It is normal for a Triac to have voltage bleed through of 40 to 80 VAC. It is possible to get bleed through if the Triac has failed open.
- Page 69 https://appliancetechmanuals.com Troubleshooting M Series Wall Oven M Series Wall Oven Procedure I: TCO Open Environmental issues are the major reason for the TCO getting excessively hot and opening. Environment issues should be eliminated first, then proceed to unit issues. Environmental Issues: 1.
- Page 70 https://appliancetechmanuals.com M Series Wall Oven Troubleshooting M Series Wall Oven Statistics Tab From the general diagnostics screen touch Statistics tab. A report of unit operation will appear on the GUI (See Figure 4-12). • Power Cycles: The number of times power has been removed from the unit.
- Page 71 https://appliancetechmanuals.com Troubleshooting M Series Wall Oven M Series Wall Oven Control Tab Activating Component - Upper Bake • The upper bake element has been selected. Press Turn On Component. Note the following changes in the GUI (See Figure 4-16). • Requested: Is now Active.
- Page 72 https://appliancetechmanuals.com M Series Wall Oven Troubleshooting M Series Wall Oven Knob Tab - Professional Models Only The Knob tab allows confirmation that the correct mode is selected on mode select encoder, and that the adjust encoder is sending an increase or decrease sig- nal (See Figure 4-20).
- Page 73 https://appliancetechmanuals.com Troubleshooting M Series Wall Oven M Series Wall Oven Main Element Circuit Main element circuit path on the relay board has a redundant DLB system. The bake element and the right convec- tion element share the same L2 source. As does the broil element and left convection element. While each has it’s own DLB only one DLB needs to be closed for each pair elements to complete the L2 circuit path.
- Page 74 https://appliancetechmanuals.com M Series Wall Oven Troubleshooting M Series Wall Oven Auxillary Component Circuit Auxillary component circuit includes MDL, cooling fan, oven lights, and convection fans. Cooling fan, convection fans, and lights use a triac as a driver. MDL uses a relay as a driver. Auxillary component circuit is a 230 VAC cir- cuit and shares on auxillary DLB.
- Page 75 https://appliancetechmanuals.com Troubleshooting M Series Wall Oven M Series Wall Oven Push To Open (PTO) Required Force - Contemporary Models Only The PTO system has a clasp mounted to the door skin, and a latch mounted to the front of the cabinet behind the gasket collar.
-
Page 76: Technical Data
https://appliancetechmanuals.com M Series Wall Oven M Series Wall Oven Technical Data Component Ratings Ratings below are based upon design testing. All measurements are subject to a variation of +/-10%. Ohm compo- nents with power to the unit off, also remove wires or connectors from relay board. Part Voltage Amperage... - Page 77 https://appliancetechmanuals.com M Series Wall Oven M Series Wall Oven Technical Data Relay Circuit Test Points Relay board circuit test point chart shows wire and location of wire to test components. Ohm components with power to the unit off, also remove wires or connectors from relay board. Circuit Test Points Wire # Location...
- Page 78 https://appliancetechmanuals.com M Series Wall Oven M Series Wall Oven Technical Data TCO Specifications: Professional Transistional Contemporary TCO/TCO Postion Open Close Open Close Open Close Upper Oven TCO 221° F ±5° F 185° F ±6° F 221° F ±5° F 185° F ±6° F 221° F ±5° F 185° F ±6° F Lower Oven TCO 221°...
- Page 79 https://appliancetechmanuals.com M Series Wall Oven M Series Wall Oven Technical Data RTD Resistance Table (±10%) Probe Resistance Table (±10%) Temperature Resistance Temperature Resistance (°F) (Ohms) (°F) (Ohms) 1059.12 99536.8 50.0 1075.96 94884.7 51.8 1094.87 90476.4 53.6 1113.76 86297.8 55.4 1132.61 82335.7 57.2 1151.44...
- Page 80 https://appliancetechmanuals.com M Series Wall Oven M Series Wall Oven Technical Data Probe Resistance Table (±10%) Probe Resistance Table (±10%) Temperature Resistance Temperature Resistance (°F) (Ohms) (°F) (Ohms) 12892.6 226.4 2697.2 138.2 12435.4 228.2 2622.5 140.0 11996.8 230.0 2550.3 141.8 11575.9 231.8 2480.4 143.6...
- Page 81 https://appliancetechmanuals.com M Series Wall Oven M Series Wall Oven Wire Diagrams/Schematics Relay Board Ladder Schematic Bake Element Bake Relay Bake DLB Rt Convection Element Rt Convection Relay Rt Convection DLB Broil Element Broil Relay Broil DLB Lt Convection Element Lt Convection Relay Lt Convection DLB #824974 - Revision C.1 - December, 2019...
- Page 82 https://appliancetechmanuals.com M Series Wall Oven M Series Wall Oven Wire Diagrams/Schematics Auxillary Circuit Ladder MDL Relay Cooling Fan Triac Oven Lights Aux DLB Triac Left Convection Fan Triac Right Convection Fan Triac #824974 - Revision C.1 - December, 2019...
- Page 83 https://appliancetechmanuals.com M Series Wall Oven M Series Wall Oven Wire Diagrams/Schematics WIRE DIAGRAM MODELS: SO30 M SERIES - This wiring information is provided for use by qualified service personnel only. - Disconnect appliance from electrical supply before beginning service. - Be sure all grounding devices are connected when service is complete. PART NUMBER 9005023 Rev B - Failure to observe the above warnings may result in severe electrical shock.
-
Page 84: Power Control
https://appliancetechmanuals.com PRO MODEL ONLY SLEW MODE KNOB KNOB Touch TOUCH USER INTERFACE INTERFACE Sensor MODULE DISPLAY INTERFACE 380-BRN BACKLIGHT 8 7 6 5 4 3 2 1 1 2 3 4 5 37-BRN UIM POWER & BOARD 36-BRN 35-BRN 34-BRN COMMUNICATION (J8) POWER (J7) 33-BRN... - Page 85 https://appliancetechmanuals.com M Series Wall Oven M Series Wall Oven Wire Diagrams/Schematics WIRE DIAGRAM MODELS: DO30 M SERIES - This wiring information is provided for use by qualified service personnel only. - Disconnect appliance from electrical supply before beginning service. - Be sure all grounding devices are connected when service is complete. PART NUMBER 9005023 Rev B - Failure to observe the above warnings may result in severe electrical shock.
-
Page 86: Wiring Diagrams
https://appliancetechmanuals.com Wiring Diagrams M Series Wall Oven M Series Wall Oven Wiring Diagram M Series Double Wall Oven 43-BLACK 90-GREEN/YELLOW 42-RED 44-BLACK 70-RED 59-RED 71-RED 58-RED LIGHT 2 LIGHT 3 LIGHT 1 46-YLW 47-YLW 48-YLW RIGHT LEFT SPLICE 49-BROWN 50-BLUE 51-ORANGE 52-VIOLET LWR COOLING... - Page 87 https://appliancetechmanuals.com PRO MODEL ONLY LWR MODE LWR SLEW UPR MODE UPR SLEW KNOB KNOB KNOB KNOB 44-BLK 70-RED 71-RED 59-RED 58-RED Lower Touch TOUCH 47-YLW 48-YLW USER INTERFACE 49-BRN INTERFACE Sensor 50-BLU MODULE 51-ORG DISPLAY 52-VIO INTERFACE 380-BRN BACKLIGHT 8 7 6 5 4 3 2 1 Lower Cooling Fan 1 2 3 4 5 1 2 3 4 5 6 7...
Need help?
Do you have a question about the Wolf M Series and is the answer not in the manual?
Questions and answers