Advertisement
Quick Links
Advertisement

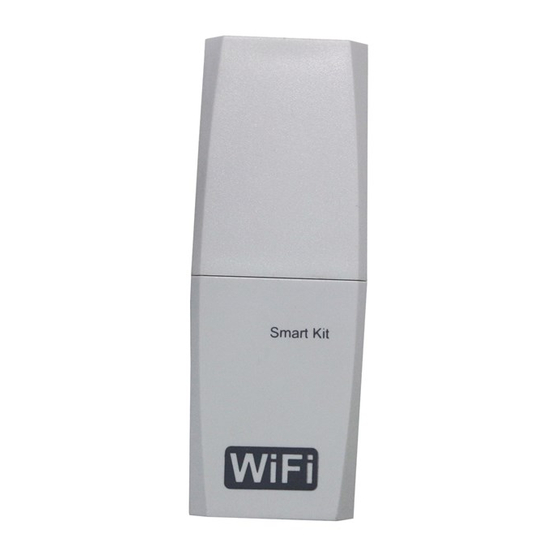
Summary of Contents for Vivax OSK105
- Page 2 VIVAX...
-
Page 3: Table Of Contents
VIVAX Please read this owner s manual carefully and thoroughly before operating the unit! Take care of this manual for future reference! CONTENTS Specification Precaution Technical solution Operational instruction How to use App Special functions Waste disposal, CE Declaration of Conformity... -
Page 4: Specification
VIVAX Specifications Model: OSK105 Standard: IEEE 802.11b/g/n Antenna Type: Printed PCB Antenna Frequency: 2400-2483.5 MHz Maximum Transmitted Power: <20dBm Max Dimension: 55*24*8(mm) Operation Temperature: 0 C~45 C/32 F~113 F. Operation Humidity: 10%~85% Power Input: DC 5V/300mA Precautions Applicable system :IOS, Android. (Suggest:IOS 7.0 or later Android 4.0 or later) Please check the service website for more applicable devices. -
Page 5: Operational Instruction
VIVAX Install the Wi-Fi Smart kit Remove the protective cap of the smart kit Open the front panel and insert the smart kit into the reserved port Attach the QR code packed with SMART KIT to the side panel of the machine, ensure it is convenience to be scanned by the mobile phone. - Page 6 VIVAX 3. User Registration Please ensure your mobile device is connected to Wifi router. Also, the Wifi router has already connected to Internet before doing user registration and network configuration 1. Click “Create Account” Enter your email address and password, and then click „Registration“...
- Page 7 VIVAX 4. Network Configuration Using Android or iOS device to do network configuration 1. Make sure your mobile device has already been connected to the Wi-Fi network which you want to use. Also, you need to forget other irrelevant Wi-Fi network in case it influences your configuration process.
- Page 8 VIVAX Wait smart devices to find, then click to add it. Select home Wi-Fi, enter the password. Wait connecting to the network. Configuration Success, you can modify the default name.
- Page 9 VIVAX You can choose an existing name or customize name. Bluetooth network configuration successful, now you can see the device in the list.
- Page 10 VIVAX Network configuration by select appliance type 1. If the bluetooth network cofiguration is failure, please select the appliance type. 2. Please follow the following steps to enter “AP” mode: a) Power on the device, wait 5 seconds, then click...
- Page 11 VIVAX b) Press the LED or Do Not Disturb button on the remote 7 times until the device shows “AP” on the displays. Note: The 3rd (following) step is for Android system only! iOs system does not need this step.
- Page 12 VIVAX 4. When choose the “Manual Setup” method(Android). Connect to the wireless network(iOS) 5. Please enter password...
- Page 13 VIVAX 6. Network configuration is successful. 7. Configuration Success, you can see the device in the list. NOTE: When finishing network configuration, APP will display success cue words on the screen. Due to different internet environment, it is possible that the device status still display “offline”.
-
Page 14: How To Use App
VIVAX How to use App Please ensure both your mobile device conditioner are connected to the Internet before using app to control the air conditioner internet, please follow next steps: 1. Click "Sign in". 2. Select the target air conditioner to enter into the main control interface. -
Page 15: Special Functions
VIVAX Special functions Including:Schedule, Sleep, Check, Share Device. Note: If the air conditioner do not support the above function, the function will be hided from the function list. Schedule Weekly, user can make an appointment to turn on or off AC on specific time. - Page 16 VIVAX Sleep User can customize their own comfortable sleep by setting target temperature.
- Page 17 VIVAX Check User can simply check the AC running status with this function. When finishing this procedure, it can display the normal items, abnormal items, and detail information. Share Device The air conditioner can be controlled by multi-users at the same time by Share Device function.
- Page 18 VIVAX 3. The other users must log in „Nethome Plus“ App first, then click „Add Share Device“ on their own mobile, then ask them to scan the QR Code. Now the others can add the shared device...
-
Page 19: Waste Disposal, Ce Declaration Of Conformity
VIVAX European Disposal Guidelines To protect our environment and to recycle the raw materials used as completely as possible, the consumer is asked to return unserviceable equipment to the public collection system for electrical and electronic. The symbol of the crossed indicates that this product must be returned to the collection point for electronic waste to feed it by recycling the best possible raw material recycling.
Need help?
Do you have a question about the OSK105 and is the answer not in the manual?
Questions and answers