Table of Contents
Advertisement
Quick Links
Technical instruction
Manual for use and maintenance
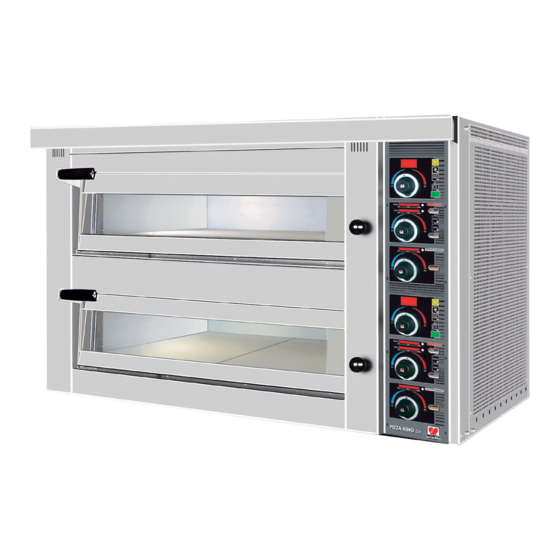
ELECTRIC PIZZA OVEN
MODELS
FP70 • FPD92 • FP100 • FPD152
These appliances comply with requirements of E.E.C 73/23/CEE EN 60335-1
SOTIRIOS D. PRODANAS & CO
PROFESSIONAL ELECTRIC & GAS MACHINES FOR RESTAURANT – PATISSERIES – SNACK BAR
OFFICE – FACTORY : National Road Kilkis-Thessaloniki P.C 545 00 Tel.: ++30 23410 41991 Fax: ++30 23410 41539
P.O Box 400 70, P.C : 560 00
www.north.gr
- e-mail :
info@north.gr
1
Advertisement
Table of Contents

Related Manuals for North FP70

Summary of Contents for North FP70
- Page 1 Manual for use and maintenance ELECTRIC PIZZA OVEN MODELS FP70 • FPD92 • FP100 • FPD152 These appliances comply with requirements of E.E.C 73/23/CEE EN 60335-1 SOTIRIOS D. PRODANAS & CO PROFESSIONAL ELECTRIC & GAS MACHINES FOR RESTAURANT – PATISSERIES – SNACK BAR OFFICE –...
-
Page 2: Description Of Appliance
General Characteristics 1. DESCRIPTION of APPLIANCE The Present handbook is reported in more models of appliances. For more information with regard to your model you are consulted the Technical Data. The appliance has the following: • General Switch On/Off for each deck •... -
Page 3: Power Supply
TABLE 1 TECHNICAL DATA MODEL FP70 FPD92 FP100 FPD152 POWER SUPPLY 380… 400 380… 400 380… 400 380… 400 (VOLT) AC FREQUENCY (Hz) Electrical output 6950 13900 10200 20400 convection unit (Kw) Main Fuse (3 X 400V) Power Supply cable... -
Page 4: General Warnings
GENERAL GENERAL WARNINGS ECOLOGY AND ENVIRONMENT All the materials of packing are compatible with the • environment. They can be stored without danger or be Before you install and place in burn at an authorised incineration plant. operation the appliance you carefully read the present handbook that offers 2.2 USE important information... -
Page 5: Instructions For Installation
INSTRUCTIONS FOR INSTALLATION 1. INSTALLATION PLACE 3.1 INSTALLATION of ELECTRIC CABLE In order to you connect the electric cable with the Install the appliance only in spaces with sufficient appliance, you act as follows: ventilation Unscrew the adjacent panel in the right side of the appliance. -
Page 6: Troubleshooting
7. TROUBLESHOOTING INSTRUCTION FOR USE Before you place in operation the appliance it is Even at the regular use of appliance can necessary you read carefully the present handbook. present anomalies or dysfunctions. The oven Instruction contain constitute important source of chamber heating does not activate or is information on the right and sure use of oven. -
Page 7: Operation
OPERATION INTRODUCTION 2.2 Turn of f In order to function easily the operation of oven To turn off keep pressing the electronic switch for keep open at the duration of reading leaf that about 3 sec until the display see off. In case you do concerns the control panel not intend to use automatic start on function you 1.2. - Page 8 3. Starting cooking cycle Push the button back to regulate the power of the heating elements in top. The cooking cycle start immediately. The temperature can be modify while the oven is in use. Also the value of each part heating elements. Turn the knob (CD) to your desire energy e.g 50%.
- Page 9 5. Preheating Cycle – Auto Cook 6. Replace lamp You must preheat the oven before use it. To replace the lamp inside the oven be sure that the - Turn on the oven - Push the button G Auto Cook with no food inside the machine is cold.
-
Page 10: Function Control
FUNCTION CONTROL... - Page 11 General Switch (stand by) Light button Choice button for the top front heating elements Choice button for the top back heating elements Regulate bottom heating elements Auto cook function . CD Knob to regulate the top heating elements (depend of the choice front/back) 1 Display bottom heating elements T Button to auto turn on 1 Display for time to turn on.
- Page 12 AUTO COOK PROGRAMMING 1. With the oven in stand by mode push the Light (b) button together with the ON (a). 2. When the oven turn on let booth button. (b & a) 3. Time Display ( 1) blink and has the cod (P1,P2… … PJ), while the temperature display ( h1) saw the values of each parameter..
- Page 13 NORTH DEFAULT 1 (BARGRAPH) 1-31 Seconds 1 (BARGRAPH) 1-31 Seconds 1 (BARGRAPH) 1-31 Seconds 1 (BARGRAPH) 1-31 Seconds 1 (BARGRAPH) 1-31 Seconds 1 (BARGRAPH) 1-31 Seconds 1 (BARGRAPH) 1-31 Seconds 1 (BARGRAPH) 1-31 Seconds 1 (BARGRAPH) 1-31 Seconds BARGRAPH 1...
Need help?
Do you have a question about the FP70 and is the answer not in the manual?
Questions and answers