Advertisement
Available languages
Available languages
Quick Links
Advertisement

Summary of Contents for Folio ZERO19
- Page 1 .ZERO19 MANUALE UTENTE Alimentatore remoto Parete...
- Page 2 .ZERO Indice Componenti Fissaggio struttura Collegamento elettrico Fissaggio telo AVVERTENZE Alimentatori Movimentazione Pulizia Apparecchiature danneggiate Smantellamento Telo Guarnizione PVC Magnete Fondo ferro Profilo alluminio ZERO.19 ® FOLIO...
- Page 3 .COMPONENTI All’interno della cassa troverete: Struttura in alluminio Telo (con o senza stampa) ® FOLIO Svitare le viti di fissaggio per aprire la cassa STRUTTURA IN ALLUMINIO ® FOLIO TELO (stampato)
- Page 4 .FISSAGGIO STRUTTURA Posizionare la struttura e fissarla a parete utilizzando i fori per le viti già presenti sulla lamiera. N.B. Utilizzare viti idonee al supporto per il fissaggio. Utilizzare SOLO i fori presenti sulla lamiera per il fissaggio. Non crearne altri poichè...
- Page 5 .FISSAGGIO STRUTTURA Posizionare il pannello sulla struttura precedentemente fissata. Far passare il cavo di alimentazione (A) nel foro (B) presente sul profilo della struttura. Magneti (retro pannello) Cavo alimentazione / foro per cavo alimentazione...
- Page 6 Dopo aver fatto passare il cavo di alientazione nel foro apposito, inserire il pannello nella struttura assicurandosi che i magneti abbiano fatto presa e tutto sia stabile.
-
Page 7: Collegamento Elettrico
24 V. Riallacciare la corrente. Utilizzare trasformatori in classe II, con adeguato assorbimento in relazione al consumo dei LED FOLIO ® , con tensione di uscita 24 V e con uscita SELV conformi alla EN 61347-2-13. È consigliato collegare un massimo di 4/5 pannelli Folio ad un solo alimentatore. - Page 8 Dopo aver fissato la Struttura e collegato i cavi, stendere il telo con cura evitando di causare graffi e aloni.
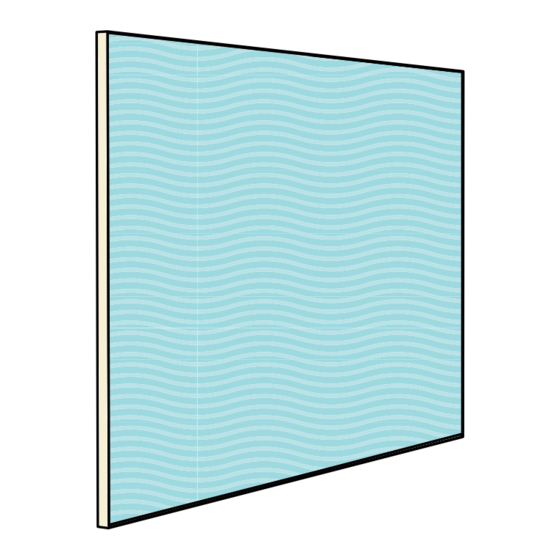
- Page 9 Posizionare il telo con l’eventuale stampa rivolta verso l’esterno.
- Page 10 Inserire la guarnizione del telo nell’apposita sede, come mostrato in figura. N.B. Fare attenzione ad inserire la guarnizione nel modo corretto. Inserire la guarnizione su tutti e quattro i lati della struttura per tensionare il telo.
- Page 11 .AVVERTENZE Consultare l’azienda Cifralluminio s.r.l. prima di intervenire in qualsiasi maniera sui pannelli FOLIO ® . Per qualsiasi dubbio sul funzionamento dell’apparecchio o sulla manutenzione consultare l’azienda Cifralluminio s.r.l.. • Non spruzzare/rovesciare direttamente sul pannello nessun tipo di liquido/ detergente.
- Page 12 NEL CASO SI RISCONTRASSERO MALFUNZIONAMENTI, DISALIMENTARE L’APPARECCHIATURA. Utilizzare trasformatori in classe II, con adeguato assorbimento in relazione al consumo dei LED FOLIO ® , con tensione di uscita 24V e con uscita SELV conformi alla EN 61347-2-13. ROSSO Alimentatore LED FOLIO ®...
- Page 13 Non usare ventose per la movimentazione o la messa in posa della struttura LED FOLIO ® In aggiunta alle immagini, fate attenzione a: • non urtare, tirare o danneggiare i cavi della corrente • evitare il contatto dei LED FOLIO ® con liquidi.
-
Page 14: Note Sulla Sicurezza
PER LA PULIZIA PONENDOLI PRIMA SU DI UN PANNO MORBIDO, NON ABRASIVO. É POSSIBILE LA PULIZIA A SECCO SOLO CON PANNI MORBIDI, NON ABRASIVI. In caso di dubbi sulla corretta pulizia degli apparecchi FOLIO ® consigliamo di chie- dere indicazioni inviando una mail all’indirizzo info@foliopanel.it NOTE SULLA SICUREZZA •... - Page 15 Verificare che la tensione di alimentazione sia compatibile con la tensione e corrente necessaria per il regolare funzionamento della apparecchiatura che andrete ad installare, per cui i dati di targa dei LED FOLIO ® sono il fattore primario da verificare.
- Page 16 .SMANTELLAMENTO Lo smantellamento dell’apparecchio dovrà essere affidato a personale esterno o interno qualificato. L’attività di smantellamento, dovrà essere effettuata conforme- mente alle disposizioni di legge, tenendo conto che alcuni materiali impiegati non sono riciclabili e taluni possono essere dannosi. In conformità al DECRETO LEGISLATIVO 14 marzo 2014, n. 49. (in materia di rifiuti da apparecchiature elettriche ed elettroniche) vi informiamo che, l’apparecchiatura a cui il presente manuale d’istruzioni fa riferimento, non può...
- Page 17 .ZERO19 USER MANUAL Remote driver Wall...
- Page 18 .ZERO Index Components Installation of ZERO frame Electrical connection Cloth positioning Warning Power supplies Handling Cleaning Damaged appliances Dismantlement Fabric Seal Magnet Iron plate Aluminum Zero 19 profile ® FOLIO...
- Page 19 .COMPONENTS Inside the packing crate you will find: Zero19 profile Fabric (printed or not) ® FOLIO Svitare le viti di fissaggio per aprire la cassa Zero19 profile ® FOLIO Fabric (printed)
- Page 20 .ZERO19 INSTALLATION Position the structure and fix it to the wall using the screw holes already present on the iron plate. N.B. Use screws suitable for fixing support. Use ONLY the holes on the iron plate for fixing. Don’t make others...
- Page 21 Place the panel on the previously fixed structure. Pass the power cable (A) through the hole (B) on the profile of the structure. Magnets (back panel) Power cable / hole for power cable...
- Page 22 Insert the panel in the structure making sure that the magnets have set and everything is stable.
-
Page 23: Electrical Connection
110 V cable and power the system. Use class II transformers with adequate absorption with regards to the consumption of the FOLIO® panel, with an exit current of 24V and with SELV exits EN 61347-2-13 compliant. It is recommended to connect maxi- mum 4/5 Folio panels to one driver. - Page 24 After fixing the frame and connecting the cables, spread the sheet carefully avoiding scratches and halos.
- Page 25 Place the sheet with the possible print facing outwards.
- Page 26 As shown in the picture insert the sheet’s gasket in its seat. Note Well. Pay attention to insert the gasket correctly. Repeat the same action for all the sides of the sheet.
- Page 27 .WARNING Consult the company Cifralluminio s.r.l. before intervening in any way on the FOLIO® panels. For any doubts on the functioning of the device or on its mainte- nance consult Cifralluminio s.r.l.. • Do not open or tamper with the FOLIO® panel.
-
Page 28: Power Supplies
Use class II drivers with adequate absorption with regards to the consumption of the FOLIO® panel, with an exit current of 24V and with SELV exits EN 61347-2-13 compliant. It is recommended to connect maximum 4/5 FOLIO® panels to one driver. - Page 29 .HANDLING Remove the LED FOLIO® panel from the wooden case, not from the edges but from the middle, prevent bending and curving and carry it vertically. Carry the LED FOLIO® panel vertically to prevent every possibility of bending and curving. Pay attention not to pull the power cables.
-
Page 30: Safety Notice
• The parts influencing the performance of the light (such as white acrylic sheets, marbles or glass) should be cleaned following the instructions below. • The cleaning of EXTERNAL parts and SURFACES which are part of the FOLIO® panel can be executed in according to the following table:... - Page 31 Verify that the supply voltage is compatible with the voltage and current necessary for the regular functioning of the appliance you are about to install: the primary factor to consider is the data on the FOLIO® LED panels’ label.
- Page 32 .DISMANTLEMENT Dismantlement of the appliance must be commissioned to qualified internal or external personnel. Dismantlement operations must be carried out in accordance with current regulations, considering that some of the materials used are not recyclable and some others may be harmful. In accordance with Italian LEGISLATIVE DECREE 14 March 2014, no.
Need help?
Do you have a question about the ZERO19 and is the answer not in the manual?
Questions and answers