Sony SEL1855 Service Manual
Interchangeable
Hide thumbs
Also See for SEL1855:
- Specification sheet (2 pages) ,
- Specifications (35 pages) ,
- Adjustment manual (9 pages)
Advertisement
Quick Links
SERVICE MANUAL
Ver. 1.3 2013.04
Revised-3
Replace the previously issued
SERVICE MANUAL 9-852-799-13
with this Manual.
Link (English)
SPECIFICATIONS
SERVICE NOTE
NOTE ON REPLACEMENT OF SERVICE
DISASSEMBLY
EXCLUSIVE OPTICS BLOCK
Link (Japanese)
SERVICE NOTE
SPECIFICATIONS
DISASSEMBLY
サービス専用光学ブロッ ク交換時の注意
分解図につきましては, 英語版を
ご参照ください。
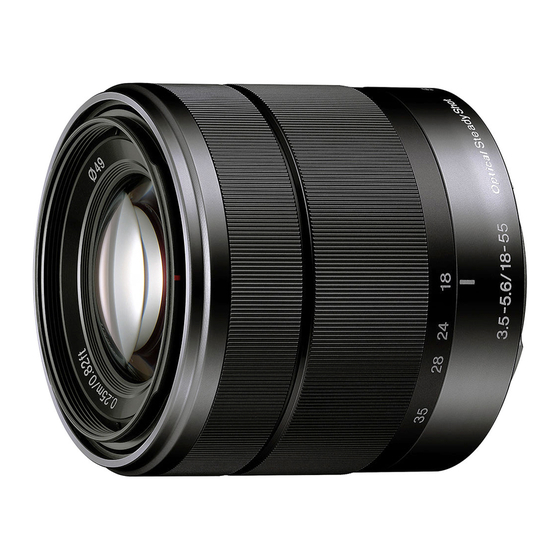
SEL1855 (E 18-55mm F3.5-5.6 OSS)
9-852-799-14
SEL1855
(E 18-55mm F3.5-5.6 OSS)
US Model
Canadian Model
AEP Model
Chinese Model
Japanese Model
REPAIR PARTS LIST
ADJUSTMENTS
REPAIR PARTS LIST
ADJUSTMENTS
INTERCHANGEABLE LENS
Sony Corporation
Revision History
Ver.
Date
History
1.0
2010.05
Official Release
1.1
2010.07
Revised-1
• Addition of item 2. to NOTE ON REPLACEMENT OF SERVICE
(A1 10-100)
EXCLUSIVE OPTICS BLOCK
• Addition of METHOD OF FIRMWARE UPDATE
S.M. Revised:
1.2
2012.01
Revised-2
• Addition of REPAIR PARTS LIST
(A2 11-342)
Page 3-1
1.3
2013.04
Revised-3
• Revision of NOTE ON REPLACEMENT OF SERVICE EXCLUSIVE
(A3 12-343)
OPTICS BLOCK
Page
3,
4
• Addition of DISASSEMBLY
English :
Page
Japanese :
• Addition of REPAIR PARTS LIST
Page 3-1
• Addition of Section 4. ADJUSTMENTS
English :
Page
Japanese :
985279914.pdf
Contents
—
Page
3,
4
2-2,
2-7
Page
2-2,
2-7
4-1, 4-2, 4-3, 4-4, 4-5, 4-6,
4-7
Page
4-1, 4-2, 4-3, 4-4, 4-5, 4-6,
4-7
Published by Sony Techno Create Corporation
S.M. Rev.
issued
—
Yes
Yes
Yes
2013D08-1
© 2013.04
Advertisement

Related Manuals for Sony SEL1855


Summary of Contents for Sony SEL1855
- Page 1 ADJUSTMENTS DISASSEMBLY EXCLUSIVE OPTICS BLOCK Link (Japanese) SERVICE NOTE REPAIR PARTS LIST SPECIFICATIONS DISASSEMBLY ADJUSTMENTS サービス専用光学ブロッ ク交換時の注意 INTERCHANGEABLE LENS 分解図につきましては, 英語版を ご参照ください。 2013D08-1 SEL1855 (E 18-55mm F3.5-5.6 OSS) © 2013.04 Sony Corporation 9-852-799-14 Published by Sony Techno Create Corporation...
- Page 2 レンズ (1) 、レンズフロントキャップ (1) 、レンズリアキャップ (1) 、レンズフード (1) 、印刷物一式 Lens (1), Front lens cap (1), Rear lens cap (1), Lens hood (1), Set of printed documentation 仕様および外観は、改良のため予告なく変更することがありますが、ご了承ください。 Design and specifications are subject to change without notice. is a trademark of Sony Corporation. はソニー株式会社の商標です。 SEL1855 (E 18-55mm F3.5-5.6 OSS)
- Page 3 If the update is not required, message will appear in dialog box, click [Finish] to abort the update process. 7. Click the [Finish] button to exit the update process. If the connection is established normally, the following message appears on camera’s LCD. 2 Check the version. SEL1855 (E 18-55mm F3.5-5.6 OSS)
- Page 4 ⑥ アップデート実行 dat”を保存してく ださい。 3. E-mountレンズを接続した状態のNEX-5 (以下セッ ト) とPCをUSBケーブルで接続し、セッ トの電源をONにしてく ださい。 4. “FirmwareUpdater.exe”を実行してく ださい。 液晶画面に下記のメッセージが表示されている間は、 セッ トの電源をOFFにしないでく ださ い。 5. PCに表示される下記①〜⑥のダイアログの指示に従い、[次へ]ボタンをクリ ックして順次アップデートを実行してく ださい。 ① カメラ本体とパソコン接続 6. 液晶画面に下記のメッセージが表示されたら、セッ トの電源をOFFにしてバッテリーを抜いてく ださい。 ファームウェアのアップデートが不要の場合は、 ダイアログにメッセージが表示されるので、 その場合は[終了]ボタンをクリ ックしてプログラムを終了させてく ださい。 また, 正常に接続された場合は、 液晶画面に左図のメッセージが表示されます。 7. [終了]ボタンをクリ ックしてプログラムを終了させてく ださい。 ② バージョン確認 SEL1855 (E 18-55mm F3.5-5.6 OSS)
-
Page 5: Service Note
ARE CRITICAL TO SAFE OPERATION. REPLACE THESE COMPO- CRITIQUES POUR LA SÉCURITÉ DE FONCTIONNEMENT. NE REM- NENTS WITH SONY PARTS WHOSE PART NUMBERS APPEAR AS PLACER CES COMPOSANTS QUE PAR DES PIÈCES SONY DONT SHOWN IN THIS MANUAL OR IN SUPPLEMENTS PUBLISHED BY LES NUMÉROS SONT DONNÉS DANS CE MANUEL OU DANS LES... -
Page 6: Note For Repair
Chip-B Holes SERVICE TOOLS B-40 Grease (FT-210): 9-913-200-37 A dhesive bond (B -40): J-6082-614-A FT-210 LOCTITE 460 A dhesive bond (L OCT IT E 460) or the equivalent SG-310 Grease (SG-310): 9-913-200-36 or the equivalent. SEL1855 (E 18-55mm F3.5-5.6 OSS) - Page 7 Sheet CL-015 Board, Complete 1st Group Lens Assy HELP10 HELP15 1st Light Shield Ring Zoom Cover Assy Zoom Cover Assy HELP12 HELP15 1 Group Block Assy MF-PI Hold Plate Zoom Linkage Pin Zoom Linkage Pin SEL1855 (E 18-55mm F3.5-5.6 OSS)
- Page 8 Assemble Rear Cover Assy by fitting the bosses with the holes on Fixed Hold Barrel Assy. Note: Take care that do not make the flexible boards get caught when assembling Rear Cover Assy. Flexible Board Boss Rear Cover ASSY Flexible Board SEL1855 (E 18-55mm F3.5-5.6 OSS)
- Page 9 Take notice that 2 Group Lens Assy and 3 Group Lens Assy may drop off if turn Zoom Cover Assy until it is in OVER TELE. Cam Pin Notch of 2 Group 2 Group Lens Assy Lens Assy F Lock Pin SEL1855 (E 18-55mm F3.5-5.6 OSS)
- Page 10 Take notice that 3 Group Lens Assy may drop off if turn Zoom Cover Assy until it is in OVER TELE. Zoom Linkage Pin Zoom Cover Assy Mount side of the camera Slide Var Rec Boss FPC Holder Plate Groove Zoom Cover Assy Zoom Cover Assy Apply grease (FT-210) Zoom Cover Assy SEL1855 (E 18-55mm F3.5-5.6 OSS)
- Page 11 Assemble Focus Cover Assy to Fixed Hold Barrel Assy by fitting the 3 places of phases of Bayonet. Remove MF-PI Hold Plate, and then float PI. Note: Make gears inside Focus Cover Assy to Mount side. Focus Cover Assy MF-PI Hold Plate Bayonet SEL1855 (E 18-55mm F3.5-5.6 OSS)
- Page 12 B portion 30 to 45 Apply the adhesive A portion bond (B-40) 1st Group B portion Lens Assy (three locations) 1st Group Lens Assy 4. Tighten the 1st Light Shield Ring. 1st Light Shield Ring SEL1855 (E 18-55mm F3.5-5.6 OSS) 2-7E...
-
Page 13: Repair Parts List
REAR LIGHT SHIELD BARREL 4-175-468-31 ZOOM CAM BARREL X-2547-686-1 BL CONTACT_BOX ASSY A-1772-781-A CL-015 BOARD, COMPLETE 3-254-058-01 SCREW Selection Parts CAM PIN C (Note) 4-172-050-13 MOUNT Selection Parts CAM PIN B (Note) 2-684-244-01 STOPPER SCREW SEL1855 (E 18-55mm F3.5-5.6 OSS) -
Page 14: Supplied Accessories
Note: This item is supplied with the unit as an accessory, but is not Note: 当商品はアクセサリーとして同梱されておりますがサービス用補 prepared as a service part. 修部品としては準備しておりません。 Other accessories 他の付属品 レンズフロントキャップ レンズリアキャップ レンズフード X-2546-071-1 4-159-701-02 4-159-703-02 Front Lens Cap Rear Lens Cap Lens Hood X-2546-071-1 4-159-701-02 4-159-703-02 取扱説明書 (Note) INSTRUCTION MANUAL (Note) SEL1855 (E 18-55mm F3.5-5.6 OSS) 3-2E... - Page 15 1 GB or more recommended (Windows Vista) USB port: USB 2.0 recommended (also compatible with 1.1) Two connectors are required. Run time: .NET Framework 2.0 (.NET Framework 2.0 is installed at lens adjustment program installation, if it is not installed.) SEL1855 (E 18-55mm F3.5-5.6 OSS)
-
Page 16: Installing Procedure
Two connectors are required. Run time: .NET Framework 2.0 (.NET Framework 2.0 is installed at lens adjustment program installation, if it is not installed.) Fig.4-2-1 3. The installer screen appears, then click the [Next] button. Fig.4-1-2 Fig.4-2-2 SEL1855 (E 18-55mm F3.5-5.6 OSS) - Page 17 6. The following screen appears when the installation is complete, then click the [Close] button. Click the [Disconnect] button and check if the connection status becomes “Disconnect”. Fig.4-2-5 Fig.4-3-2 Click the [ ] button on the upper right of the main window to finish. SEL1855 (E 18-55mm F3.5-5.6 OSS)
- Page 18 If all the adjustments for each required item are complete, click the [Iris Close] button. Click the [ ] button on the upper right of the main window to finish E-Mount Lens Adjustment. Turn off the power of camera. Fig.4-3-6 SEL1855 (E 18-55mm F3.5-5.6 OSS)
- Page 19 * If it cannot be resolved even after replacing the parts 1) and 2), replace the Service Exclusive Optics Block. Fig.4-3-9 Click the [ ] button on the upper right of the pop-up window. * The “FINISHED” dialog box will appear when click the [ ] button. SEL1855 (E 18-55mm F3.5-5.6 OSS)
- Page 20 * Use Adobe PhotoShop to check the image resolution. Near the limit * Check the five patterns in center and four corners at the same magnification. NG or out of focus Fig.4-5-2 4-4-1. Adjusting Procedure SEL1855 (E 18-55mm F3.5-5.6 OSS)
-
Page 21: Flange Back Check
4-6-3. Flange Back Check 1. Play back the movie taken in section 4-6-2 on a LCD monitor. * Check that there is no notable image blur, center shifting, image shaking or image jumping. 4-4-1. Adjusting Procedure SEL1855 (E 18-55mm F3.5-5.6 OSS) 4-7E... - Page 22 5. チップ部品交換時の注意 1-3. 無鉛半田について • 取り外した部品は再使用しないでください。 • タンタルコンデンサのマイナス側は熱に弱いため交換時は注意してください。 本機には無鉛半田が使用されています。 6. フレキシブルプリント基板の取扱いについて 無鉛半田を使用している基板には,無鉛(Lead Free)を意味するレッドフリーマークがプリントされています。 • こて先温度を270℃前後にして行なってください。 (注意: 基板サイズによっては,無鉛半田を使用していてもレッドフリーマークがプリントされていないものがあります) • 同一パターンに何度もコテ先を当てないでください。(3回以内) • パターンに力が加わらないよう注意してください。 : レッドフリーマーク 無鉛半田は,下記の点に注意して使用してください。 注意 電池の交換は,正しく行わないと破裂する可能性がありま • 半田こてのこて先温度は約350℃に設定してください。 す。電池を交換する場合には必ず同じ型名の電池又は同等 温度調節が無理な場合は,高温短時間で作業を行ってください。 品と交換してください。 注意: 半田こてを長く当てすぎると,基板のパターン(銅箔)がはがれてしまうことがありますので,注意してください。また,従 来の半田よりも粘性が強いため,IC端子などが半田ブリッジしないように注意してください。 • 半田こてのこて先は,必ず無鉛半田用と有鉛半田用に分けて管理してください。 無鉛半田と有鉛半田が混在すると剥離現象が発生してしまいます。 SEL1855 (E 18-55mm F3.5-5.6 OSS) 1-1E...
- Page 23 切り欠き用: チップA 穴用: チップB 下図のようにレンズ専用治具をレンズブロック等の穴,または切り欠きに合わせて使用する。 チップA レンズ専用治具 切り欠き,または 穴の幅に合わせて チップA 調節する 切り欠き チップB チップ チップ チップB 穴 副資材について B-40 ボンド (B -40): J-6082-614-A FT-210 グリス(FT -210): 9-913-200-37 ボンド (ロックタイト460) ロックタイト460 SG-310 グリス(SG-310): 9-913-200-36 または相当品 または相当品 SEL1855 (E 18-55mm F3.5-5.6 OSS)
- Page 24 2群レンズASSY HELP03 Cam Pin C BL接点ボックスASSY カムピン C カムピン B HELP06 ゴムブッシュ 防御シール マウント FT-210 HELP01 カムピン B HELP02 FT-210 HELP05 B-40 後部外装ASSY ゴムブッシュ 1群移動枠 固定保持環部組 ノイズ防御シート CL‑015マウント基板部組 1郡レンズAssy HELP15 HELP10 1群遮光環 HELP15 ズーム外装ASSY 1郡部組 HELP12 MF‑PI押え板 ズーム連動ピン SEL1855 (E 18-55mm F3.5-5.6 OSS)
- Page 25 ボンド : ロックタイ ト460 注意 : ボンド (ロックタイ ト460) , または相当品を使用すること。 瞬間接着剤のように, 乾燥後に表面が白くなるボンドは使用しないこと。 マウント ストッパービスのネジ先端にボンド (ロックタイ ト460) を塗布し, マウントに締め付ける。 マウント HELP02 マウントを取り外すとき,BL接点ボックスのフレキを必ず切り離してからマウントを取り外してください。 マウント ボンド(ロックタイト460)塗布 HELP05 後部外装ASSYのボスと固定保持環部組の穴を合わせて後部外装ASSYを組み付ける。 注意:後部外装ASSYを組み付けるときは,ズームをオーバー TELE端以外にセッ トしてから,フレキを挟まないようにするこ と。 フレキ ボス 後部外装ASSY フレキ SEL1855 (E 18-55mm F3.5-5.6 OSS)
- Page 26 注意: オーバー TELE端までズーム外装ASSYを回転させると1群移動枠,2群レンズASSY,3群レンズASSYが落下する恐れがあります。 注意: オーバー TELE端までズーム外装ASSYを回転させると3群レンズASSYが落下する恐れがあります。 1群移動枠 ズーム外装ASSY オーバーTELE時 1群移動枠 3群レンズASSY カムピン カムピン ズーム外装ASSY 1群移動枠 R部 固定筒 ズーム外装ASSY HELP07 1. ズーム外装ASSYをオーバー TELE側へ回転させる。 2. 前外装ロックピン側を手前にする。 ズーム外装ASSY 3. 2群レンズASSYの切り欠き部が,右側になるように2群レンズASSYのカムピンをズームカム環の内側のカム溝に 合わせて組み付ける。 4. ズームをWIDE方向に回転させる。 注意: オーバー TELE端までズーム外装ASSYを回転させると2群レンズASSY,3群レンズASSYが落下する恐れがあります。 カムピン 2群レンズの 2群レンズASSY 切り欠き部 前外装ロックピン SEL1855 (E 18-55mm F3.5-5.6 OSS)
- Page 27 1. ズーム連動ピンをオーバー TELE側へ回転させる。 4. FPC 固定板 (2箇所) を固定保持環部組の溝に挿入する。 2. スライド可変抵抗ボスをカメラマウント側へ移動させる。 3. ズーム外装ASSYの溝にグリス (FT-210) を塗布する。 注意: FPC固定板の先端が固定保持環部組の溝にはまっているこ とを確認する。 4. ズーム外装ASSYの溝とズーム連動ピン,スライド可変抵抗を合わせてズーム外装ASSYを組み付ける。 オーバー TELE端までズーム外装ASSYを回転させると3群レンズASSYが落下する恐れがあります。 5. ズーム外装ASSYをWIDE側 (マウント側から見て左回り) へ回す。 ズーム連動ピン ズーム外装ASSY カメラマウント側 スライド可変抵抗ボス FPC 固定板 溝 ズーム外装ASSY ズーム外装ASSY グリス(FT-210) 塗布する ズーム外装ASSY SEL1855 (E 18-55mm F3.5-5.6 OSS)
- Page 28 HELP13 固定保持環部組に固定環とズームカム環を組み付ける。 1. バヨネット (3箇所) の位相と前外装ロックピン取り付け穴の向きを合わせて,前外装ASSYを組み付ける。 2. 前外装ASSYを矢印方向に回転させて、前外装ロックピンの挿入口を合わせる。 注意: 固定保持環部組と固定環のカメラマウント側の穴の形状を合わせて,ズームカム環のズーム連動ピン取り付け穴が,固定保 持環部組のズーム連動ピン取り付け穴と一致していることを確認する。 固定保持環部組 固定環 注意: 固定環とズームカム環を誤って分解した場合は,固定環 とズームカム環の位相を合わせて組み付ける。 前外装ロックピン バヨネット 前外装ASSY ズームカム環 カメラマウント側の穴 バヨネット 固定筒 HELP14 ズーム連動ピン取り付け穴 バヨネット (3箇所) の位相を合わせて,フォーカス外装ASSYを固定保持環部組に組み付ける。 HELP12 注意: フォーカス外装ASSY内のく し歯をマウント側にする。 MF-PI押え板を取り外して,PIを浮かせる。 フォーカス外装ASSY MF‑PI押え板 バヨネット SEL1855 (E 18-55mm F3.5-5.6 OSS)
- Page 29 1. 丸印が2個並んでいる箇所と指標の位置を合わせて1郡レンズAssyを1郡移動枠に取り付ける。 指標 印2個 1郡レンズAssy バヨネット 印2個 指標 バヨネット 1群移動枠 1群移動枠 1郡レンズAssy 2. 1郡移動枠の指示部にボンド (B-40) を塗布する (3箇所) (A部)。 3. 1郡レンズAssyの指示部にボンド (B-40) を塗布する (3箇所) (B部)。 A部 ボンド(B-40) 1群移動枠 を塗布 1群移動枠 B部 30 〜45 (3箇所) ボンド(B-40) A部 を塗布 1郡レンズAssy (3箇所) B部 1郡レンズAssy 4. 1郡遮光環を締め付ける。 1群遮光環 SEL1855 (E 18-55mm F3.5-5.6 OSS) 2-7E...
- Page 30 スターチャート ACアダプター J‑6082‑563‑A J‑6080‑875‑A フランジバック確認 (AC‑PW20) (1‑487‑963‑12:EXCEPT US, CND) Table 4-1-1 (1‑487‑963‑22:US, CND) Fig.4-1-1 Note1: パーソナルコンピュータ (SeusEX がインストール済みのもの) OS: Windows XP Home, Professional SP2 以降 / Vista / 7 RAM: 256 MB またはそれ以上を推奨 (Windows XP / 7) 1 GB またはそれ以上を推奨 (Windows Vista) USB port: USB 2.0 を推奨 (USB 1.1 でも使用可能) ポートは2個必要 Run time: .NET Framework 2.0 (.NET Framework 2.0がインストールされていないPCには,レンズ調整プログラムインストール時にインストールされます) SEL1855 (E 18-55mm F3.5-5.6 OSS)
- Page 31 USBコネクタへ 1. TISSホームページより, レンズ調整プログラム (E-Mount Lens Adjustment.zip) をダウンロードする。 (SeusExがインストール済みのもの) OS: Windows XP Home, Professional SP2以降/Vista/7 2. setup.exeをダブルクリ ックする。 RAM: 256MBまたはそれ以上を推奨(Windows XP/7) 1GBまたはそれ以上を推奨(Windows Vista) USBポート: USB 2.0を推奨(USB 1.1でも使用可能) ポートは2個必要 Run time: .NET Framework 2.0 (.NET Framework 2.0がインストールされていない PCには,レンズ調整プログラムインストール時にイ Fig.4-2-1 ンストールされます) 3. インストーラー画面が表示されるので, [次へ] ボタンをクリ ックする。 Fig.4-1-2 Fig.4-2-2 SEL1855 (E 18-55mm F3.5-5.6 OSS)
- Page 32 2) [Connect]ボタンをク リ ックし, Connection Statusが “Connect” に変化するこ とを確認する。 5. インストール開始画面が表示されるので, [次へ] ボタンをクリ ックし, インストールを開始する。 Fig.4-3-1 Fig.4-2-4 2. E -Mount Lens Adjustmentの終了 6. インストールが完了すると, 下記画面が表示されるので, [閉じる] ボタンをク リ ックする。 1) [Disconnect]ボタンをク リ ックし, Connection Statusが “Disconnect” に変化するこ とを確認する。 Fig.4-2-5 Fig.4-3-2 2) メインウインドウ右上の[ ]ボタンをクリ ックし終了する。 SEL1855 (E 18-55mm F3.5-5.6 OSS)
- Page 33 5) 調整が終了すると, ポップアップウィ ンドウにて“FINISHED”と表示されるので, [OK]ボタンをクリ ックする。 ※Fig.4-3-3のようにMessage Historyへ調整結果が表示されます。 ※[Clear]ボタンをクリ ックすると, Message Historyに表示されている履歴が消去されます。 Fig.4-3-4 2) ズームをWIDE端にセッ トし, ENTERを押す。 Fig.4-3-5 3) ズームをTELE端にセッ トし, ENTERを押す。 Fig.4-3-3 6) 必要な調整項目の調整が全て終了したら, [Iris Close]ボタンをクリ ックする。 7) メインウインドウ右上の[ ]ボタンをク リ ックし, E-Mount Lens Adjustmentを終了する。 8) カメラの電源を切る。 Fig.4-3-6 SEL1855 (E 18-55mm F3.5-5.6 OSS)
- Page 34 7) 上記4) 〜6) の操作を“POS8”まで繰り返す。 レンズ交換(Note1) レンズ交換(Note2) Note1: 撮影解像力の確認で片ボケがNGの場合は,1群部組を交換してく ださい。 ※1群部組の部品交換を行っても改善しない場合は,サービス専用光学ユニッ トの交換を行ってく ださい。 Fig.4-3-8 Note2: フランジバックの確認 (調整後) でNGの場合は,以下の順に部品の交換を行ってく ださい。 1. ズームカム環 2. 1群部組 8) 調整が完了すると, Fig.4-3-9の画面が表示されます。 ※1,2の部品交換を行っても改善しない場合は,サービス専用光学ユニッ トの交換を行ってく ださい。 Fig.4-3-9 9) ポップアップウインドウ右上の[ ]ボタンを押す。 ※[ ]ボタンを押すと, “FINISHED”のダイアログボックスが表示されます。 SEL1855 (E 18-55mm F3.5-5.6 OSS)
- Page 35 1. “4-5-1. 準備”の状態で, マニュアルフォーカスに設定する。 4-4-1. 調整手順 2. ピントを合わせて, セルフタイマーで撮影する。 3. ピントは手順2) の状態のままで, 撮影距離を 1300mm, 1500mm にし, 2枚セルフタイマーで撮影する。 4. 撮影画像3枚の結果から, 周辺の解像がFig.4-5-2で示す基準を満たしているか確認する。 注意: 周辺4隅が同じ解像で見えるこ とを確認してく ださい。 ※Adobe PhotoShop等を使用して,解像の確認を行ってく ださい。 限界レベル付近 ※中心と周辺4箇所を等倍で確認してください。 OKレベル NGレベル OKレベル NGレベルまたはピントズレ Fig.4-5-2 4-4-1. 調整手順 SEL1855 (E 18-55mm F3.5-5.6 OSS)
- Page 36 5. 再度, 被検レンズを装着し直す。 ( フォーカスが∞となる) ※フォーカスリングには絶対に触れないでく ださい。 10mm以内 フランジバック調整用治具 被検レンズ カメラ Fig.4-6-1 4-6-2. フランジバック確認用映像の撮影 1. 以下のようにズーム操作を行い, 映像を撮影する。 ズーム : 55mm → 35mm → 28mm → 24mm → 18mm → 24mm → 28mm → 35mm ※ズームをそれぞれの位置で止めてく ださい。 4-6-3. フランジバックの確認 1. 上記で撮影した映像を液晶モニタで再生する。 ※著しいピントボケ, 中心像移動, 像ユレ, 像トビがないこ とを確認してく ださい。 4-4-1. 調整手順 SEL1855 (E 18-55mm F3.5-5.6 OSS) 4-7E...
Need help?
Do you have a question about the SEL1855 and is the answer not in the manual?
Questions and answers