
Summary of Contents for impro technologies HRB910
- Page 1 PLT-04815, Rev. A.1 Installation MANUAL Impro Biometric Reader – HRB910, HRB911, HRB912, HRB913...
-
Page 2: Copyright
Copyright © 2020 Impro Technologies. All rights reserved. Revision history Date Description Revision February 2020 First Release www.impro.net Impro Biometric Reader – Installation Manual Page 2 of 25... -
Page 3: Table Of Contents
Contents Copyright ....................................2 Revision history ..................................2 Introduction ....................................4 Document Purpose ................................... 4 Intended audience ................................... 4 Related products ..................................4 Access Portal hardware ................................4 Plastic modules that plug together ............................4 Integrated Power Supply (IPS) Combo ..........................4 Related material ................................... -
Page 4: Introduction
Introduction Document Purpose Install and configure the Impro Biometric Reader with guided example steps: Adding the IBR to the Access Portal access control system Adding a tagholder (person) Adding fingerprint templates to a tagholder. Intended audience Personnel who perform the following: Mounting and wiring of the IBR Reader/Controllers and other system hardware ... -
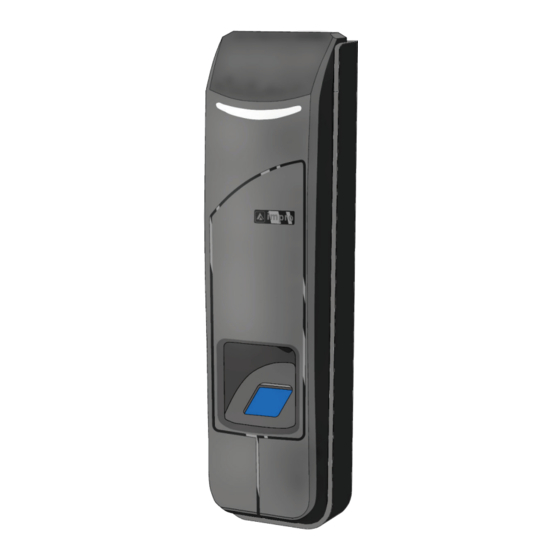
Page 5: Ibr Specifications
IBR Specifications The IBR is a networked biometric/RFID reader Door controller functionality (relay, Door Position Sense and Request to Exit and OSDP) will be included in a future release. Category Parameter Specification RFID, only models Protocol 13.56 MHz MIFARE/DESFire/DESFire EV1 /NFC/iClass/SEOS HBR912 &... -
Page 6: Hardware And Platform Compatibility
Hardware and platform compatibility Hardware The IBR Biometric Reader requires a Wiegand (or OSDP in the future) reader interface that integrates to the (Personnel Access Control System) PACS. The Impro Cluster Controller and Wiegand Reader modules provide the necessary system interface. -
Page 7: Mount And Wire The Ibr
IBR Hardware installation Mount and wire the IBR Follow the steps shown on the Quick Start Guide (PLT-04644), included in the IBR’s carton. Update the site plan Apply the spare fixed address label (for each reader) to the site plan to indicate its physical location. You will need this plan when configuring the Access Portal software. -
Page 8: Power Supply Connection
Power Supply Connection Power +12V (Red) 12V DC Power Ground (Black) Power Supply Power Supply considerations The IBR can draw up to 2A at 12VDC, and a separate 12VDC mains adaptor is recommended. Do NOT attempt to power the IBR from a Wiegand Reader terminal. ... -
Page 9: Wiegand Reader Module Connections
Wiegand Reader Module Connections These wires are all from the pigtail group labelled “Wiegand” Do NOT use the Reader 12V terminal on the Wiegand Reader Module (Green) (White) (Brown) Green (Orange) (Yellow) Hold (Blue) (Violet) Ground (Black) The IBR must not be powered from the 12V Reader terminal on the Wiegand Reader Module ... -
Page 10: Adding The Impro Biometric Reader
Adding the Impro Biometric Reader (If Access Portal is not installed, first go to Getting started with Access Portal, on page 24.) 1. When logged into to the Access Portal Client screen, navigate: Setup -> Biometrics: 2. Click on - if this is not displayed click on 3. - Page 11 7. Click on to confirm your selection: 8. The IBR is successfully installed when you see a success message: 9. The installed IBR will now be listed on the Biometrics screen: www.impro.net Impro Biometric Reader – Installation Manual Page 11 of 25...
-
Page 12: Editing The Ibr's Settings
Editing the IBR’s settings 1. You should now be in Biometrics view, where the screen lists the installed Biometric devices, if not, you get there by navigating: Setup -> Biometrics 2. Hover over the device in the list and click on the pencil icon –... -
Page 13: Setting The Ibr's Authentication Mode
Setting the IBR’s Authentication Mode 5. Click on the arrow next to the authentication mode setting 6. Choose the mode that features the reading combination that you require, for this example we choose Finger Only. 7. Click on to save the changes you make. 8. -
Page 14: Enrolling Tagholders (People)
Enrolling Tagholders (people) 1. Navigate: Enrolment -> Tagholders 2. Click on , if there is already one or more tagholders listed.) Continues on the next page… www.impro.net Impro Biometric Reader – Installation Manual Page 14 of 25... - Page 15 3. Fill in all the compulsory fields (those fields with red lines). will appear when any data has changed. 5. Click on to save the details, and more options will become available. Adding fingerprints is next www.impro.net Impro Biometric Reader – Installation Manual Page 15 of 25...
-
Page 16: Adding Fingerprints To A Tagholder (Allocating Tags To A Person)
Adding fingerprints to a tagholder (allocating tags to a person) 1. If not already on the Tagholder’s screen, navigate: Enrolment -> Tagholder and select the person from the list. Enrolling Tagholders If there are no tagholders you will need to add one before adding tags – go to on page 14. - Page 17 4. Select “Enrol Card” 5. Select Random PAC (Personal Access Code) Continues on the next page… www.impro.net Impro Biometric Reader – Installation Manual Page 17 of 25...
- Page 18 6. Click on to save the randomly generated Personal Access Code. 7. Select again Continues on the next page… www.impro.net Impro Biometric Reader – Installation Manual Page 18 of 25...
- Page 19 8. Select Enrol Finger 9. Select from the available reader models: “Impro Biometric Reader” 10. Select Device. (If there is more than one IBR, confirm the MAC address on the back of the enrolling IBR) The site plan (spoken of on page 7) should show the fixed addresses and physical locations of all installed readers. Continues on the next page…...
- Page 20 11. Click on all the fingers you would like to enrol (you may enrol all ten if you wish.) 12. Click on when you are ready to present the first finger. 13. You will need to scan each finger THREE times. 14.
- Page 21 16. The first scanned print will appear when the IBR is ready for the second scan of the SAME finger 17. When the finger has been scanned three times, click on 18. You will then be prompted for the next finger 19.
- Page 22 20. Click on to save all the data for this tag Now that fingerprint templates are on the system, the IBR will now be ready to scan fingers. 21. Present an enrolled finger: The IBR will beep and flash green momentarily. If a Wiegand Reader Module has been wired in and added to Access Portal, the door will unlock.
-
Page 23: Biometric Scanning - Best Practices
Biometric Scanning – Best Practices 1. Insert the finger (in one movement) with the contact area on the finger in the middle of the sensor window. 2. Apply a gentle, even pressure on the sensor to slightly flatten the finger and expose a useable area. 3. -
Page 24: Getting Started With Access Portal
Browser: Latest version of Chrome, Firefox, Internet Explorer or Safari Portal Software installation Impro Technologies offers access control software in different versions. Note that AP Light does NOT support Biometric Readers. 1. Go to https://www.impro.net/software/, register and download the version of Access Portal of your choice. -
Page 25: Help
9. Log in using: Username: sysdba • • Password: masterkey Note: There may be some menu options shown in this manual that do not appear on your Access Portal application. More functions become available when you purchase licenses, the Enterprise level licence opens up all functionality. 10.
Need help?
Do you have a question about the HRB910 and is the answer not in the manual?
Questions and answers