
Summary of Contents for Intertek 4327FTB
- Page 1 5021119 Gas Fire Pit Table Assembly & Care instructions Model:4327FTB Please read & retain for future reference...
-
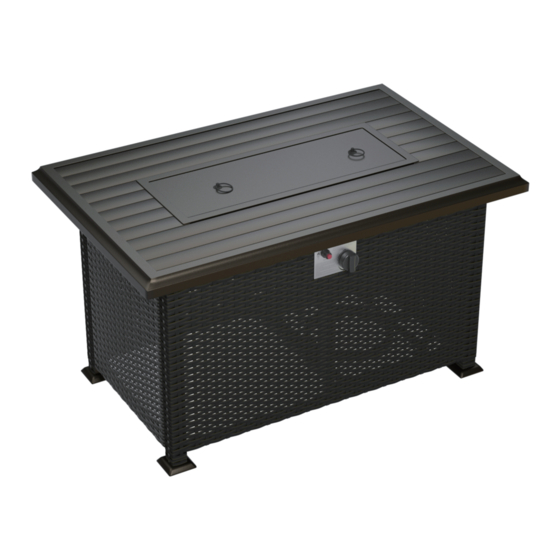
Page 2: Assembly Parts
ASSEMBLY PARTS... -
Page 3: Parts List
Parts List Part Image Description Table Top 1 Pc Right Side Panel 1 Pc Left Side Panel 1 Pc Rear Panel 1 Pc 1 Pc Gas Cylinder Base Door 1 Pc Stiffener Panel 1 Pc Bracket 2 Pcs Caster 1 Pc 1 Pc Burner Burner Lid... - Page 4 Parts List Part Image Description Bolt M4x6 2 Pcs Washer M1 2 Pcs Bolt M6x15 16 Pcs Bolt M6x35 4 Pcs Bolt M6x40 6 Pcs Washer M6 22 Pcs Allen Wrench 1 Pc Knob 1 Pc Glass Stones 6 KGS Cover 1 Pc...
- Page 5 Extra Part Image Description Bolt M4x6 1 Pc Washer M1 1 Pc Bolt M6x15 2 Pcs Bolt M6x35 1 Pc Bolt M6x40 1 Pc Washer M6 3 Pcs WARNING: Failure to position the parts in accordance with these diagrams or failure to use onlu parts specificaly apprived with this appliance may result in property damage or personal injury.
- Page 6 Step 1:Attach gas cylinder base(E) to door (F) using bolts(Q) and washers(R). Install theknob(T) Note:Please do not fully tighten bolts until unit is fully assembled. Step 2:Attach brackets(H) to gas cylinder base(E) and door (F) using bolts(O) and washers(R). NOTE:Please fully tighten all bolts at this time. You can scan the QR code to watch the install video.
- Page 7 Step 3:Screw caster(I) to gas cylinder base(E). Step 4:Attach right side panel(B) and left side panel(C) to table top(A) using bolts(O) and washers(R). Note:Please do not fully tighten bolts until unit is fully assembled. You can scan the QR code to watch the install video.
- Page 8 Step 5:Attach rear panel(D) to right side panel(B) and left side panel(C) using bolts(O) and washers(R). Note:Please do not fully tighten bolts until unit is fully assembled. Step 6:Attach stiffener panel(G) to side panel(B) and left side panel(C) using bolts(P) and washers(R).
- Page 9 Step 7:Attach burner(J) to table top(A) using bolts(O). NOTE:Please fully tighten all bolts at this time. Step 8:Insert Door and gas cylinder base(E&F) into the guide rail and push it to the end. NOTE:Please pour the glass stones(U) into the burner at this time and place them evenly.
- Page 10 Step 9:Attach pull ring (L) to burner lid (K) using bolts (M) and washers (N). NOTE:We recommend the use of furniture covers to protect the patio fire pit when not in use; Please remove the wind guard before you use waterproof table cover. You can scan the QR code to watch the install video.
Need help?
Do you have a question about the 4327FTB and is the answer not in the manual?
Questions and answers
Does the igniter need a battery