Table of Contents
Advertisement
Quick Links
UPMAX ISC Immersive Soundfield
Controller
Linear Acoustic UPMAX ISC Immersive Soundfield Controller
Trusted Linear Acoustic upmixing for the immersive audio capabilities of Next Generation Audio systems.
UPMAX ISC builds upon the proven and long-running lineup of Linear Acoustic upmixers, employs our
latest algorithm, and adds support for the immersive audio requirements of Next Generation Audio.
UPMAX ISC is designed for live events and broadcasts and can be inserted on a mix bus or placed at the
output of the mixing console in the OB truck at the venue for upmixing music, effects, and legacy content not
natively presented in an immersive format.
It is equally at home in the airchain at the Network Operations Center (NOC) to ensure all programming –
including commercials and interstitial content – is delivered to the viewer as a consistent immersive
experience.
Features include:
Upmixing from 2-, 3-, 5.1-, and 7.1-channel audio to immersive formats including 5.1.4 and 7.1.4
Upmixing to legacy formats including 5.1- and 7.1-channel audio
Automatic pass-through of native immersive content
Standard I/O includes 3Gb/s HD/SD-SDI, AES-3, and AES67 to support SMPTE ST 2110-30 and -31
workflows. Quad-Link SDI I/O for 4K video workflows or MADI I/O are available as mutually exclusive
options.
Additional features include dual internal redundant auto-ranging power supplies, dual 1000BaseT Ethernet
connections (one each for control and AES67), and a web-based user interface for setup, configuration,
routing, control, and metering.
UPMAX ISC Quick Start Guide
Linear Acoustic UPMAX ISC
Advertisement
Table of Contents

Summary of Contents for Linear Acoustic UPMAX ISC
- Page 1 Next Generation Audio. UPMAX ISC is designed for live events and broadcasts and can be inserted on a mix bus or placed at the output of the mixing console in the OB truck at the venue for upmixing music, effects, and legacy content not natively presented in an immersive format.
- Page 2 Next Generation Audio. UPMAX ISC is designed for live events and broadcasts and can be inserted on a mix bus or placed at the output of the mixing console in the OB truck at the venue for upmixing music, effects, and legacy content not natively presented in an immersive format.
-
Page 3: Installation And Initial Setup
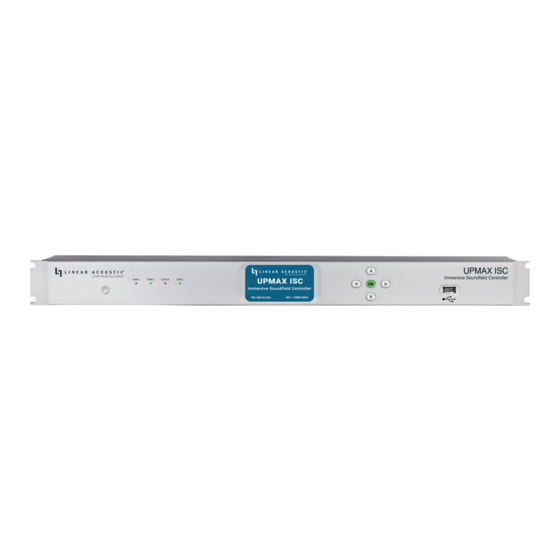
Figure 1 - Front panel The front panel of the UPMAX ISC includes the following: Reset button for restarting the unit from the front panel (1A) Four status LEDs indicating the status of each power supply (1B, 1C), the overall status of the unit... - Page 4 Installation UPMAX ISC is a 1RU product intended to be permanently installed in a standard 19½” equipment rack and secured with four standard rack screws. UPMAX ISC is fan cooled with air intakes and exhausts located on the side of the unit just behind the front panel, but whenever possible, it is recommended to leave 1RU of empty space above and below the unit.
- Page 5 If both the Control and AES67 ports will be used, they must be in different subnets. In-band control is available using the AES67 port. If only one port will be used, set the unused port to “Static IP” with an IP Address of 0.0.0.0, a Subnet Mask of 0.0.0.1, and a Gateway of 0.0.0.0.
- Page 6 AES67 Ethernet port. Connect the physical inputs and outputs as appropriate for your installation. Connecting to the Web-Based User Interface No special client software is required to remotely connect to the UPMAX ISC, and the HTML-5-based GUI is device, operating system, and browser agnostic. We recommend Google Chrome or Apple Safari. The computer or tablet should be on the same network and subnet as the UPMAX ISC.
-
Page 7: Front And Rear Panel Overview
Figure 6 - Home screen Clicking on the UPMAX ISC logo (6A) will always bring you back to the Home screen. To log in to the unit, enter the default password of 1234 into the Password field (6B) then click the Log In button (6C). The ability to change the password will be included in an upcoming software update. - Page 8 UPMAX ISC Rear Panel Figure 2-2 - UPMAX ISC rear panel The rear panel of the UPMAX ISC contains the following connections: Two RJ-45 Gigabit Ethernet connections, one for network remote control (2-2A) and one for AES67 I/O (2-2B)
- Page 9 SDI I/O Two sets of 3Gb/S HD/SD-SDI inputs and outputs are included. At this time however, only the connectors closest to the RJ-45 Ethernet connectors are active. The second SDI connection will be enabled in an upcoming firmware update. AES-3 I/O The top row of AES-3 connectors are inputs.
-
Page 10: Physical Installation
UPMAX ISC is fan cooled with air intakes and exhausts located on the side of the unit just behind the front panel, but whenever possible it is recommended to leave 1RU of empty space above and below the unit. -
Page 11: The Home Screen
Pressing the Right button navigates to the Information screen. The name of this particular UPMAX ISC and its location are displayed at the top of the screen. These values can be customized using the remote interface as detailed in the "Upmixing" section. -
Page 12: Ip Configuration Screen
Subnet Mask of 0.0.0.1, and a Gateway of 0.0.0.0. By default, the UPMAX ISC will automatically obtain an IP address from a DHCP server which will suffice to provide initial remote access to the unit for configuration purposes. A fixed IP address will be preferred in most cases and can be set as follows: Press the OK button to highlight “Edit”... -
Page 13: Locate Mode
Press OK to save the new IP information If you suddenly notice you’ve entered some incorrect information and need to bail out and start over, use the Right/Left buttons to highlight “Cancel” followed by “OK” Pressing the Right button from the IP Configuration (Control) screen will bring you to the IP Configuration (AES67) screen. -
Page 14: Remote User Interface
Once the UPMAX ISC and your computer are connected to your network, enter the IP address of the UPMAX ISC to which you want to connect in the URL field of your browser. Once connected, the Home Screen will appear. As you navigate through the user interface, clicking on the UPMAX ISC logo (4-1A) in the top left corner will always return you to this screen. - Page 15 See the section “UPMAX ISC Home Screen When Logged In” below for detailed information. The Locate Unit feature (4-1E), which causes the front panel display of the unit to flash for easy identification in a crowded rack, can also be activated without logging in.
-
Page 16: Program Menu
It is not intended to provide step-by-step instructions for setting up or operating the UPMAX ISC. Where applicable, references to specific sections will be made where you can find more detailed instructions for specific controls. Figure 4-2 - Home screen when logged in... - Page 17 Figure 4-3 - Program menu I/O, Clocking, and Reference Configuring inputs, outputs, clock reference, delays, sample rate converters, and GPI/O. Input and Output Routing Connect your SDI, AES-3, and/or AES67 sources to the rear panel of the UPMAX ISC as required for your installation.
- Page 18 The UPMAX ISC can access any of the eight audio pairs carried in the incoming HD- or SD-SDI streams applied to SDI Input 1 Inputs and outputs for five stereo pairs via AES-3 are also provided Any visible and accessible AES67 networked audio source can be input into UPMAX ISC for processing then returned to the network via AES67, embedded into the SDI output, and/or sent to the AES-3 output.
- Page 19 Figure 5-1 - I/O menu Routing a signal into the UPMAX ISC is a two-step process. The first step is creating an input group from the available physical hardware inputs (5-2A). The second step is routing the audio from these inputs into the upmixer input (5-2B).
- Page 20 If the channels in the input group are destined to be upmixed, select “Program” in the View as switch (5-3E). If the input group is being established only to pair shuffle or to pass through content without upmixing, choose “Passthrough.” To quickly route a physical channel pair to the corresponding input to the upmixer –...
- Page 21 Once the first output group has been created and saved, drag the output audio lines from the physical outputs to the desired output pair of the upmixer, then click “Save.” GPI/O UPMAX ISC features five GPI and five GPO functions through its rear panel DB-15 connector, activated by a...
- Page 22 momentary contact closure GPI/O Pinout Function Function Pin 1 +5VDC Pin 9 +5VDC Pin 2 GPI 1 Pin 10 GPO 1 Pin 3 GPI 2 Pin 11 GPO 2 Pin 4 GPI 3 Pin 12 GPO 3 Pin 5 GPI 4 Pin 13 GPO 4 Pin 6...
-
Page 23: Sample Rate Converters
Latency and Delays Latency through the UPMAX ISC varies depending on which inputs and outputs are used and whether or not SRCs are enabled. In any case, it will be necessary to compensate for any latency incurring in the encoding process. Please see the Specifications section of this manual for latency measurements for the current software version. -
Page 24: Clock Reference
Input and 16 for Output, or all 36 can be reserved for only the Input. Figure 5-8 - Sample rate converters Clock Reference Because the UPMAX ISC supports multiple input and output formats, having a firm grasp of the clock sync (reference) requirements is critical. Clock Reference Requirements Sample Rate Converters (SRCs) are provided on both SDI inputs, the SDI 1 output, and the AES-3 input. - Page 25 When using AES-3 I/O, the UPMAX ISC can be referenced to either the AES-3 clock (using the SRCs in the SDI path) or to the SDI clock (using the SRCs in the AES-3 path. When using an AES-3 source without an accompanying reference, the UPMAX ISC’s 48kHz internal clock can be used as the system reference if necessary, providing the SRC on the AES-3 input is enabled.
- Page 26 The UPMAX ISC offers five GPI and five GPO functions through its rear panel DB-15 connector, activated by a momentary contact closure. The configuration is done by first clicking on the GPI/O menu (5-10A). GPI/O Actions GPI Actions (5-10C) include:...
- Page 27 An overview and explanation of the upmixing controls. UPMAX ISC uses the latest Linear Acoustic® upmixing algorithm for upmixing from 2-, 3-, 5.1-, and 7.1- channel audio to immersive formats including 5.1.2, 5.1.4 and 7.1.2. If the channel count and format of the incoming content matches the desired output format, UPMAX ISC will pass it through as-is.
- Page 28 Figure 6-1 - Basic UPMAX control grouping Format Controls Input Format The Input Format menu (6-2A) is used to specify the channel format of the source audio. If the input format matches the selected output format (as selected with the Output Format control) the unit will pass the signal through as-is without additional processing.
- Page 29 5.1 Legacy: Like the standard 5.1 output, it provides a constant 5.1-channel output from Stereo, Stereo + Dialog, and 5.1-channel input sources but with upmixing that is sonically closer to the previous UPMAX algorithm used in the Linear Acoustic UPMAX v4 upmixer and the algorithm employed in the various Linear Acoustic AERO®-series processors 7.1: Provides a constant 7.1-channel output from Stereo, Stereo + Dialog, 5.1-channel, and 7.1-channel...
- Page 30 Figure 6-2 - Format controls LFE Channel Controls The LFE channel controls are used to tune the crossover frequencies, gain, and signal routing of the low- frequency effects audio. LFE Crossover The LFE Crossover control (6-3A) defines the frequency at which audio below below the setting is routed to the LFE channel and audio above is sent to the Lf, Rf, C, Ls, and Rs channels.
- Page 31 Figure 6-3 - LFE channel controls Center Width Controls These controls define the routing of the Center channel LF and HF bands across the Left, Center, and Right channels. Used in combination with the Mid-Bass Crossover frequency control, they provide the ability to craft the image of the Front channels in a way that maintains a direct sonic-visual association of dialog while providing a pleasant and wide image of the phase-correlated elements.
- Page 32 Figure 6-4 - Center Width controls Auto-Detect Controls When the Input Format is set to Auto-Detect, the UPMAX ISC continuously monitors the input signal to determine its format and will automatically switch between upmixing to the selected Output Mode and pass- through.
- Page 33 Figure 6-5 - Auto-Detect controls Advanced UPMAX Menu The Advanced parameters are included for audio experts who wish to dig deep and tweak settings for very specific applications or demanding tastes. They are not required for most users and are accordingly not displayed by default.
- Page 34 Front-Rear Balance Factor The Front-Rear Balance Factor control (6-6D) determines the amount of upmixed sound pushed to the surround channels (analogous to the Surround Depth control in previous UPMAX versions). A value of 0 sends all audio to the Rear channels while a value of 1 sends no audio to the Rear channels. A value of 67 sends 33% of the audio to the Rear channels and keeps 67% of the audio in the Front channels.
- Page 35 Highs in Laterals The Highs in Laterals control (6-6L) determines to what degree higher frequencies from the ear-level to height speaker crossover circuit are mixed back into the ear-level speakers when upmixing to 5.1.4 and 7.1.2 output formats. The audio spectrum in these channels is determined by a combination of this control and the Lows in Heights control (described below).
- Page 36 Figure 6-6 - Advanced menu controls...
Need help?
Do you have a question about the UPMAX ISC and is the answer not in the manual?
Questions and answers