Advertisement
Quick Links
Advertisement

Summary of Contents for e-survey P9III
- Page 1 P9III Quick Start Guide...
- Page 2 Copyright © Shanghai eSurvey GNSS Co., Ltd. 2022. All rights reserved. No part of this document may be reproduced or transmitted in any form or by any means without prior written consent of Shanghai eSurvey GNSS Co., Ltd. Trademarks and Permissions and other eSurvey trademarks are trademarks of Shanghai eSurvey GNSS Co., Ltd.
- Page 4 Please follow the following instructions to ensure optimal performance of the device: • Please use this device indoor in • For your safety, please do not use the European Community using this device during thunderstorms. frequency in 5150 - 5250MHz to •...
- Page 5 • After the device has reached its • Please do not charge the device service life, please discard it in a if the ambient temperature is too proper way to avoid environmental high (above 50°C) or too low pollution. (below 0°C). •...
-
Page 6: What's In The Box
5 V / 3 A , 9 V / 3 A , 1 2 V / 3 A , 15V/3A, 20V/2.25A Bracket For data collector survey pole Power cable Type C to type C 1.5 m USB cable Type C to USB 1.5 m P9III Android 9, internal battery... - Page 8 YOUR P9III...
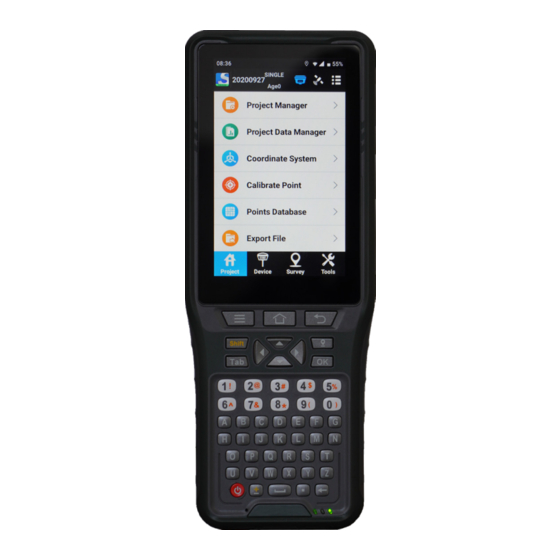
- Page 9 • Touch screen: to interact with the device through simple or multi-touch gestures by touching the screen with a special stylus or one or more fingers. • Keyboard: including numeric keys, letter keys and special function keys, etc. 52 keys. •...
- Page 10 • Homepage button: to back to the homepage. • Menu button: to conduct home settings / create widgets / change wallpaper. • Shift button: to define the definition of the grey area: Short pressing it: to switch between Chinese and English input methods. Long pressing it: to switch between numbers keys and function keys or switch between the upper case of English input and lower case.
- Page 11 0 : ) • Letter buttons: to input letters (A-Z). • Power button: to power on/off P9III. • Return button: to return to the previous screen. • Survey button: to start data collection if the current interface is the interface of land survey software;...
-
Page 12: Power Off
POWER ON The start-up time is about 20 seconds. Press and hold the power key and release your finger until you feel the device vibrate a little. POWER OFF Press and hold the power key until the options menu shows, and select "Power off" option to shutdown. RESTART Press and hold the power key until the options menu shows, and select "Restart"... -
Page 13: Install The Bracket
INSERT A SIM/TF CARD The disassembly process is the reverse of the installation process. Flip the device to its rear, and remove the strap. Open the SIM/TF card slot. Push the cover of the SIM/TF card backwards. Face the SIM/TF card metal contacts downwards, and push the SIM/TF card into the slot. - Page 14 HOMEPAGE After powering on the device, swipe upwards on the screen to unlock the homepage. The layout of homepage is as follows: Notification area To open the notification panel, hold the status bar and drag down. Application icons • To see all applications, swipe upwards on the homepage.
-
Page 15: Transmit Data
TRANSMIT DATA This operation is applicable to windows 7, windows 10 and windows 11. You can transmit data via the local disk or Bluetooth. Via the local disk Insert the type C end of the power cable into the type C port of the device, and insert the USB end of the power cable into your computer. - Page 16 Via the Bluetooth Open the app "File Manager", and select the target file to be transmitted. in the lower left, and select "Send selection" → “Bluetooth”, and tap "SEND". The device starts to search the Bluetooth device.
- Page 17 Turn on the Bluetooth of your computer, and select the target Bluetooth device via P9III. Select "Receive a File". The file starts to be transmitted. After file transmission, select the target file path to save the received file.
- Page 18 SELECT DEVELOPER OPTIONS Open the app "Settings", and tap "About phone". Continuously tap "Build number" 7 times. The prompt "You are now a developer" shows. Return to the previous page. Tap "System", tap "Advanced", and tap "Developer options". Select the target developer options.
- Page 19 UPDATE THE SYSTEM If there is a updated version of the system firmware under networked status, the update alert will be automatically pushed in the notification area. Swipe upwards on the homepage, tap the application "System update". Do one of the following: Under networked status, tap "Check update", and start to update the system according to tips if there is a updated...
- Page 20 CUSTOMIZE THE BUTTON DEFINITION You can freely define the action of survey button, left side button and right side button. After the customization, you can quickly access to the target application by short pressing the button. Survey button is customized to access the land survey software "Surpad" by default.
- Page 22 To be the leading provider of high-precision professional, solution & service in the global geospatial industry Shanghai eSurvey GNSS Co., Ltd. Address: Building 4, No.651 Wanfang Rd, Pujiang Town, Minhang District, Shanghai, China E-mail: Sales: info@esurvey-gnss.com Support: support@esurvey-gnss.com Hotline: +86 400-9998088 Website: https://esurvey-gnss.com/...
Need help?
Do you have a question about the P9III and is the answer not in the manual?
Questions and answers